Thanks for choosing WooPayments!
We provide an integrated payments solution to get your WooCommerce store up and running quickly without setup costs or monthly fees. With WooPayments, you’ll get:
- Credit and debit card acceptance
- Local payment method offerings
- Automated payouts to your bank account
- Buy now, pay later payment methods
- Built-in multi-currency support
- Easy integration of popular digital wallets
Managing payments — including refunds, disputes, and payouts — is integrated into your site’s WordPress administrator dashboard, so it all happens from within your site’s admin dashboard.
Requirements for WooPayments
↑ Back to topFirst, let’s make sure you have what’s required to ensure a smooth installation:
- Your business is based in one of our supported countries.
- PHP, WordPress, and WooCommerce are on recent versions.
- Your site has an SSL certificate and is accessible over HTTPS.
- You are at least 18 years old.
Check for WooPayments
↑ Back to topGo to Plugins > Installed Plugins to see if WooPayments is already installed. If it is, great! Head to the Signing up for WooPayments section and continue from there.
If it’s not listed, please follow the instructions in the Installing WooPayments section below.
Installing WooPayments
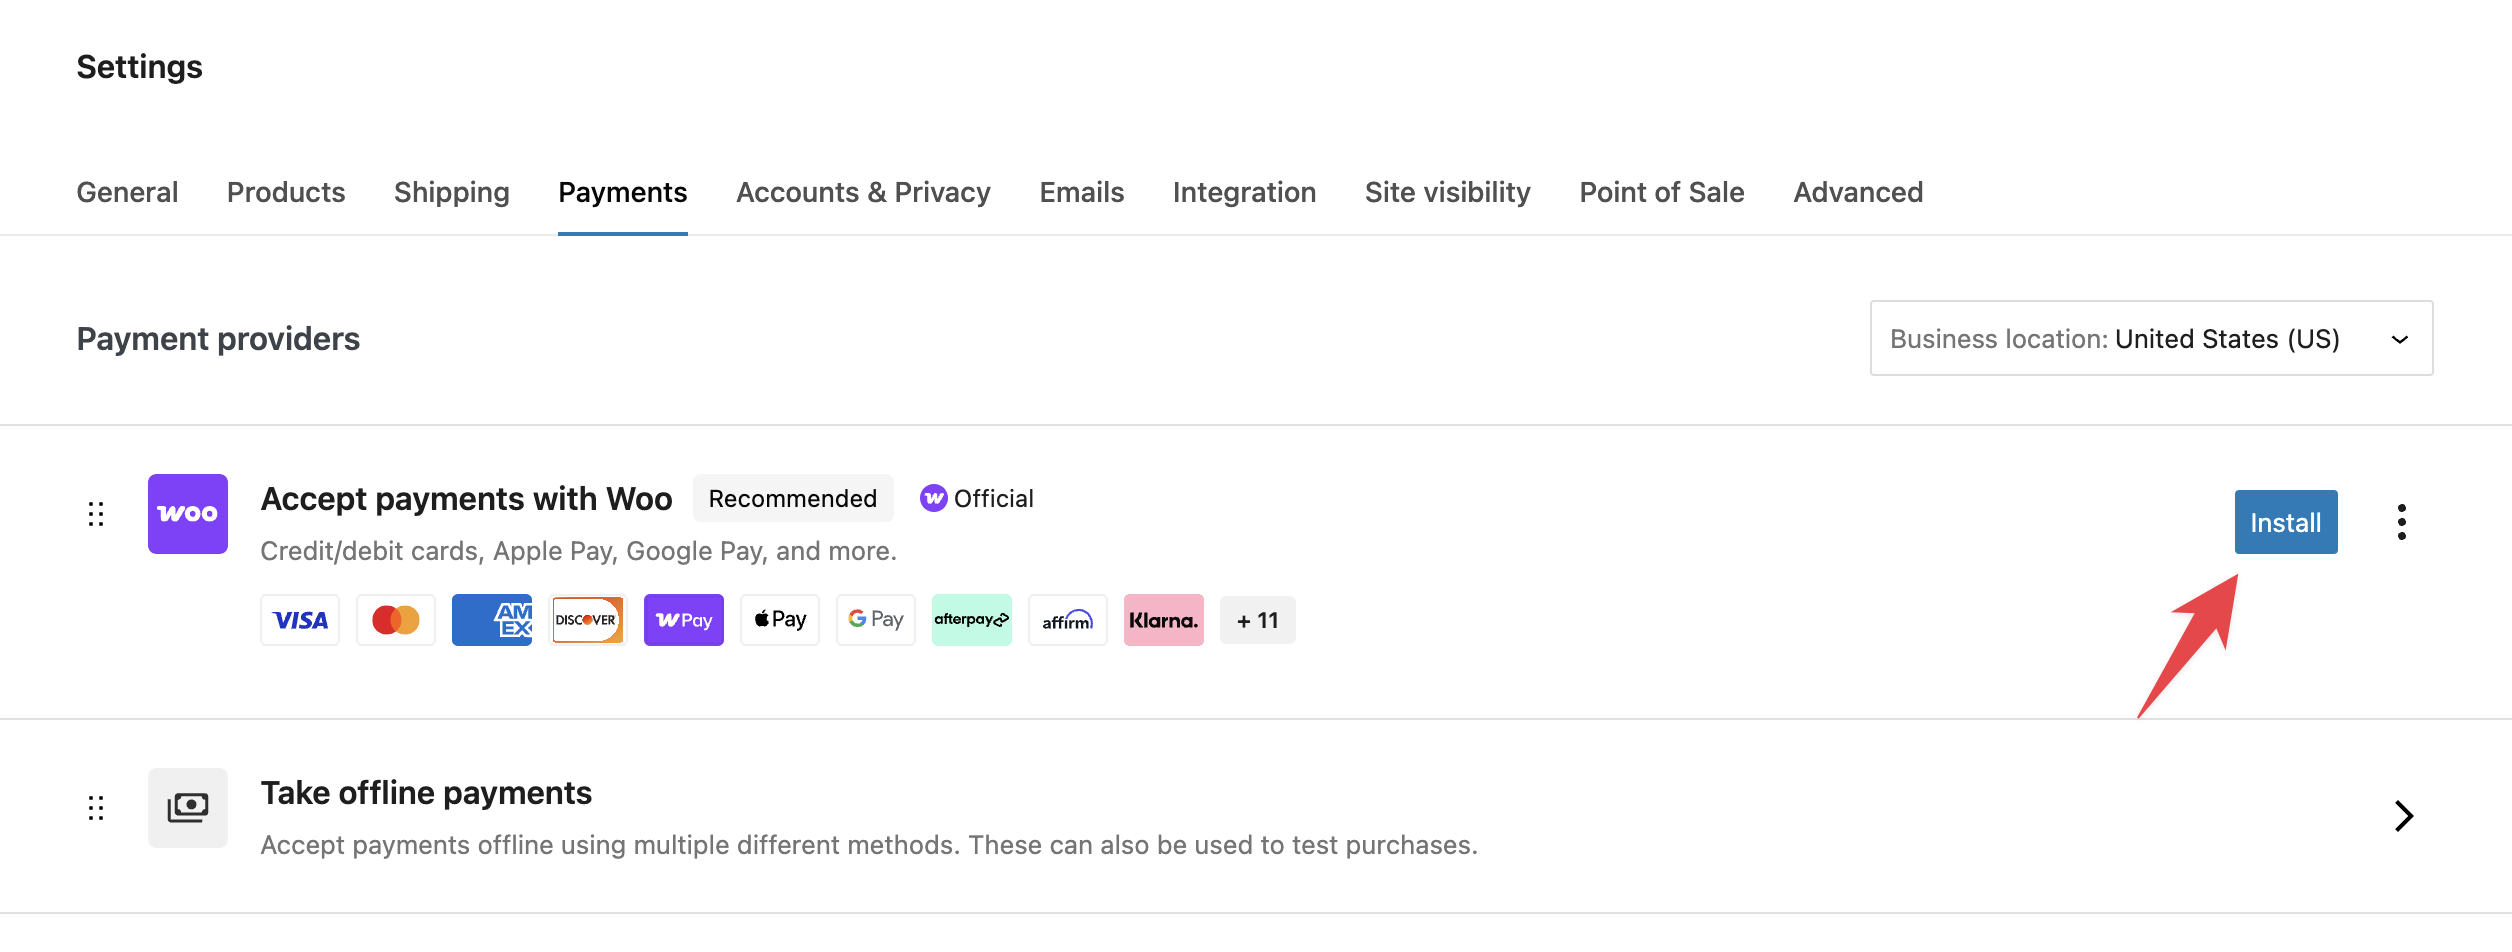
↑ Back to topMost users will be able to install WooPayments directly from the WooCommerce > Payments settings. You can access the Payments settings through any of the following options:
- Selecting the Payments menu item.
- Selecting the Set up payments option in the WooCommerce setup list at WooCommerce > Home.
- Navigating to WooCommerce > Settings > Payments.
Once you’ve navigated to the Payments settings, you can select the Install button for the Accept payments with Woo option in the list.
WooPayments is not listed in the Payments settings
↑ Back to topIf WooPayments does not appear as an option in the Payments settings, then it’s likely that:
- The Business location at the top of the page is not set to one of our supported countries.
- You previously hid the WooPayments suggestion.
In either of these cases, you will need to manually install WooPayments.
Manually installing WooPayments
Expand this section to see how to manually install WooPayments.
To manually install WooPayments:
- Go to Plugins > Add Plugin on your WordPress site.
- In the search box, type “WooPayments” and hit Enter on your keyboard.
- One of the first results will be WooPayments: Integrated WooCommerce Payments by WooCommerce.

- Click the Install Now button to begin installation on your site. Once installation is complete, the Install Now button will change to Activate.


- Click the Activate button.
After clicking Activate, you will be taken to the onboarding wizard to start creating your account.
Signing up for WooPayments
↑ Back to topAfter you’ve installed and activated WooPayments, it’s time to start the signup process.
Before you begin
↑ Back to topBefore starting the signup process, keep the following information in mind:
- Although most of the signup process takes place on your site, there will be a popup shown from
connect.stripe.com(Stripe is our payments partner) that collects your phone number and email address. This popup is normal. - Be sure to select the correct country for your account, as it cannot be changed later. If you’re using WooPayments for a business, the relevant country is the one where your business is registered, not the one in which you personally live.
- You will have the option to create a test account as a part of the signup process, which allows you to explore WooPayments using simulated information.
- If you run into any issues with the signup form itself, please read our onboarding troubleshooting document to help diagnose the problem.
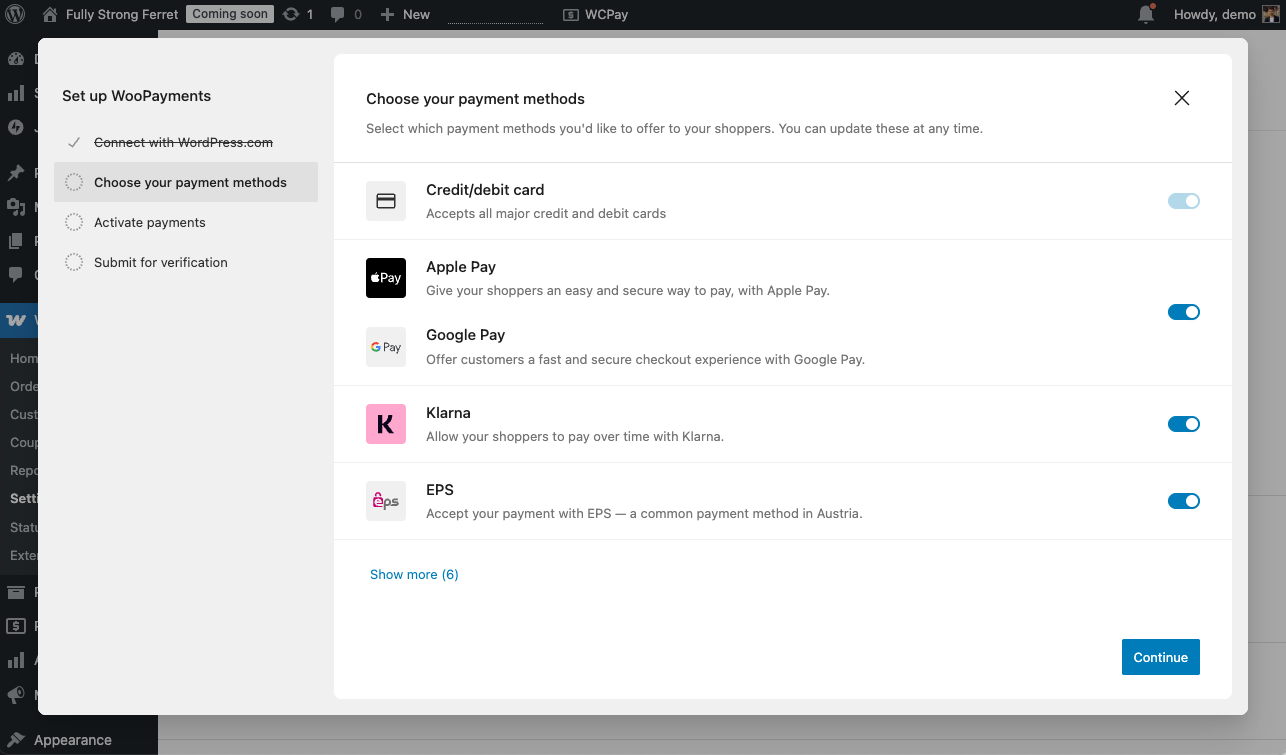
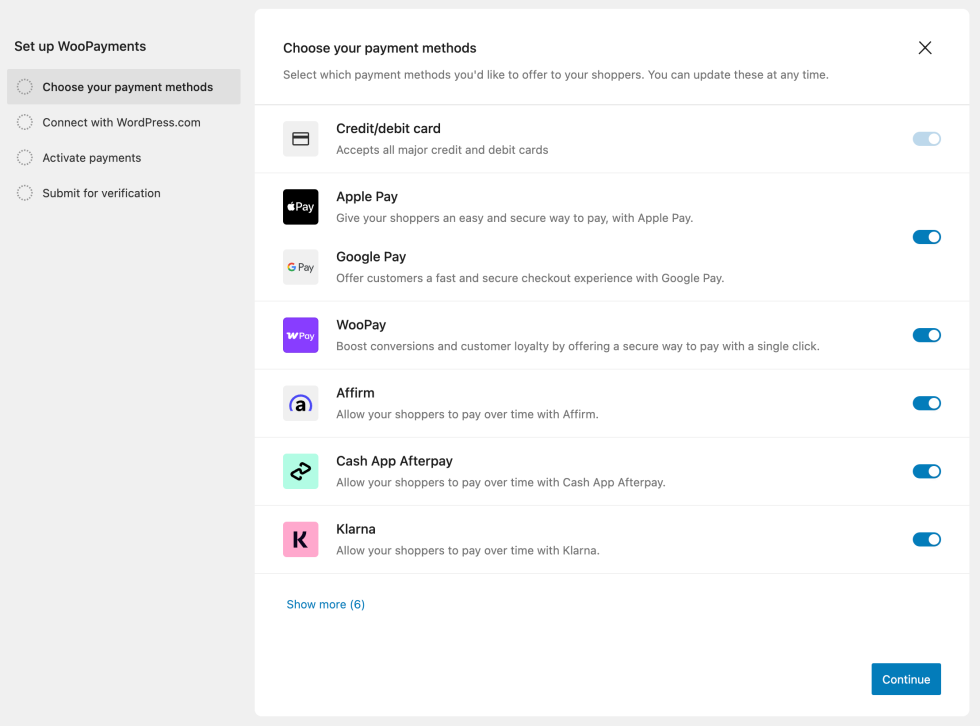
The WooPayments signup process
↑ Back to topTo sign up for WooPayments:
- If you’re not automatically redirected, navigate to Payments and select Complete setup.
- Select which payment methods you’d like to enable and select Continue. You can adjust the available payment methods later in the WooPayments settings.
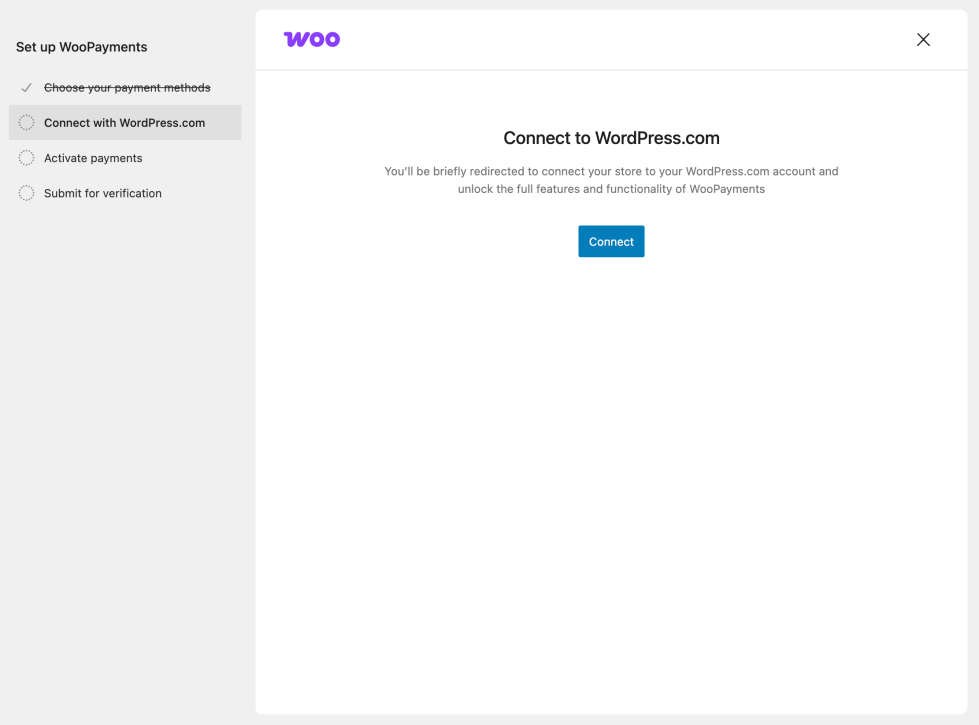
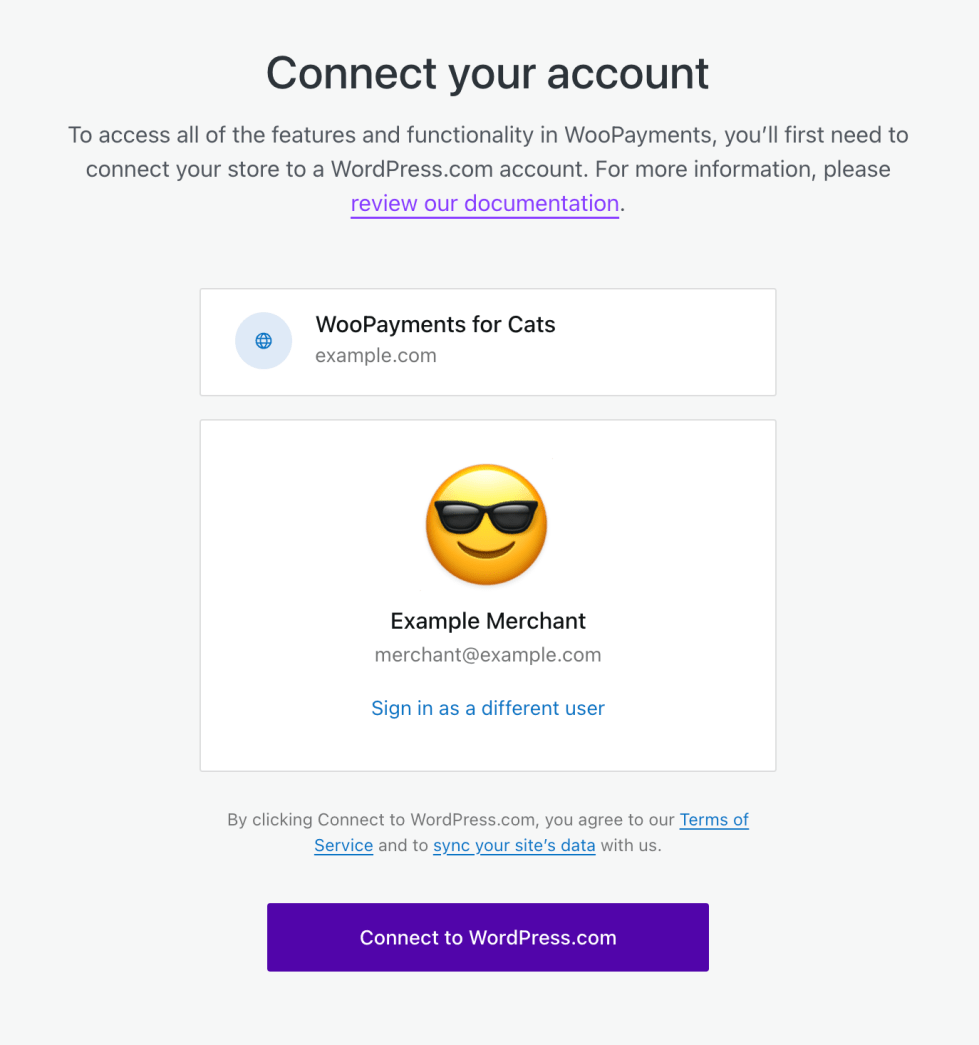
- Select Connect in the next step to connect to your WordPress.com account.
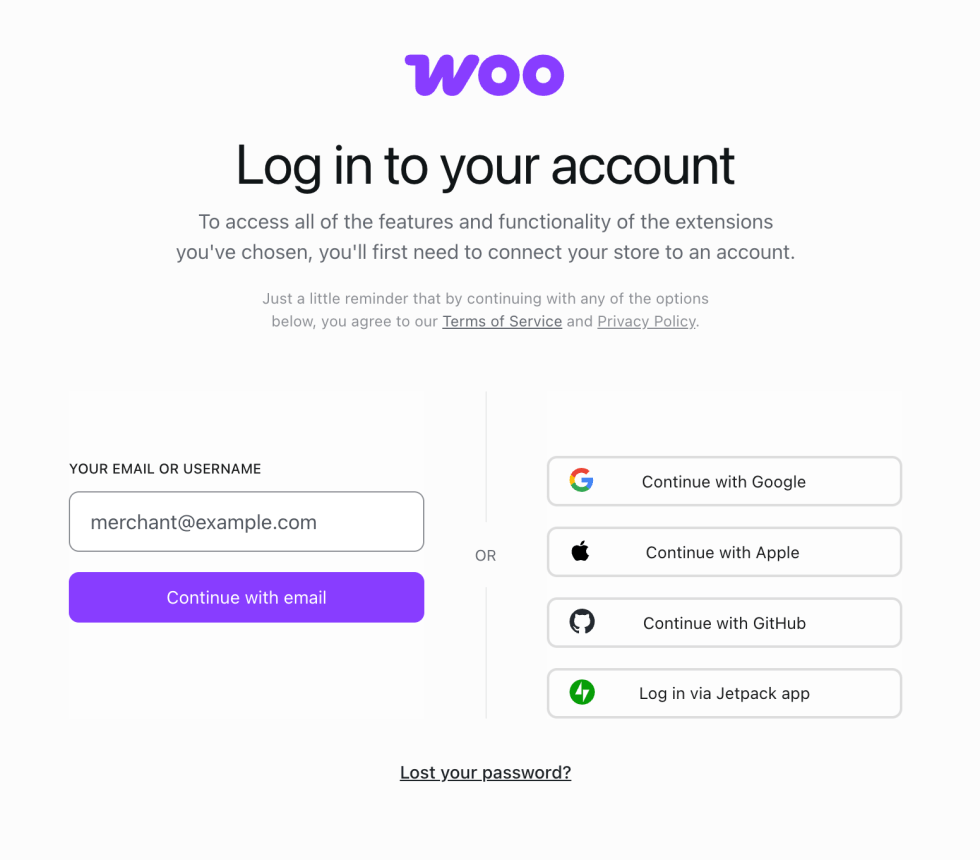
- If you don’t have an existing WordPress.com account, that’s fine! You can create one quickly using your preferred email or by logging in with your Google, Apple, or GitHub account.
- Your WordPress.com account email will be used for most WooPayments notifications. If you don’t want such emails going to that address, it might be best to create a new WordPress.com account solely for connecting your WooPayments site.
- Select Start accepting payments to begin creating your WooPayments account.
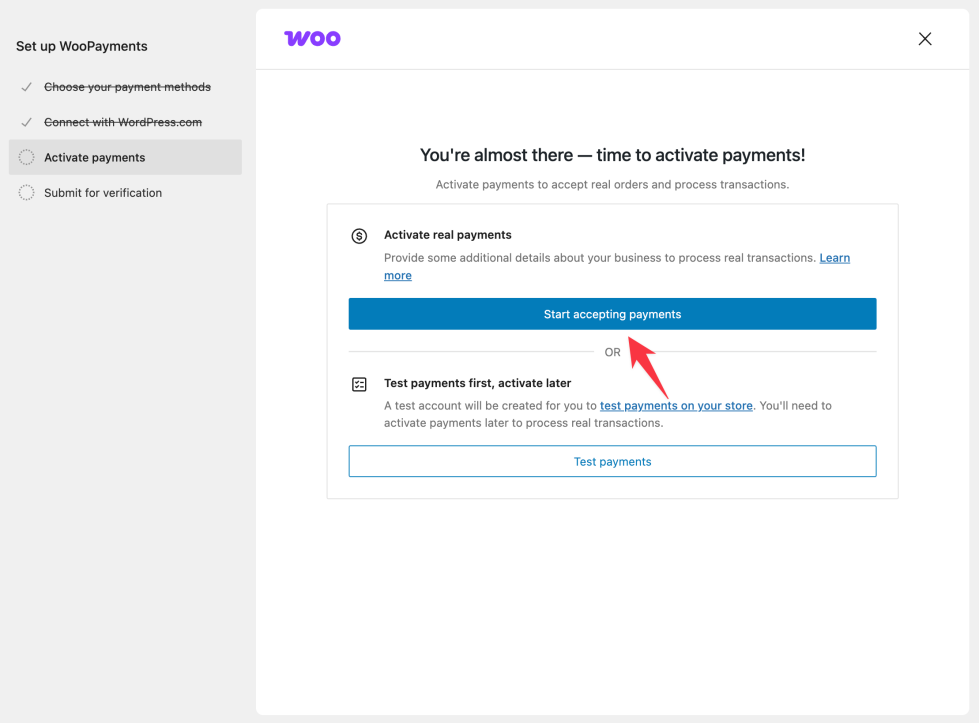
Note: Selecting Test payments will create a test account, which will allow you to safely test payments in a sandbox-like environment. However, you cannot accept real payments with a test account.
- Provide the required business information and select Continue.
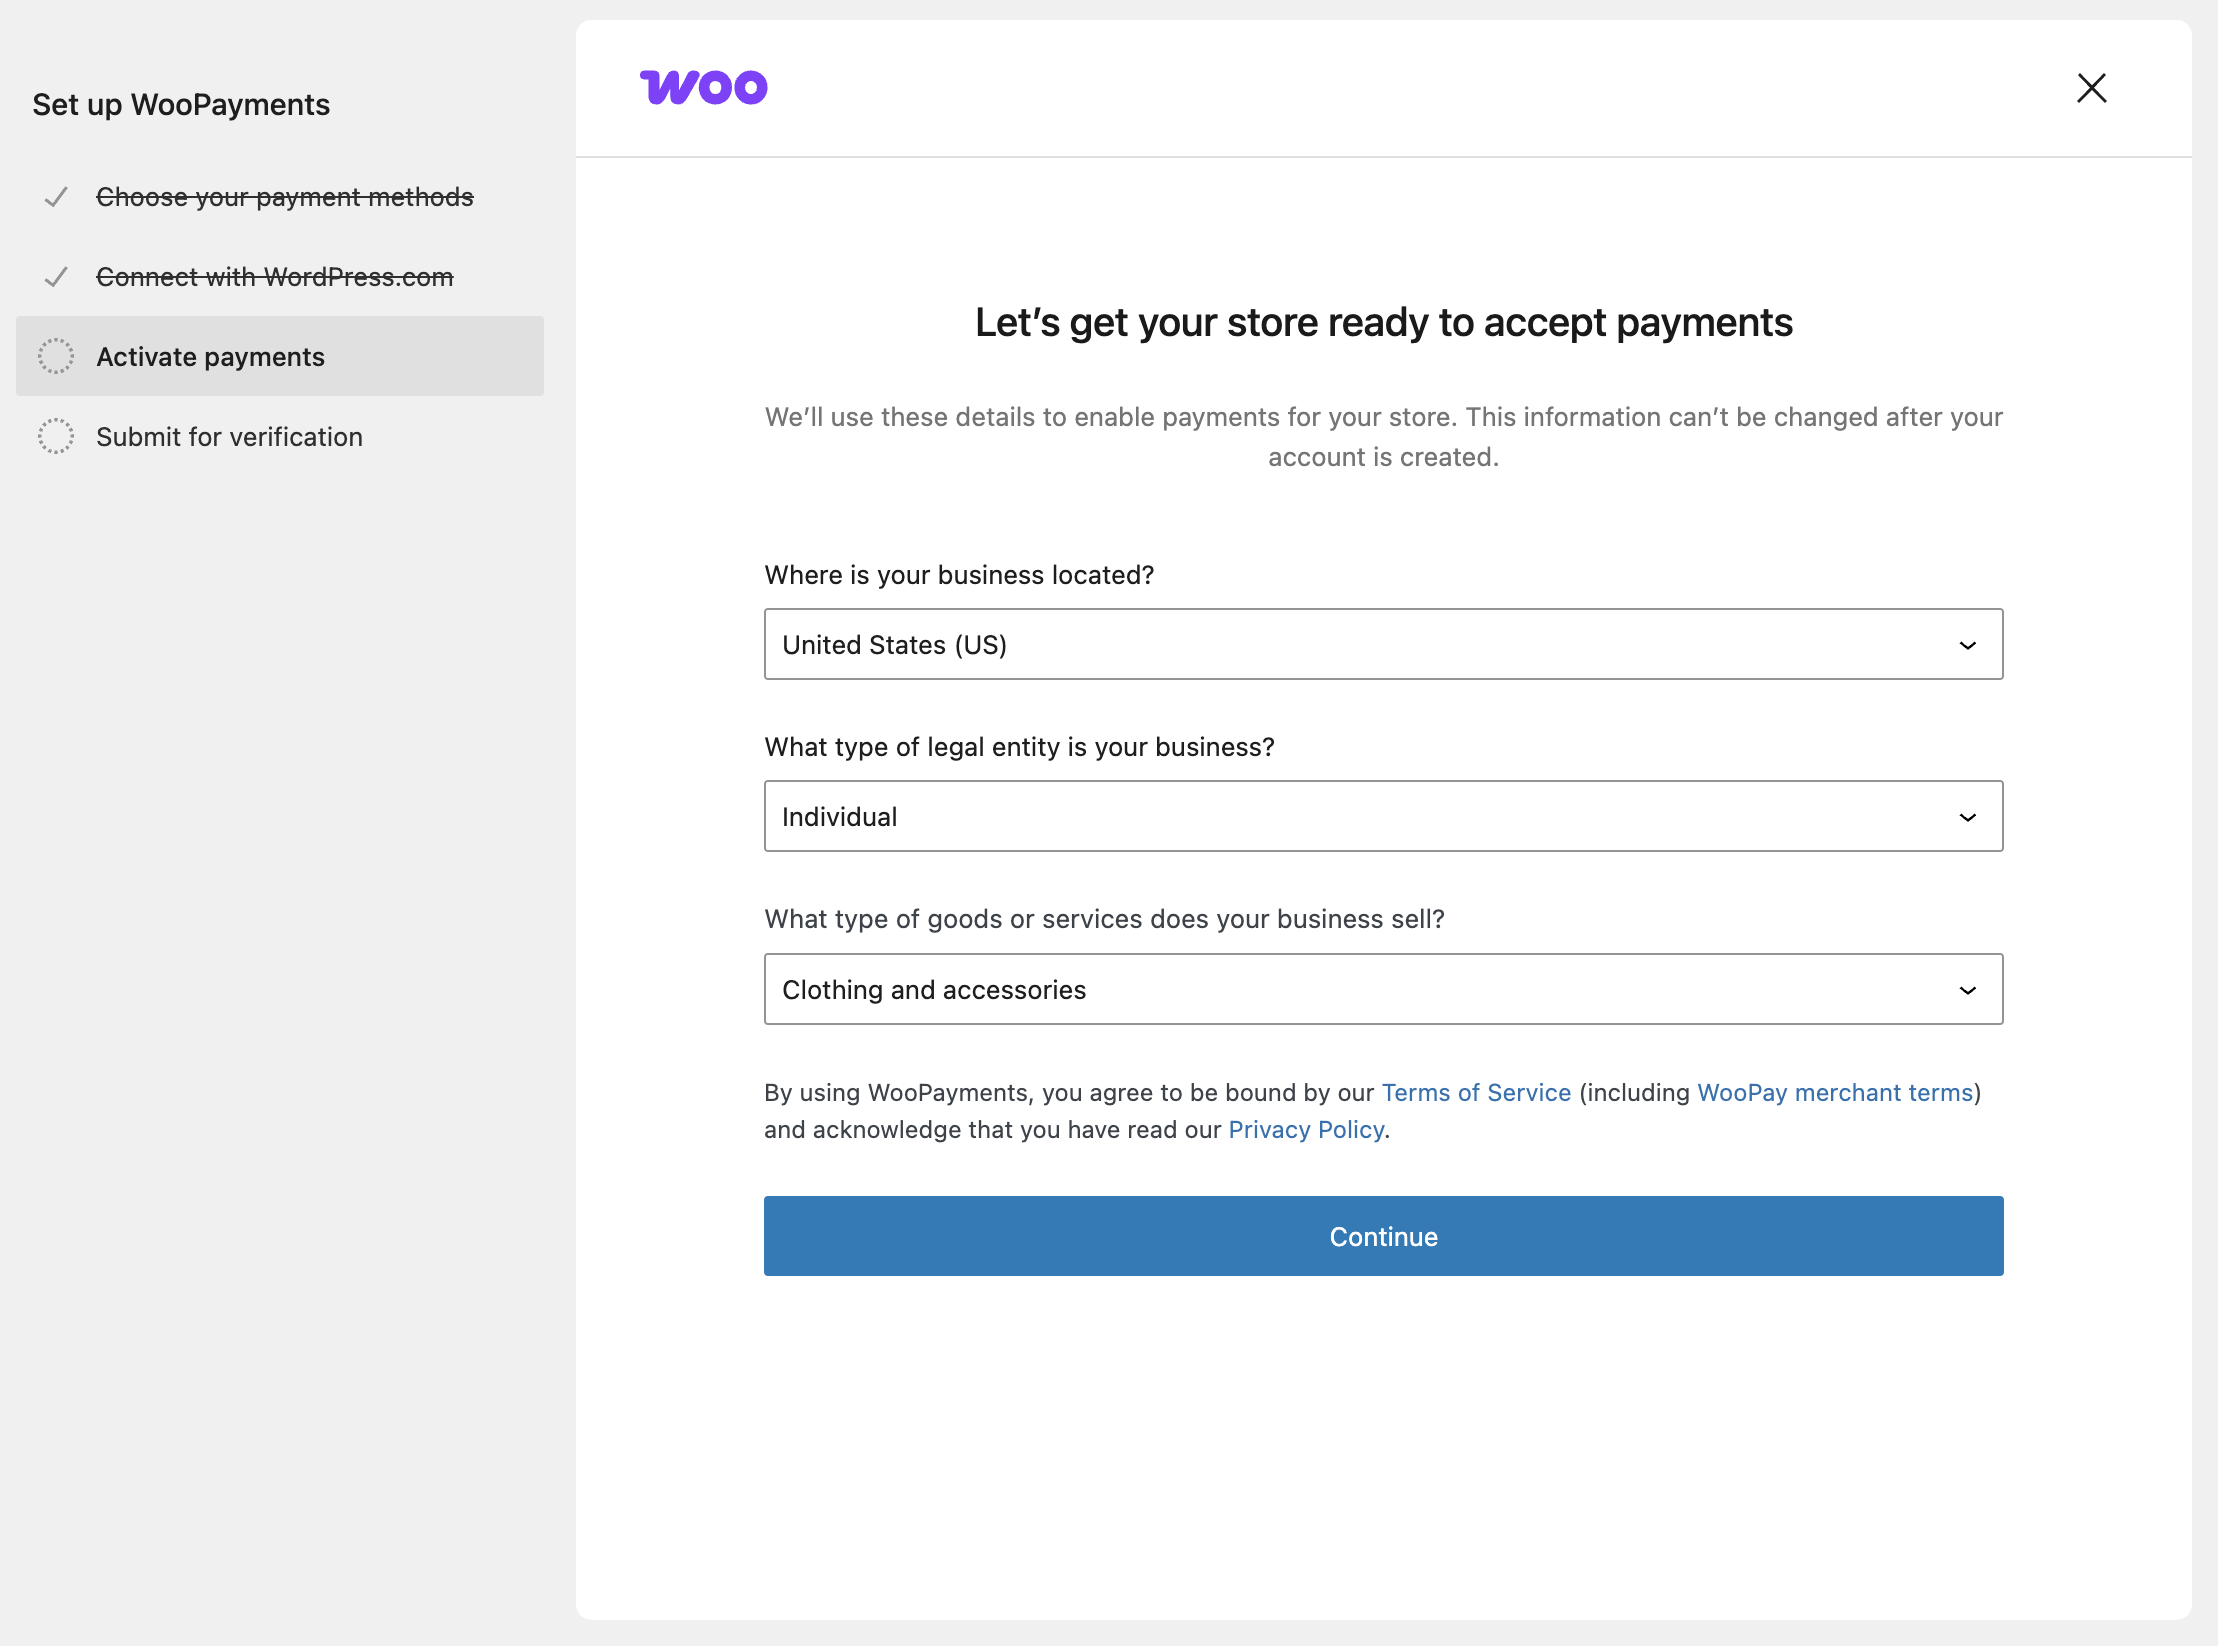
- Verify your business details with our payments partner, Stripe.

- After you click the Add information button, a popup from
connect.stripe.comwill appear, asking for your phone number and email address. This is a normal part of the account creation process. - Once you’ve verified your phone number, you’ll start entering your personal and business details.
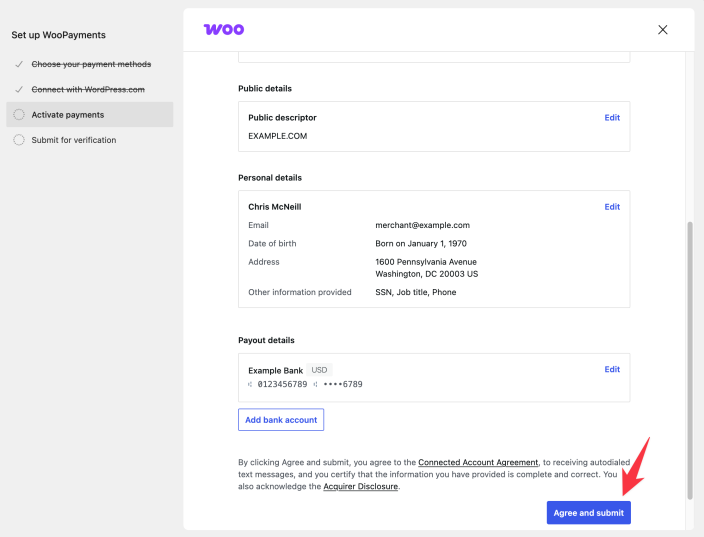
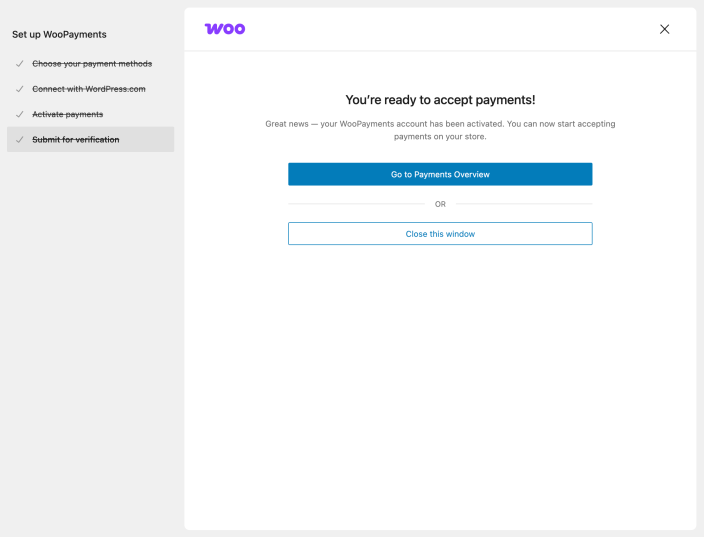
- After you’ve gone through the process of entering all your details, and clicked the Agree and submit button, you will be taken back to the set up flow on your site where you will see a success notification.
This short video shows how you can use WooPayments after you’ve signed up.
After you’re done signing up, you may see a notice on the Payments > Overview page that your account information is under review:

This is normal, and the notice will go away once your information is verified.
Resetting the signup process
↑ Back to topIf you made a mistake while signing up for WooPayments and you want to start fresh, you can reset the signup process if you haven’t finished it yet.
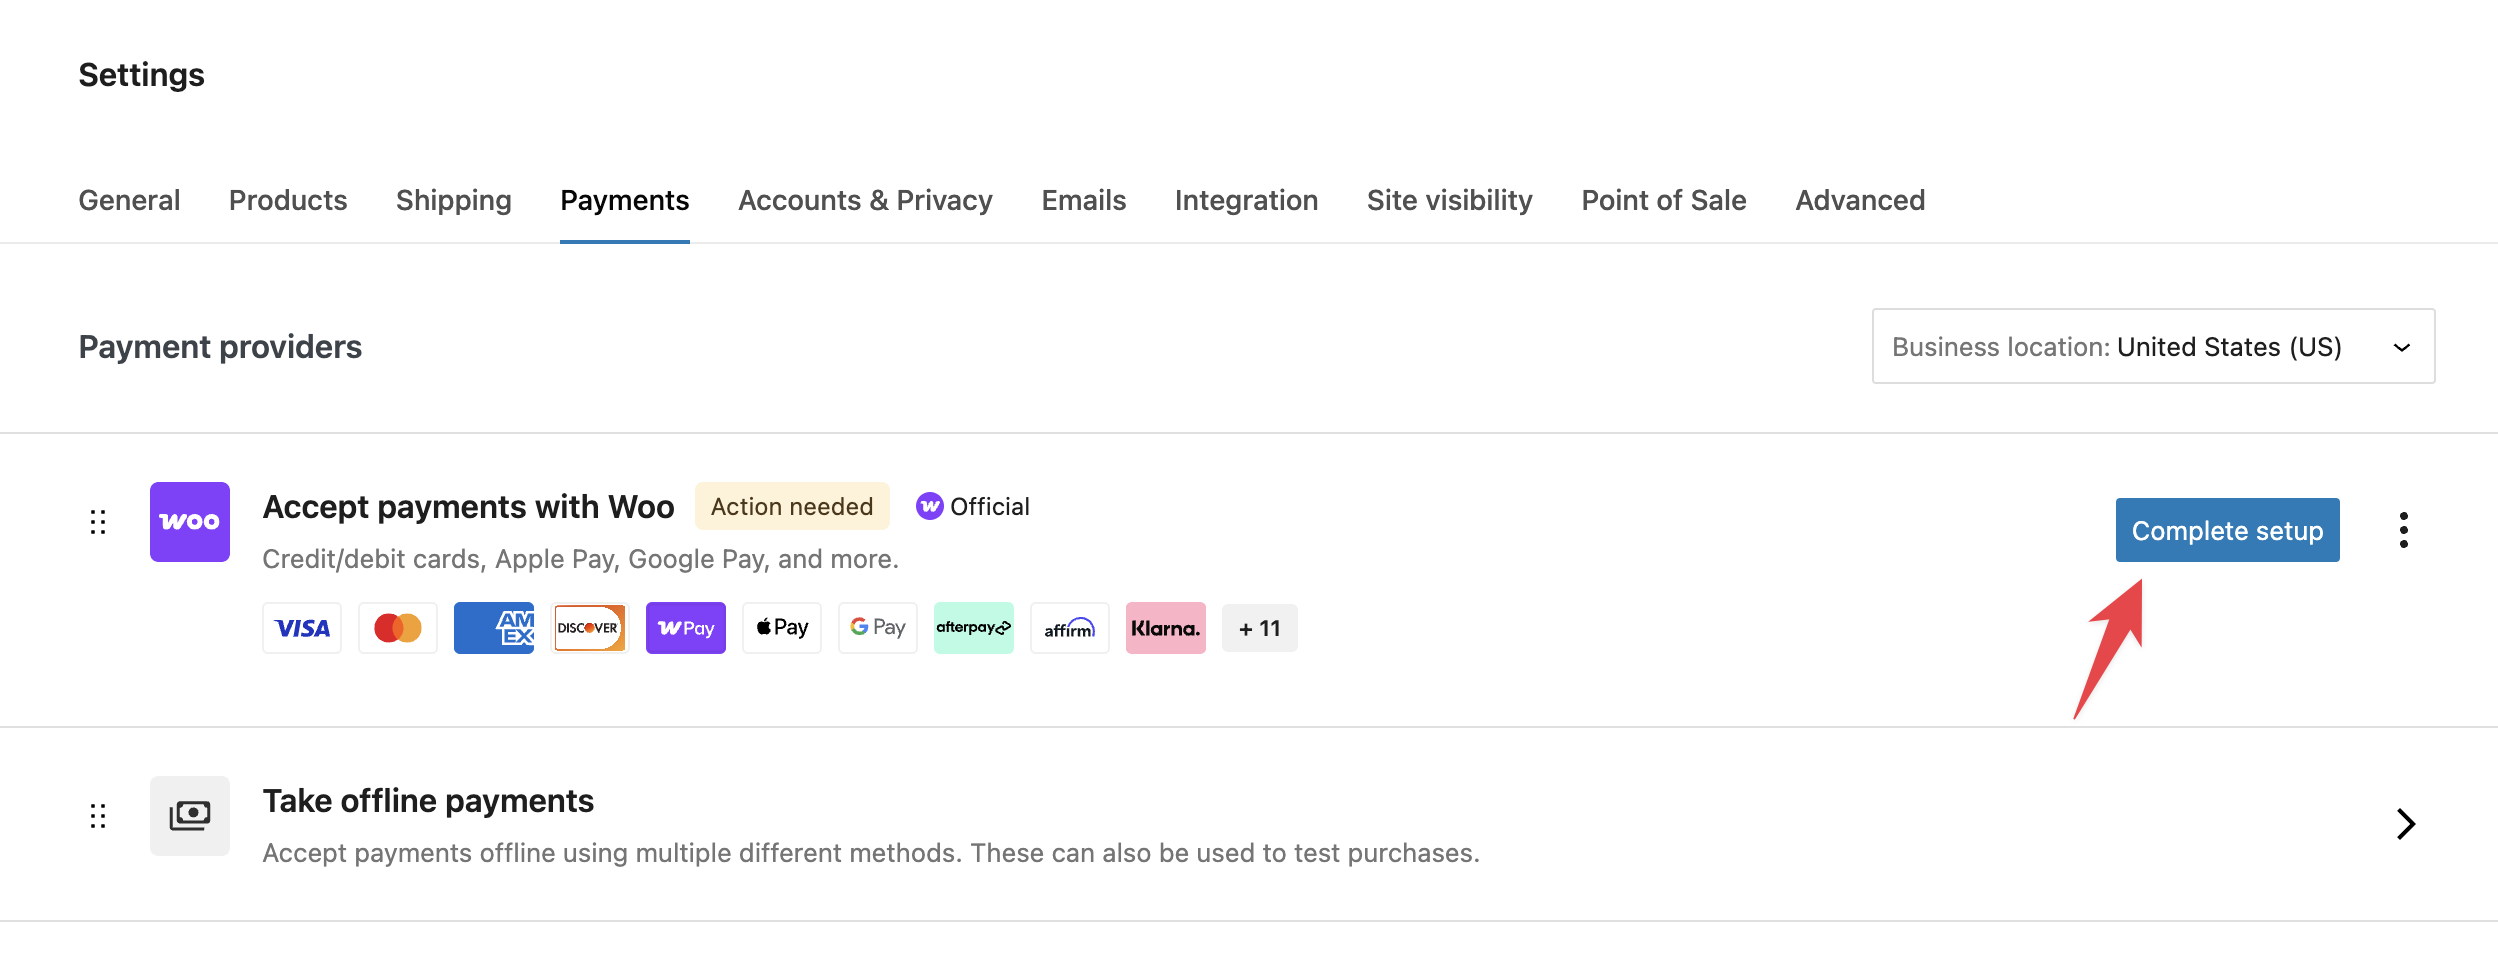
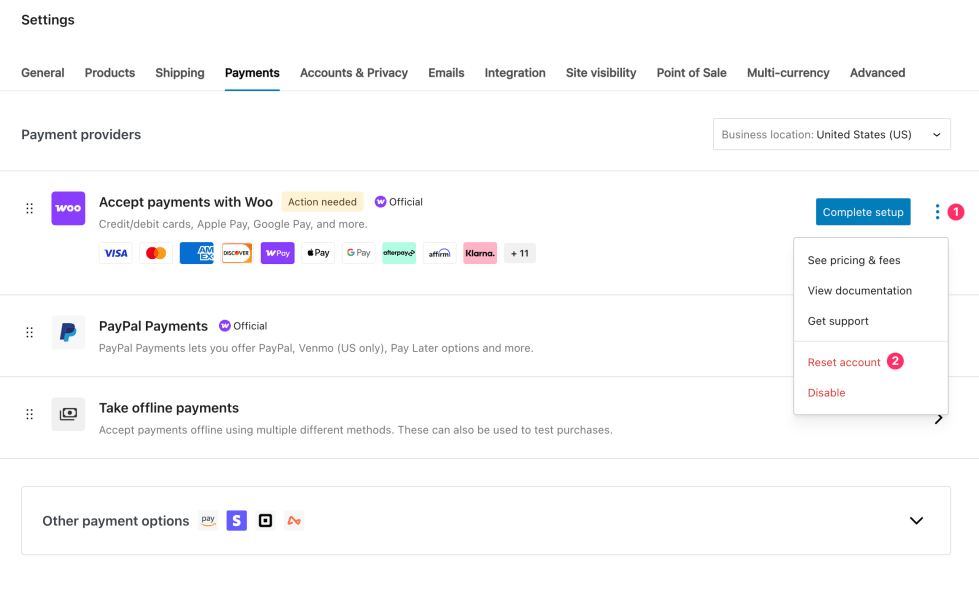
To reset your account from the Payments menu:
- Select the three dots next to the Complete setup option.
- Select the Reset account option in the modal that appears.
- Confirm you’d like to reset by clicking the Yes, reset account button.
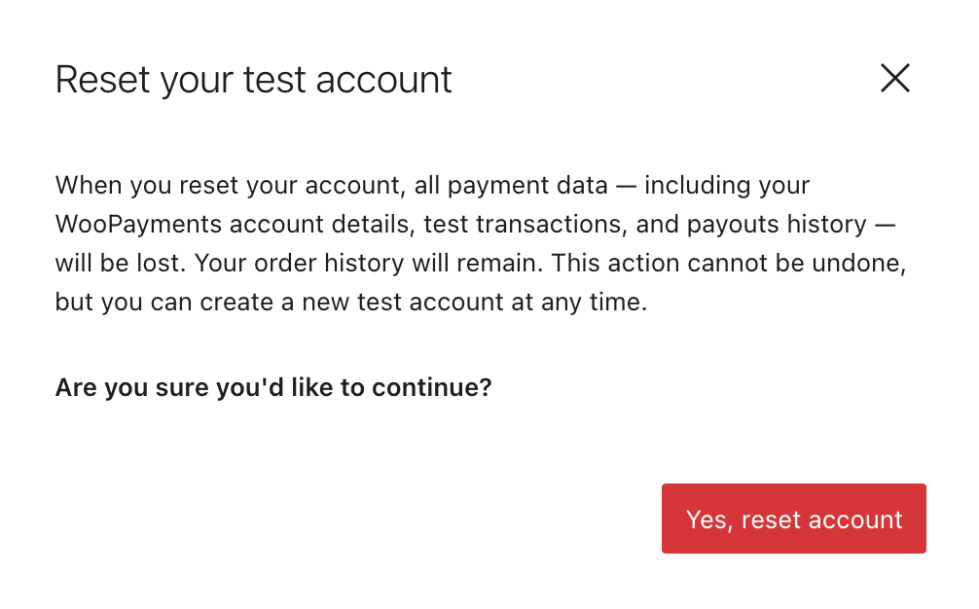
If you’ve already finished the signup process (by clicking Agree and submit) but need to reset your account, you can request your account be deleted.
Staying updated
↑ Back to topRunning the latest versions of both WooCommerce and WooPayments is a crucial part of keeping your site secure. We suggest enabling automatic updates for both plugins on the Plugins > Installed Plugins page.

You can learn more about auto-updating plugins on this WordPress.org page.
Configuring
↑ Back to topOnce you’ve finished signing up, go to the Payments > Settings section of your WordPress dashboard. This is where you can configure WooPayments.
First, make sure WooPayments is enabled by checking the Enable WooPayments box. If you want to test WooPayments before taking any real payments, you can do that by also checking the Enable test mode box.
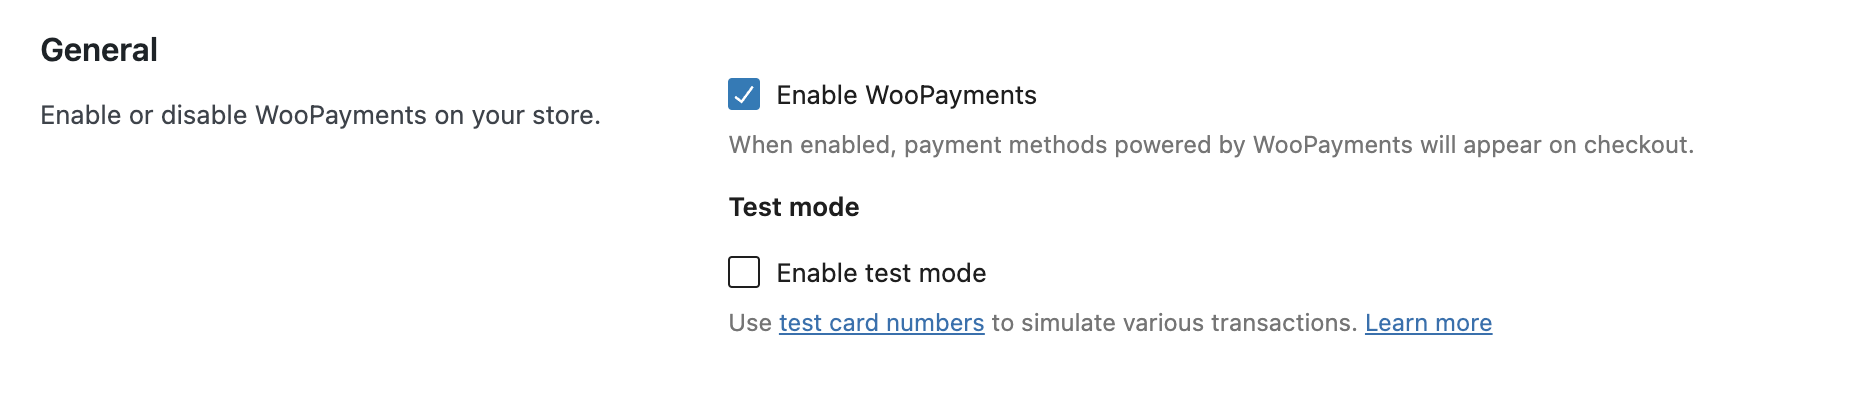
Test mode
↑ Back to topTest mode lets you simulate transactions using test card numbers so that you can ensure your checkout process is working as expected. Simply put any product in the cart and go through the checkout process and the order confirmation page to see exactly what customers would see during an actual purchase.
When you’re ready to go live, remember to disable test mode before accepting live payments.
NOTE: Test mode only works with test credit card numbers. Using real credit card information while WooPayments is in test mode will cause the order to fail and an error will be displayed.
Payments accepted on checkout
↑ Back to topIn the Payments accepted on checkout section, you’ll see that by default you are already able to take credit and debit card payments:

By checking the boxes for other payment methods, you can also offer additional payment options to certain customers. Offering these payment methods can increase the chance that visitors to your site will purchase from your store.
Buy now, pay later
↑ Back to topThis section contains buy now, pay later payment (BNPL) methods. These can help boost sales by offering customers more buying power and flexible payment options.
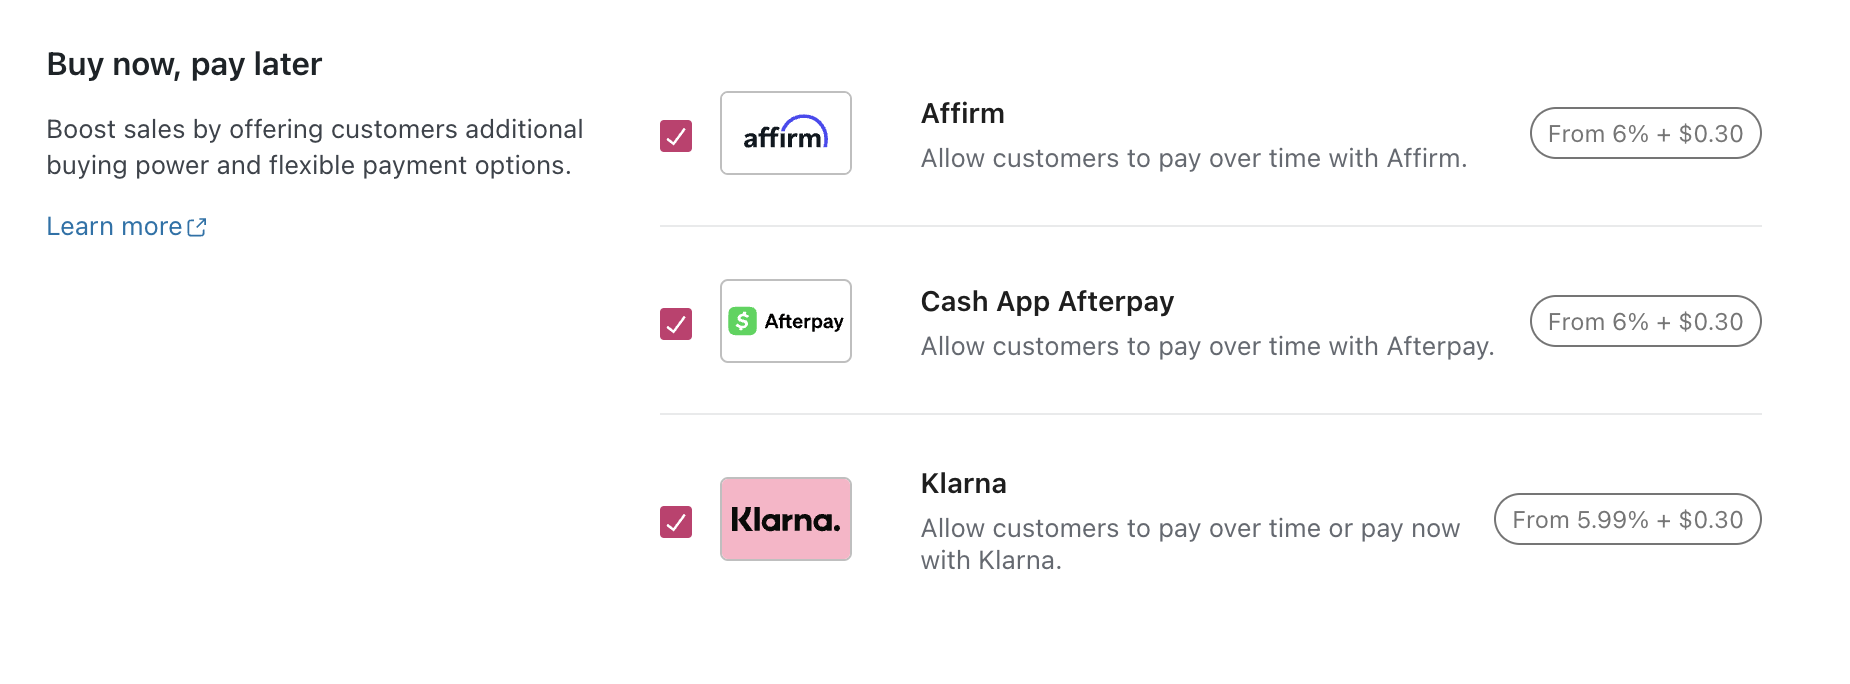
Please see our BNPL documentation to learn more about these payment methods.
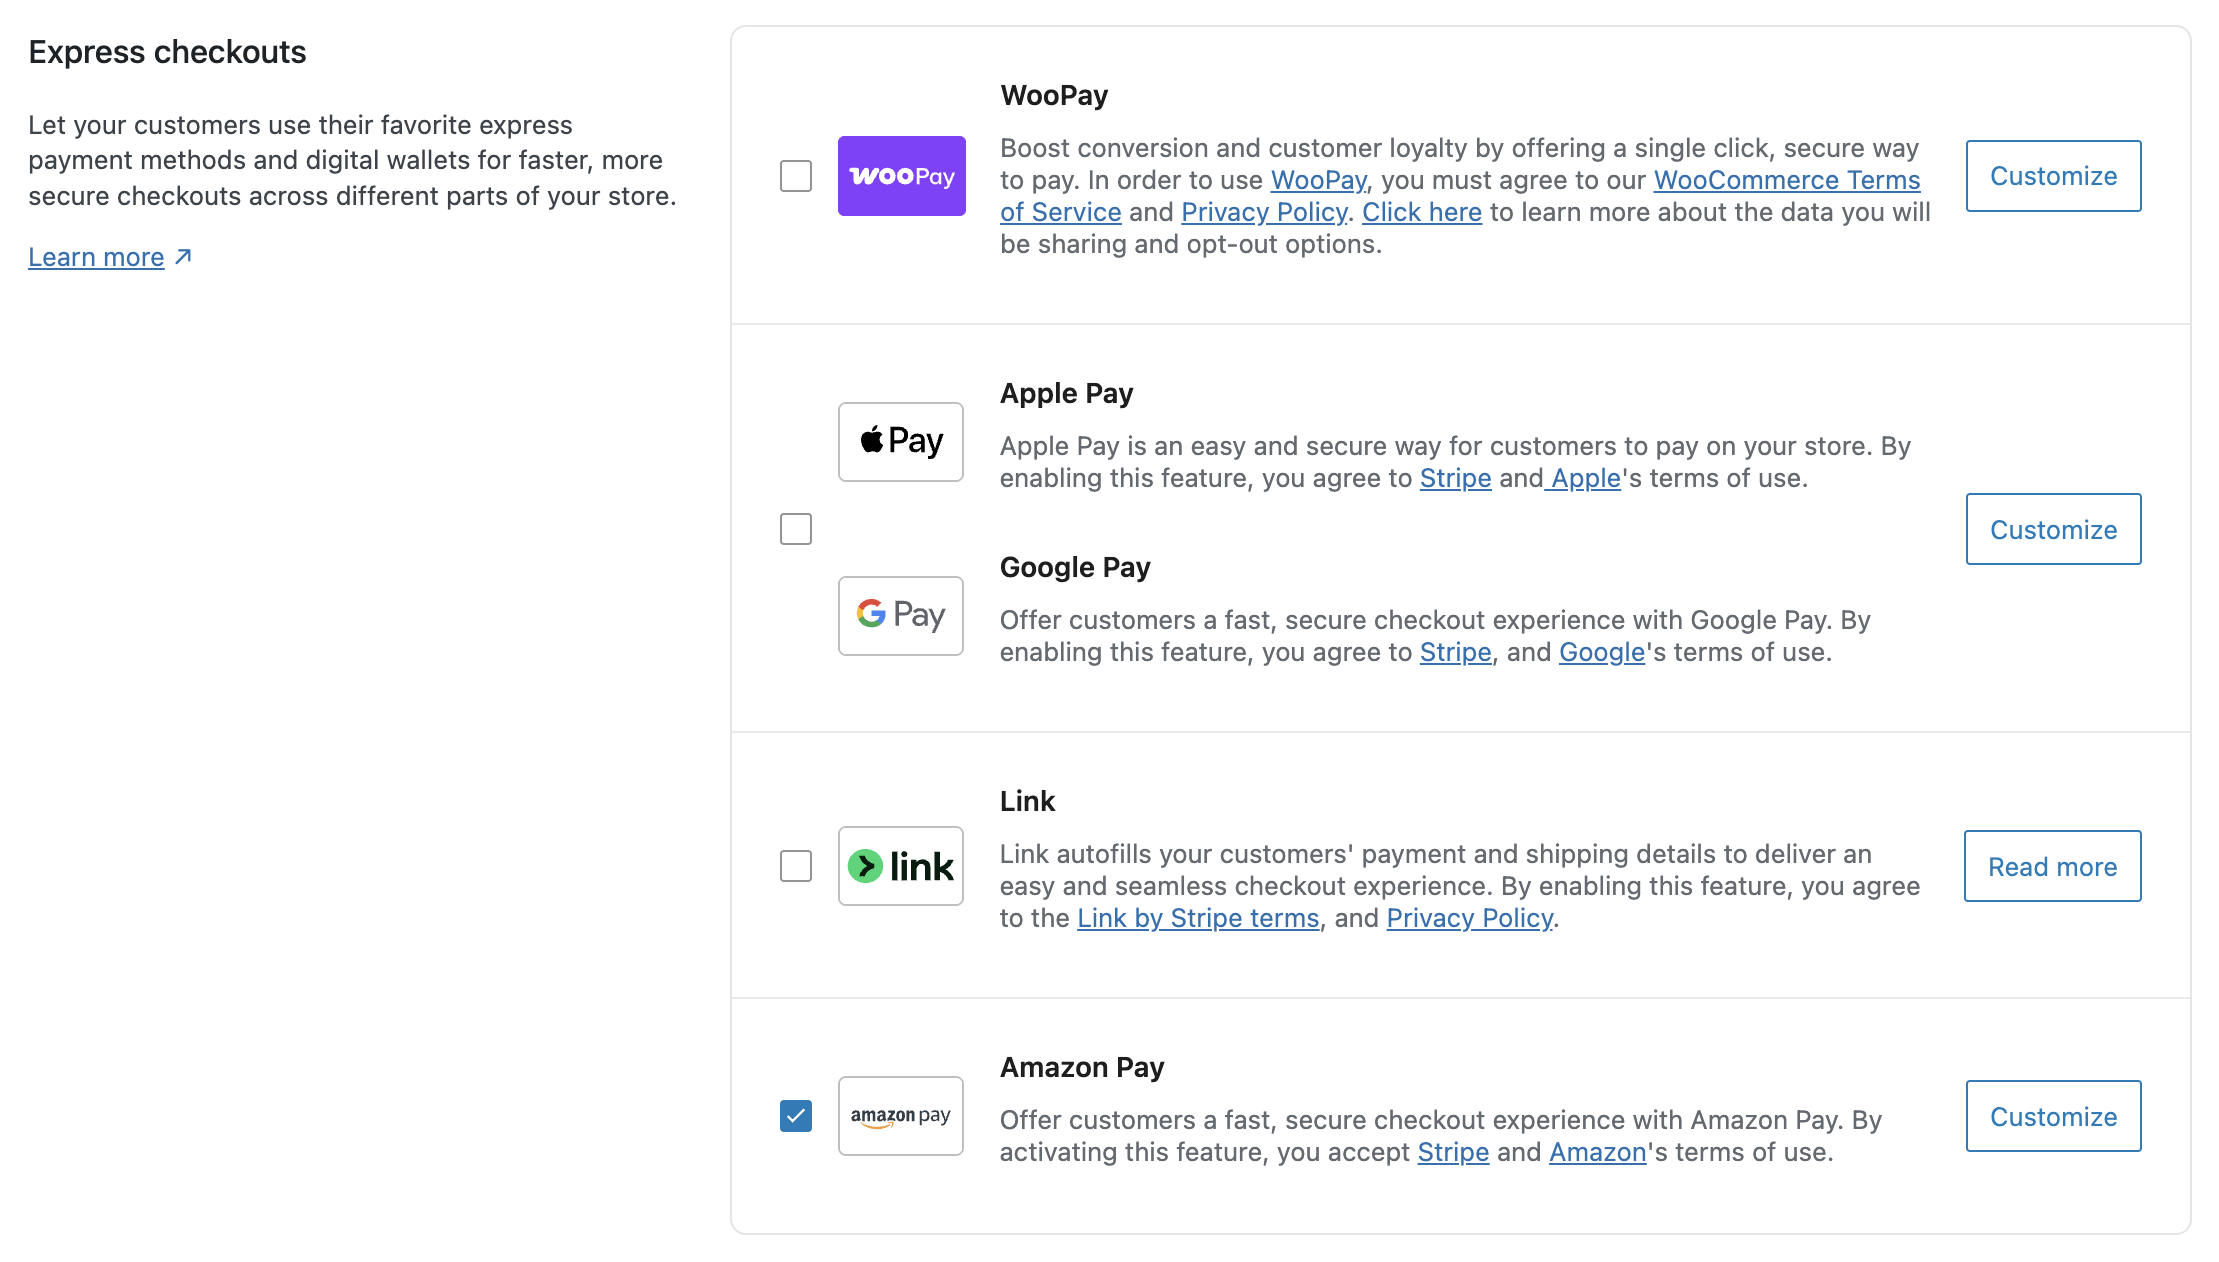
Express checkouts
↑ Back to topThis section shows features which enable even faster checkouts. Enabling these can boost your sales and reduce abandoned carts, as they make it easier for customers to complete their purchase. WooPayments currently supports WooPay, Amazon Pay, Apple Pay, Google Pay, and Link by Stripe.
Transactions and payouts
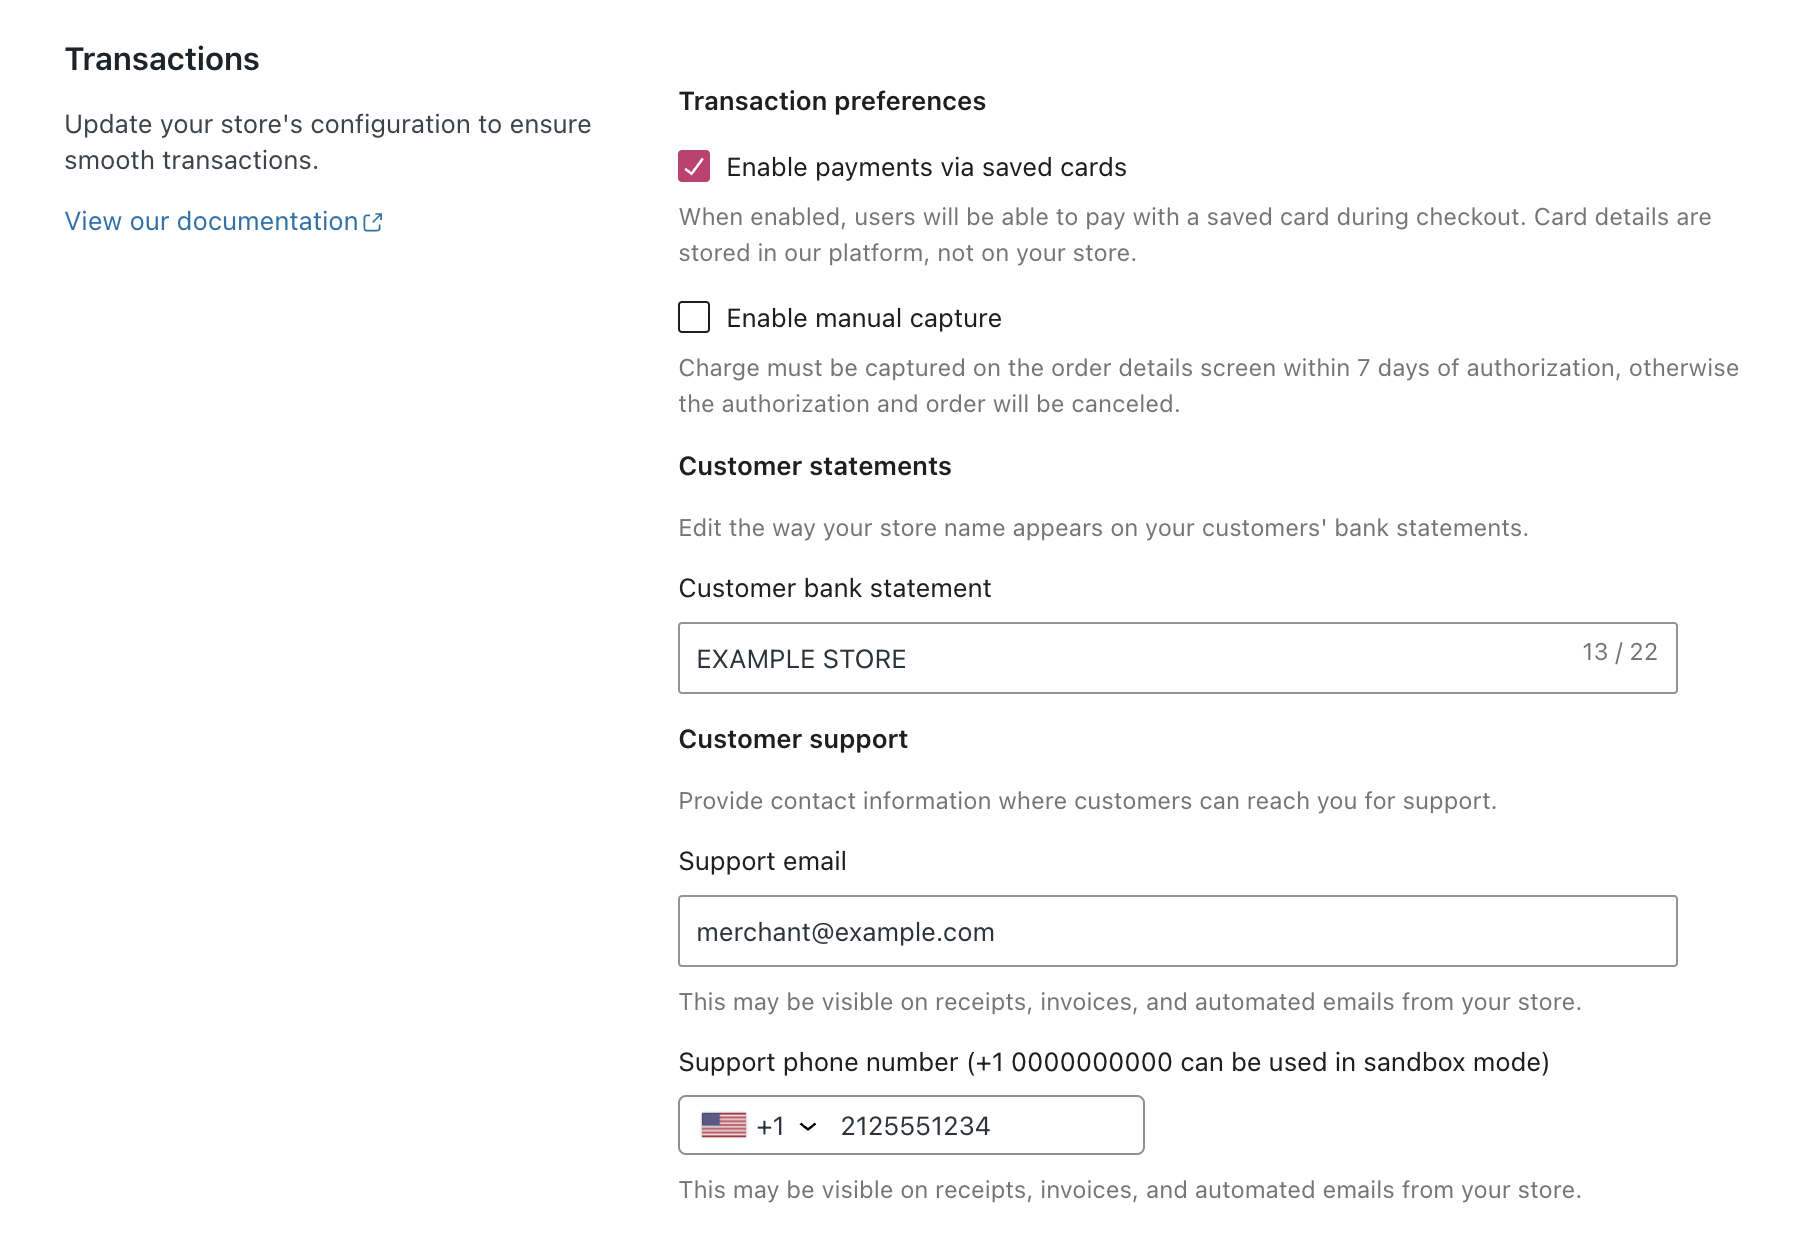
↑ Back to topThe Transactions section controls how your checkout works. Here you can configure whether to allow customers to save their card information on your site and how a charge from your site will appear on your customers’ bank statements. You can also add some contact information, which will appear on receipts and emails from your site.
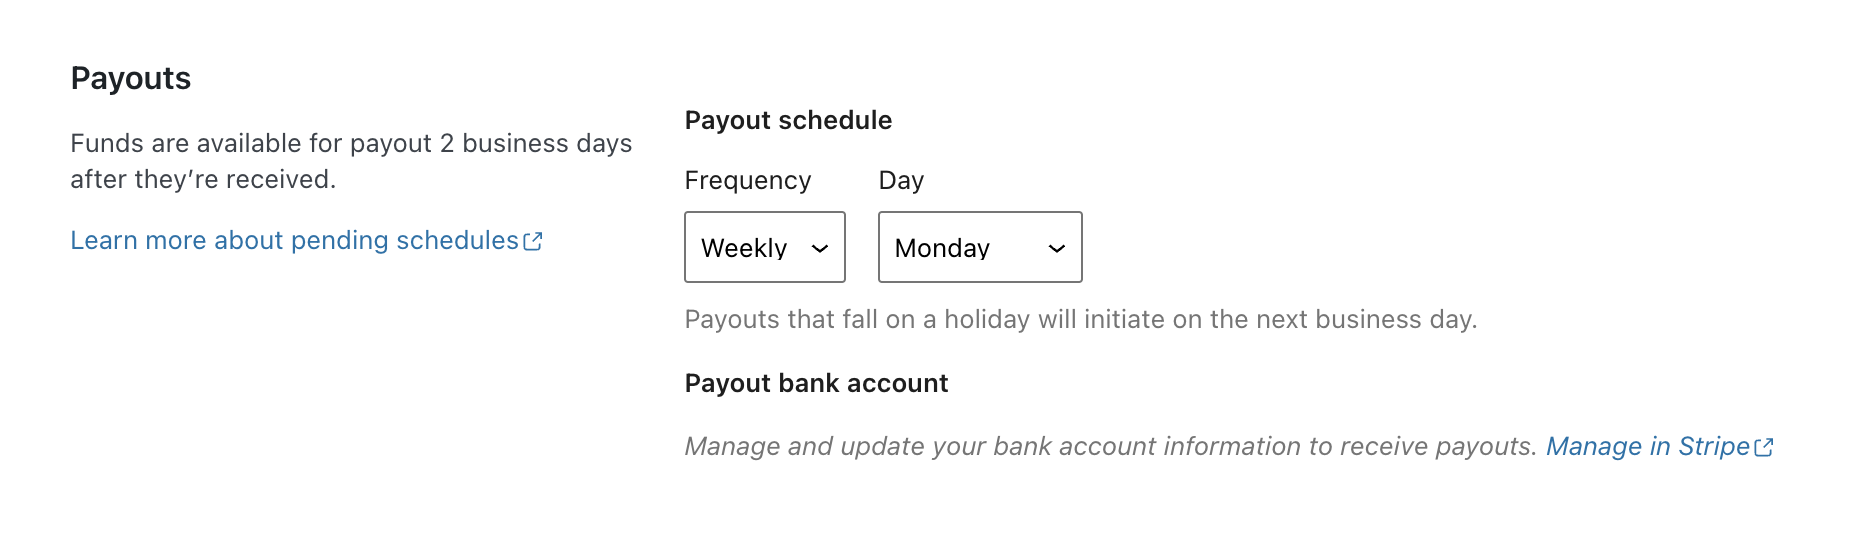
The Payouts section lets you to control how often WooPayments pays out your earnings into your bank account.
Fraud protection
↑ Back to topOur Fraud protection feature offers rules with which you can block suspicious orders before they get placed. This can help you avoid carding attacks and increased disputes.
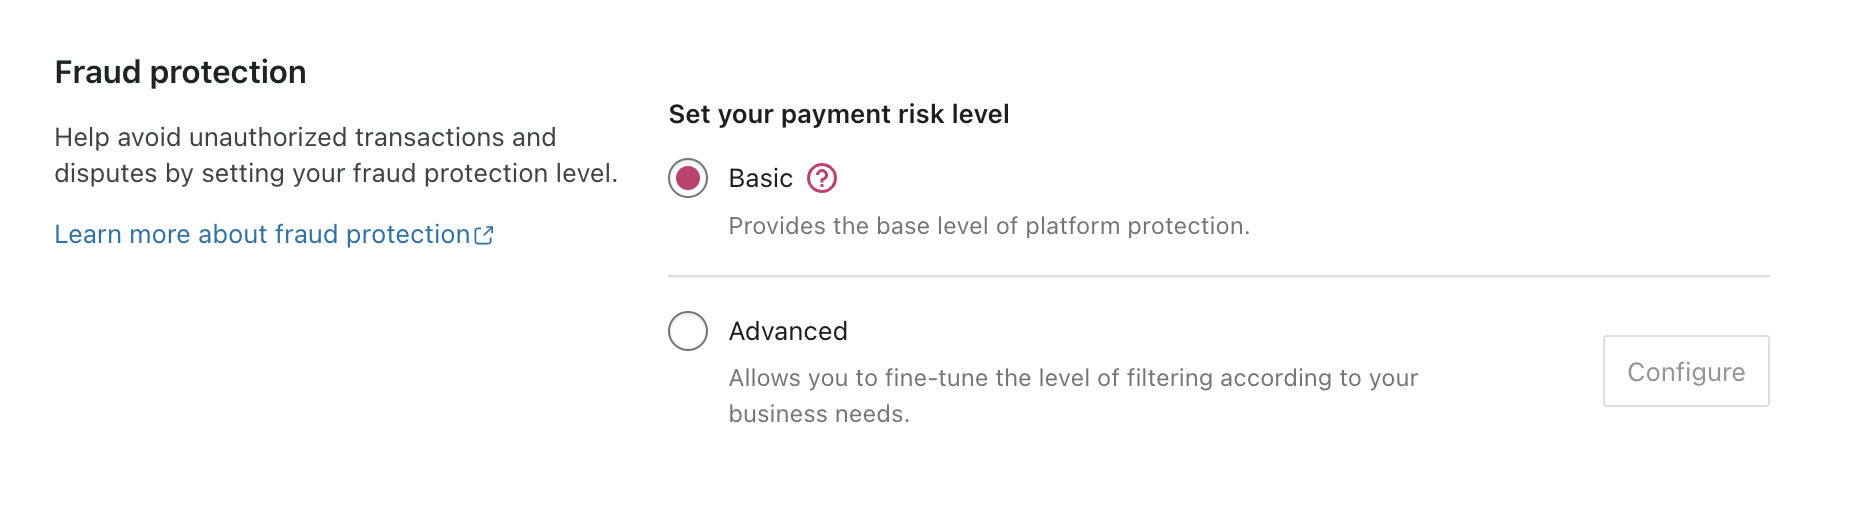
We suggest most stores use the Basic risk level, but to learn more about this feature, please consult our dedicated page on the fraud protection rules.
Going further
↑ Back to topNow that you’re up and running with WooPayments, you can learn more about managing your money and the various settings available to you. After that, feel free to explore some of the more advanced functionality our plugin has to offer!
Our preventing disputes guide can be especially help to review, since it contains some important suggestions about what contact information, policies, and other details you should have on your site.
Getting help
↑ Back to topHere are a few simple things you can do to ensure you have the best experience with WooPayments:
- Try to stay on the latest version of WooCommerce and WooPayments. This helps you avoid bugs and security issues that could disrupt your store!
- Consult the WooCommerce self-service guide for help solving the most common issues merchants sometimes experience with their sites and stores.
If you need help, don’t worry! WooPayments is supported by our worldwide team of Happiness Engineers. Please contact us via the Support tab in your account dashboard, where we can assist over live chat (when available) or email.