NOTE
This product is no longer sold on WooCommerce.com. This document has been left available for existing users, but will no longer be updated.
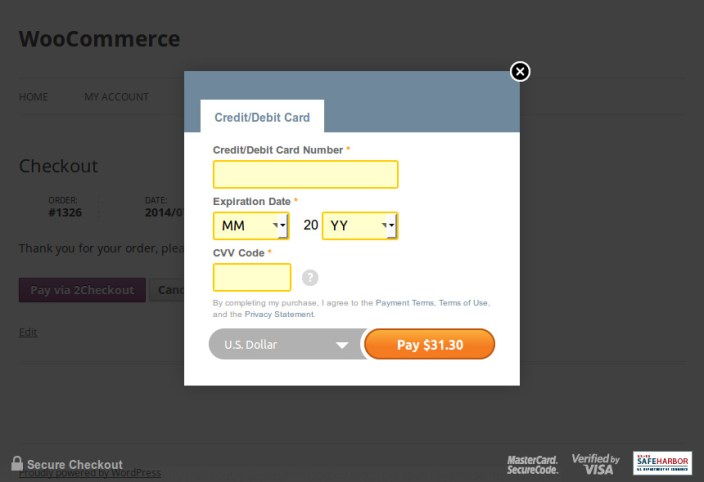
2Checkout Inline Checkout creates an iFrame checkout option that displays a secure payment form inside your WooCommerce store and allows you to process transactions from 196 countries using 26 currencies and 15 languages.
Installation
↑ Back to top- Download the .zip file from your WooCommerce account.
- Go to: WordPress Admin > Plugins > Add New and Upload Plugin with the file you downloaded with Choose File.
- Install Now and Activate.
More information at: Install and Activate Plugins/Extensions.
Requirements
↑ Back to top- A 2Checkout account – go to www.2checkout.com and Sign Up or Log In if you have an existing account
Sign up with 2Checkout
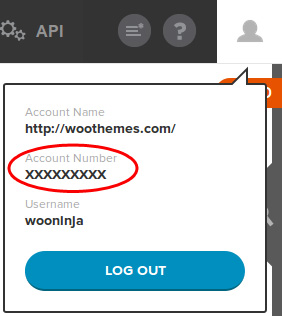
↑ Back to topIn the 2Checkout Seller Area, find your Account Number at the top right of the screen by clicking the profile icon:
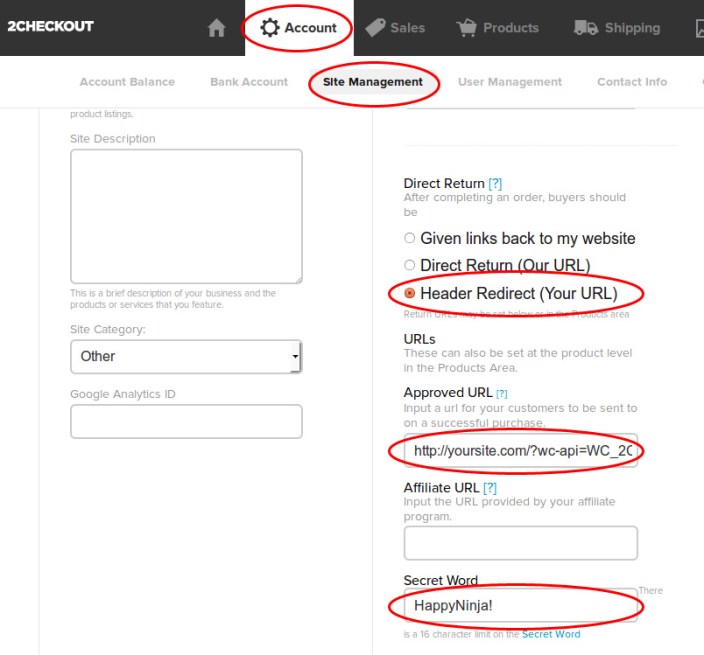
- Go to Account > Site Management.
- Set the Direct Return as Header Redirect (Your URL).
- Enter the Approved URL. For example:
http://yoursite.com/?wc-api=WC_2Checkout_Inline_Checkout_Gateway - Enter a strong Secret Word.
Set up the Notification URL. Click the following button:

Enable the Order Created, Fraud Status Changed, Invoice Status Changed and Refund Issued options and set the URLs. For example:
http://yoursite.com/?wc-api=WC_2Checkout_Inline_Checkout_Gateway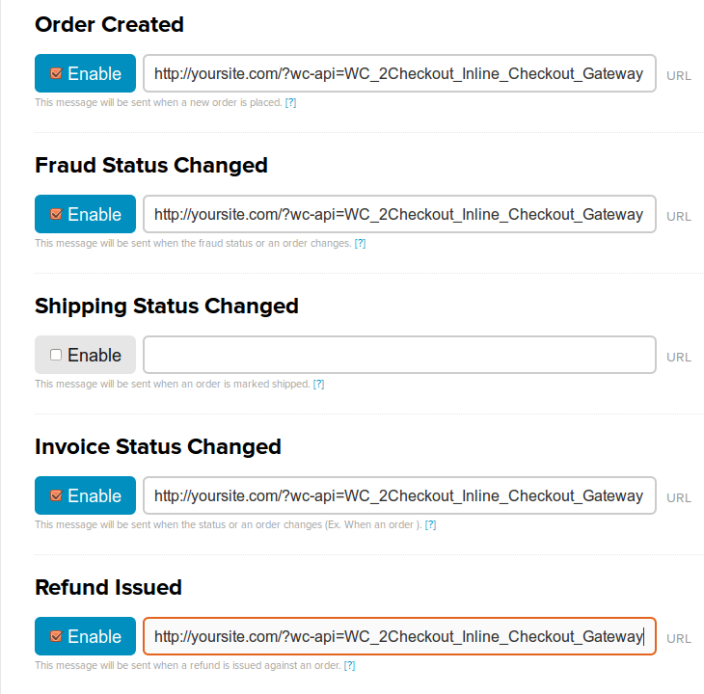
Setup and Configuration
↑ Back to top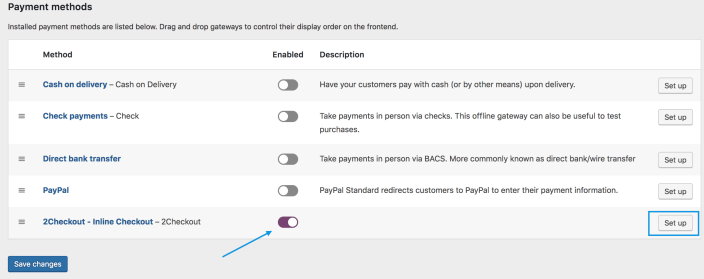
- Go to: WooCommerce > Settings > Payments.
Note: ‘Payments’ formerly called ‘Checkout’ prior to WooCommerce 3.4. - Use the toggle under Enabled to select 2Checkout Inline.
- Select Set Up. You are taken to the 2Checkout – Inline settings.
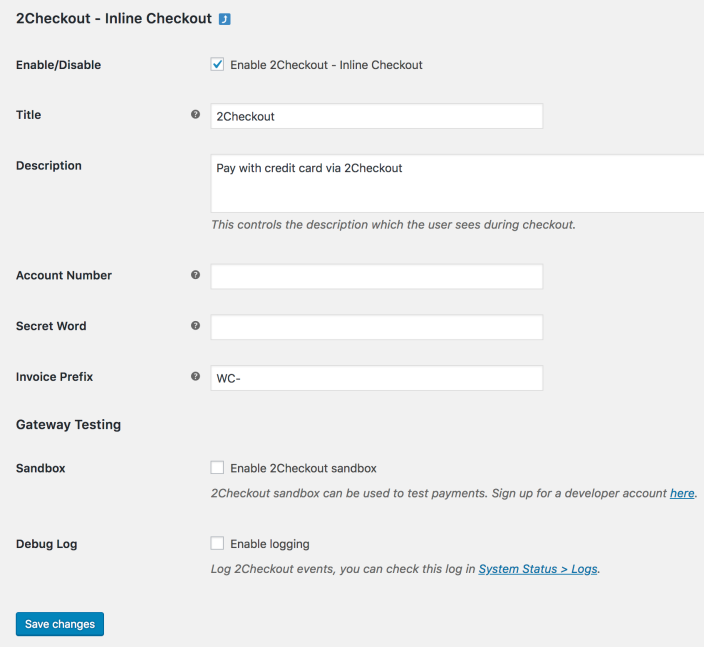
- Configure your settings:
- Enable/Disable – Enable to use. Disable to turn off.
- Title – Choose the title shown to customers during checkout
- Description – Add info shown to customers if they use 2Checkout – Inline
- Account Number and Secret Word – From your 2Checkout account
- Invoice Prefix – Useful if you run multiple stores/locations or need designation
- Gateway Testing
- Sandbox – Tick the box to enable Test mode. Untick to return to Live mode.
- Debug Log – Tick the box to enable logging for troubleshooting.
- Save changes.
