Applying Discounts to Regular Prices
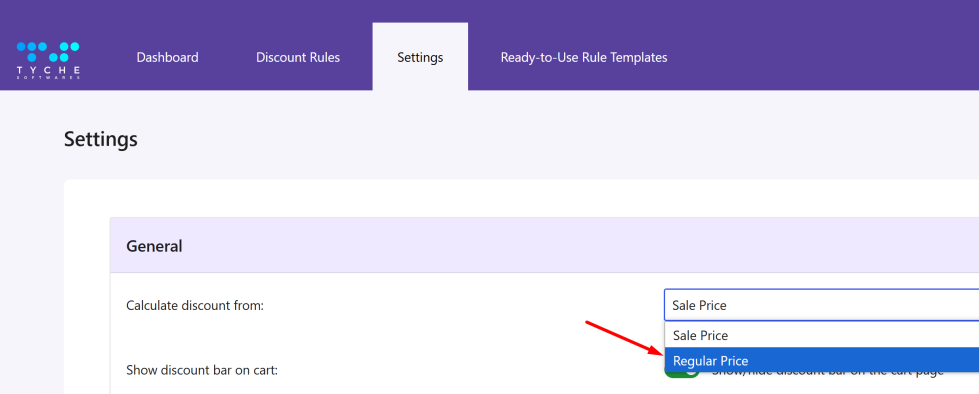
↑ Back to topWith the Flexi BOGO for WooCommerce plugin, you can not only offer free products but also offer when purchasing a specific item, the other item will be at a reduced price. This plugin lets you choose whether discounts are calculated based on the Sale price or the Regular price of your products.
Our plugin provides an option ‘Calculate discount from’ that allows selecting the discounts to be calculated from the Sale price OR the Regular price. You can find this option at WooCommerce -> Flexi BOGO -> Settings tab. By default, the plugin calculates discounts from the Sale price, but I’ve changed it to use the Regular price instead.
Displaying Messages on Cart Page When Discount Is Applied
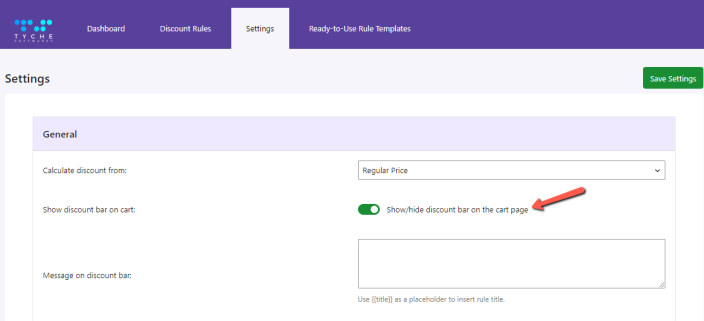
↑ Back to topWhen you offer discounts, customers need to know about them. This plugin has an additional setting named “Show discount bar on cart” available at WooCommerce -> Flexi BOGO -> Settings. Enabling this setting displays a bar on the shopping cart page that informs customers about applied discounts, encouraging them to complete their purchase.
Adding a Discount Bar on the Product Page
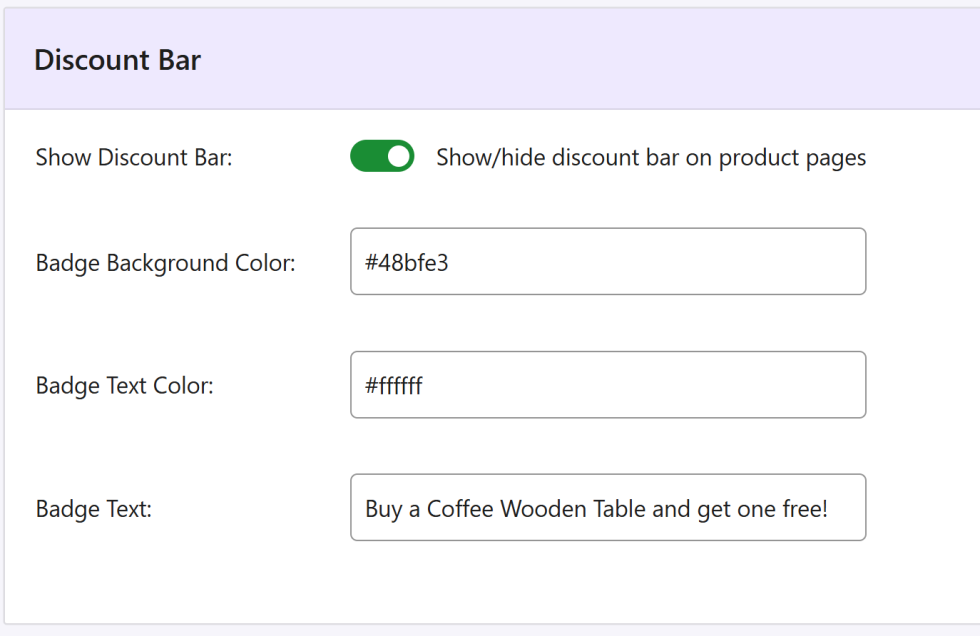
↑ Back to topOur plugin also allows displaying the discount bar on the individual product pages. It has the ‘Discount Bar’ section located at WooCommerce -> Flexi BOGO -> Discount Rules -> Edit Rule template page.
You can create a rule by navigating to WooCommerce -> Flexi BOGO -> Discount Rules -> Click on the ‘+ Create Rule’ button. You can set up a rule as per your requirements. Don’t forget to click the “Save Rule” button after you’ve created your rule to ensure it’s applied.
It has a setting named ‘Show Discount Bar’ which displays a prominent bar on your product pages that informs customers about the BOGO offer, highlighting the savings they can enjoy with their purchase. This section has other options also like ‘Badge Background Color’, ‘Badge Text Color’, and ‘Badge Text’ which allows store owners to customize the appearance of the promotional discount bar displayed on your product pages.
Setting Priority for Discount Rules
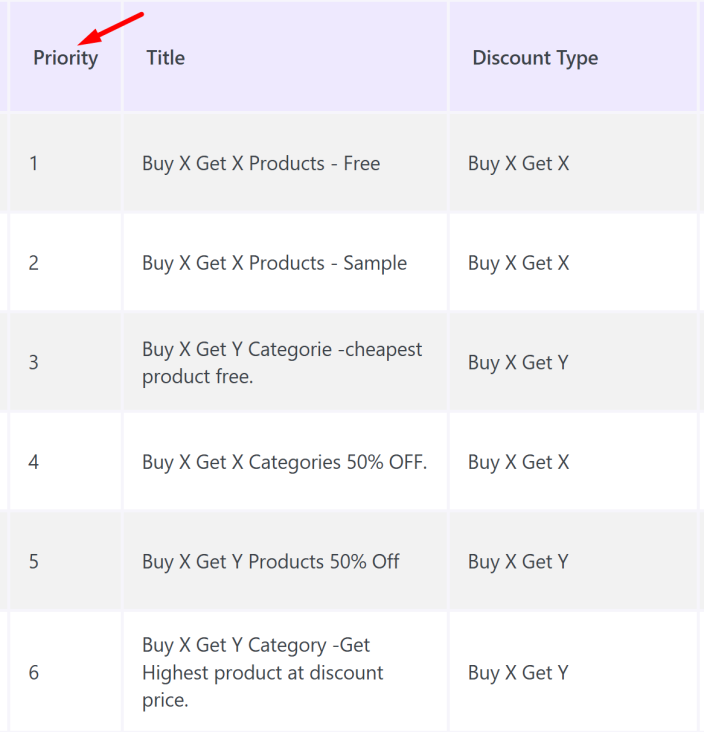
↑ Back to topWhen you have multiple BOGO offers or discounts running at the same time, our plugin lets you prioritize each rule. This means the most important discounts will be applied first, giving you complete control over your promotions.
To set priority for your discount rules, simply go to WooCommerce -> Flexi BOGO -> Discount Rules. You’ll see a ‘Priority‘ column in the Discount Rules table.
Applying Discounts: Auto Add Products vs. Discounts on Cheapest or Highest Products
↑ Back to topIn our Flexi BOGO for WooCommerce plugin, we offer three options for the Mode of Apply to have a discount that is Exclusively for Buy X Get Y Discount type.
1) Auto add
2) Cheapest
3) Highest
Auto add:
↑ Back to topThe Auto Add option is available only when a specific product is given for free. For example, if you want to offer a Belt and Sunglasses for free when the cart contains 2 Polo T-shirts, set up the settings as follows:
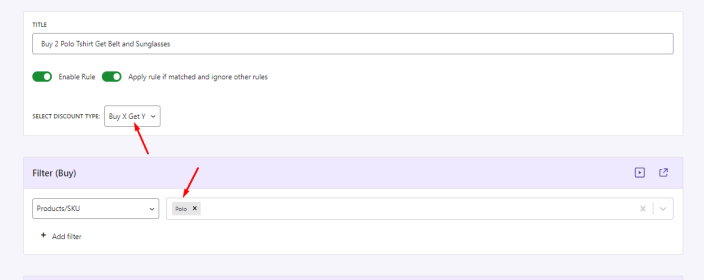
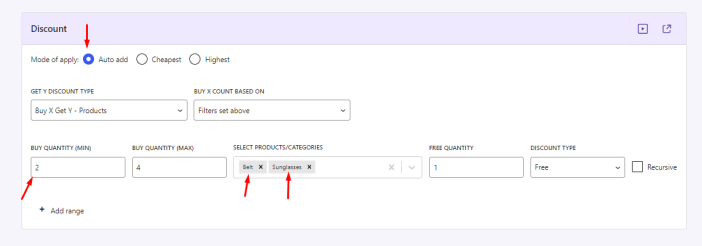
Customer Experience
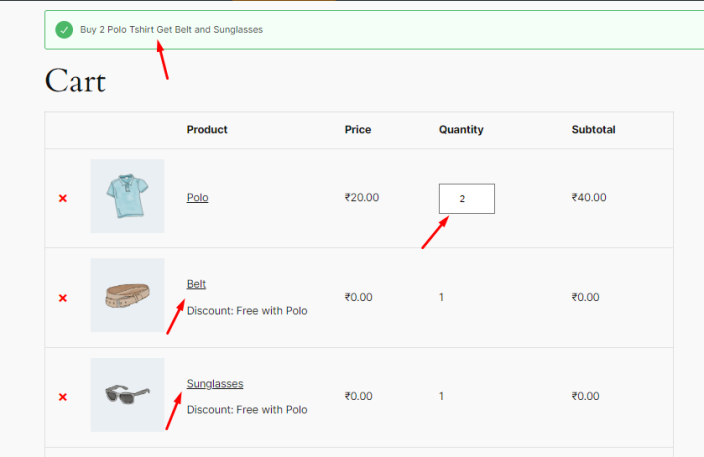
When a customer adds two Polo T-shirts to their cart, the Belt and Sunglasses will automatically be added for free. This is how the cart and checkout page will appear to the customer:
Cheapest:
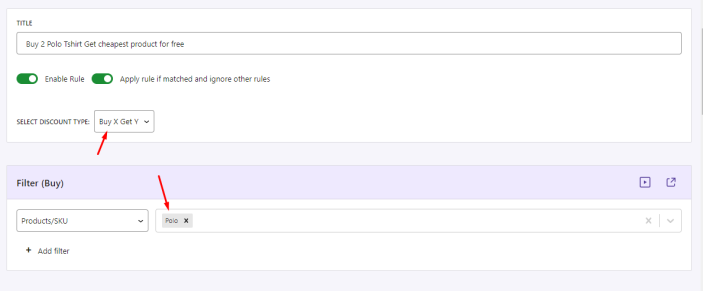
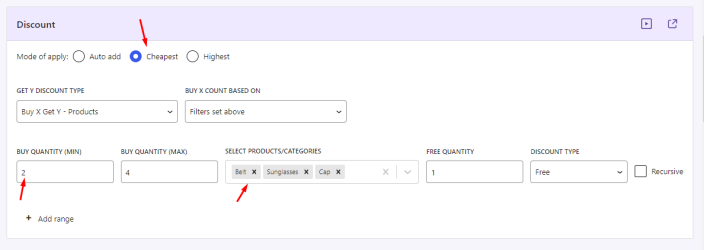
↑ Back to topThe product with the lowest value among the items selected from the “Discount” section will be discounted based on the quantity. This option works when there are multiple selected products in the cart.
For instance, if Belt, Sunglasses, and Cap products are added to the cart along with 2 Polo T-shirts, the cheapest product among the three will be given for free as below:
Highest:
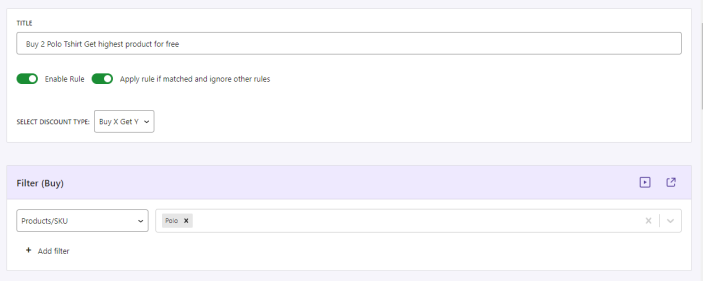
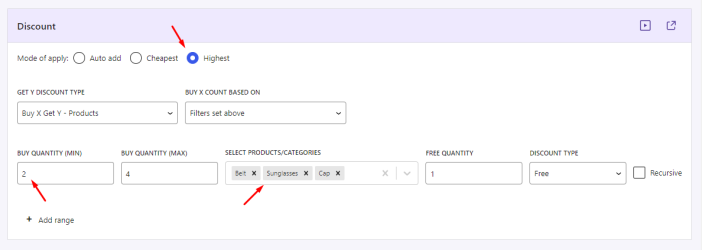
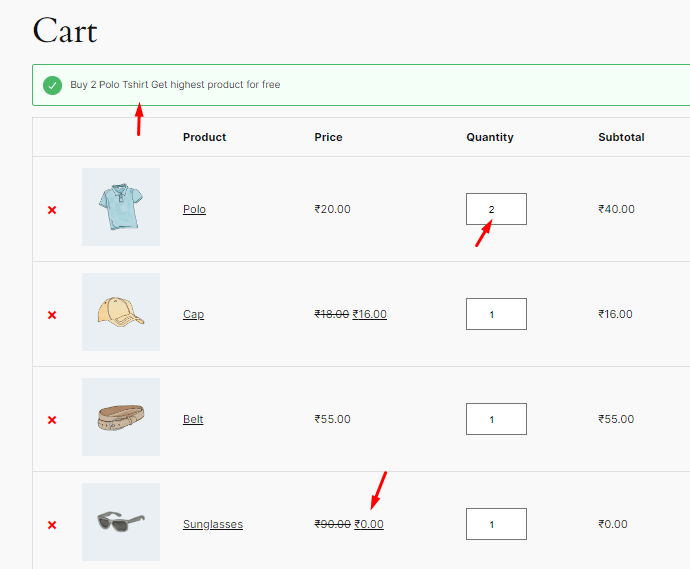
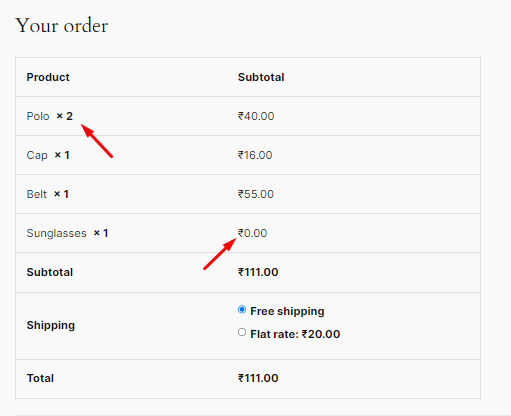
↑ Back to topThe product with the highest value among the items selected from the “Discount” section will be discounted based on the quantity. This option works when there are multiple selected products in the cart.
For example, if Belt, Sunglasses, and Cap products are added to the cart along with 2 Polo T-shirts, the most expensive product among the three will be given for free as below:
