NOTE
This product is no longer available on WooCommerce.com. This document has been left available for existing users, but will no longer be updated.
Installation
↑ Back to top1. Download the .zip file from your WooCommerce account.
2. Go to WordPress Admin > Plugins > Add New and Upload Plugin the file you have downloaded.
3. Click Install Now and Activate
Configuration of B2B-Quotes Plugin
↑ Back to topAfter activation, the B2B-Quotes plugin will add three sections under the WooCommerce menu in the WordPress admin panel:
- Manage Quote Rules – Control where and how quotes appear.
- Quote Lists – View and manage customer-submitted quotes
- Settings – Customize plugin behavior.
Manage Quote Rules
↑ Back to topAdding a New Quote Rule
↑ Back to top- Go to WooCommerce Menu > Manage Quote Rules.
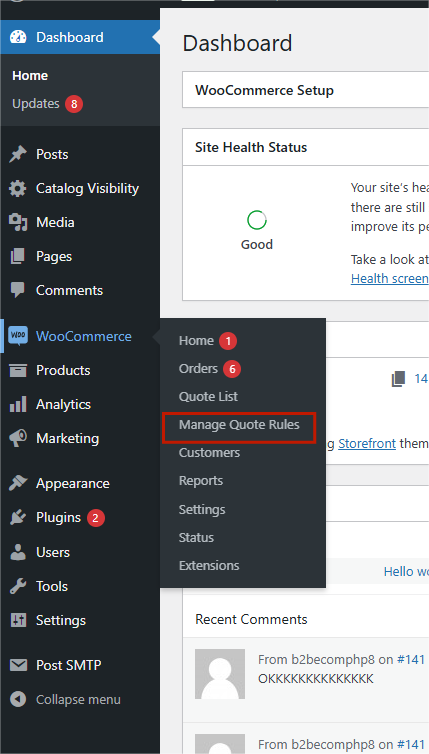
- Click Add New Quote Rule.
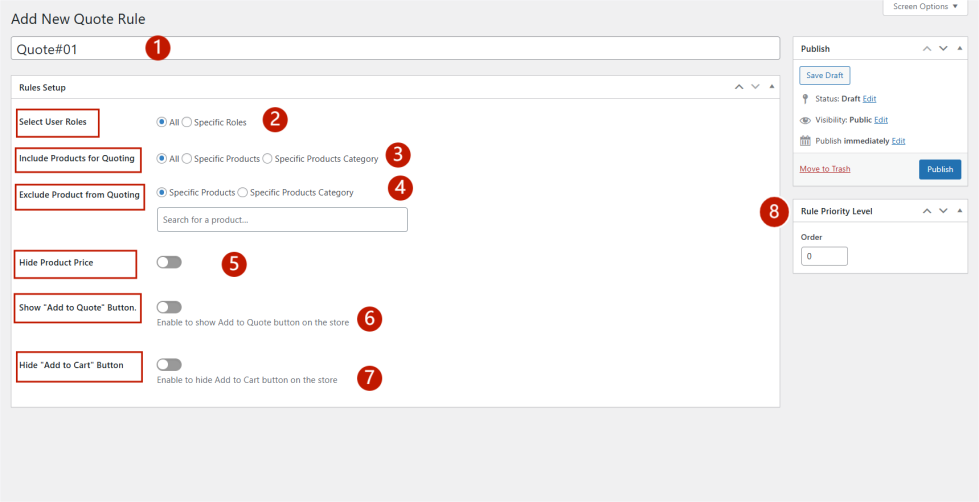
- Configure the following:
- Rule Title: A unique name for reference.
- User Roles: Choose whether the rule applies to all users or specific user roles.
- Include Products for Quoting: Choose specific products, all products, or product categories where the “Add to Quote” button will appear.
- Exclude Products for Quoting: Specify products or categories where the “Add to Quote” button should be hidden.
- Hide Product Prices: Toggle this option and set a custom message for hidden prices.
- Show “Add to Quote” Button: Enable the quote button on selected products.
- Hide “Add to Cart” Button: Replace the cart button with the quote button.
- Set Rule Priority: Define execution order (lower numbers run first).
- Click Publish to activate the rule.
- Confirm that the rule appears in Manage Quote Rules.
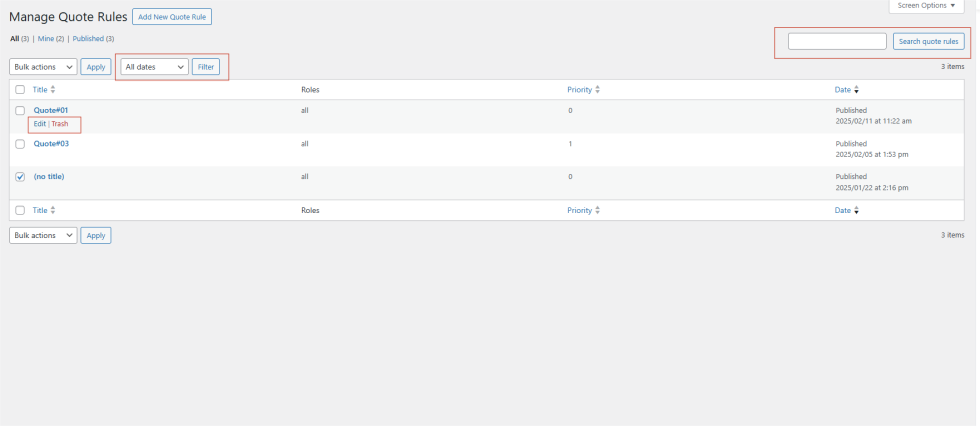
Manage Quote Rules
↑ Back to top- View all active rules in a grid format.
- Edit, delete, search, and filter rules by date.
Settings Configuration
↑ Back to topNext, Navigate to WooCommerce > B2B Quotes > Settings to customize features:
- Enable Email Notifications:
- Quote Conversation Email: Notifies customers/admins of new messages when sent through Quote Conversation
- Quote Status Email: Alerts users when a quote status changes.
- Customize Button Labels:
- “Add to Quote”
- “Accept Quote”
- “Reject Quote”
- “Request Revision Quote”
- “View Quote”
- Click Save Changes to apply settings.

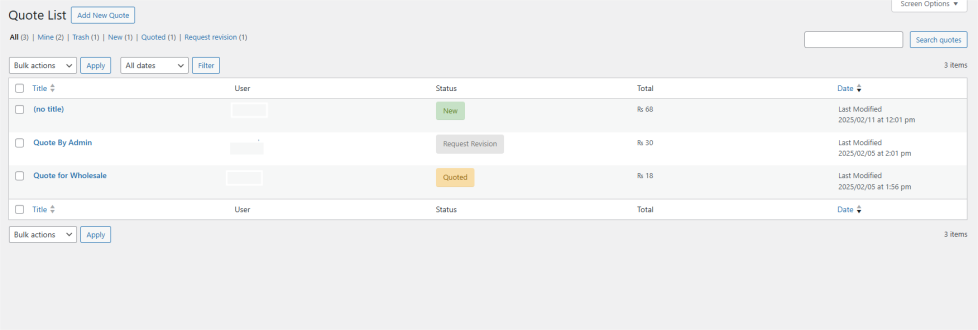
Quote List
↑ Back to topThe Quote List section displays all submitted quotes. You can:
- View, edit, delete, and filter quotes by date.
- Click a quote to see details.
Viewing Quote Details
↑ Back to topClicking on a quote opens the Quote Details page, where you can review:
Customer Information
- Requestor Email: Email address of the intended recipient of the quote.
- Quote ID: Unique identifier for the quote.
- User Email: The email address associated with the logged-in user.
- Requestor Name: Name of the person requesting the quote.
Quoted Products
Below this section, you will find the products included in the quote. You can modify prices, add new products, or remove existing ones as needed.
- Modify prices
- Add/remove products
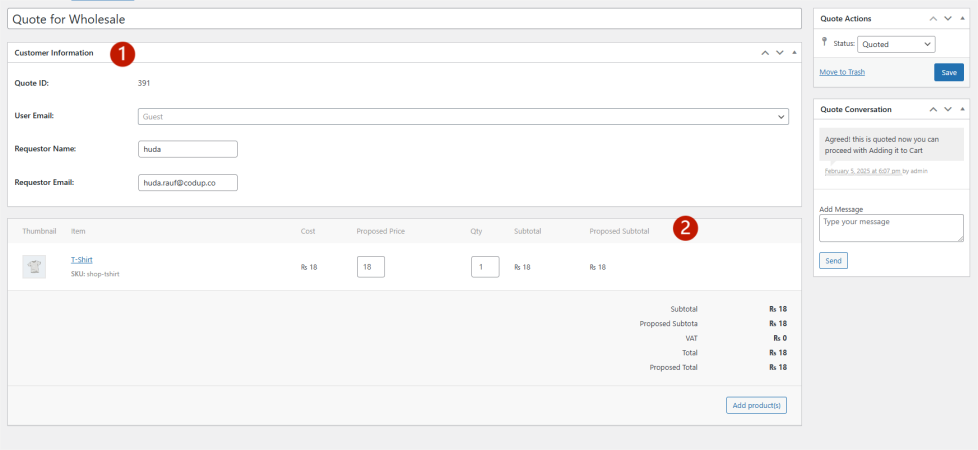
Updating Quote Status
Next is the Quote Actions section, where you can update the quote status. There are five available actions:
- New – The quote has been submitted by the customer and is awaiting review
- Quoted – The admin has responded with a proposed price and updated details.
- Accepted – The customer/admin has approved the quote and can proceed to checkout.
- Rejected – The customer/admin has declined the quote, and no further action is required.
- Request for Revision – The customer has requested modifications, such as price adjustments or quantity changes.
Click Save to notify the customer of the status update.
Quote Conversations
- Exchange messages with customers.
- Enter a message and click Send.
- Both you and the customer will receive an email notification whenever a new message is added.

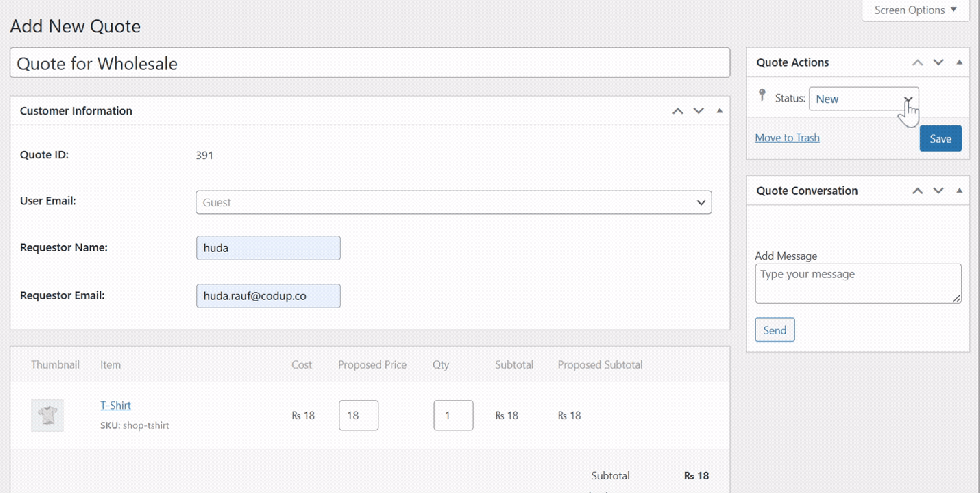
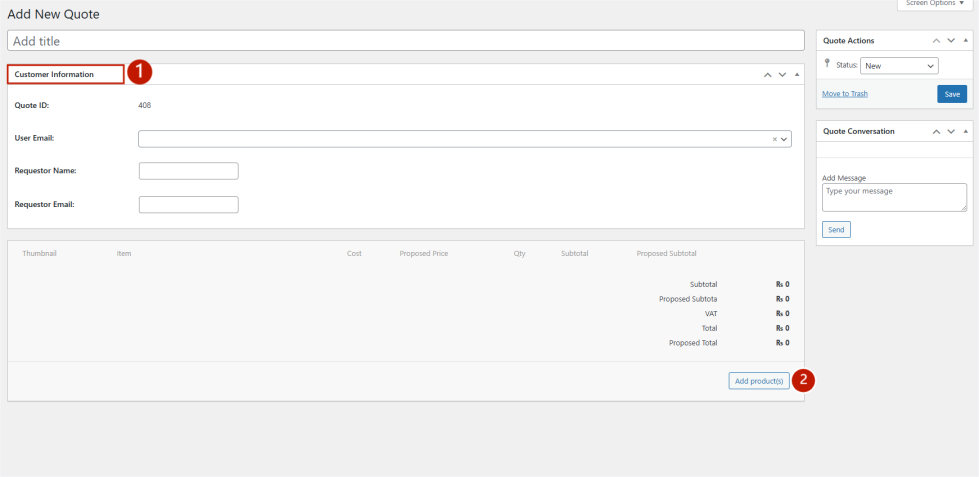
Creating a Quote for a Customer
↑ Back to topAdmins can create quotes on behalf of customers:
- Click Add New Quote.
- Then, Enter Customer Information (Name & Email).
- Click Add Product(s)
- Select products, and enter quantities.

- Set a Proposed Price.
- Click Save to finalize the quote.
Customer Experience with Quotes
↑ Back to topSubmitting a Quote
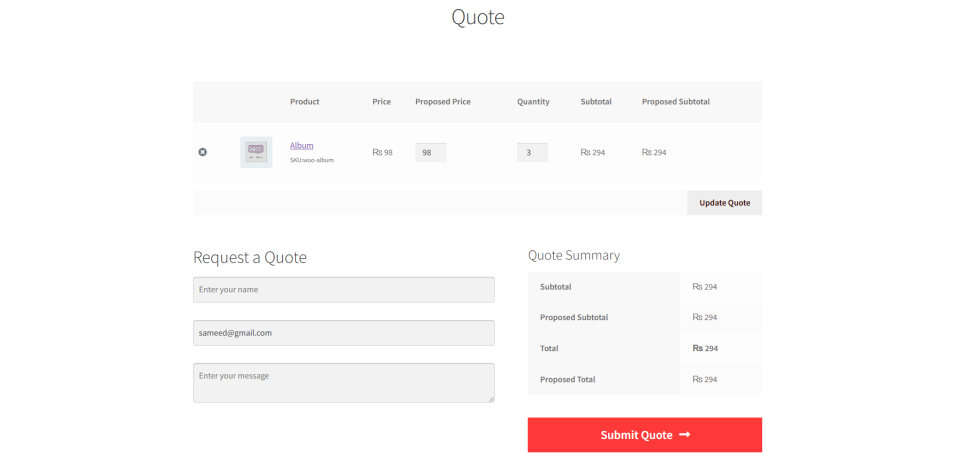
↑ Back to top- When a customer adds an item to the quote, they can proceed to the Quote Page by clicking the View Quote button.

- On the Quote Page, they can:
- Adjust the proposed price and quantity.
- Click Update Quote to save changes.
- Under the Request a Quote section:
- Customers enter their name.
- If logged in, their registered email will be pre-filled.
- They can add an optional message.
- Click Submit Quote to finalize the request.
- Once submitted, the quote will be listed in the Quote List, where merchants can manage it as per the instructions above.
Customer Actions on Quotes
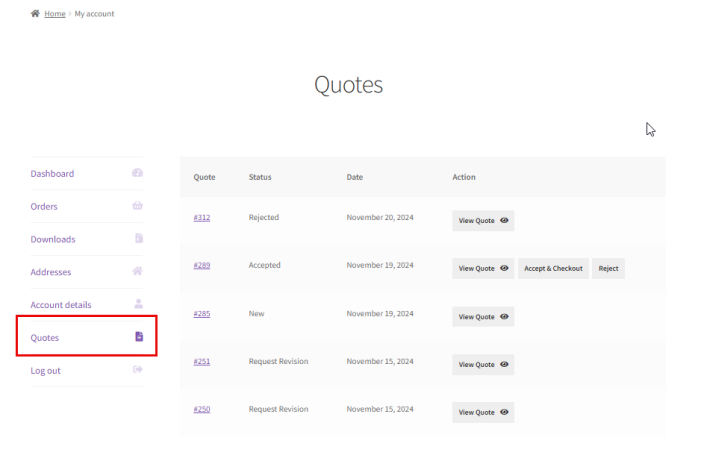
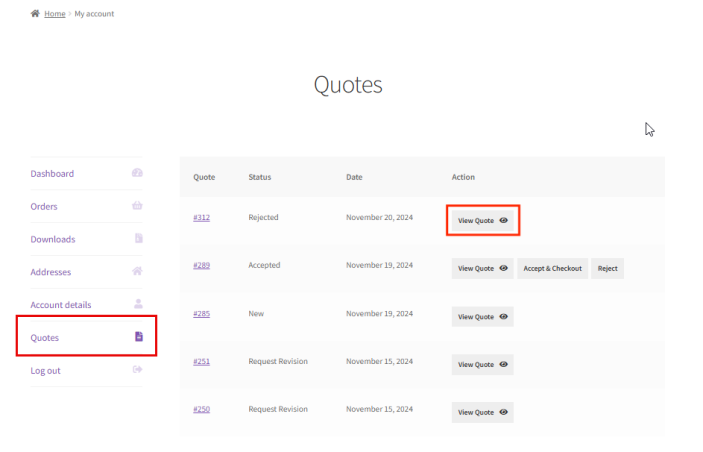
↑ Back to topCustomers can view their submitted quotes in My Account > Quotes. Depending on the status of the quote, they can:
- View newly created quotes
- If marked as “Quoted,” they can:
- Accept and Checkout
- View Details
- Reject the Quote
- Request a Revision
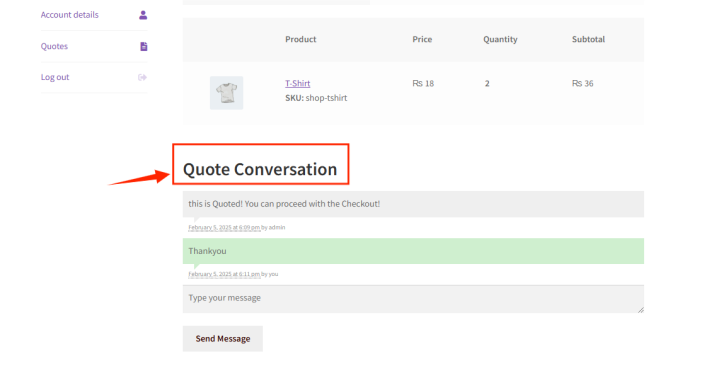
Communication Through Quote Conversations
- Customers can access their submitted quotes and navigate to the Quote Conversation section.
- Here, they can send messages directly to you regarding their quote.
- Whenever a customer sends a message, you will receive an email notification informing you of the latest update.
With the B2B-Quotes plugin, your WooCommerce store is fully equipped to manage quote requests efficiently. From configuring quote rules to managing customer conversations and updating quote statuses, this plugin streamlines the entire B2B quoting process.