With WooCommerce In-Person Payments, your customers can pay for products and services in-person using the M2 card reader, WisePad 3 card reader, or Tap to Pay on a compatible iPhone or Android device.
Requirements
↑ Back to topYou will need to meet the following requirements in order to collect payments in-person using WooPayments:
- A connection to the Internet via WiFi or cellular data.
- The latest version of WooPayments.
- A WooPayments account based in:
- Canada
- The United Kingdom
- The United States
- A WooPayments account in good standing.
- The latest version of the Woo Mobile App.
- A device running iOS 15+ or Android 5+.
- The Woo Mobile App is connected to your site.
Additional requirements for Tap to Pay
↑ Back to topUsing Tap to Pay on iPhone and Tap to Pay on Android have specific requirements and processes for accepting payments. Please view the relevant page for your particular device.
In-Person Payments fees
↑ Back to topIn addition to the above requirements, the fees for accepting In-Person Payments are different than the fees for accepting online payments.
The fees for In-Person Payments are dependent on the country your business is located in. You can find more information on our fees page.
Charging your card reader
↑ Back to topAllow your reader to fully charge before the first use. Both the M2 and the WisePad 3 readers ship partially charged, but we recommend that you charge your reader fully before the first use.
To charge your reader, use the supplied cable to connect the USB-C on the reader to a USB charger. A full charge will take a few hours.
With a full charge, the reader should be able to process 600 to 800 contactless transactions before needing a recharge.
Connecting your card reader
↑ Back to topYour reader will need to be connected to your device using the WooCommerce Mobile App. You should not pair the card reader in your phone or tablet’s settings.
To connect your reader:
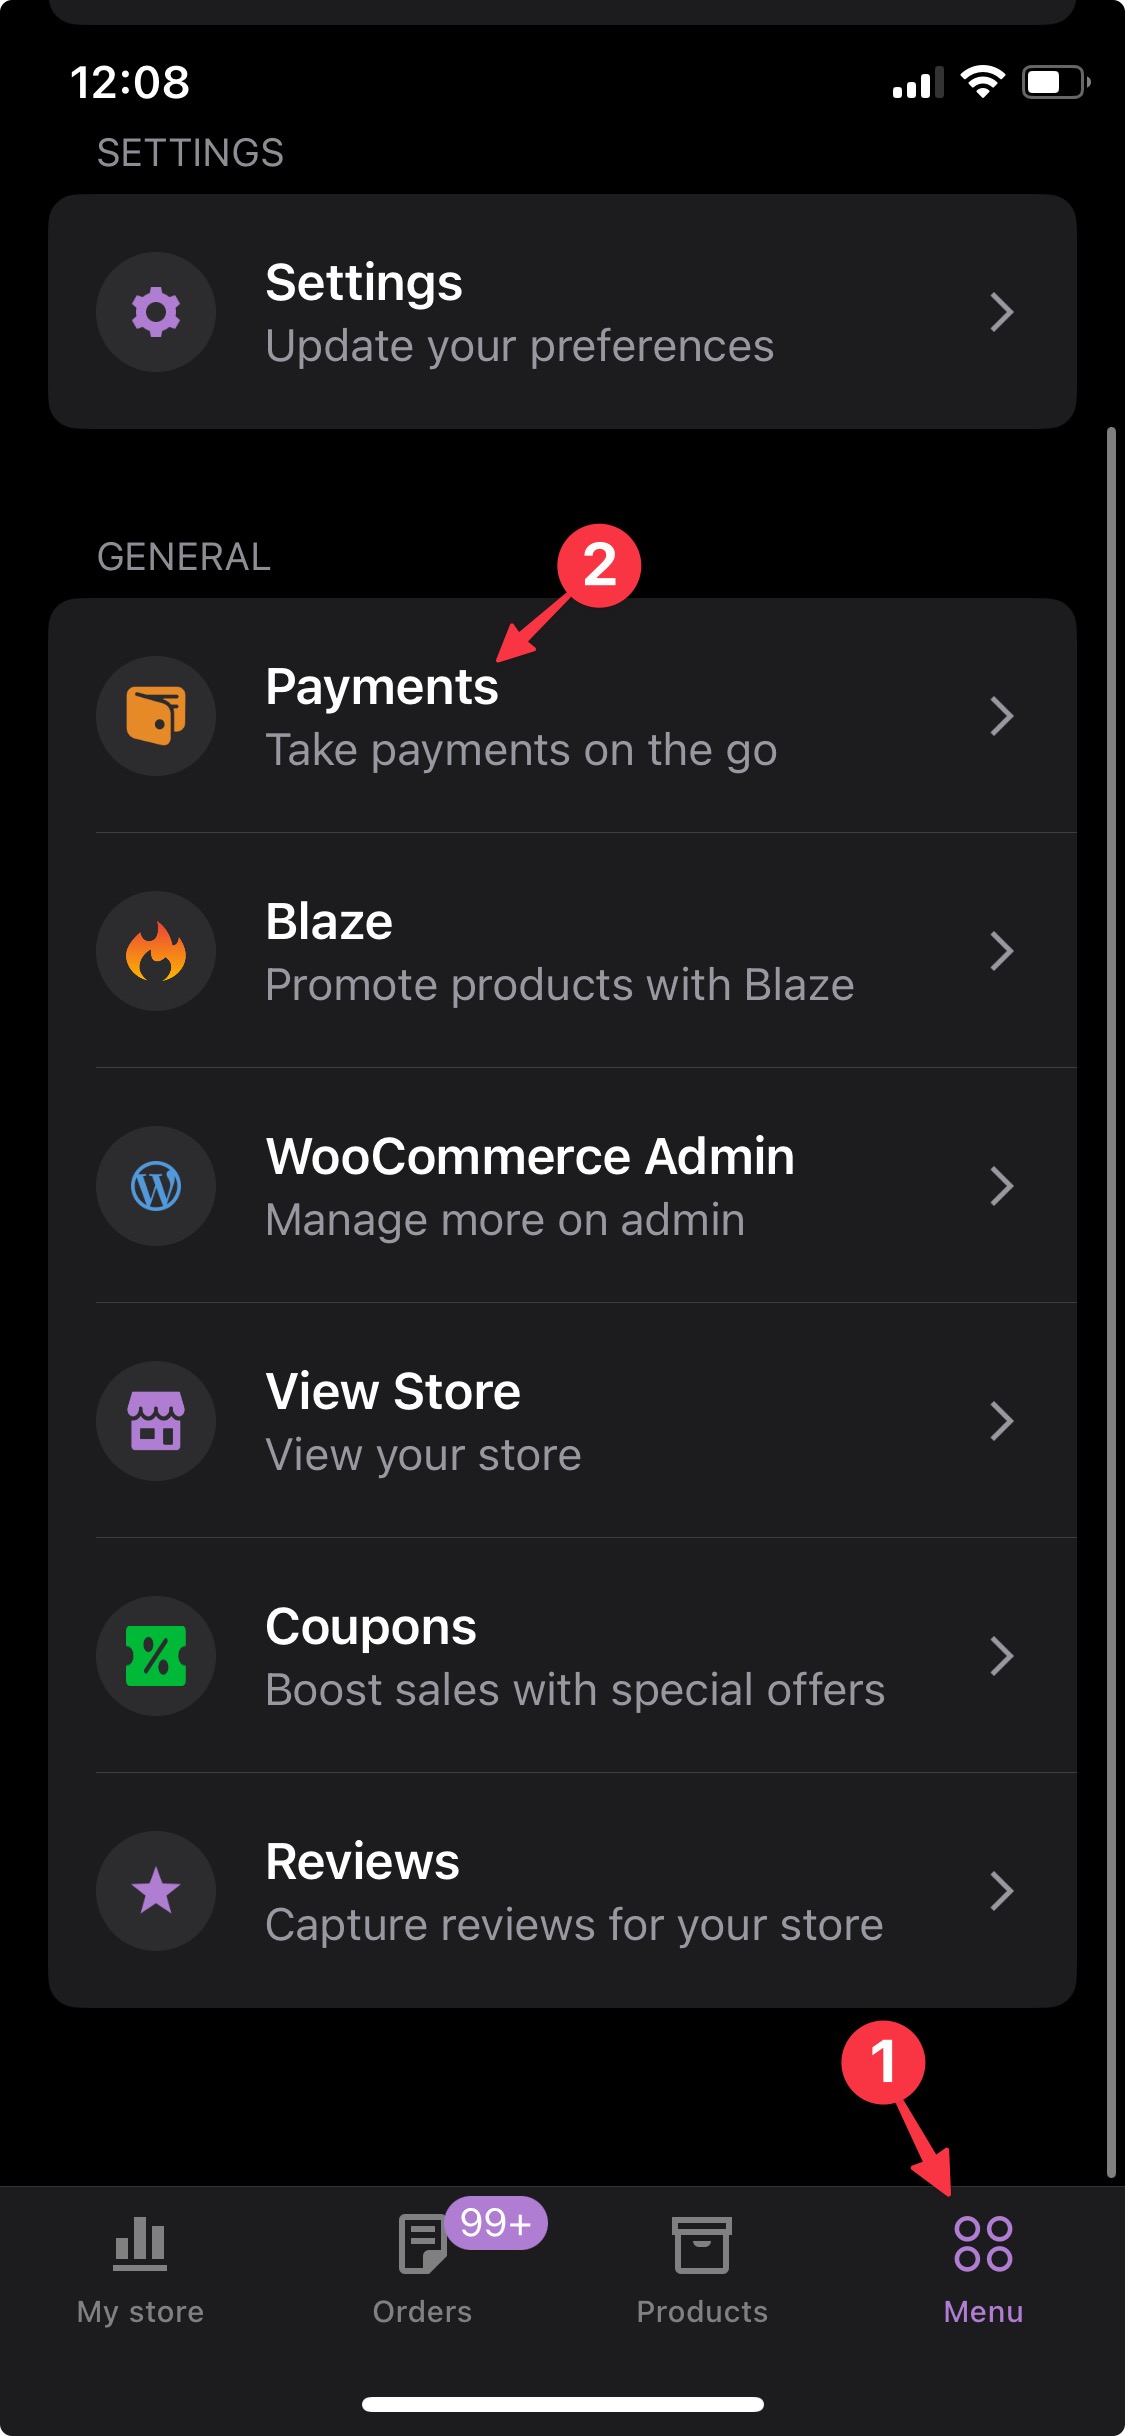
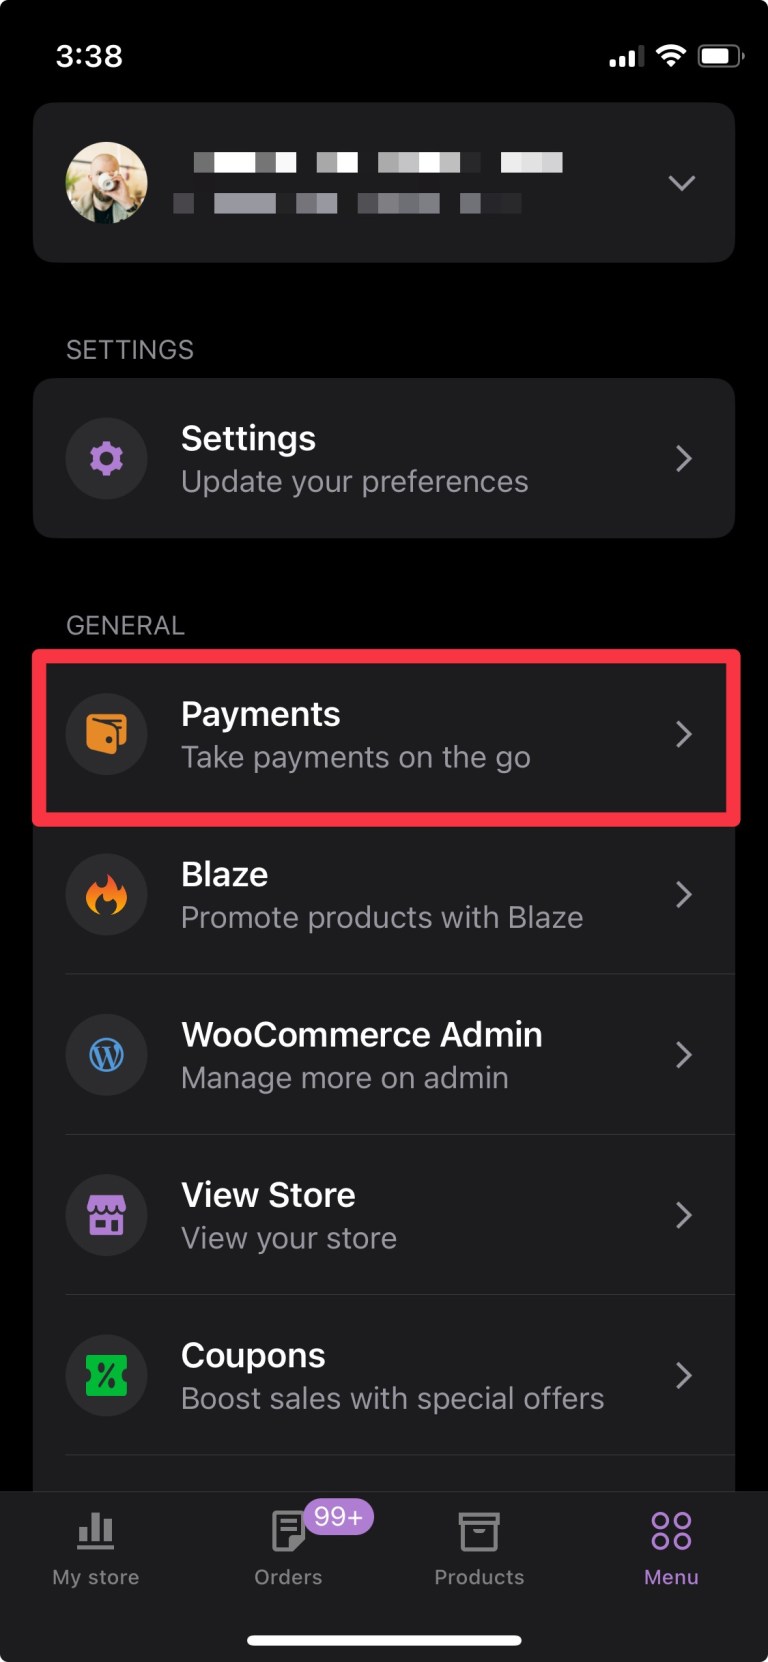
- Navigate to Menu page.
- Select Payments:
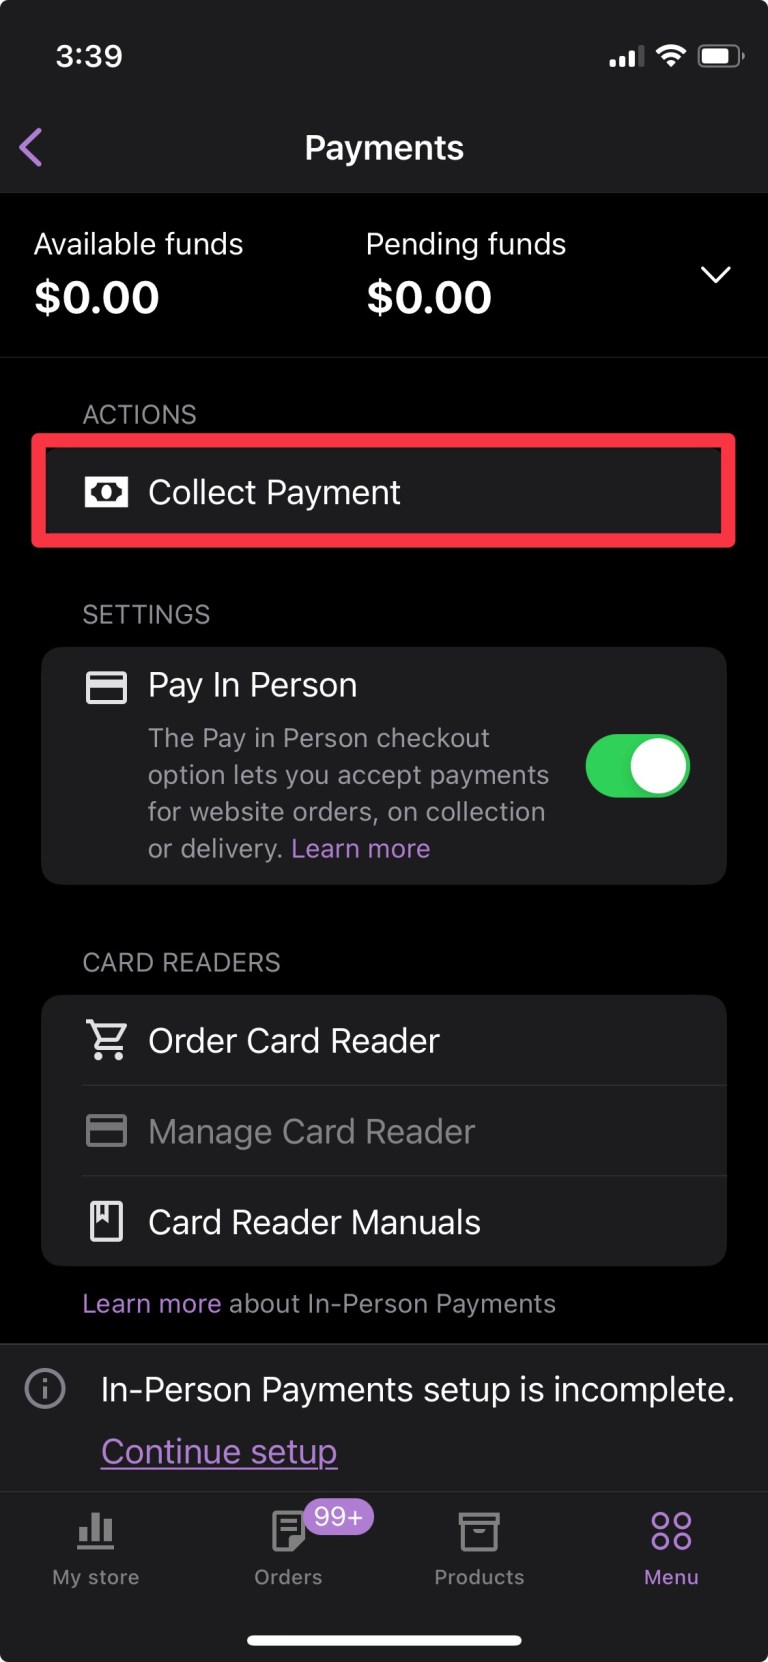
- Tap Continue setup for In-Person Payments:
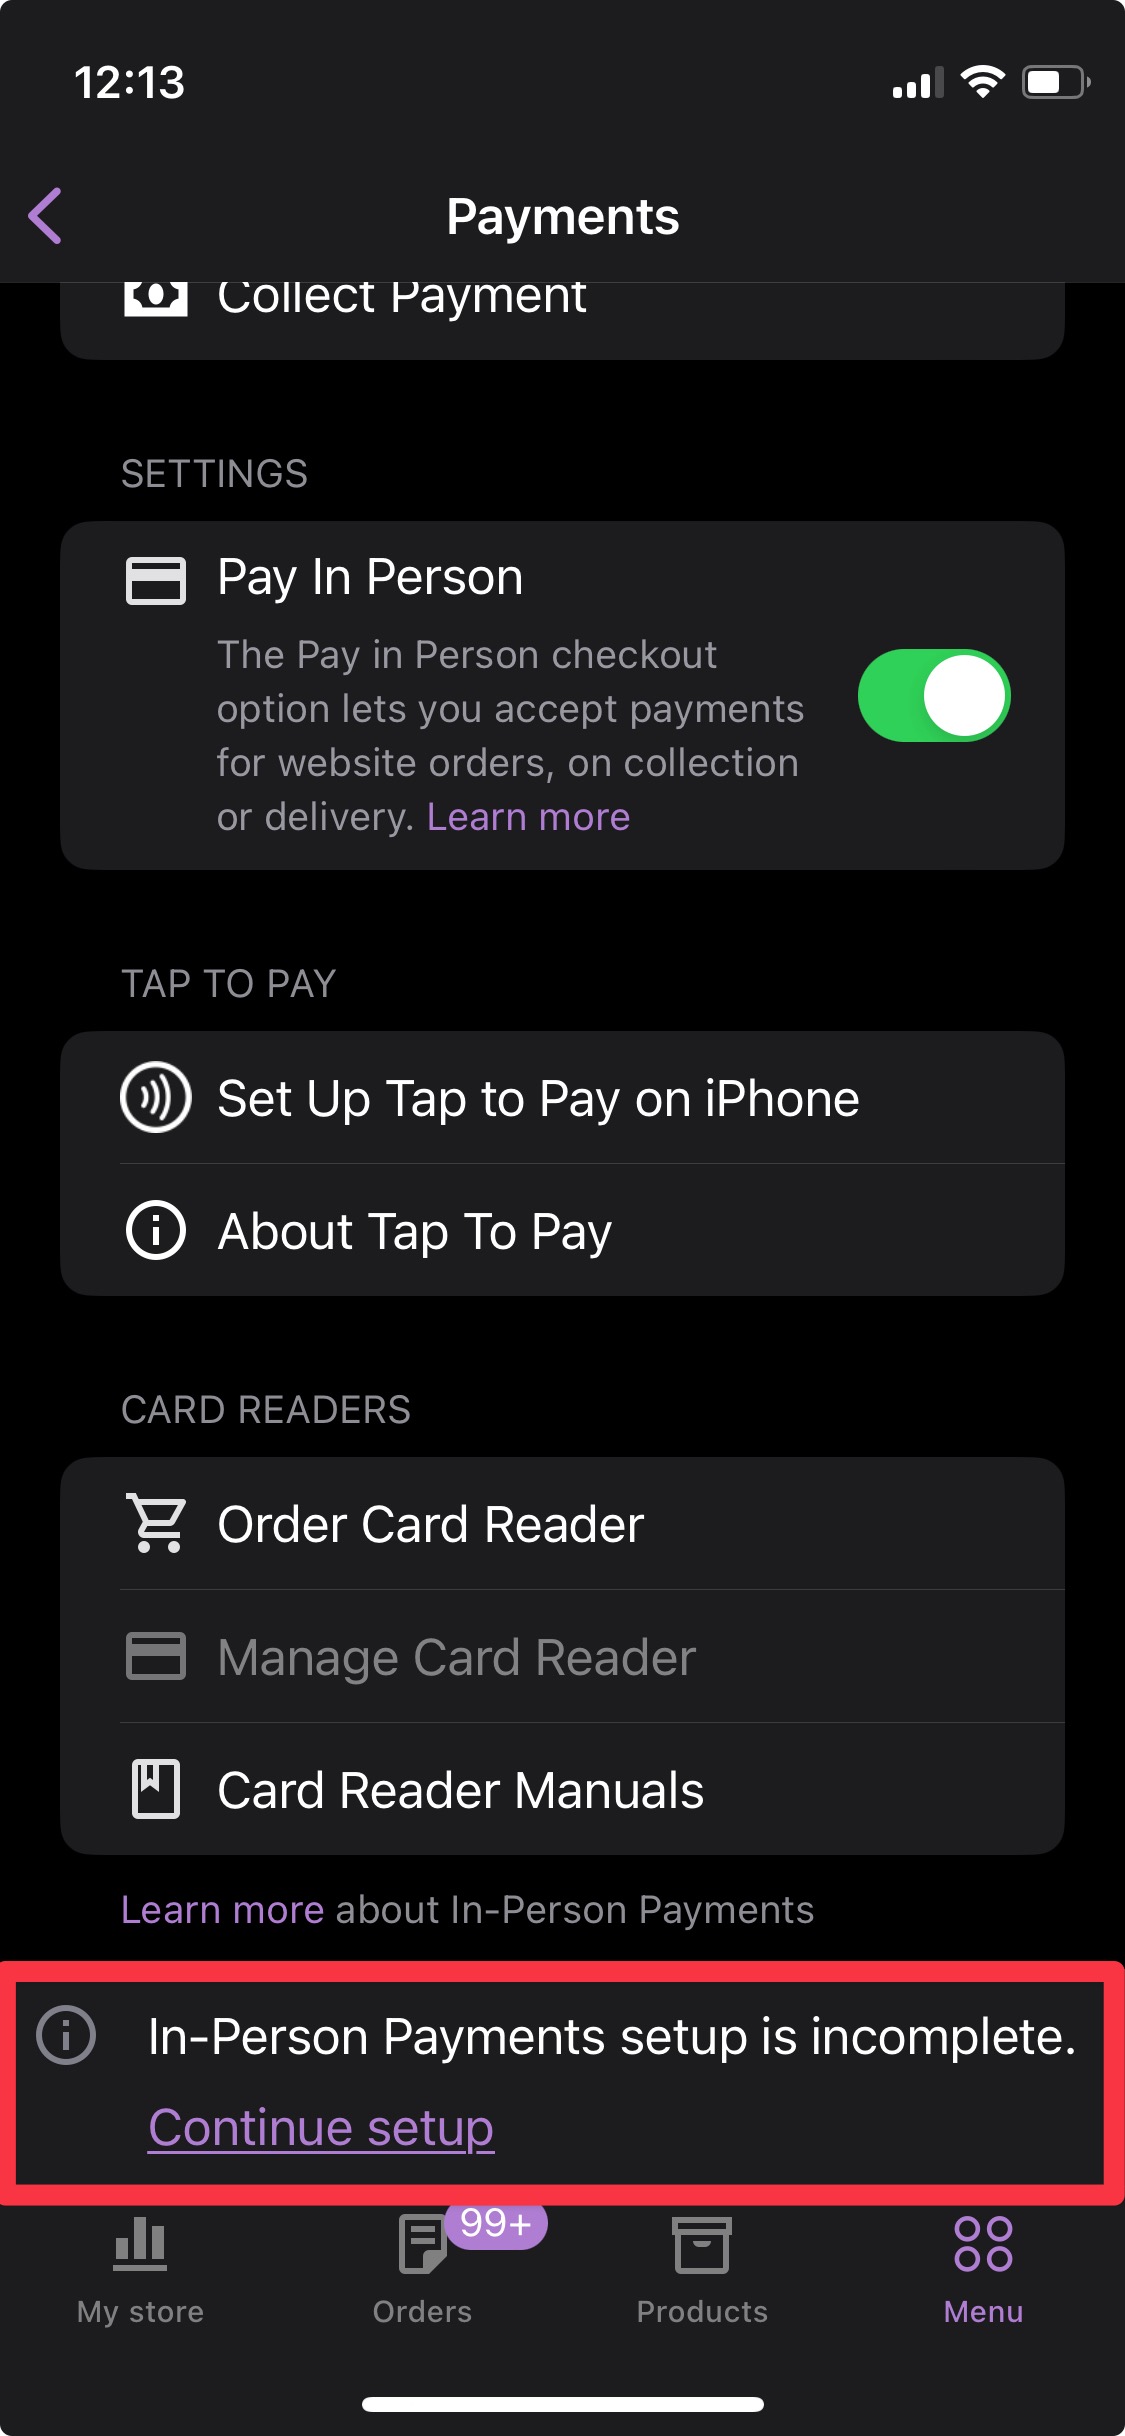
- Tap the Connect card reader button:

- Tap OK to allow the WooCommerce Mobile App to use your device’s Bluetooth capabilities to scan for your card reader.
- Turn on your card reader by holding the power button for one second.

NOTE: Keep the card reader near the mobile device while the WooCommerce Mobile App completes the scanning process.
- Tap Connect to Reader to begin the connection process.

- Tap the Allow While Using App prompt when asked.
That’s it: your reader is now connected and ready to accept payments!
Accepting payments in-person
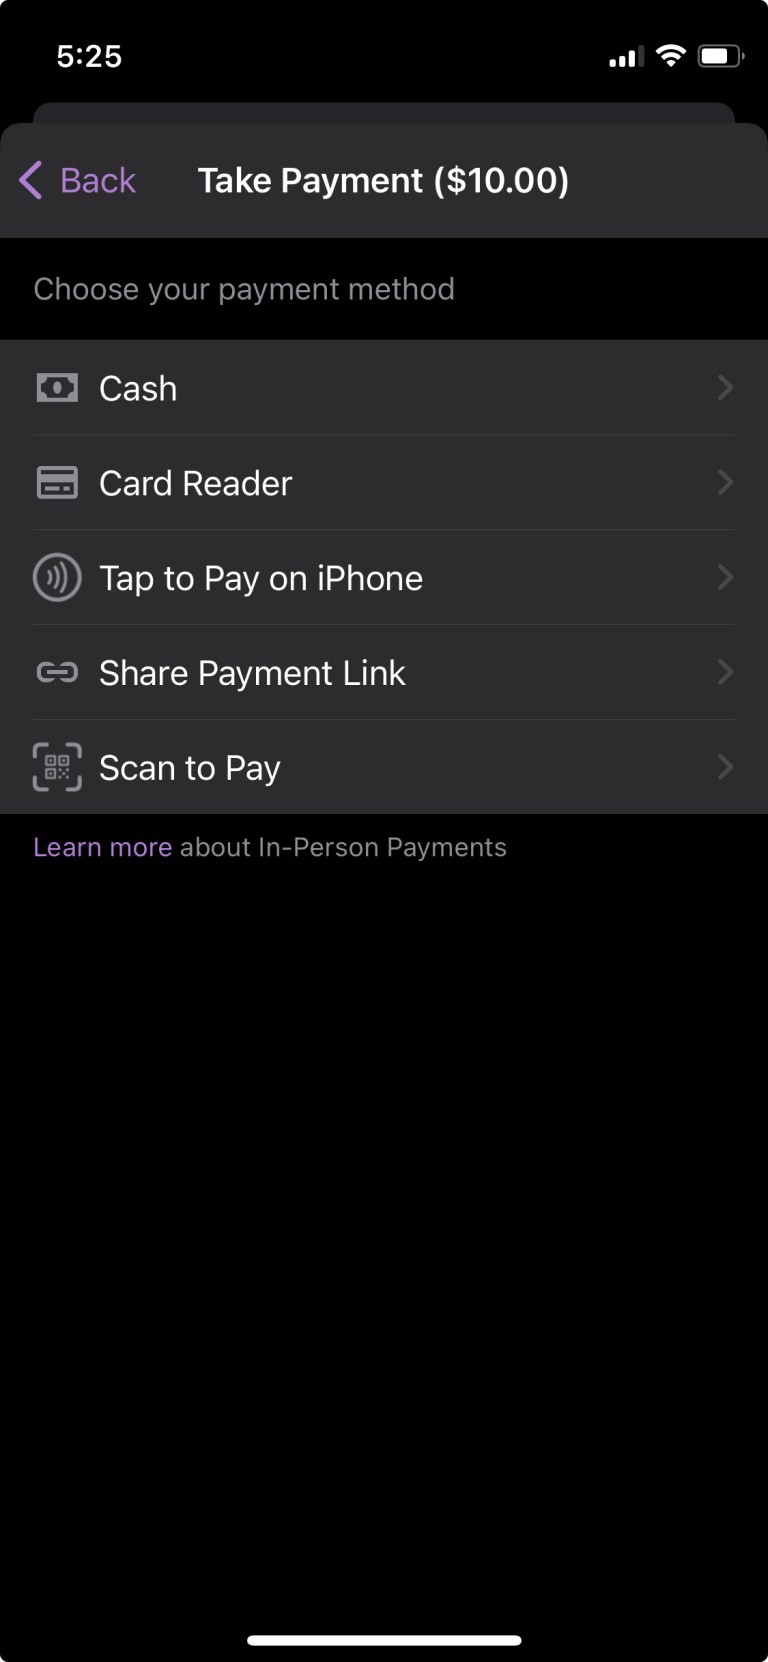
↑ Back to topWhen collecting a payment, In-Person Payments supports the following payment methods:
- Cash
- Card reader
- You’ll also be given the option to use Tap to Pay to collect the payment if you are using a supported device.
- Shareable payment link
- This link can be shared with a customer and used to pay for the order online.
- Scan to Pay
- This will generate a QR code that a customer can scan to pay for the order online.

Creating orders
↑ Back to topWith In-Person Payments, there are three ways of creating orders for payments:
- Build orders
- Collect payments for an order placed online
- Collect fast payments (deprecated as of version 18.2)
Build orders
↑ Back to topWith In-Person Payments, you can build an order in the Woo Mobile App and collect payment immediately.
To build an order and collect payment:
- Navigate to the Orders section of the Woo Mobile App.
- Tap on the
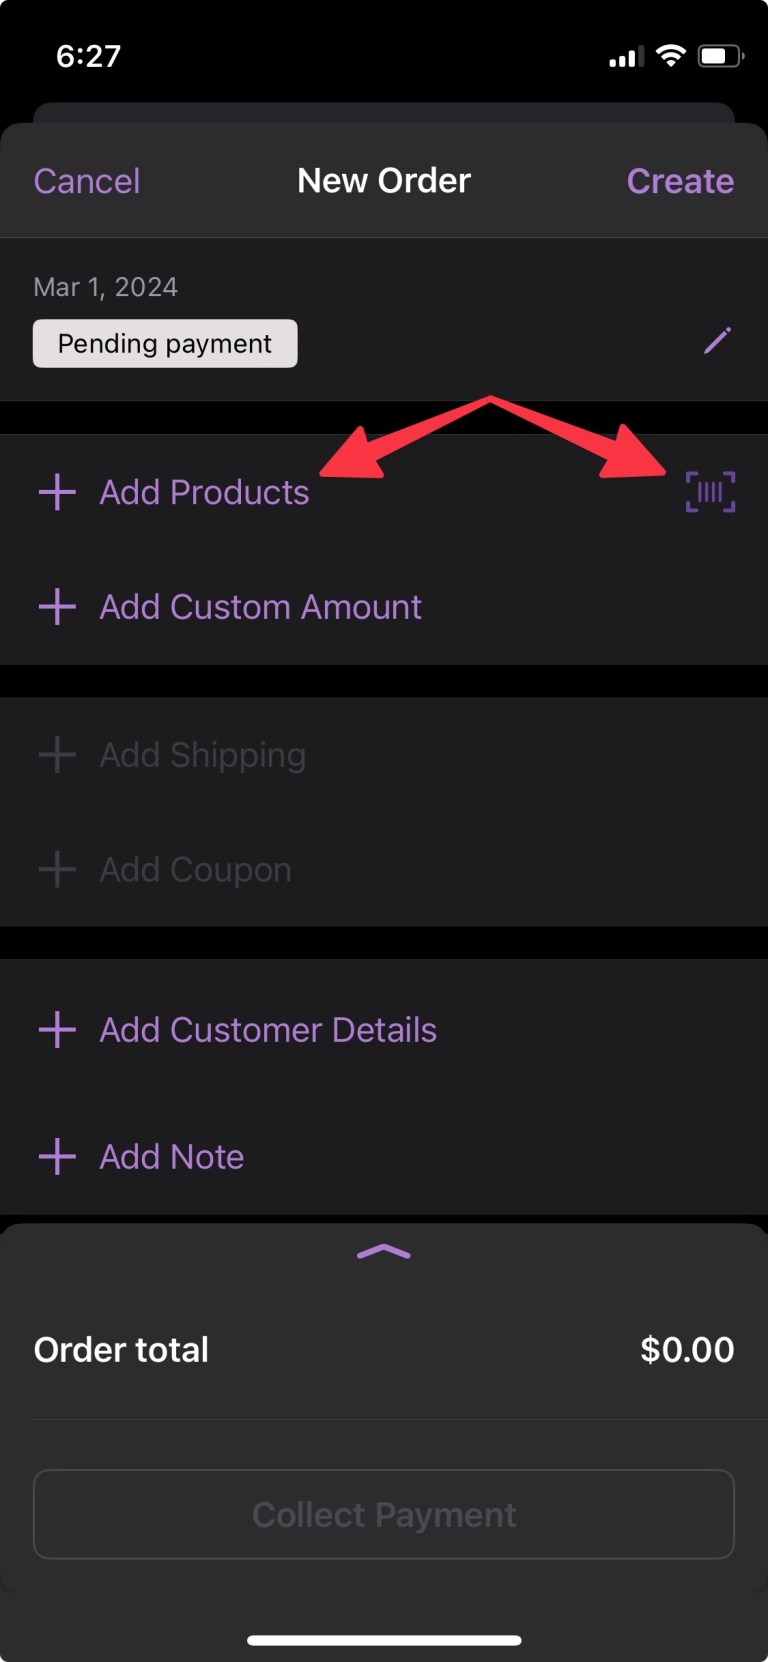
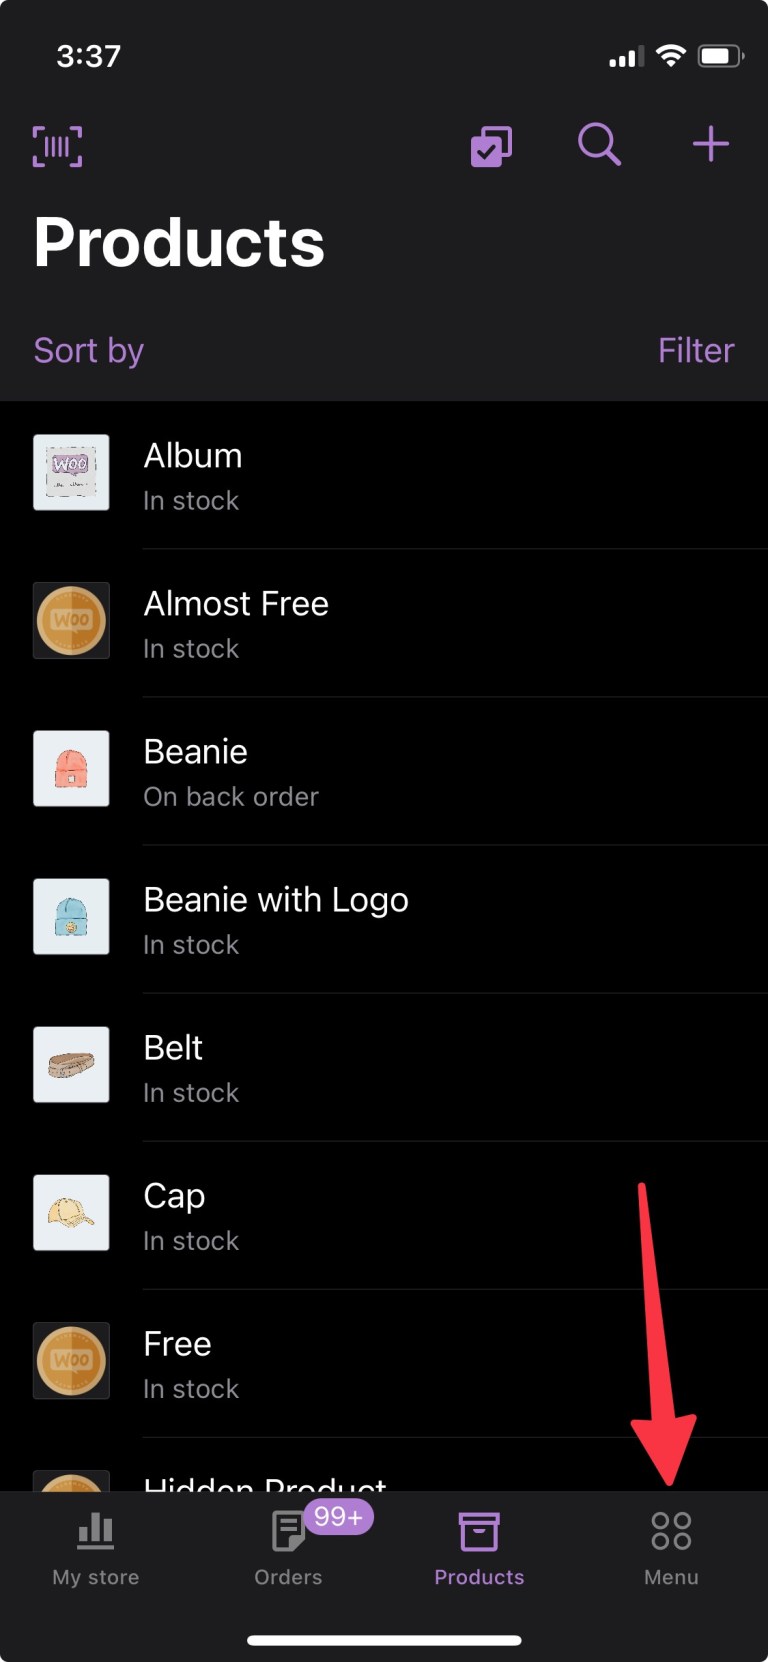
+icon in the top-right corner to create an order. - To add products to the order, you can either:
- Scan product barcodes using your device’s camera.
- If the barcode matches a SKU for a product available on your store, it will automatically be added to the order.
- Select Add Products.
- Scan product barcodes using your device’s camera.
- If you choose Add Products, select the product(s) you’d like to add to the order and tap the # Product(s) Selected button to add the product(s) to the order.
- After the order is fully created, select the Collect Payment button to take payment.
- Choose how to collect payment.


Collect payment for an order placed online
↑ Back to topWith In-Person Payments, you can allow customers to place an order online using the cash on delivery payment method to then pay for the order in-person using a card or cash.
To collect a payment in-person after it is placed online:
- Navigate to the Orders section of the Woo Mobile App.
- Tap on the order being paid for.
- Orders placed online with the Pay in Person payment method will have the
Processingstatus.
- Orders placed online with the Pay in Person payment method will have the
- Review the order details and tap on on the Collect payment option.
- Choose how to collect payment.


Receipts
↑ Back to topAn email receipt is sent automatically upon payment collection if a customer email address is set on the order. You can also send the email receipt manually after the payment.
NOTE: As an In-Person Payments merchant, you are obligated to provide your customers the option of a printed receipt for any payment.
Collect fast payments
↑ Back to topNOTE: The fast payments feature has been deprecated as of version 18.2 for both Android and iOS. Please use order creation for full order features.
With In-Person Payments, you can accept a quick payment that isn’t tied to particular products. Since it isn’t associated with products, it will not reduce stock or be associated with itemized products.
To collect a fast payment:
- Navigate to the Menu section of your Woo Mobile App.
- Tap on the Payments option.
- Tap on the Collect payment option.
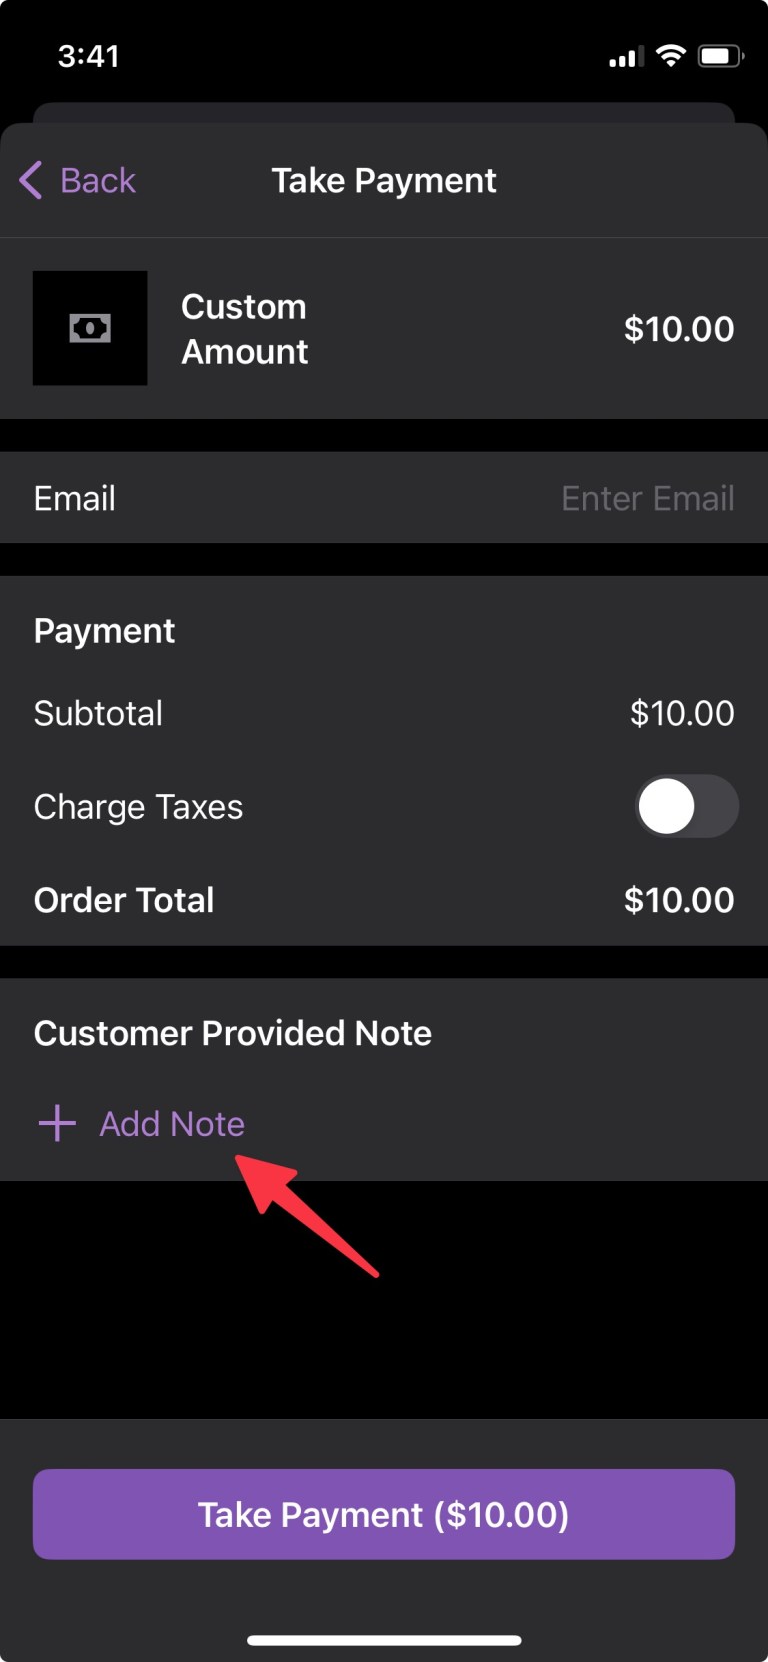
- Enter in the amount to collect.
- Add optional information, such as:
- The customer’s email.
- An order note.
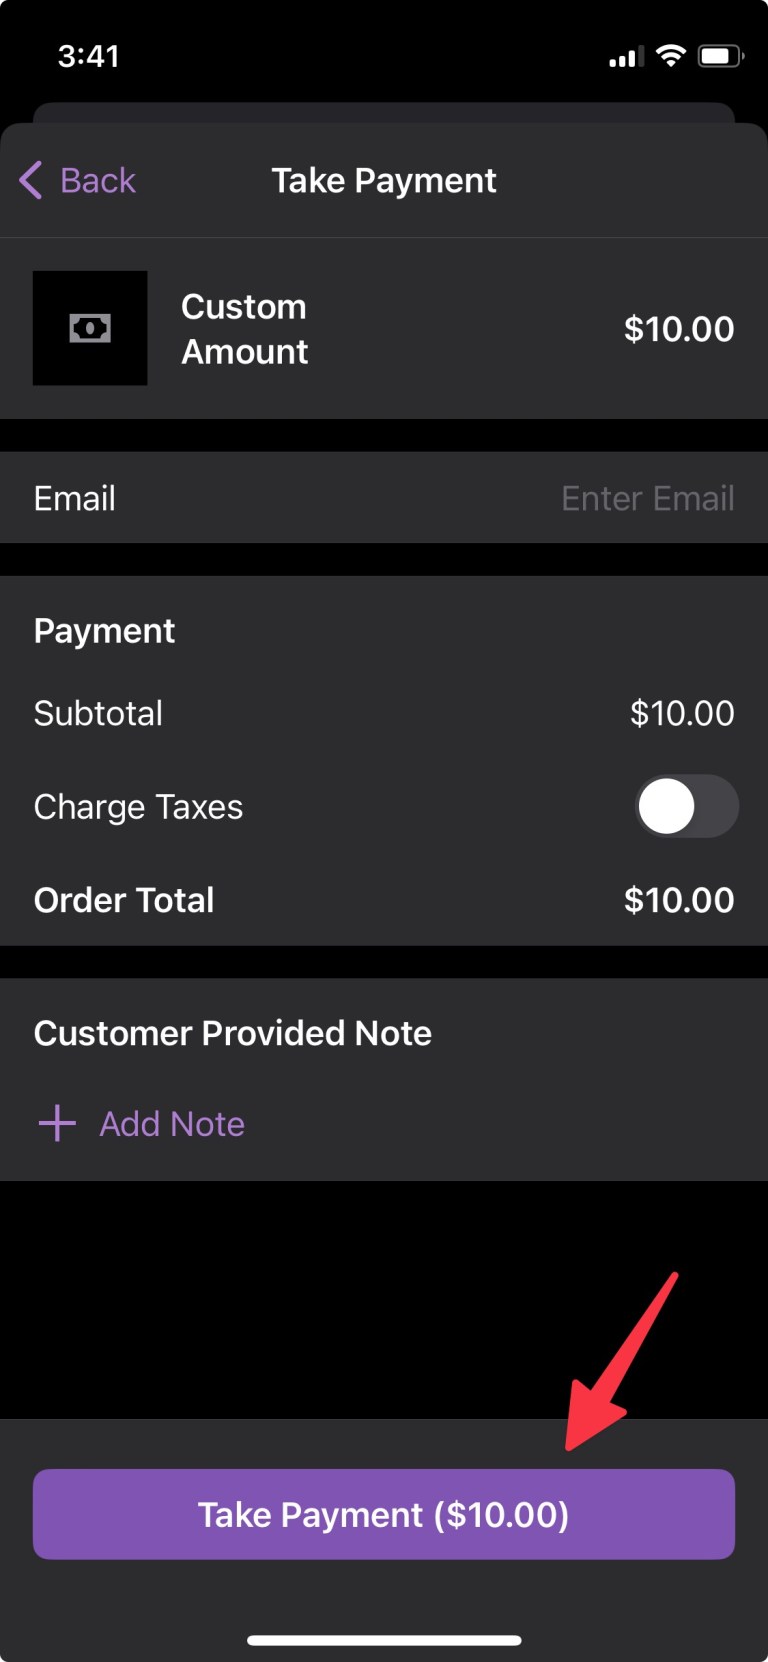
- Tap on Take payment.
- Choose how to collect payment.

Printing receipts on a network printer
↑ Back to topIf your mobile device has access to a WiFi Network (e.g. for curbside payments or point-of-sale type payments), you should be able to use any printer accessible via that WiFi network using AirPrint (iOS) or Mopria (Android).
Android users may need to install additional software (e.g., the Brother Print Service Plugin) depending on the printer.
Printing receipts on a WiFi direct printer
↑ Back to topWiFi Direct printers, like the Brother RJ-4250WB-L, have their own internal WiFi access hotspot that a mobile device can connect to directly for printing receipts.
To print receipts using a WiFi direct printer:
- Ensure your mobile device has access to cellular data.
- Connect to the printer WiFi using your device’s WiFi settings.
You can then accept payments (over cellular data) and print receipts (over WiFi Direct). This can be especially useful for in-person delivery at a customer’s home.
Collecting Payment with M2 or WisePad 3
↑ Back to topTo collect payments from customers:
- Navigate to the Menu tab in your WooCommerce Mobile App.
- Tap on Payments,.
- Tap on Collect Payment.
- Enter in the amount to collect.
- Complete optional steps if desired, such as:
- Add a customer email.
- Toggle taxation on/off.
- Add a note to the order.
- Tap on Take Payment.
- Determine how to take the payment:
- Cash allows you to accept cash for the order.
- Card Reader allows the customer to insert, swipe, or tap their preferred payment method using the connected card reader.
- Tap to Pay allows the customer to tap their preferred payment method using your compatible device.
- Share Payment Link allows you to send a web link to the customer for them to pay online.
- Scan to Pay displays a QR code that allows the customer to pay online.
Collecting Payment with Tap to Pay
↑ Back to topPayment can also be made using Tap to Pay on iPhone or Tap to Pay on Android. Please see those respective pages for our full instructions on taking payments via those methods.
Fulfillment options
↑ Back to topIf you offer local pickup or curbside pickup options, you’ll need to decide if you want to deliver to your customers, have them pick up their orders, or both.
You can specify shipping zones to determine what shipping methods customers may be eligible for. Shipping zones allow you to offer specific fulfillment options, like Local Pickup, to customers depending on where they are located in the world.
Viewing transactions
↑ Back to topPayments collected using In-Person Payments appear in your dashboard just like other payments processed via WooPayments. As a result, you can find them under Payments > Transactions.
If you’d like to view just In-Person Payments transactions, you can do so by:
- Showing the Advanced filters.
- Using the
Device typefilter to display payments made with either aniPhoneorAndroiddevice.
You can use other filters if you’d like to get more granular reporting about your In-Person Payments transactions.
Updating your privacy policy
↑ Back to topLike any Payment Method, customers using In-Person Payments should be aware of what data is shared about them and their transactions with others. Customers using card-present payments can expect to have the following personal data shared with our payments partners:
- Their location at the time and date of purchase.
- Their email address.
- Their name.
- An assigned customer ID if they had prior payments for this store.
- Their address and phone number.
- The quantity, price, and description of items in the order.
All data is used to support fraud detection during payment collection. You can find more details on provacy and our products here, and you can manage your store’s privacy policy in the Settings > Privacy section of your site’s administrator dashboard.
NOTE: You can read more about privacy and our products here.
Powering off your reader
↑ Back to topIf you want to power off the M2 or WisePad 3 to save battery life, hold down the power button for roughly four seconds.
Depending on the device, either the light will go off and stay off, or the LED will display a prompt Power off? — which you can confirm with the green enter button on the PIN pad.
Refunds
↑ Back to topYou can refund your customers’ In-Person Payment just as you would any other WooPayments payment by following the refund flow on their order in the app or on your site via WP Admin.
If an order was paid with Interac, the refund must be initiated from the Woo Mobile App, and the original card used for the purchase must be presented.
To refund through the Woo Mobile App:
- Navigate to the Orders section of your Woo Mobile App.
- Select the order you’d like to refund.
- Tap the Issue Refund option.
- Adjust the quantity of the products you’d like to refund.
- Select Next.
- Enter a reason for the refund, if desired.
- Tap the Refund button.
- Select Refund again to confirm the refund.


Frequently asked questions
↑ Back to topDoes In-Person Payments work with test mode enabled on WooPayments?
↑ Back to topNo. In-Person Payments is not compatible with test mode or sandbox mode.
Does my mobile device need an Internet connection to collect payments?
↑ Back to topYes. Your mobile device needs to be connected to the Internet to collect payments.
If you are using cellular data to connect to the internet, please be sure Cellular Data is enabled for the “Woo” application in your device’s Cellular Settings.
Which cards and digital wallets are supported?
↑ Back to topIn-Person Payments supports most credit and debit cards. It also supports payments using the following wallets:
- Apple Wallet
- Google Wallet
- Samsung Pay
- VISA payWave
- MasterCard PayPass
- AMEX ExpressPay
- Interac
- Discover D-PAS
Can I use In-Person Payments for my subscription-based products?
↑ Back to topNot at this time. Support for subscription products will be coming in a future release.
Can I bring my own card reader?
↑ Back to topYes, M2 and WisePad 3 card readers purchased from a different site work as expected with the Woo Mobile App.
What is the Card Reader Return Policy?
↑ Back to topRefer to the WooPayments Card Reader Return Policy for more information.
What is the estimated shipping time for the reader?
↑ Back to topOrders typically arrive within six business days, but orders placed after 21:00 UTC will ship the following business day.