NOTE
This product is no longer available on WooCommerce.com. This document has been left available for existing users, but will no longer be updated.
The Paymill payment gateway extends WooCommerce and allows you to take payments directly on your store via Paymill’s API.
Required
↑ Back to top- An SSL certificate
- Paymill account. Sign up at Paymill – Register.
Installation
↑ Back to top- Download the .zip file from your WooCommerce account.
- Go to: WordPress Admin > Plugins > Add New and Upload Plugin with the file you downloaded with Choose File.
- Install Now and Activate the extension.
More information at: Install and Activate Plugins/Extensions.
Setup and Configuration
↑ Back to topOnce you’ve signed up for a Paymill account, get your API keys at My Account > Settings > API Keys.
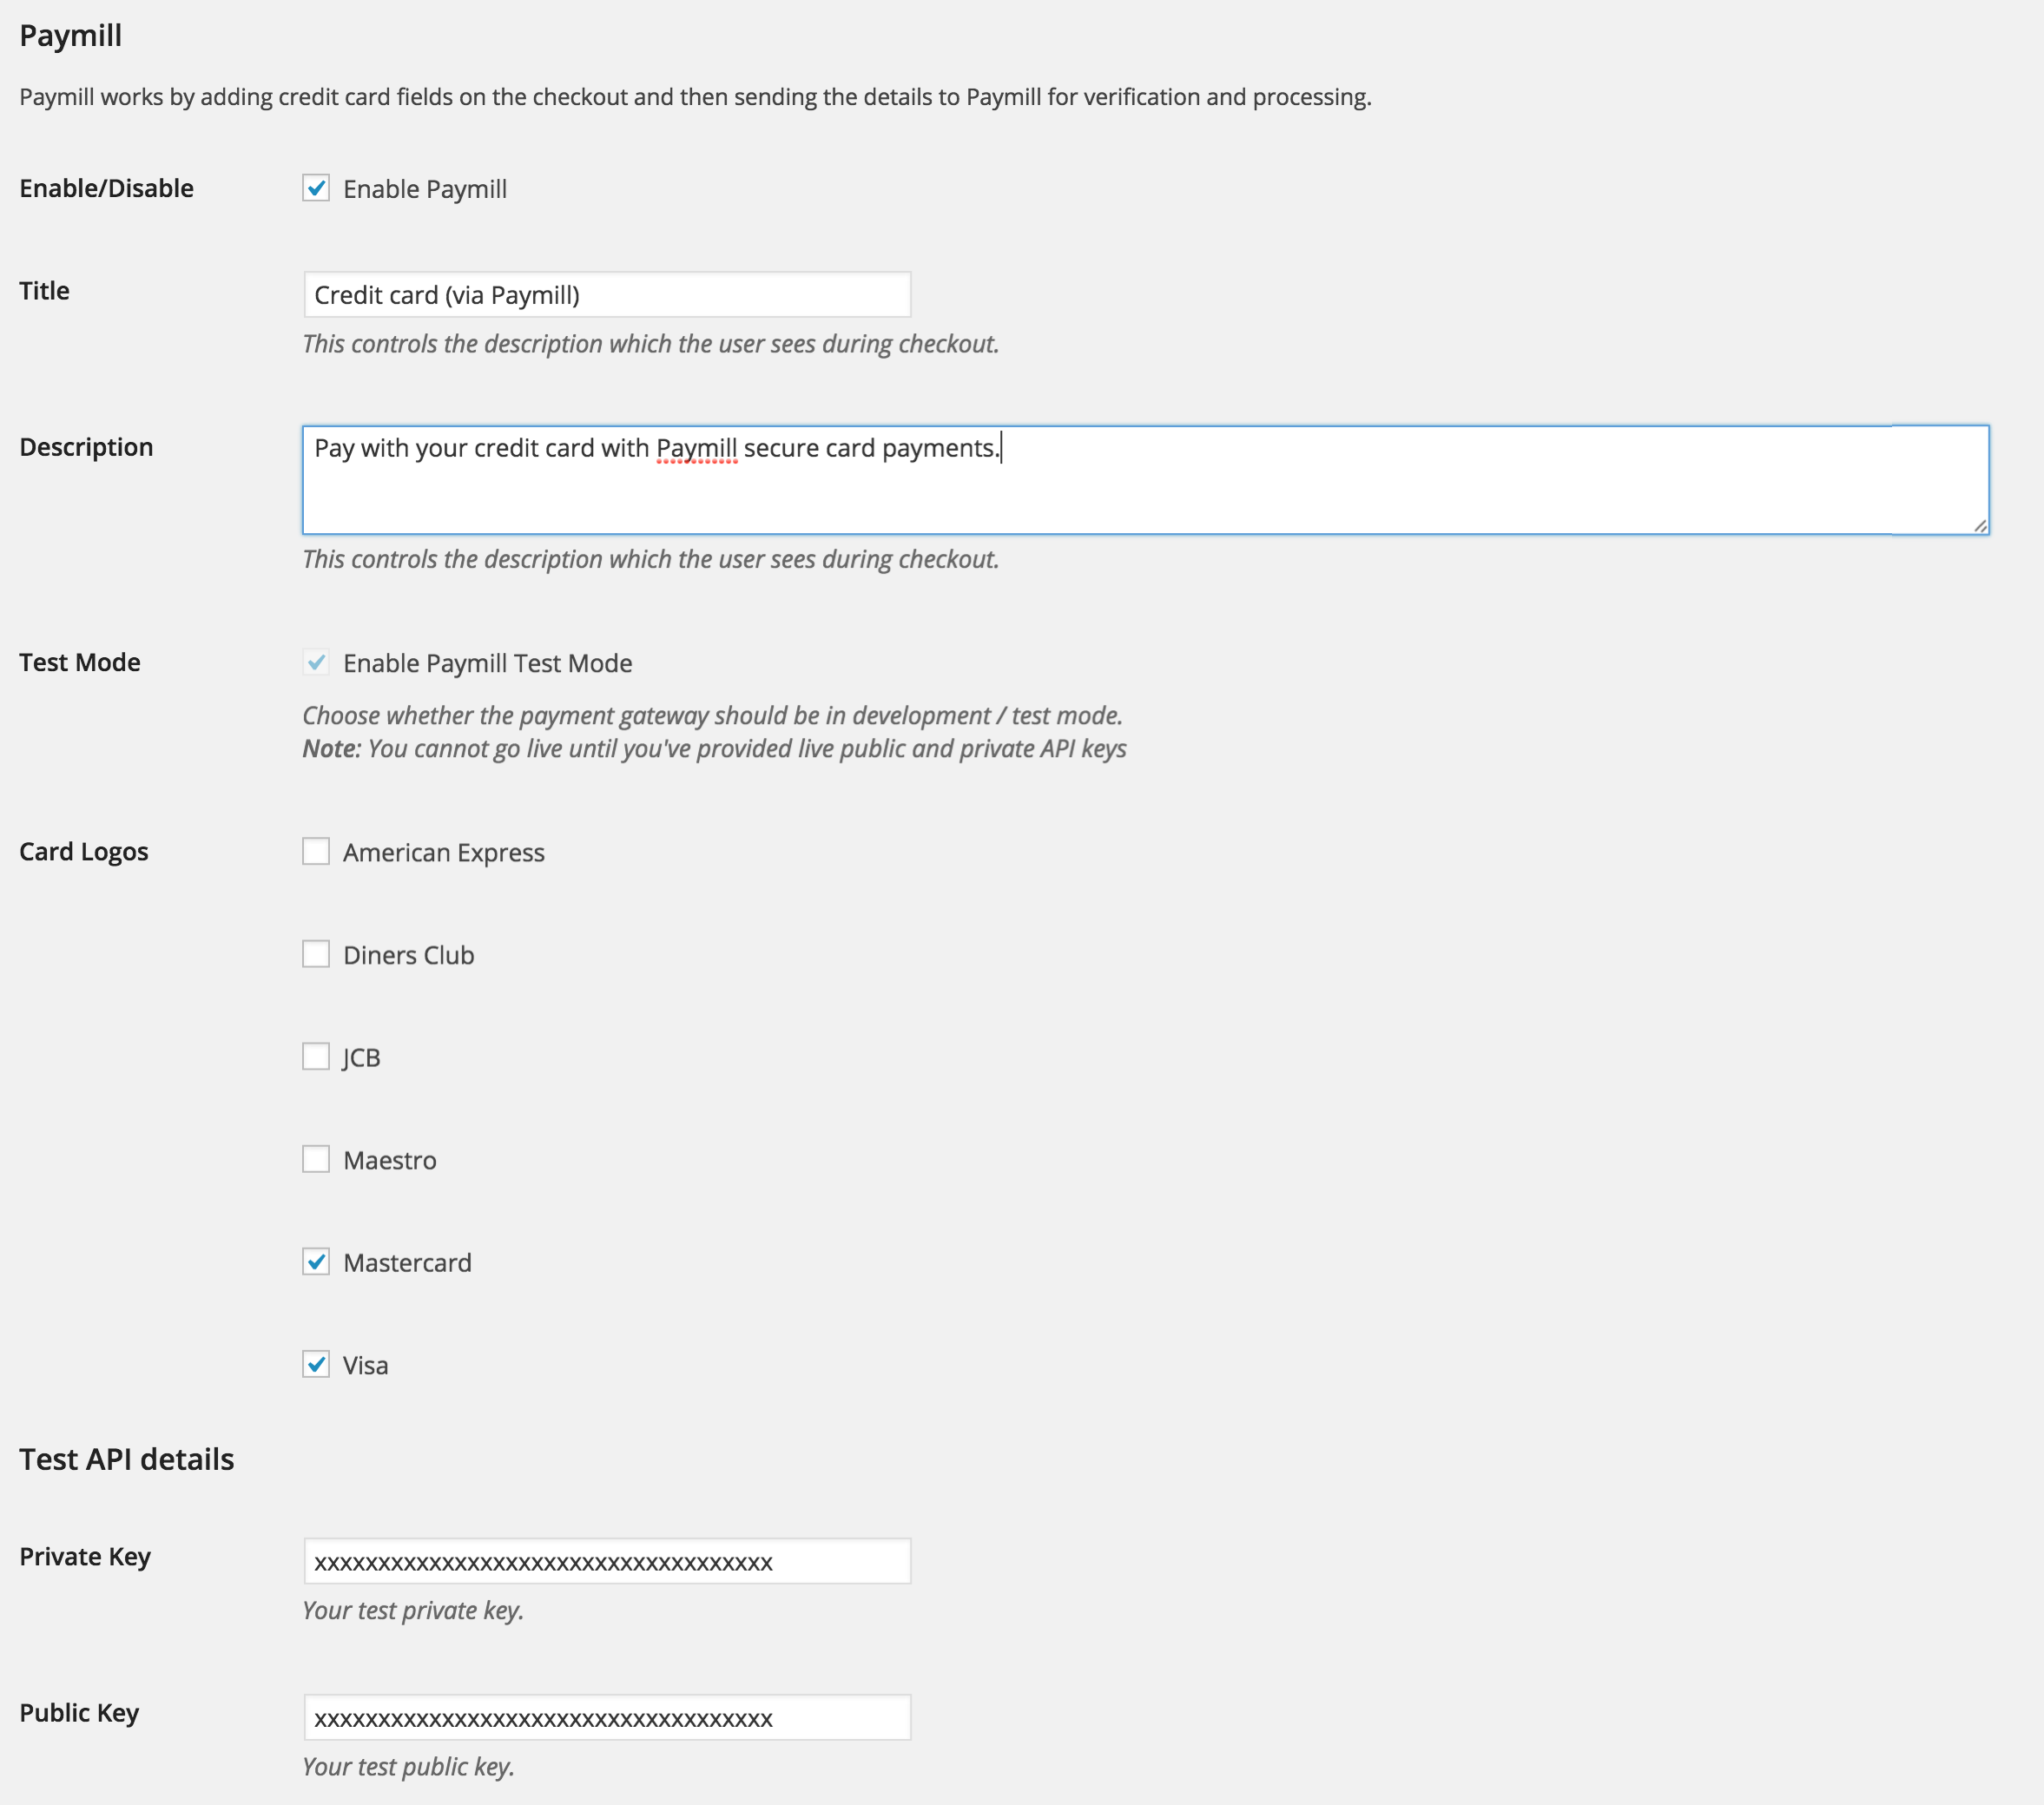
Go to your WordPress/WooCommerce site and WooCommerce > Settings > Checkout >Paymill.
Change the title, or description that is shown to customers during checkout , you can also choose whether to use test mode, or live transactions. Before you can make any transactions, you’ll need to enter your public and private keys from your Paymill account. Once you’ve done that the payment method will appear during checkout.
Customer Usage
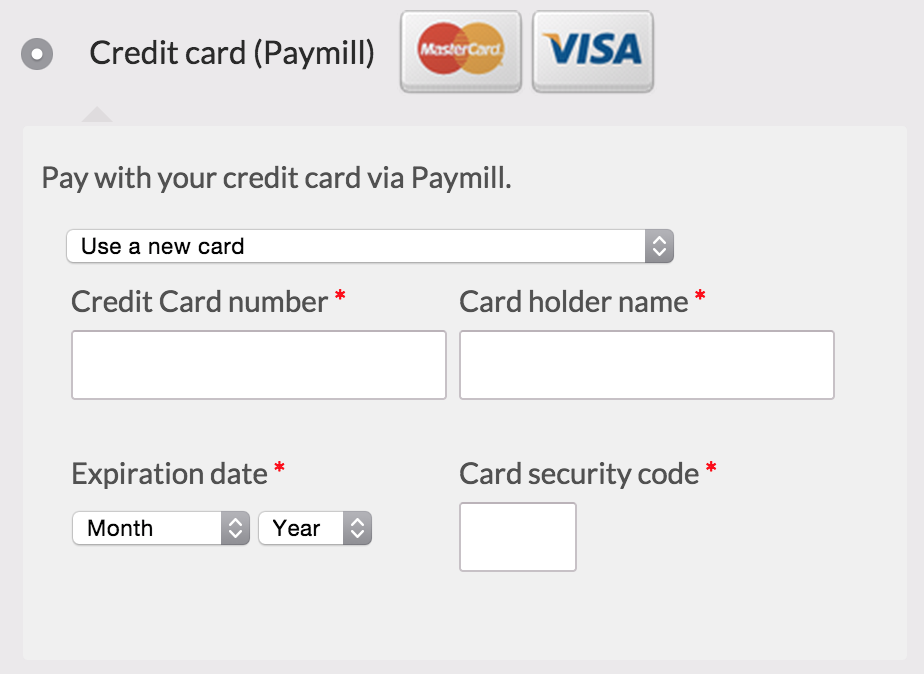
↑ Back to topCustomers pay on the checkout page and see the following:
FAQ
↑ Back to topThe method is not showing
↑ Back to topThe method won’t show up if either:
- You haven’t entered your Paymill API keys
- You’re in a country that isn’t supported by Paymill. You can check the list of supported countries on Paymill’s site
- You’re using a currency that isn’t supported by Paymill. You can check the list of supported currencies on Paymill’s site
Are card details saved for returning customers?
↑ Back to topNot currently, the functionality is planned for future releases
Does the gateway support subscriptions?
↑ Back to topNot currently, the functionality is planned for future releases.