This article explains how to set up the extension Order Delivery to offer next-day delivery for your orders. This option can be restricted to specific shipping methods and include a cut-off time.
The next-day delivery setup can vary depending on whether you need a lead time to process the orders or not. We’ll provide both options below, signified as (Option A) and (Option B) respectively. Make sure to always choose the same option in this guide based on your decision in the first step.
1 – Set the Lead time in days
↑ Back to topOption A
↑ Back to topSet the Lead time in days to 1 to indicate that products need time to be processed before they are ready to ship. Keep in mind that the lead time is only counted on Shopping Days. For non-shipping days, the lead time will not be included in the calculations.

Option B
↑ Back to topSet the Lead time in days to 0 to indicate that products don’t need to be processed before getting shipped.

2 – Configure your shop’s shipping days
↑ Back to topIn the Shipping days section, choose the days you process orders and, optionally, add a cut-off time for each of them. You can choose the days by clicking on the checkbox.
For example, Monday to Thursday with a cut-off time at 13:00, and Fridays with a cut-off time at 12:00.
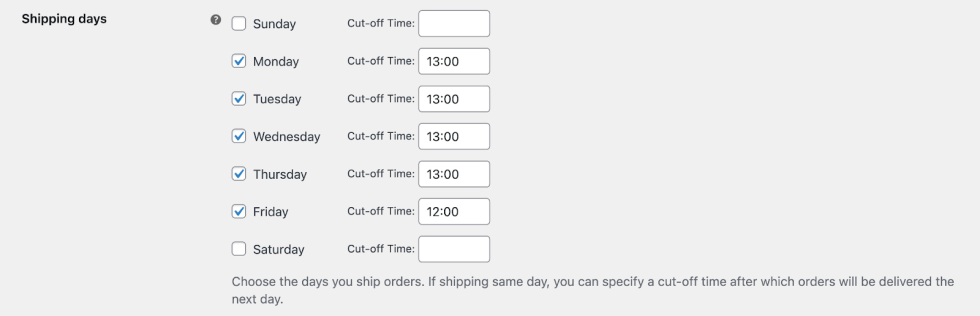
When an order is received before the time defined in the Cut-off Time field, then it can be delivered on the next day. Otherwise, the first available delivery date will be on the next available shipping day.
By leaving the Cut-off Time value empty, customers can receive their orders the next day, no matter the time they make the purchase.
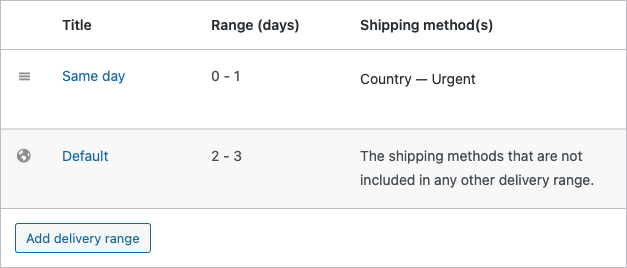
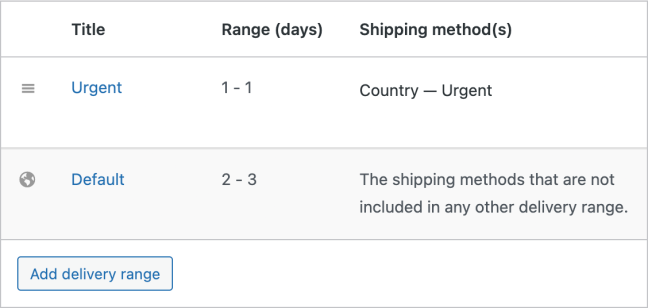
3 – Create a delivery range
↑ Back to topOption A
↑ Back to topIf a lead time was configured on step 1, then you’ll need to set a delivery range with the From (days) value set to 0 and the To (days) value set to any number. You can use the default range or create a new one for specific shipping methods.
Option B
↑ Back to topIf you didn’t set a lead time in step 1, then you can set a delivery range with the From (days) value set to 1 and the To (days) value set to any number. Similar to option A, you can either use the default range or create a new one for specific shipping methods.
4 – Toggle the Delivery Days
↑ Back to topIn the Delivery days section, toggle on the days of the week when customers can receive their orders.
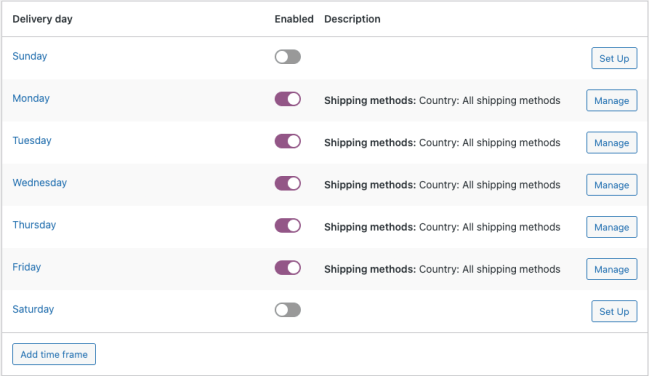
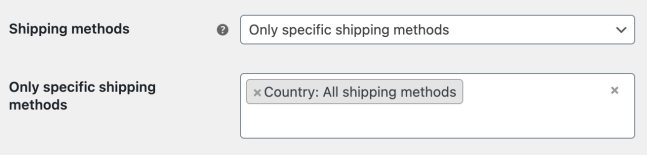
For each delivery day, you can define which shipping methods are available. For this example, we allowed only specific shipping methods for a sample shipping zone, “Country”.
Checkout form behavior
↑ Back to topAfter a customer fills in the billing and shipping addresses and selects a shipping method that supports next-day delivery, our extension will calculate the available dates and times for the delivery. Based on our configuration so far, Order Delivery will try to allow the customers to schedule a next-day delivery
If the cut-off time defined in the Shipping days setting for the current weekday hasn’t passed yet, then the shipping date for the next day will be available in the calendar. Otherwise, the first available delivery date will be two days later.
Note: In this scenario, we assumed that the two following days from today are delivery days. If this isn’t the case, the first available date on the calendar might be postponed beyond these two days.
If we want to add a cut-off time, given the previous scenario, in the Shipping days section, we will only need to enter the time in the limit box.
Conclusion
↑ Back to topNow, your customers should be able to schedule a next-day delivery for their purchased products. Do you have any questions regarding the usage of Order Delivery for WooCommerce? If yes, feel free to reach out to our team.
You can also find out more information about our extension by going through the documentation here.