NOTE
This product is no longer available on WooCommerce.com. This document has been left available for existing users, but will no longer be updated.
Top Features
↑ Back to top- High Quality Responsive Menu Designs
- Support Delivery, Takeaway, Dine-in
- Extra Options (Toppings, Extras)
- Delivery/Pickup Fee
- Opening/Closing Hours
- Supports Multistore
Setup and Installation
↑ Back to topInstall the plugin by uploading the zip file through the normal wordpress plugin installation process.
- Login to WordPress Admin
- In the left menu panel go to Plugins > Add New > Upload to install plugin
- Click Upload
- Browse your download package to select installation files
- Click Install Now button
- Once it’s uploaded, click the Activate link
Creating Menu
↑ Back to top1. Go to Food Ordering Manager > Create Menu
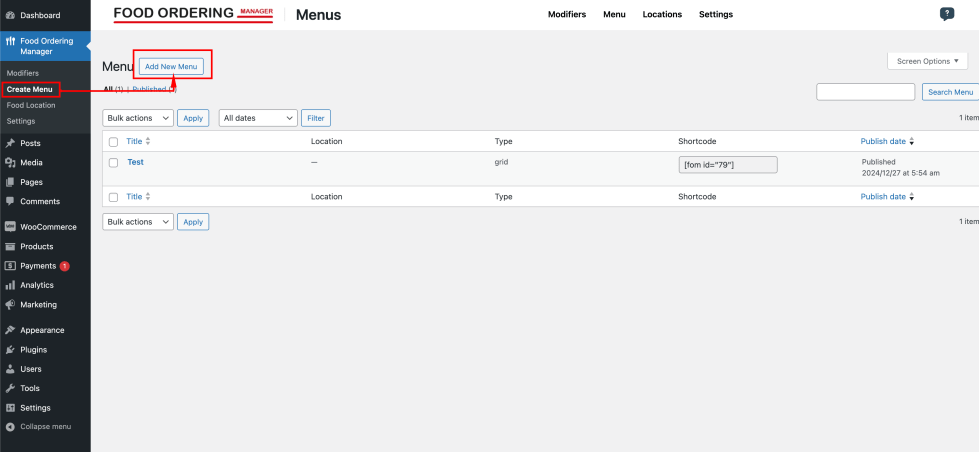
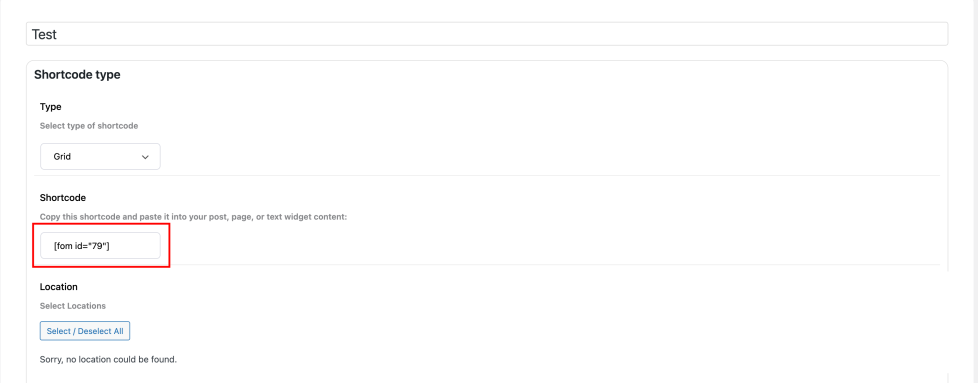
2. Config menu option as you wan to show > Click Publish button
With Selection Tyle has 4 items(Grid,Table,List, Carousel)
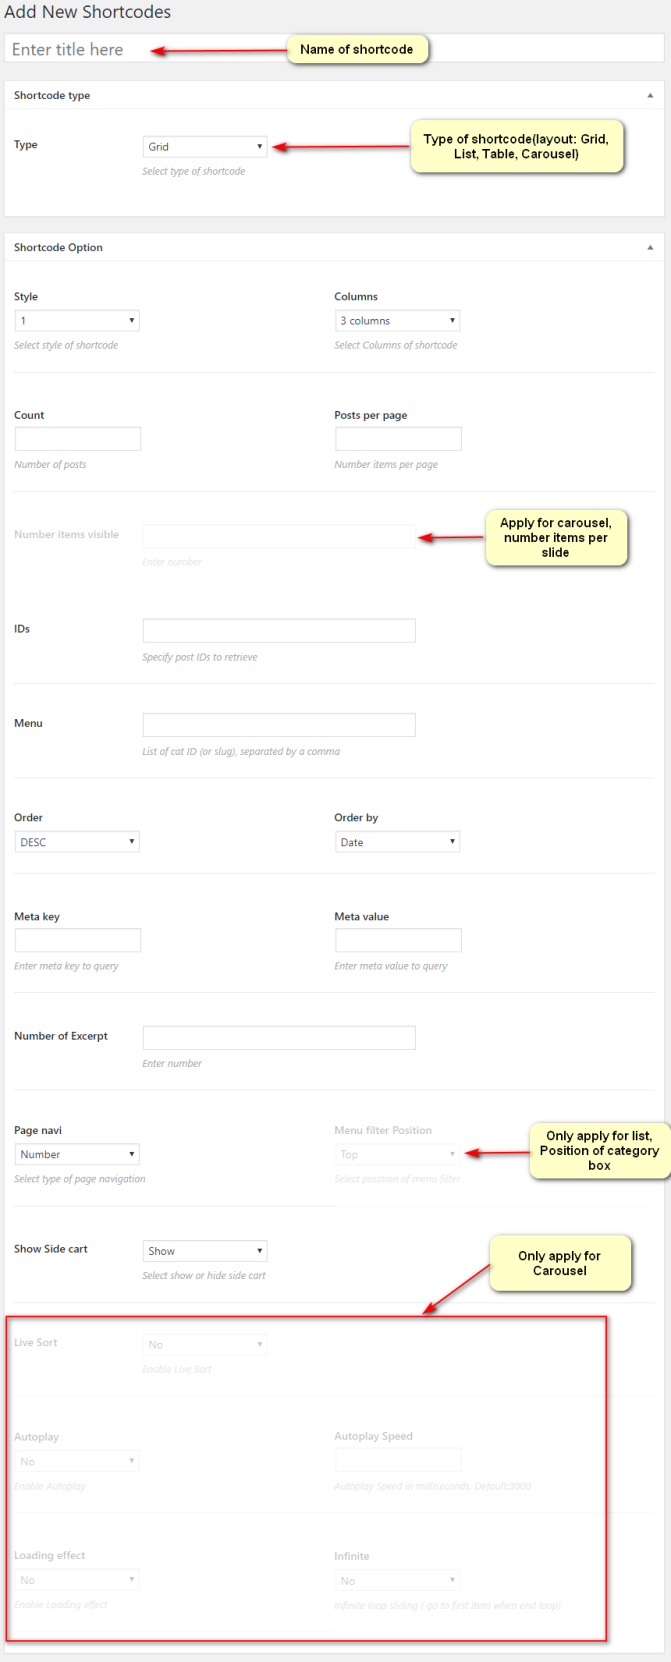
3. Copy shortcode and paste it into your post, page, or text widget content
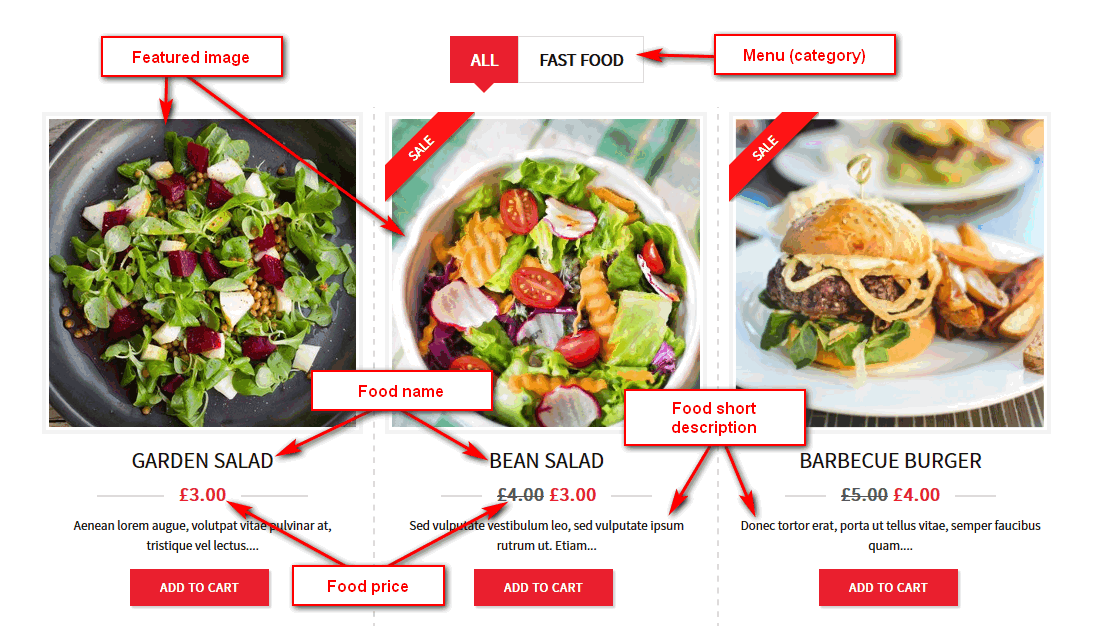
Creating Food
↑ Back to topThis plugin using product as food so you could also follow details document about create product/food from WooCommerce here
1. Go To WordPress Admin > Product > Add New Product

2. Set a title, description, featured image and required field about food
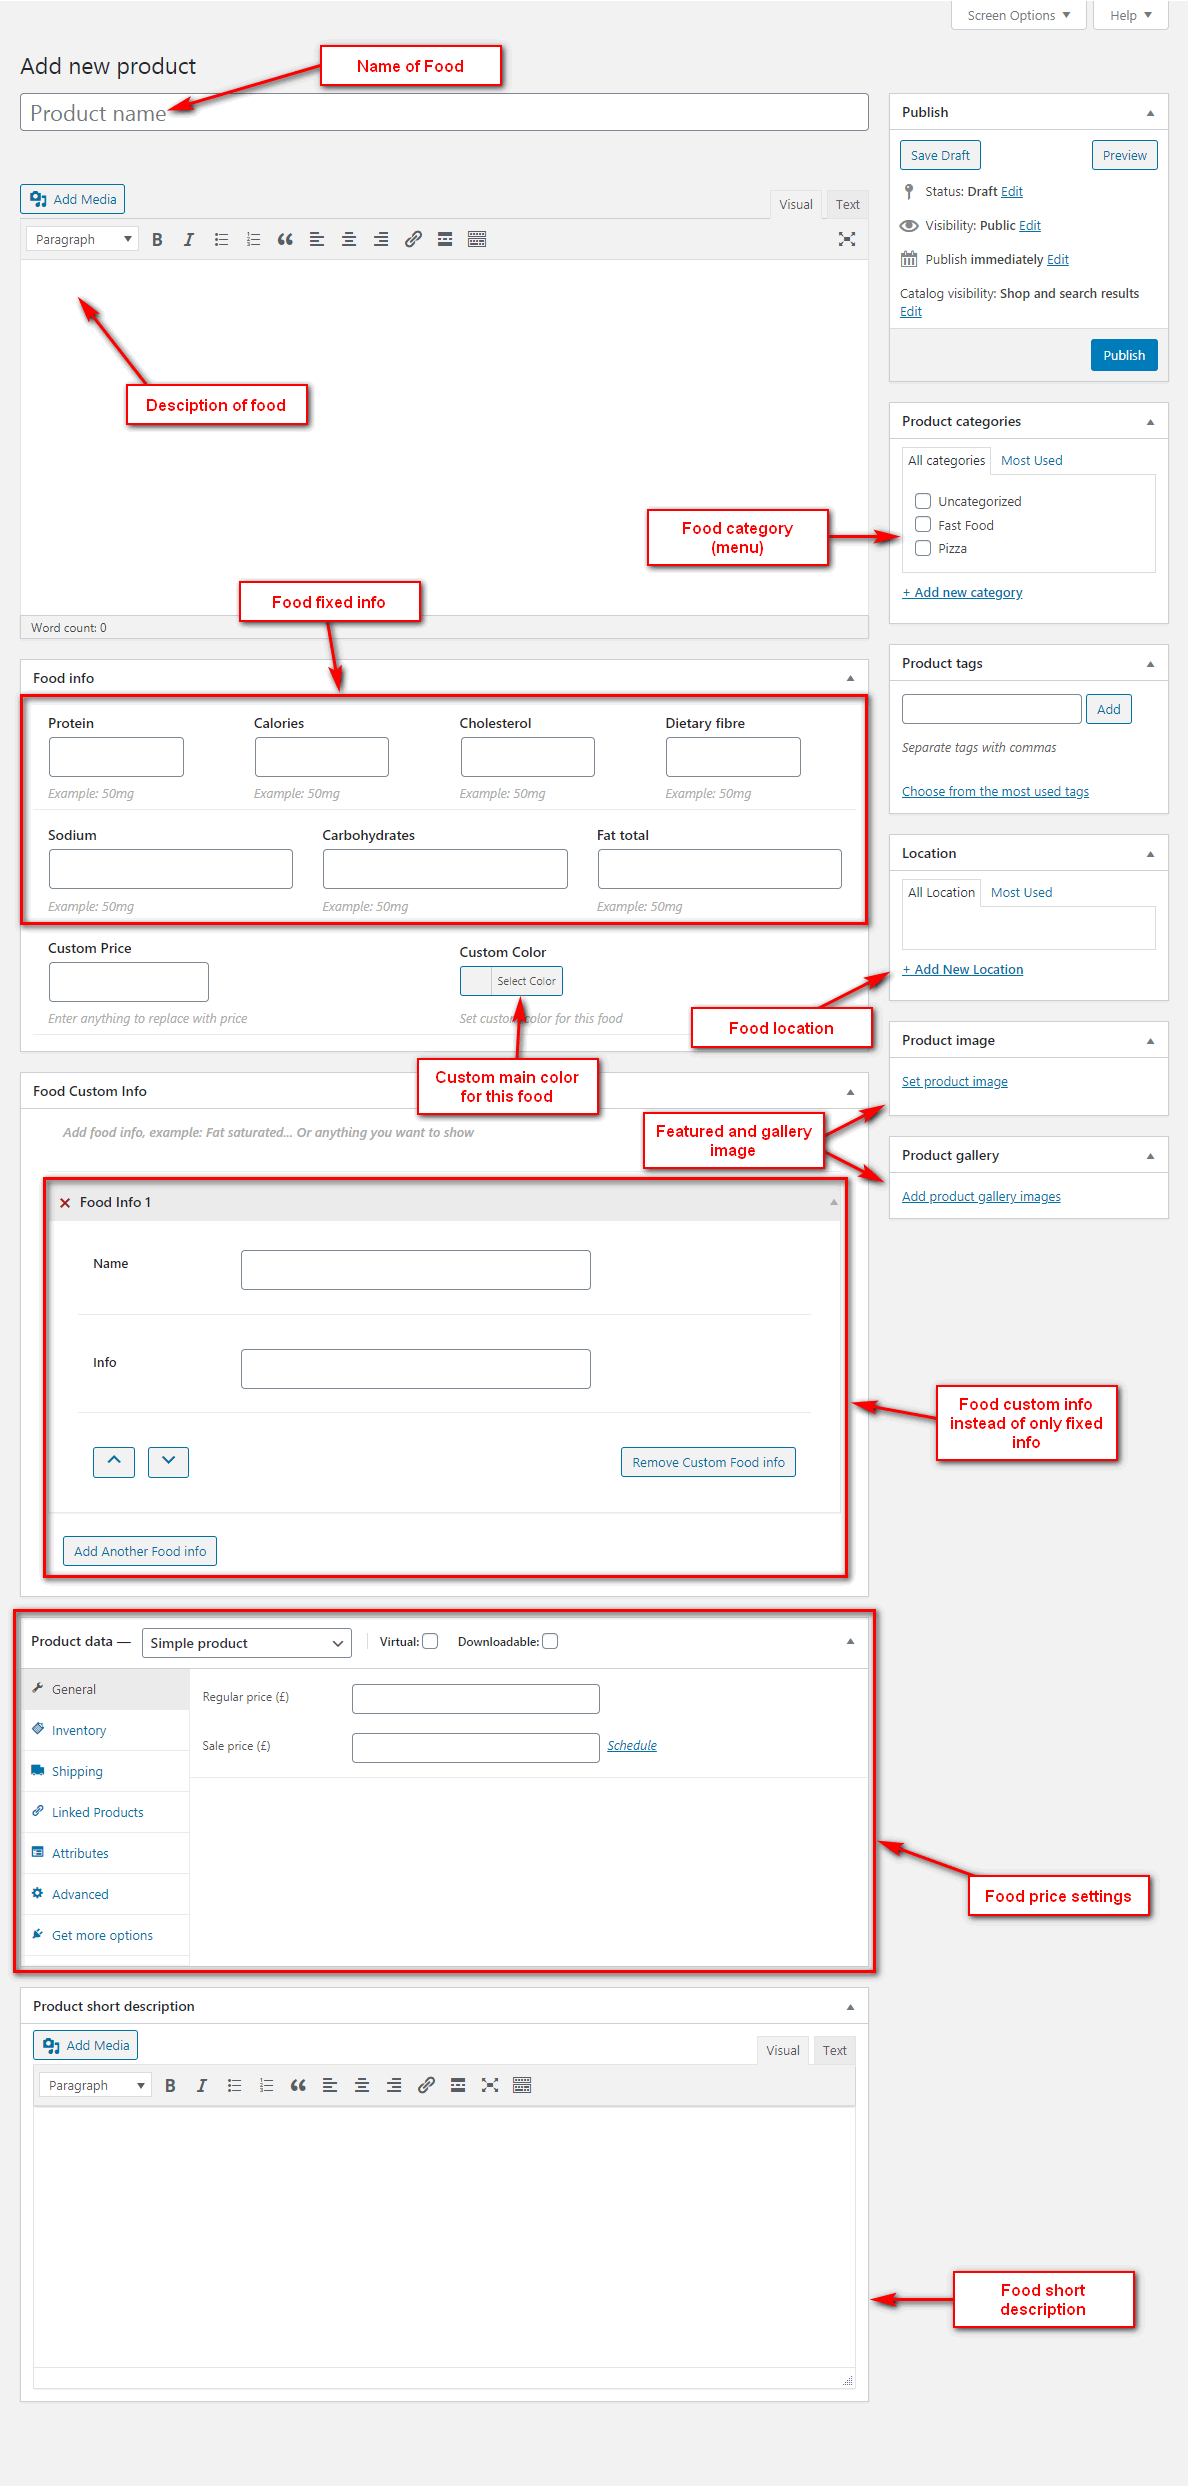
3. Display
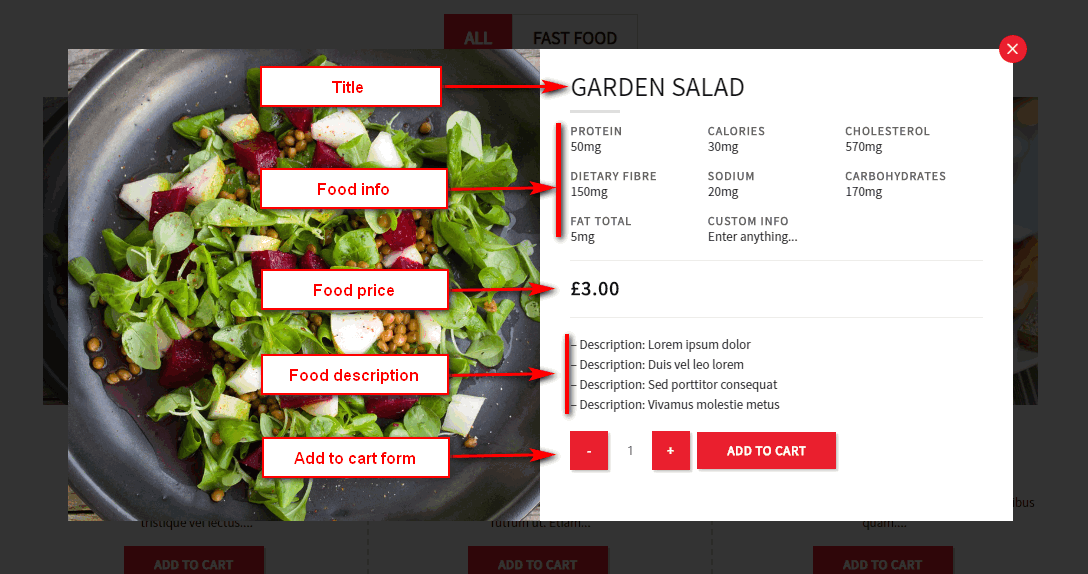
Creating Food Options
↑ Back to topYou can create food with extra options in each food/product edit page
You can also create option for all foods or special category in Products > Global Option

It will show in frontend like this:

Min Max Quantity
↑ Back to topYou can set min max quantity for each product/food or for each variation:
To set min max quantity for each product/food, please go to edit product > Inventory > Set min max qty

To set min max quantity for each product/food, please go to edit product > Variations > Edit variation > Set min max qty

Cart, Checkout, My account pages
↑ Back to topWe recommend to create a custom checkout page to get the pickup/delivery/tip options using [woocommerce_checkout] shortcode.
- Cart – Contains [woocommerce_cart] shortcode and shows the cart contents
- Checkout – Contains [woocommerce_checkout] shortcode and shows information such as shipping and payment options
- My Account – Contains [woocommerce_my_account] shortcode and shows each customer information related to their account, orders, etc.
Tell WooCommerce what pages to use
If you set up new pages yourself, or want to change what pages are used for things like cart and checkout, you need to tell WooCommerce which pages to use.
To tell WooCommerce what pages to use for Cart, Checkout, My Account, and Terms and Conditions, go to WooCommerce > Settings > Advanced.