Fees/Discounts Based on Card Issuer Country (BIN) and Issuing Bank allow you to charge an extra fee or offer a discount based on the card a customer uses at checkout. For example, you may want to apply a surcharge for international cards or offer a discount for cards issued by a specific bank.
The Payment Gateway Based Fees and Discounts for WooCommerce Pro plugin allows you to create card-based fee and discount rules using BIN (Bank Identification Number) lookups. The plugin can identify a card’s issuing country and bank and automatically apply the configured fee or discount.
To use this feature, you must first configure the BIN API settings and then create card-based fee rules under the required payment gateway settings tab.
Configuring the BIN API
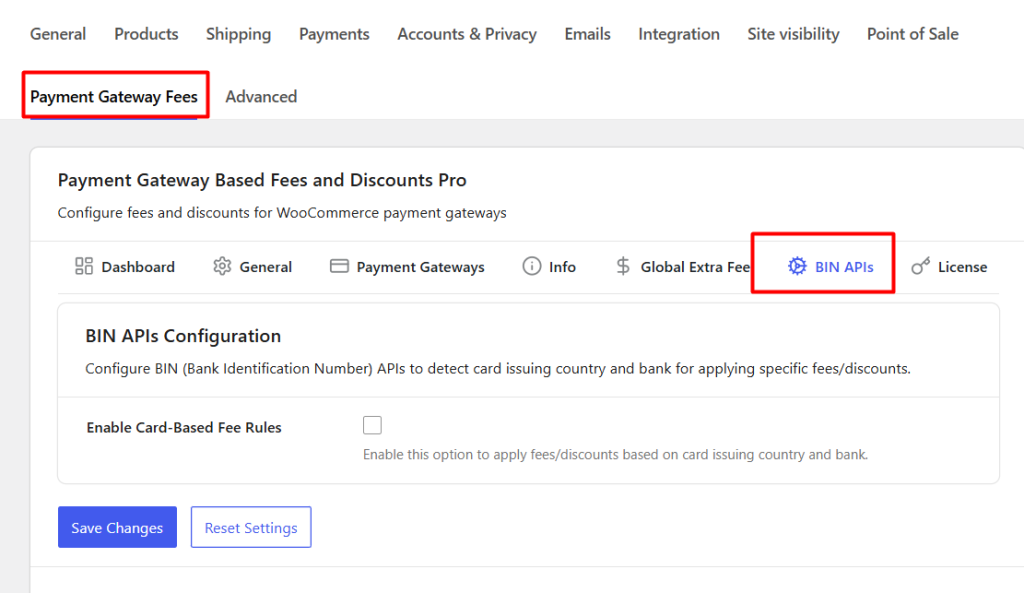
↑ Back to topTo access these settings, navigate to:
WooCommerce → Settings → Payment Gateway Fees → BIN APIs
The BIN APIs page consists of three sections:
- BIN APIs Configuration
- Binlist Configuration
- Card Details Section Configuration
The BIN API allows the plugin to automatically detect the issuing country and bank of the customer’s card at checkout. Let’s configure this step by step:
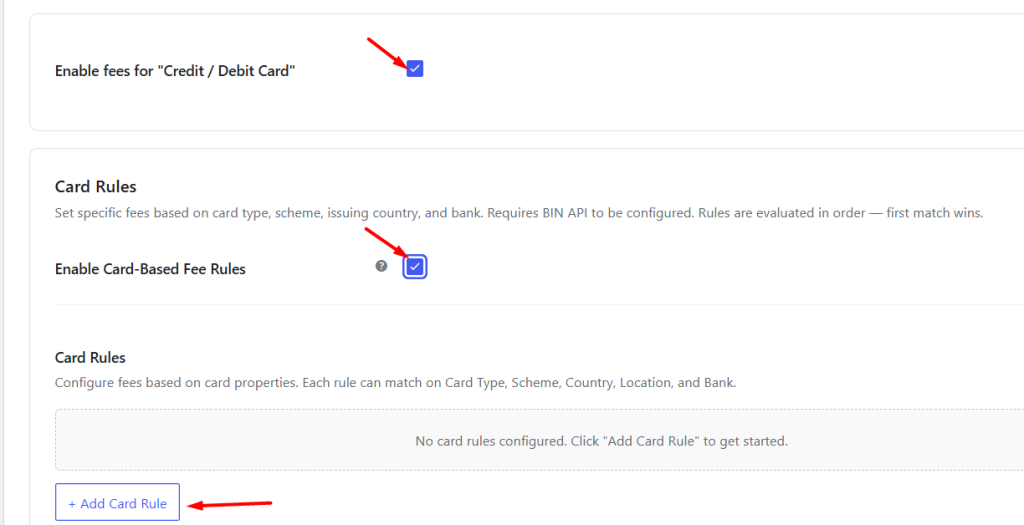
Enable the Enable Card-Based Fee Rules option. This lets the plugin detect issuing country and bank using BIN lookups.
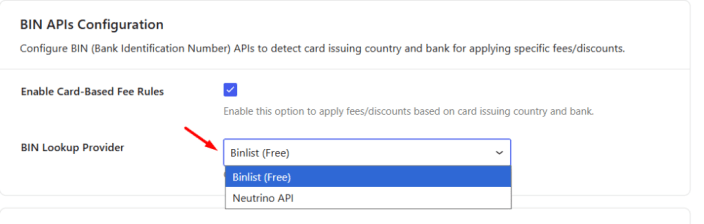
Select a BIN Lookup Provider that allows you to choose the BIN lookup service used by the plugin.
- Binlist (Free) — https://lookup.binlist.net. This is a free service that can look up card details. It’s great for testing or low-volume sites, but it only allows a limited number of look-ups per hour/day (this is called a “rate limit”).
- Neutrino (Paid) — A paid service recommended for live stores with many orders. It’s faster, more accurate, and has much higher limits.
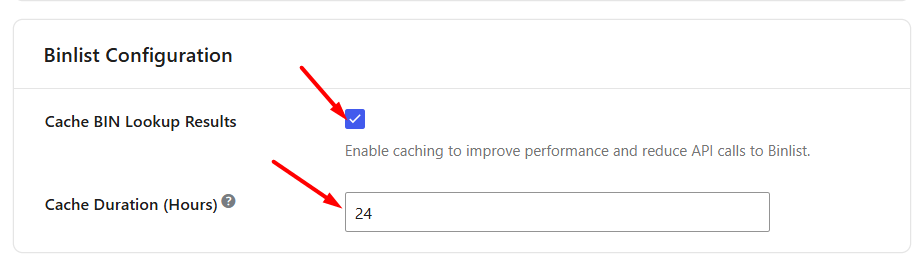
Enable “Cache Results” — This stores previous look-ups so the plugin doesn’t keep asking the BIN service again for the same card. This means if multiple customers use the same card type, the plugin won’t call Binlist every time. It speeds up checkout and helps you stay within the free limits.
Set “Cache Duration (hours)” — Set Cache Duration (hours) to define how long BIN lookup results should remain cached before a new lookup is performed. The default is 24 hours; for busy stores, you can increase to 48–72 hours.
After configuring these settings, click Save Changes.
Card Details Section Configuration
↑ Back to topSome payment gateways (like Stripe or Braintree) automatically send card details such as Visa/MasterCard, Credit/Debit, Issuer Country, and Bank Name to WooCommerce. In those cases, the plugin uses that information to apply the right fees or discounts.
However, not all payment gateways expose this data to WooCommerce. To support those gateways, the plugin provides a Card Details section that can be displayed on the Checkout page.
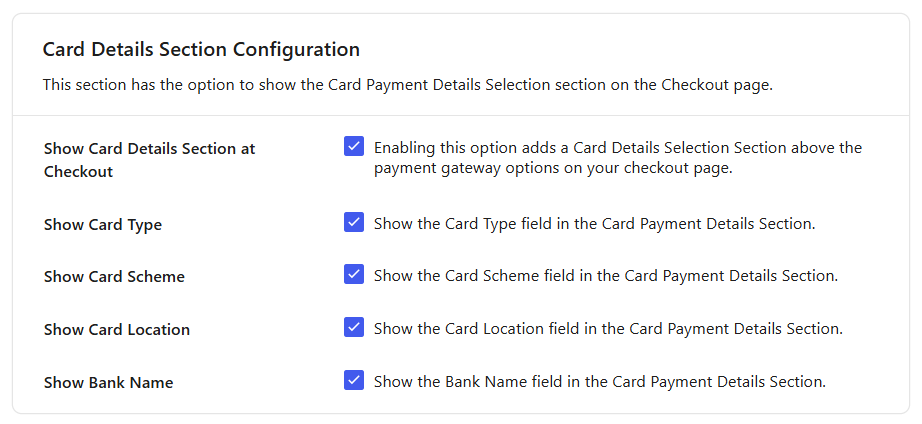
Show Card Details Section at Checkout
↑ Back to topEnable Show Card Details Section at Checkout to display a Card Details section above the payment gateway options on the Checkout page.
This allows customers to provide the card information required for card-based fee and discount calculations.
Show Card Type
↑ Back to topEnable Show Card Type to display the Card Type field in the Card Details section.
Customers can select whether the card is a Credit Card or Debit Card.
Show Card Scheme
↑ Back to topEnable Show Card Scheme to display the Card Scheme field.
Customers can select the card brand, such as Visa, Mastercard, American Express, or other supported card schemes.
Show Card Location
↑ Back to topEnable Show Card Location to display the Card Location field.
Customers can indicate whether the card is Domestic or International.
Show Bank Name
↑ Back to topEnable Show Bank Name to display the Bank Name field in the Card Details section.
Customers can provide the issuing bank information required for bank-specific fee and discount rules.
Note: Enabling these options only makes the fields available for use. Depending on the payment gateway being used, you may also need to enable card detail collection within the gateway-specific settings.
Enabling these options here does not automatically show the section for every gateway. You also need to enable Show Card Payment Details inside each individual gateway’s settings (e.g., PayPal, Stripe).
What customers will see
↑ Back to topWhen enabled, a short form will appear just above the payment gateway options, asking the customer to confirm:
- Card Type – Credit or Debit
- Card Brand (Scheme) – Visa, MasterCard, American Express, or Other
- Card Issued In (Location) – Domestic or International
- Issuing Bank – Bank name (dropdown or text field)

Install and Activate a Card-Payment Gateway
↑ Back to topTo set up and test card-based fees or discounts, you’ll need at least one payment gateway that supports card payments. This feature works with all major card-payment gateways, including:
- WooCommerce Stripe Payment Gateway
- WooCommerce PayPal Payments
- WooCommerce Authorize.Net Gateway
- Payment Plugins Braintree for WooCommerce
In this guide, we’ll demonstrate the process using WooCommerce Stripe Payment Gateway.
Adding Card-Based Fees or Discounts in Your Store
↑ Back to topSometimes you want to recover the cost of accepting certain cards, or encourage customers to use a preferred card by offering a discount. Let’s see how to do this for the Stripe payment gateway plugin.
The steps for creating card rules (Card Type, Scheme, Issuer Country, Bank, Fee/Discount) are the same across all supported gateways. However, each payment gateway has its own integration settings that must be completed before you can use card rules:
- Stripe – requires API keys and webhook setup.
- PayPal – needs to be connected to your PayPal account, typically via API credentials.
- Authorize.Net – uses API Login ID, Transaction Key, and Public Client Key.
- Braintree – requires Merchant ID, Public Key, and Private Key.
Once the gateway itself is properly configured, you’ll find the Card Rules section in that gateway’s settings, and you can add your fee/discount rules just like in the Stripe example given below.
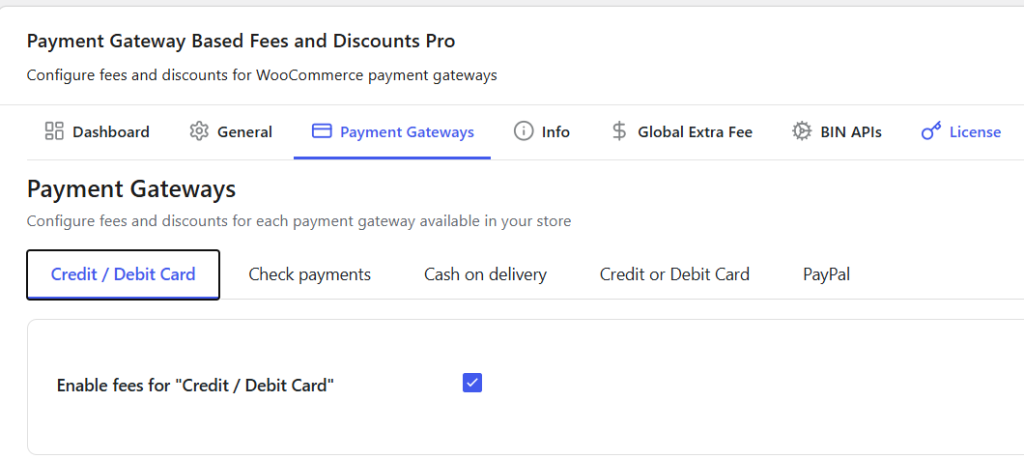
Go to Plugins > Add New, search for “WooCommerce Stripe Payment Gateway”, click Install, then Activate. Once activated you’ll see a “Credit / Debit Card” section under WooCommerce > Settings > Payment Gateway Fees >Payment Gateways. This is where you’ll create your card rules.
For more information about configuring payment gateway fees, discounts, and card rules, see Configure Fees and Discounts for Payment Gateways.
After enabling card rules, scroll down and click Add New Rule.
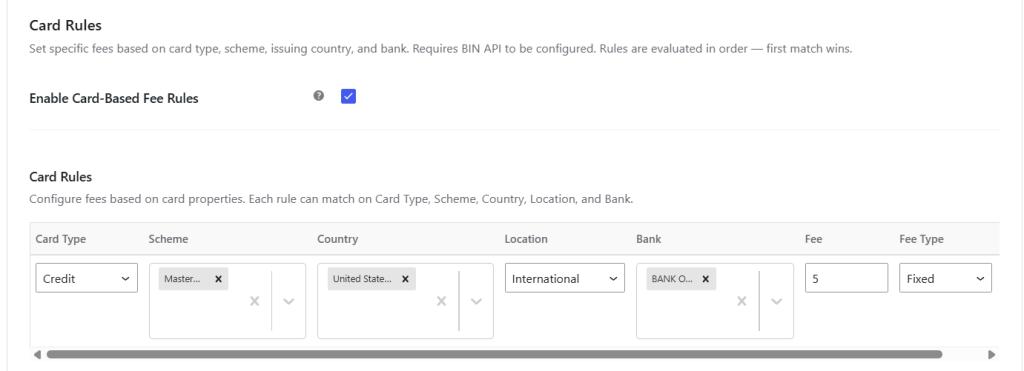
A new field will appear where you can define all the conditions in one go. For example, you might choose Credit Card as the type, set the scheme to MasterCard, select United States (US) as the issuing country, mark the location as International (if the card is from outside your store’s country), pick Bank of America as the bank, and then type 5 in the Fee field.
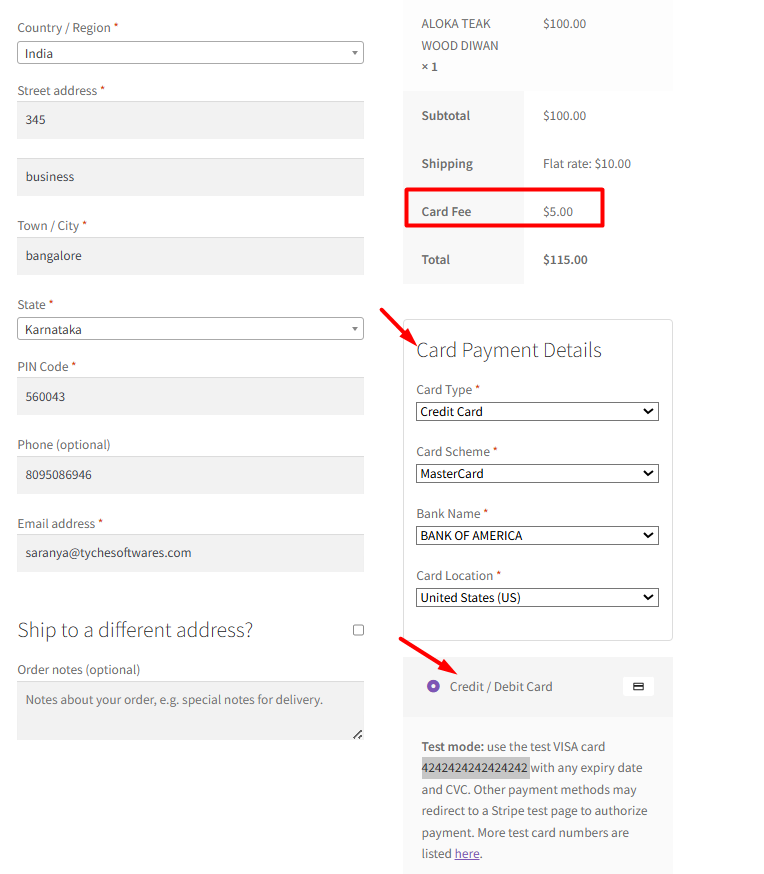
When a customer selects the Stripe Credit/Debit Card option at checkout, a small “Card Payment Details” section appears above the card fields (if you’ve turned it on in the settings). The customer enters the required card details. If the entered card details match a configured rule, the fee or discount you configured is applied automatically to their order right away.
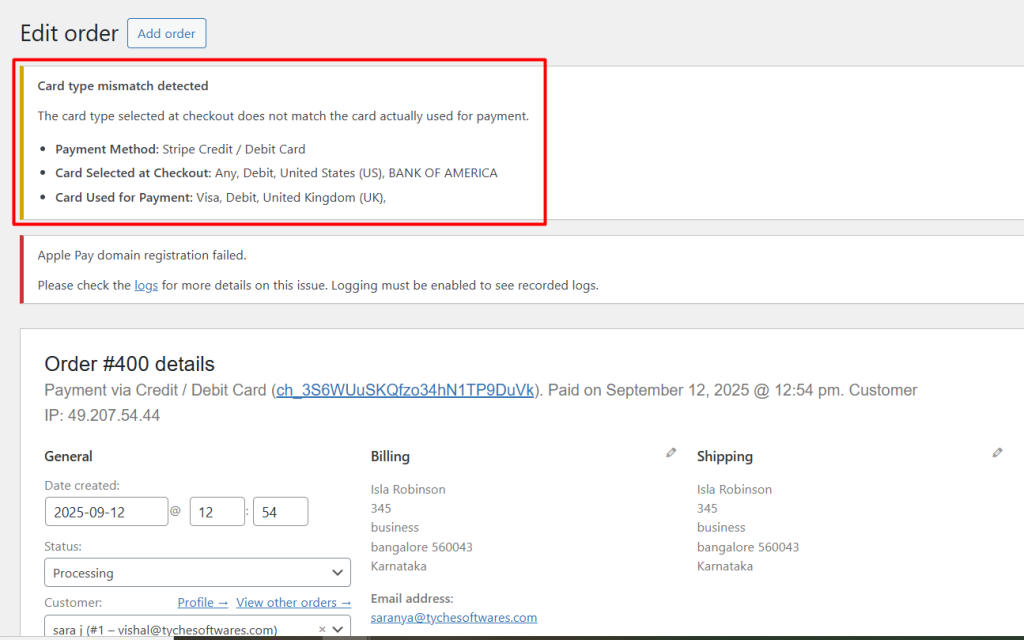
If a customer’s entered Card Details do not match the actual card used for payment,a notice will appear on the Edit Order page in your WooCommerce admin, so you can review and take action if needed.
With the BIN API integration and Card Details fallback section, you now have full control over how fees and discounts are applied based on the exact card your customers use. Whether you want to recover higher costs from international transactions or reward loyal customers from a specific bank, the plugin makes it easy to configure rules that match your business needs.