Installation
↑ Back to topTo start using a product from WooCommerce.com, you can use the “Add to store” functionality on the order confirmation page or the My subscriptions section in your account.
- Navigate to My subscriptions.
- Find the Add to store button next to the product you’re planning to install.
- Follow the instructions on the screen, and the product will be automatically added to your store.
Alternative options and more information at:
Managing WooCommerce.com subscriptions.
Configuration
↑ Back to topAfter you have installed and activated the Plugin, Go to WooCommerce > Bulk Attachment, Here you can find two Tabs which are Bulk Attachment and Settings.
1. Bulk Attachment
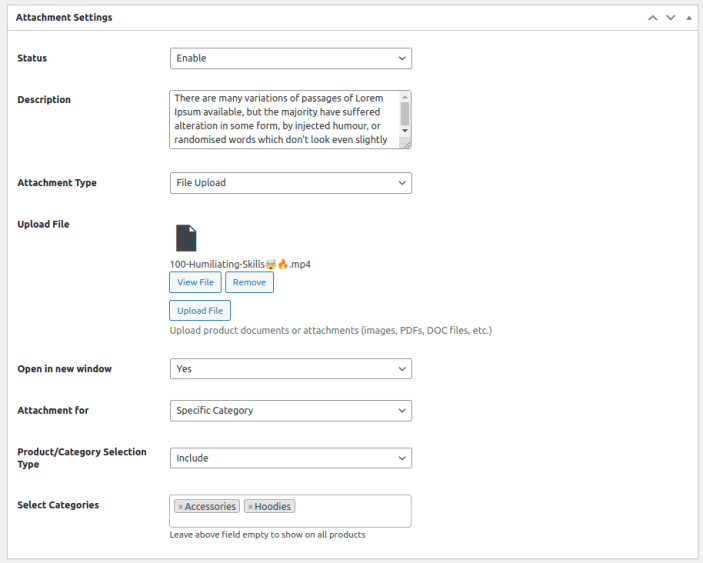
↑ Back to topIn this section, you can create different rules for attaching files to products. For each rule, you need to set the following:
- Add Title: Give a title to the attachment rule.
Attachment Settings
- Status: Choose whether to enable or disable the rule.
- Description: Add a description for the attachment rule.
- Attachment Type: Choose whether the attachment will be a file upload or an external URL.
- Upload File / External URL: Upload product documents or files (like images, PDFs, DOCs) or enter an external URL.
- Open in New Window: Decide if the attachment should open in a new window.
- Attachment For: Choose whether the attachment is for specific products or categories.
- Product / Category Selection Type: Decide if you want to include or exclude products or categories.
- Select Products / Categories: Choose which products or categories the attachment applies to. If you leave this empty, it will apply to all products.

2. Settings
↑ Back to top- Plugin Status: Turn the plugin enable or disable.
- Frontend Product Page Tab Title: Set the title for the product attachment tab.
- Show Documents In: Choose whether to show documents in the product tab or after the “Add to Cart” button.
- Shortcode: Use a shortcode to display documents in a specific location, either for general documents or for product-specific ones.

3. Product Level Settings
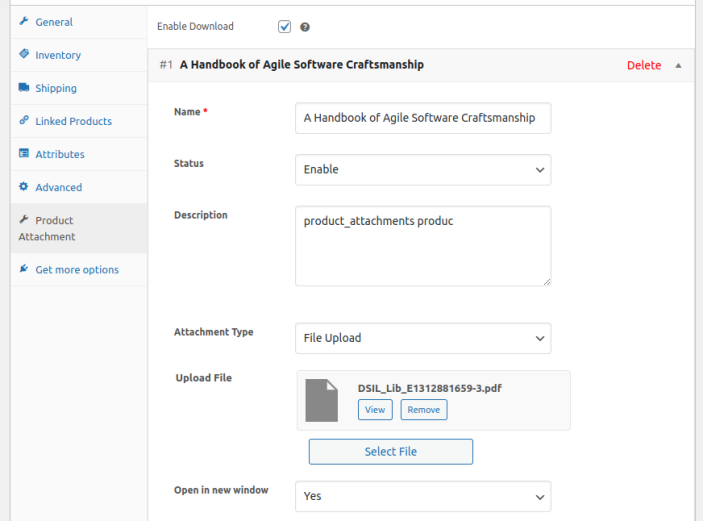
↑ Back to topTo add attachments for a specific product, go to Products > All Products, then edit a product. In the Product Data section, click the Product Attachment tab to add attachments for that product.
- Enable Download: Check this box to allow the attachment to be downloaded on the frontend.
- Add Attachment: Click the “Add Attachment” button to set the following details:
- Name: Set the name for the attachment.
- Status: Enable or disable the attachment.
- Description: Write a description for the attachment.
- Attachment Type: Choose whether to upload a file or add an external URL.
- Upload / External URL: Upload the file or enter the URL.
- Open in New Window: Decide if the attachment should open in a new window.


