A “Pay your bill” page lets customers pay an invoice or bill through your store: they enter the amount they owe, add a reference number, and check out. This tutorial builds one with Name Your Price and Product Add-ons.
Required plugins
↑ Back to top- Name Your Price, which takes the amount.
- Product Add-ons, which collects the bill or account reference.
Settings configuration
↑ Back to topGo to WooCommerce > Settings > Name Your Price and adjust the customer-facing text for a billing context. In this example: Name Your Price Text is set to Amount, and both Add to Cart Button Text fields to Pay Bill. Every setting, with its default value, is listed in the Name Your Price: Settings reference.
Product configuration
↑ Back to topCreate the product the system will use. Go to Products > Add New and set the basics (title, description, category). A Simple product works for most bill-payment pages, and it is what this example uses; a Variable product also works if you need one page per bill type.
Next to the Product type dropdown, tick the Name Your Price checkbox:
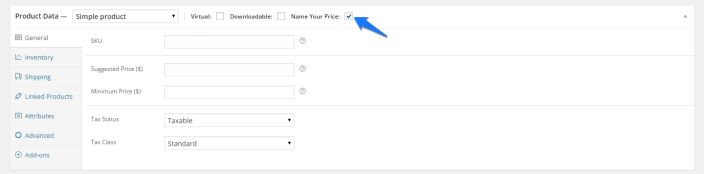
Leave the Suggested Price and Minimum Price fields blank. Every bill is a different amount, so there is nothing to suggest and no minimum to enforce.
To know which bill the customer is paying, add reference fields with Product Add-ons. Select the Add-ons tab in the product admin page and create a new add-ons group:
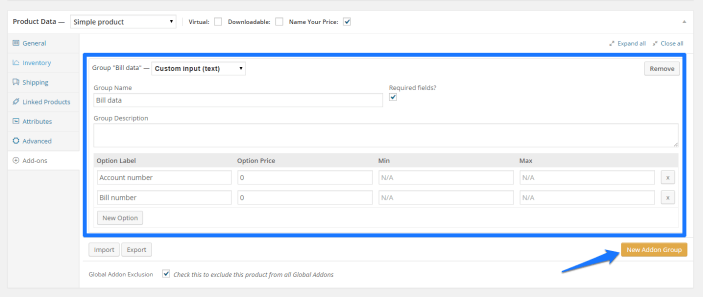
This example uses Account number and Bill number fields, but you can add as many as you need. Each add-on can also carry an additional fee through its Option price field. Save and publish the product. The product page now shows the reference fields, the amount input, and the button (your theme’s styling will differ):
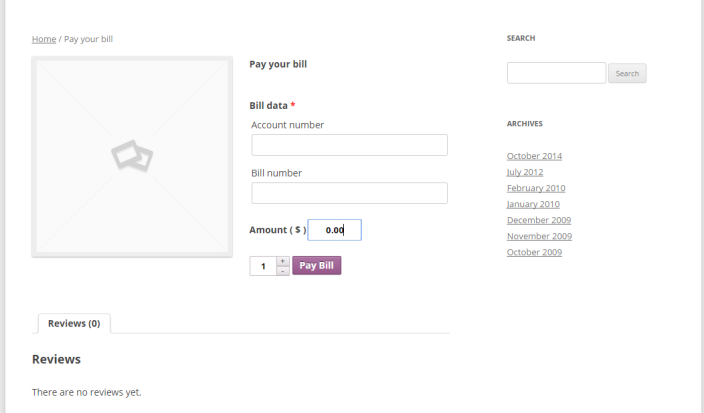
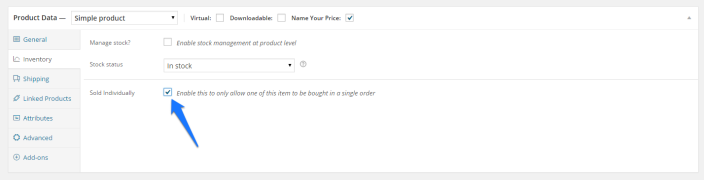
The customer can also set a quantity. For a bill-payment page you usually want one bill per order: edit the product, open the Inventory tab, and tick Sold individually:
You can also remove the quantity box from every Name Your Price product with the Hide quantity input setting, under WooCommerce > Settings > Name Your Price > Styles.
Further reading
↑ Back to top- Accept invoice payments in WooCommerce: a current, step-by-step walkthrough of this setup on the Backcourt blog.
- Name Your Price: Products: how the price fields behave in detail.
Document Version: 1.0
Last Updated: September 27th, 2026
NYP Version Covered: 3.6.0+