
Call for Price for WooCommerce Pro plugin allows you to set custom labels on the front end when the price field of a WooCommerce product is empty. By default it sets Call for Price labels, which you can customize as per the business needs. There is a provision to display a Call for Price label for all the store’s products by checking a single option.
Installation
↑ Back to topTo start using a product from WooCommerce.com, you can use the “Add to store” functionality on the order confirmation page or the My subscriptions section in your account.
- Navigate to My subscriptions.
- Find the Add to store button next to the product you’re planning to install.
- Follow the instructions on the screen, and the product will be automatically added to your store.
Alternative options and more information at:
Managing WooCommerce.com subscriptions.

General Settings
↑ Back to topCall for Price for WooCommerce Pro plugin lets you replace product prices with a custom message such as Call for Price, Request a Quote, or Enquire Now. This is especially useful for wholesale stores, made-to-order products, custom quotations, premium items, or products whose prices vary based on customer requirements.
You can configure the plugin to automatically replace prices across your store or apply it only to specific products, categories, tags, user roles, or price ranges. It also allows you to customize the appearance of the Call for Price button and control how pricing is displayed for variable products.
After installing and activating the plugin, navigate to WooCommerce → Settings → Call for Price and open the General tab to configure the default behavior of the plugin.
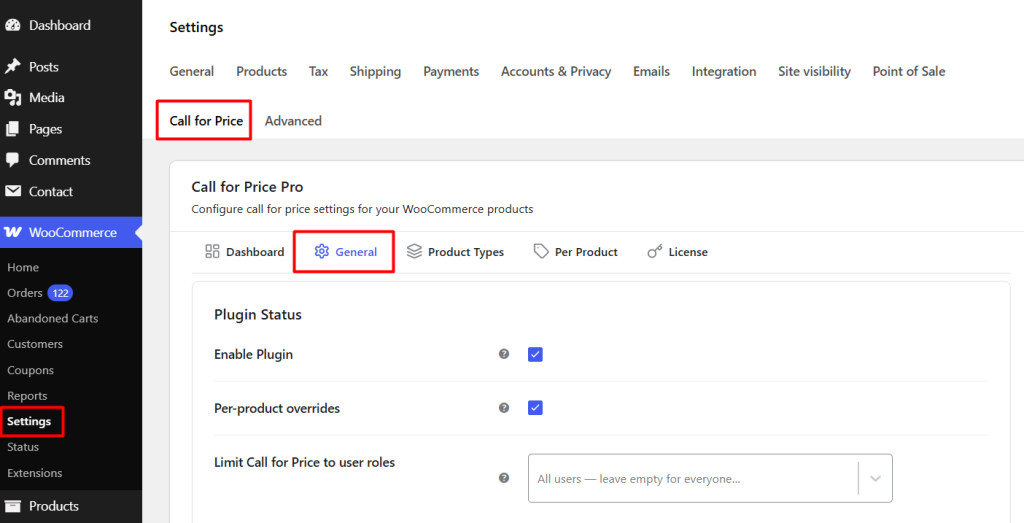
Call for Price tab under WooCommerce -> Settings
The General settings page is divided into the following sections:
- Plugin Status
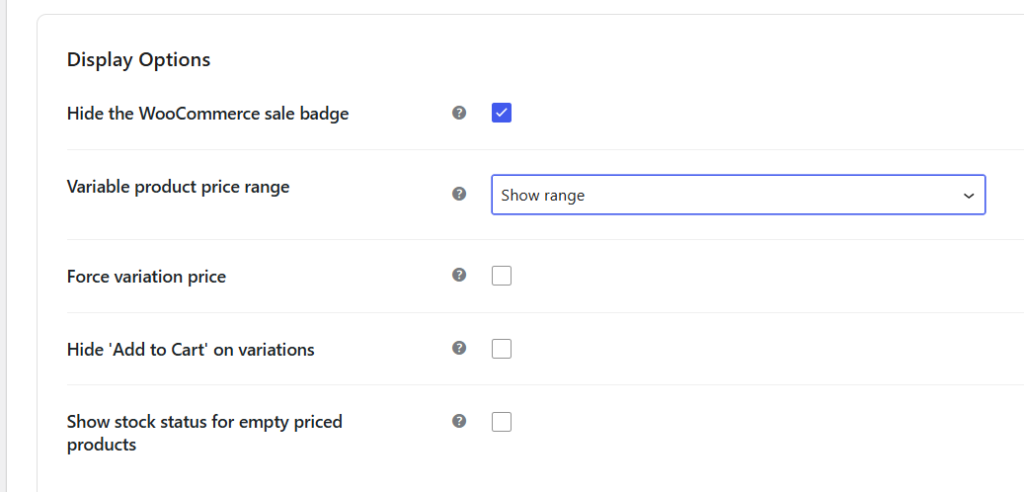
- Display Options
- Shop & Category Page Button
- Auto-apply Call for Price
- Exclusions
- Reset Usage Tracking
Each section is explained below.
1. Plugin Status
↑ Back to topThe Plugin Status section contains the core settings required to enable the plugin and define its default behavior.
a) Enable Plugin
↑ Back to topEnable this option to activate the Call for Price functionality across your WooCommerce store. Once enabled, the plugin replaces product prices with custom text based on the rules you configure in the remaining settings.
Example
A furniture manufacturer that provides custom quotations can enable the plugin so customers see Request a Quote instead of a fixed product price.
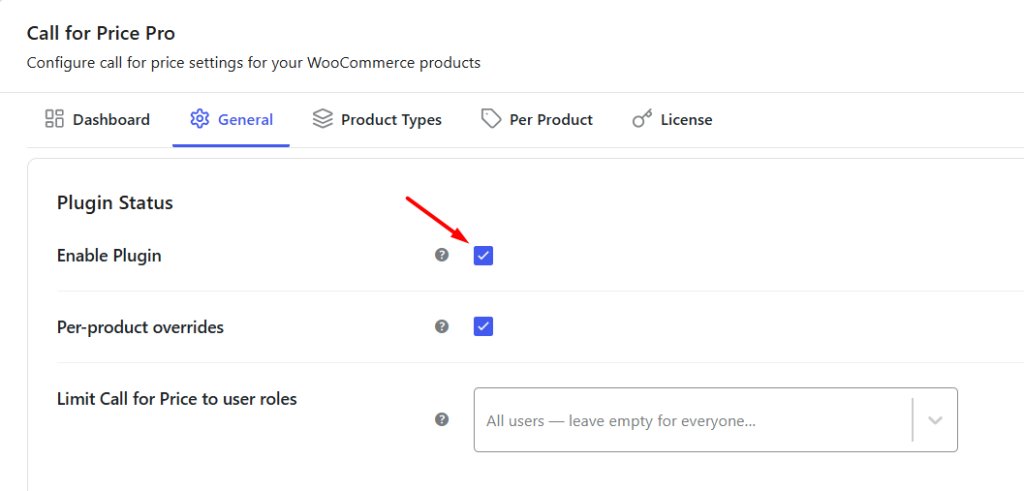
Enabling the plugin
b) Per-product Overrides
↑ Back to topEnable Per-product Overrides if you want to configure Call for Price settings for individual products instead of applying the global settings across your entire store.
When this option is enabled, a Call for Price meta box is added to the Edit Product page in WooCommerce. This allows you to customize Call for Price settings for specific products without affecting the global configuration.
For detailed instructions on configuring the settings available in the product-level meta box, refer to the Product Wise Call for Price Option documentation.
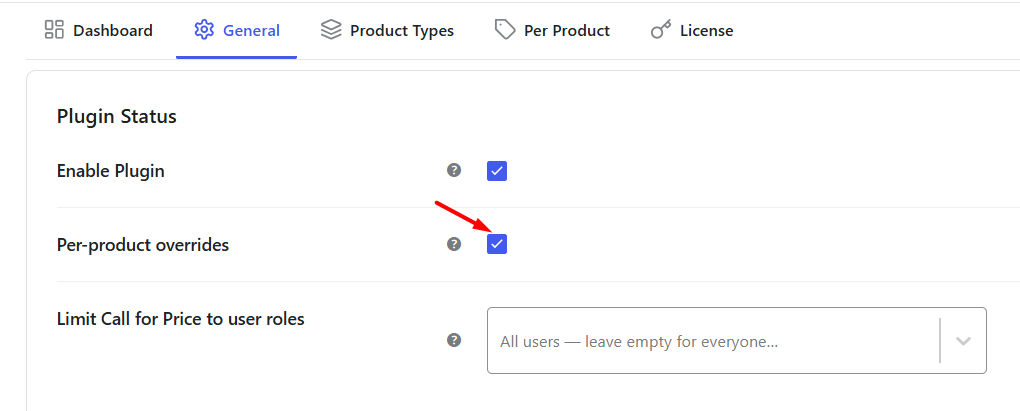
Enabling Per product option
c) Limit Call for Price to User Roles
↑ Back to topUse this option to display the Call for Price functionality only to selected user roles.
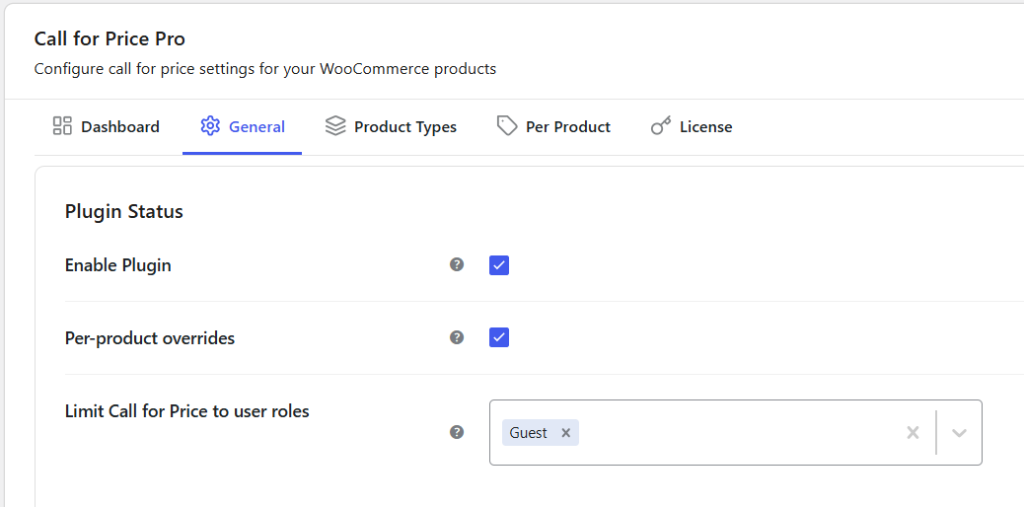
Select one or more user roles from the dropdown. Users assigned to those roles will see the Call for Price label according to your configuration, while all other users will continue to see the product price.
Leaving this field empty applies the plugin settings to all visitors.
Example
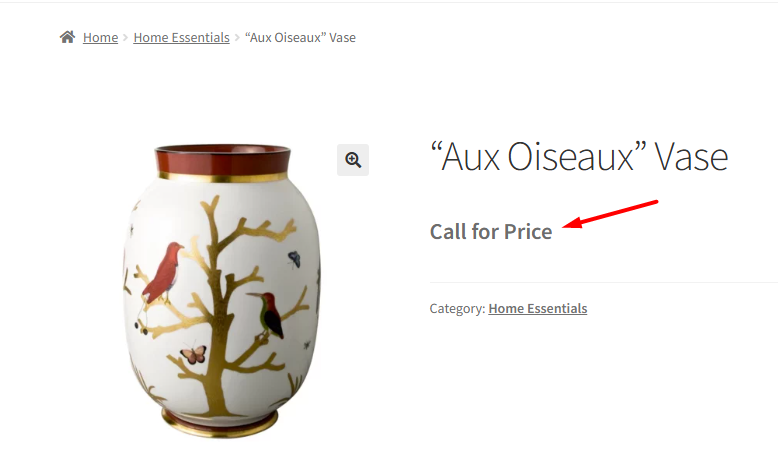
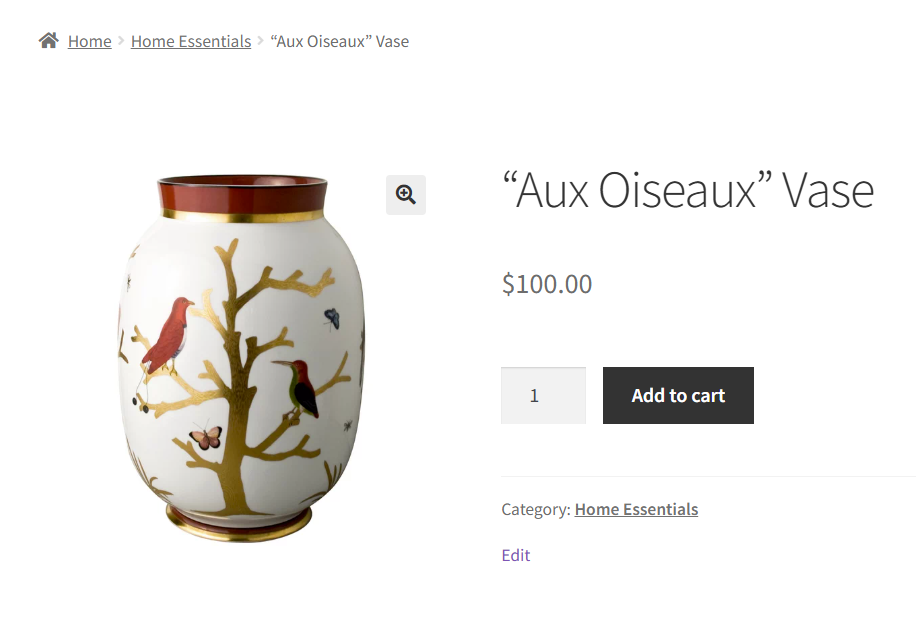
Suppose you want to display Call for Price only to Guest users while allowing logged-in customers to view product prices. Select Guest from the User Roles dropdown and save your changes. Guest visitors will see the Call for Price label as show below.
Whereas logged-in customers will continue to see the product price.
2. Display Options
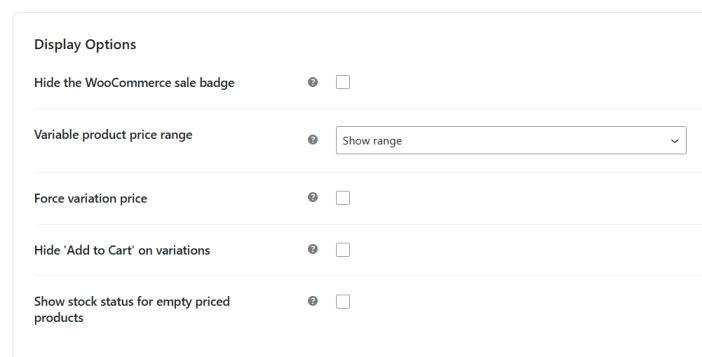
↑ Back to topThe Display Options section lets you control how product prices, stock information, sale badges, and Add to Cart buttons are displayed when the Call for Price functionality is applied.
a) Hide WooCommerce Sale Badge
↑ Back to topEnable this option to hide the default WooCommerce Sale badge for products displaying the Call for Price label.
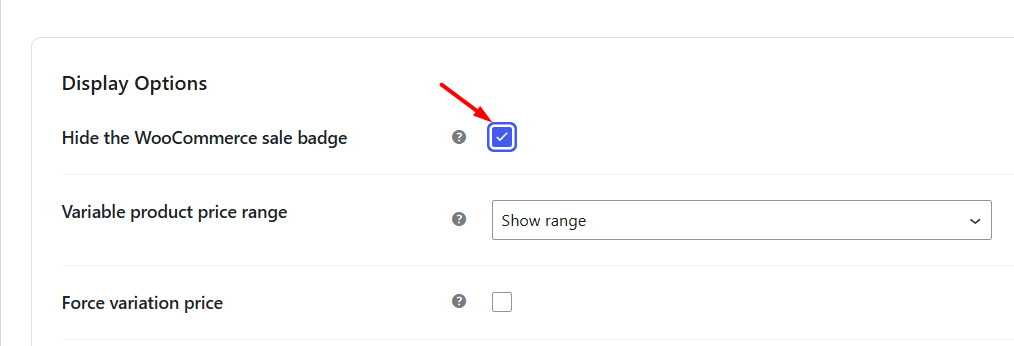
This helps create a cleaner storefront by removing promotional badges from products where customers are expected to contact you for pricing instead of making an immediate purchase.
Example
A custom furniture store displays Request a Quote instead of product prices. Hiding the Sale badge ensures customers focus on requesting a quotation rather than expecting an online discount.
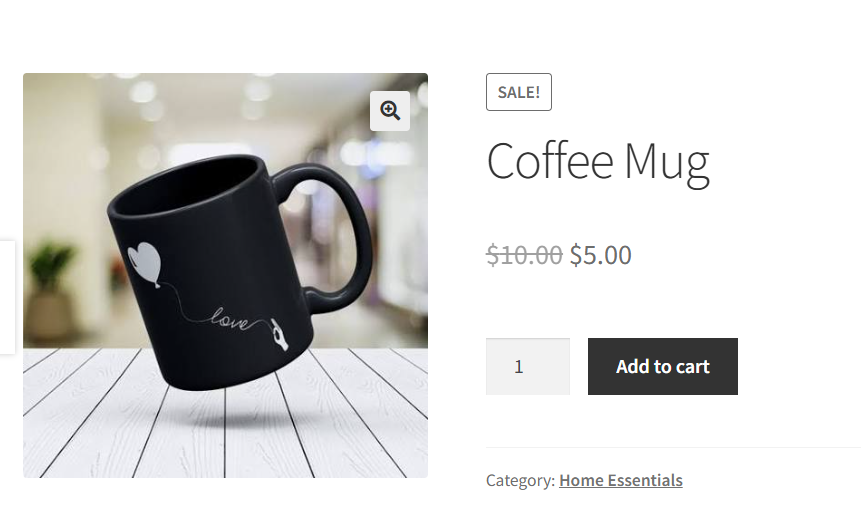
Before enabling this setting, the product displays both the WooCommerce Sale badge and the Call for Price label.
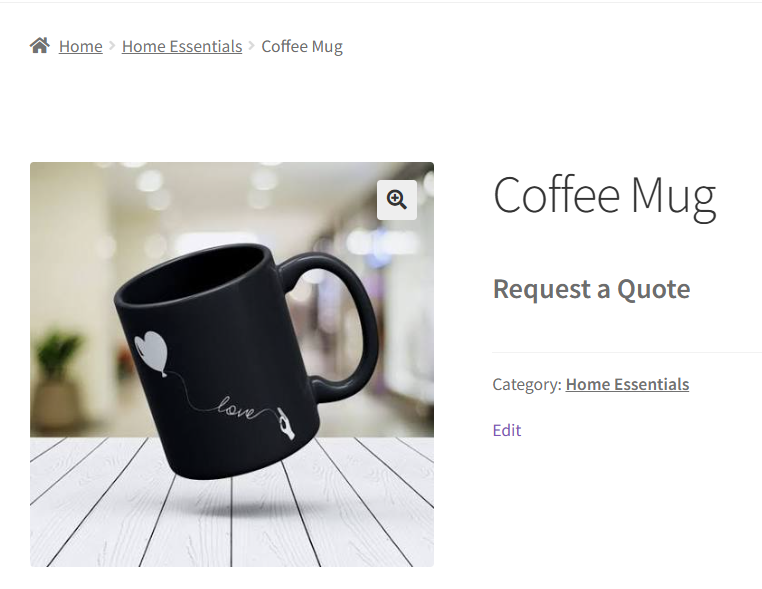
After enabling the setting, the Sale badge is removed while the Request a Quote label continues to be displayed.
b) Variable Product Price Range
↑ Back to topThe Variable Product Price Range setting controls whether the price range of variable products is displayed on the Single Product page.
Choose one of the following options from the dropdown:
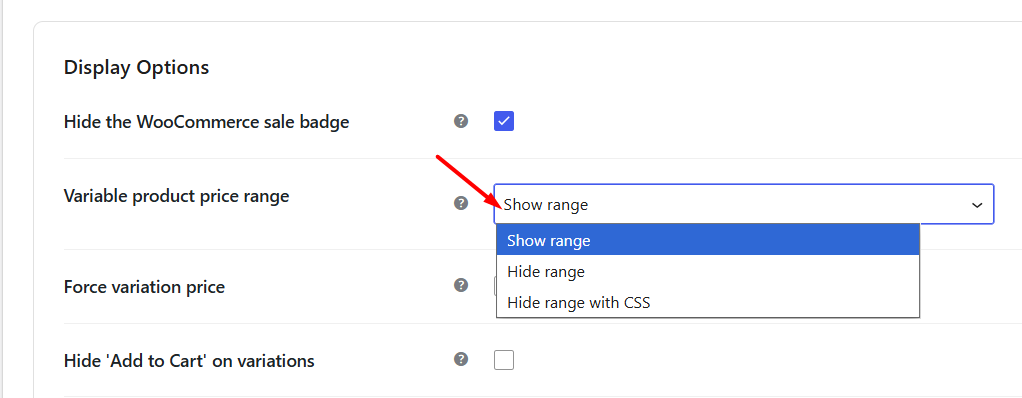
Show Range
↑ Back to topSelect Show Range to to see the starting and ending prices for product variations while still using Call for Price where applicable.
Example
A clothing store may display a price range such as $40 – $65 while using Call for Price only for selected variations.
Hide
↑ Back to topThis option hides the variable product price range from all variable products on the single product page.
This option is useful when you want customers to contact your sales team instead of viewing any pricing information.
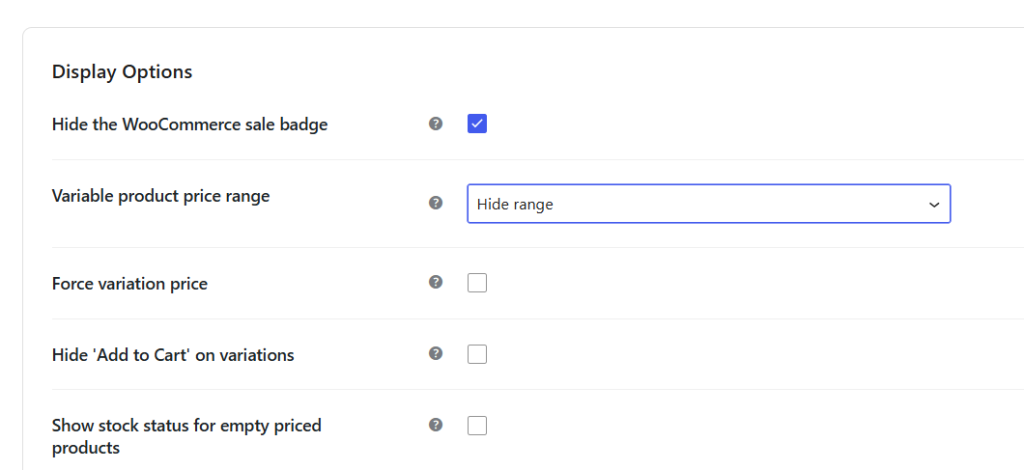
Example
A manufacturer of industrial equipment may hide all variation prices because the final cost depends on customer specifications.
Hide with CSS
↑ Back to topSelect Hide Range with CSS to hide the variable product price range using CSS.
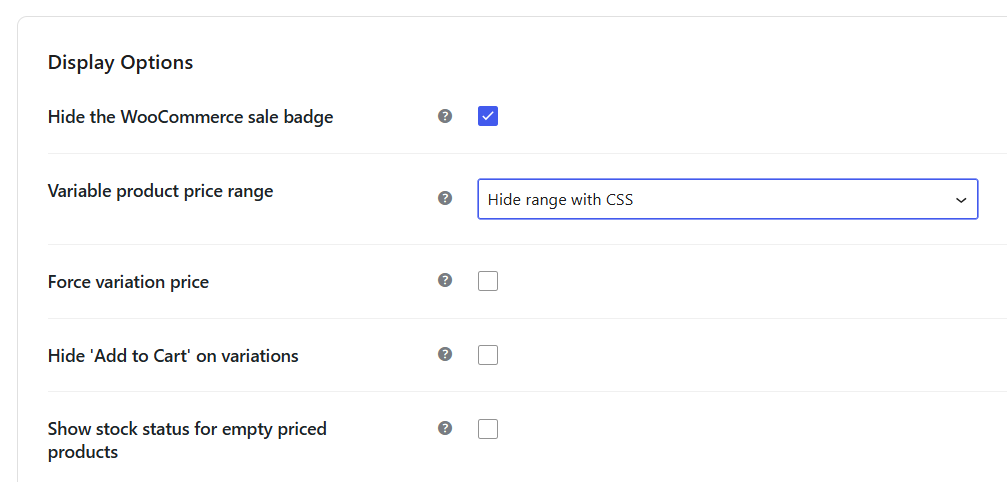
This option is intended for advanced users and developers. In most cases, Hide Range is sufficient for removing the variable product price range. Use Hide Range with CSS only if it is specifically required for compatibility with your theme or customizations.
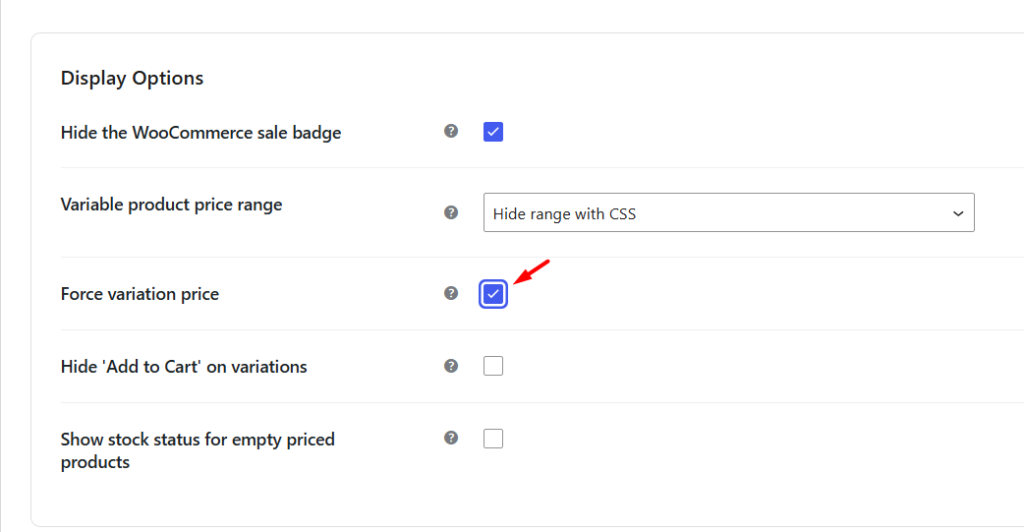
c) Force Variation Price
↑ Back to topEnable Force Variation Price to display the selected variation’s price on the Single Product page, even if it has been hidden by your theme or another customization.
This setting is useful when variation prices do not appear after a customer selects a product option, despite a price being configured for that variation.
Example
Your store uses custom code to hide variation prices globally, but you still want customers to see the price after selecting a specific size or color. Enabling this option overrides that behavior and displays the selected variation’s price.
Before enabling this setting, selecting a variation does not display its price.After enabling Force Variation Price, the selected variation’s price is displayed as expected.
d) Hide “Add to Cart” on Variations
↑ Back to topEnable this option to hide the disabled Add to Cart button for variable product variations that do not have a price.
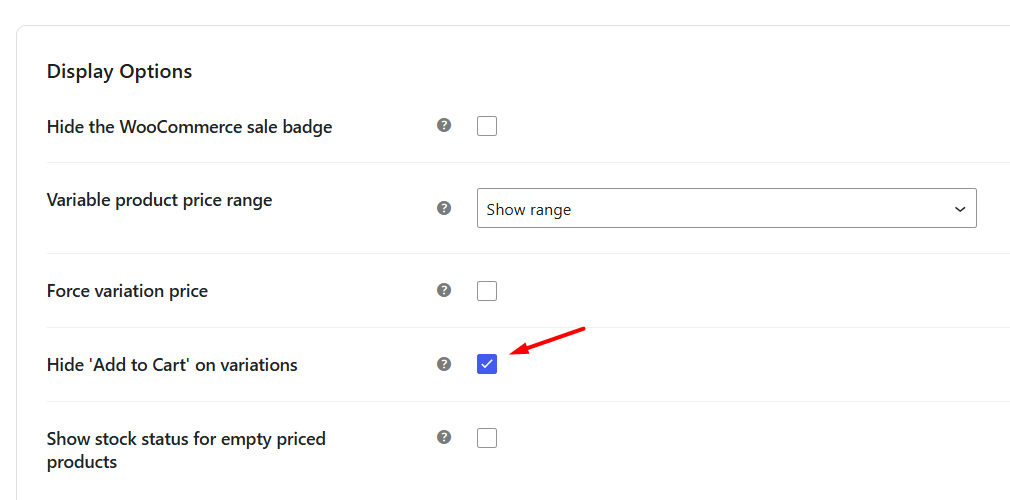
Instead of displaying an inactive button, customers will only see the available Call for Price information, resulting in a cleaner shopping experience.
Example
A supplier offers multiple material options for a product. Some premium materials require a custom quotation and therefore have no price assigned. Hiding the disabled Add to Cart button avoids confusion and encourages customers to contact your sales team.
Before enabling the setting, when a customer selects a variation without a price, a disabled Add to Cart button is displayed on the Single Product page.
After enabling the setting, the disabled Add to Cart button is hidden for variations without a price. Customers will only see the Call for Price label or button, depending on your plugin configuration.
e) Show Stock Status for Empty Priced Products
↑ Back to topEnable this option to display the product’s stock status even when its price is hidden by the Call for Price functionality.
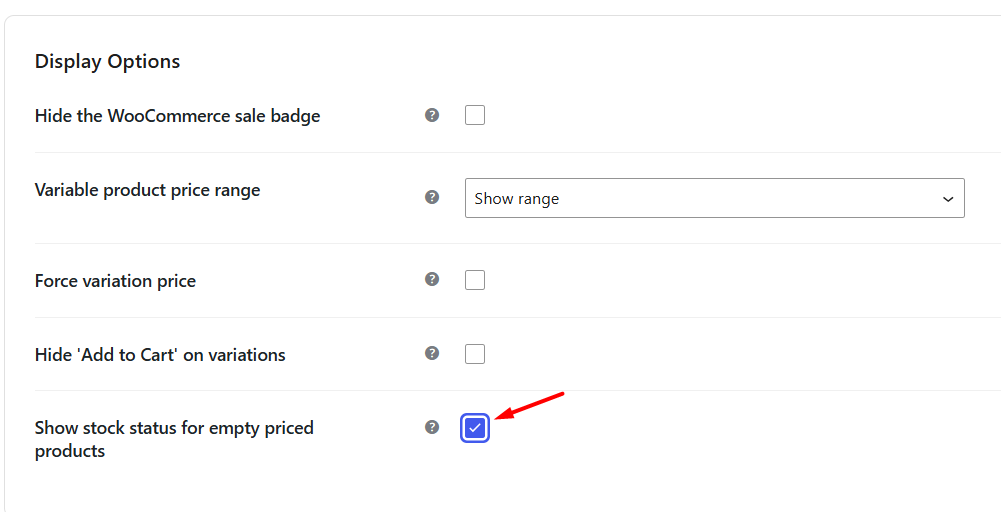
This allows customers to know whether a product is currently available while still encouraging them to request pricing information.
For detailed information about configuring product-specific stock visibility, refer to the Product Wise Call for Price Option documentation.
Example
A business selling made-to-order office furniture may hide product prices while still showing In Stock or Available on Backorder to help customers understand product availability before requesting a quotation.
3. Shop & Category Page Button
↑ Back to topThe Shop & Category Page Button section lets you customize how the Call for Price button appears on your Shop and Category pages. You can change the button text, redirect customers to a custom page, or hide the button altogether based on your store’s requirements.
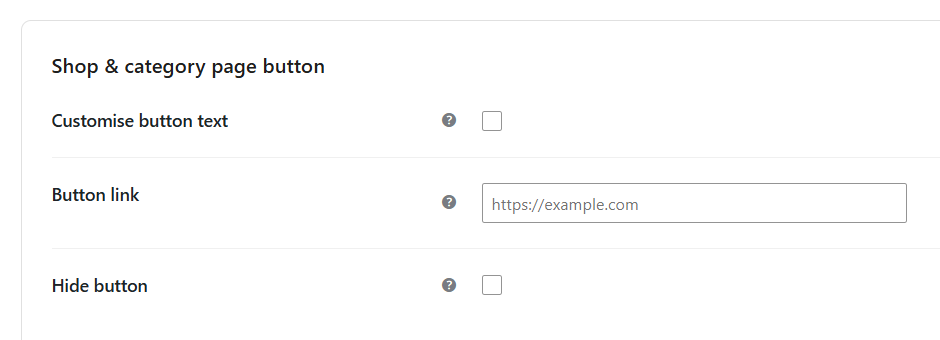
a) Customize Button Text
↑ Back to topEnable this option to replace the default WooCommerce Read More or Add to Cart button with a custom button for products displaying the Enquire Now or any other preferred label. Once enabled, you can specify the button text using the Button Text field.
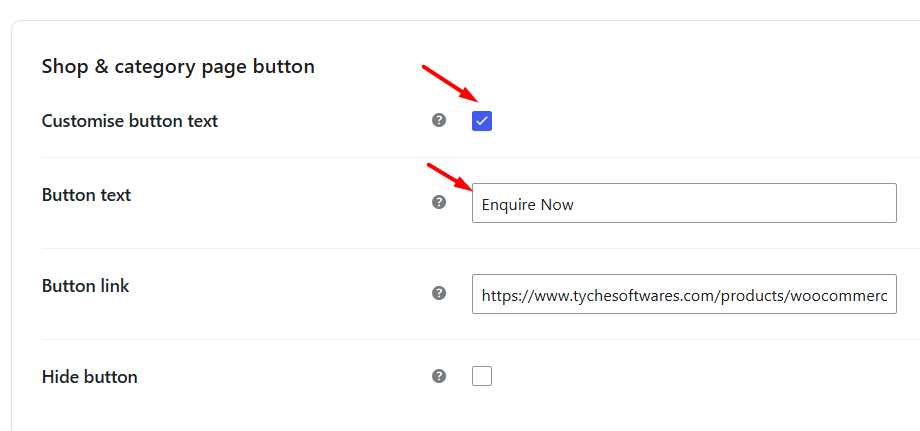
b) Button Text
↑ Back to topUse this field to enter the text that will be displayed on the custom button. You can enter any label that best suits your business, such as Call for Price, Request a Quote, Enquire Now, or Contact Sales.
The custom text is displayed on the Shop and Category pages in place of the default Read More button.
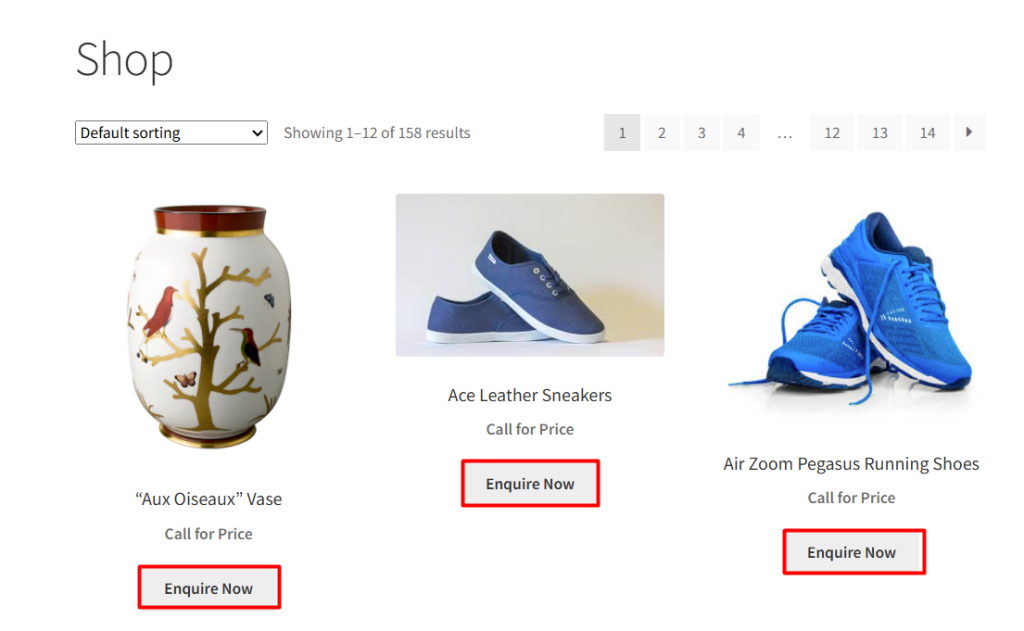
c) Button Link
↑ Back to topUse this option to specify the page customers are redirected to when they click the custom button. You can enter the URL of any page, such as a contact form, quote request page, enquiry form, or product information page.
Enter the required URL in the Button Link field and click Save Changes.
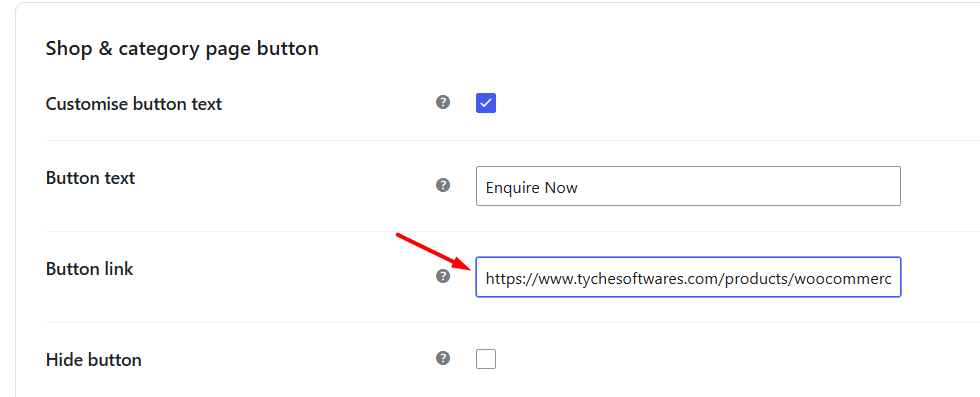
After clicking the custom Call for Price button on the Shop or Category page, customers are redirected to the configured URL.
d) Hide Button
↑ Back to topEnable this option to hide the custom button from the Shop and Category pages.
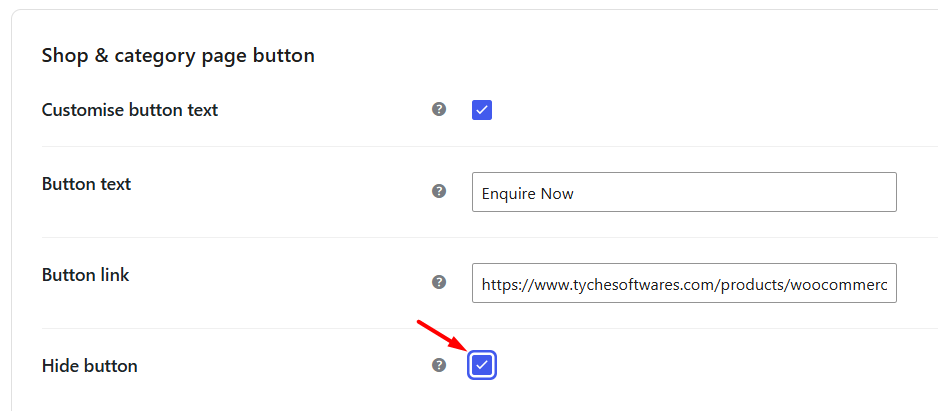
This setting is useful if you only want to replace the product price just with the Call for Price text without displaying a button.
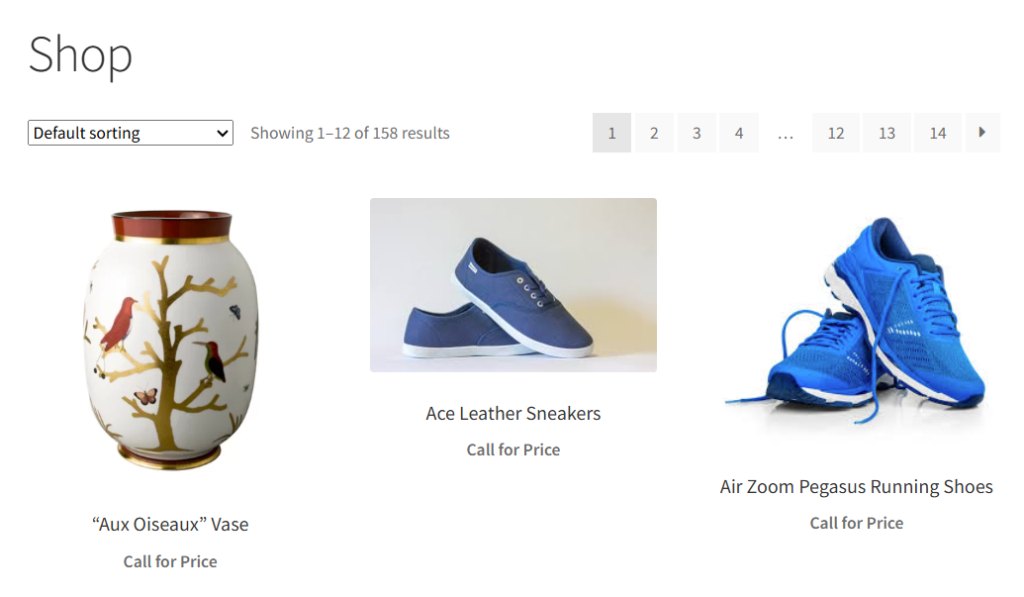
Before enabling this option, the custom Call for Price button is displayed on the Shop and Category pages.
After enabling the option, the button is hidden while the product continues to display the Call for Price label according to your plugin configuration.
4. Auto-apply Call for Price
↑ Back to topThe Auto-apply Call for Price section allows you to automatically replace product prices with the Call for Price label based on specific conditions. Instead of configuring individual products, you can apply the functionality across your store using product status, price, categories, tags, or other criteria.
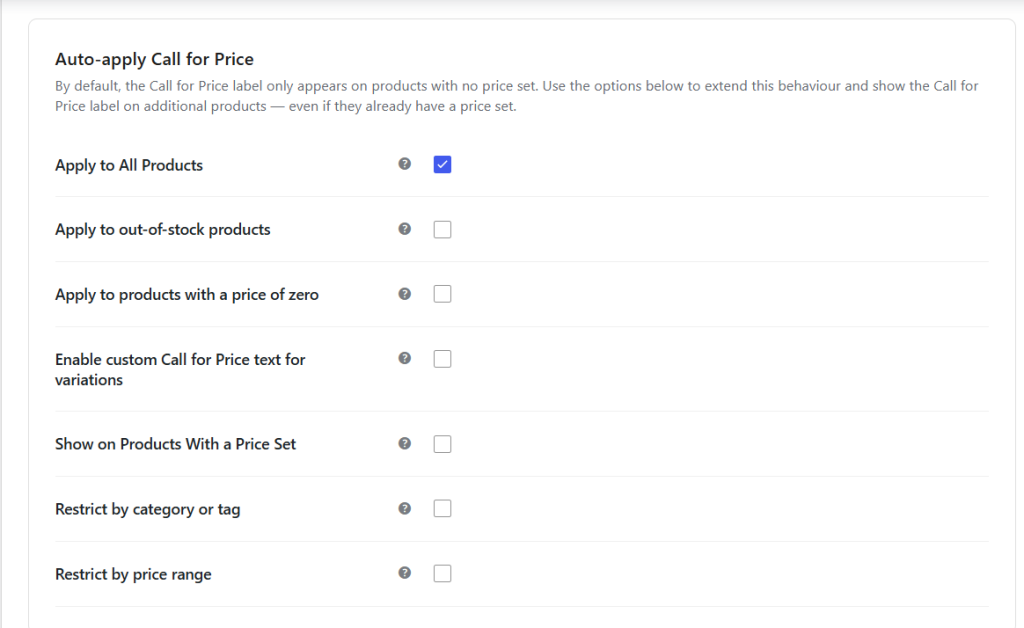
a) Apply to All Products
↑ Back to top
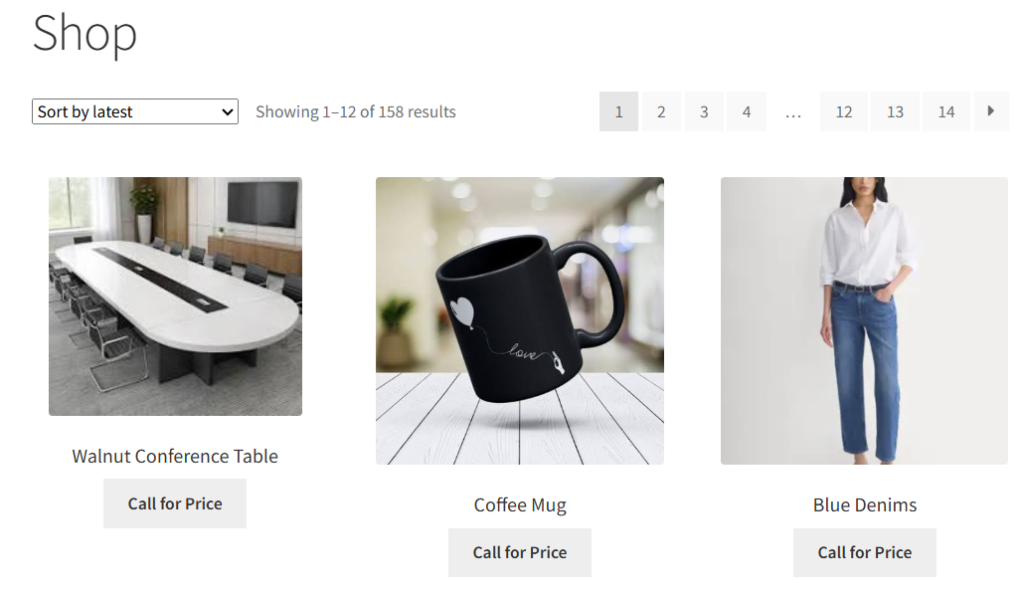
Enable this option to display the Call for Price label for all products, regardless of whether a price has been configured. This means all the product with either prices set or empty will have Call for Price button displayed on the Shop page.
b) Apply to Out-of-stock Products
↑ Back to topEnable this option to automatically display the Call for Price label for products that are currently out of stock.
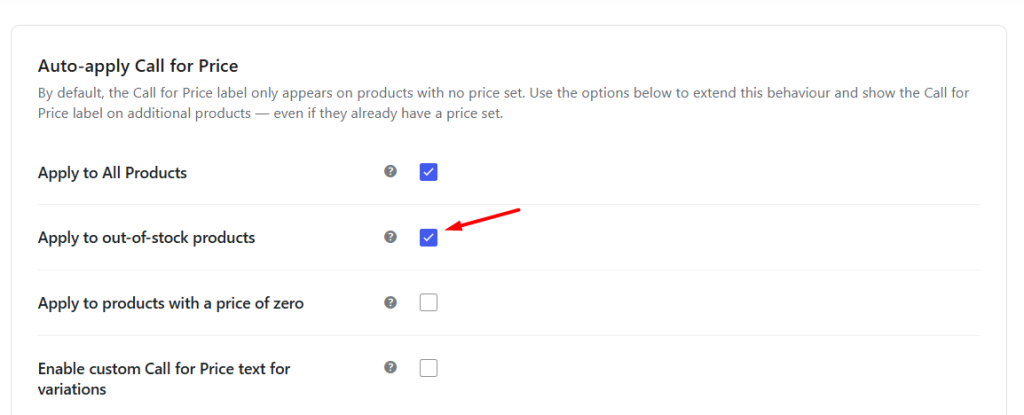
After enabling the option, all out-of-stock products display the Call for Price label while continuing to indicate that the product is unavailable.
c) Apply to Products with a Price of Zero
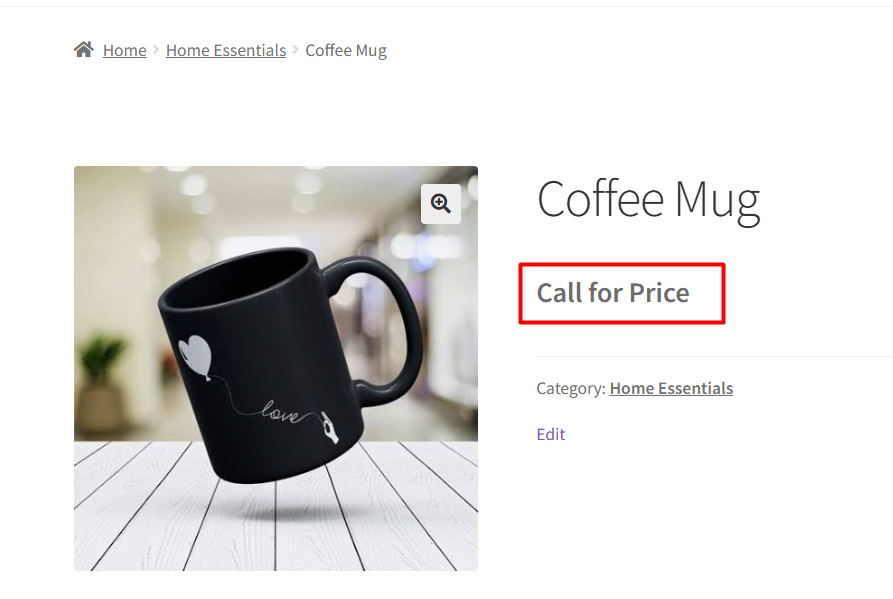
↑ Back to topEnable this option to replace the price with the Call for Price label for products whose price is set to 0.
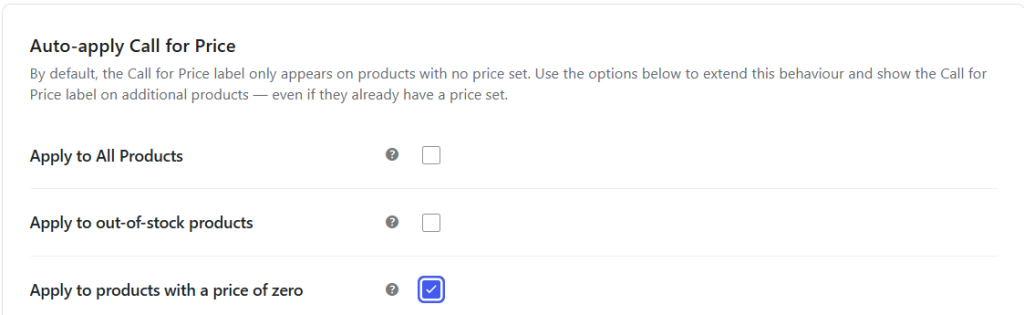
Before enabling this option, products with a price of 0 display 0 as their price.
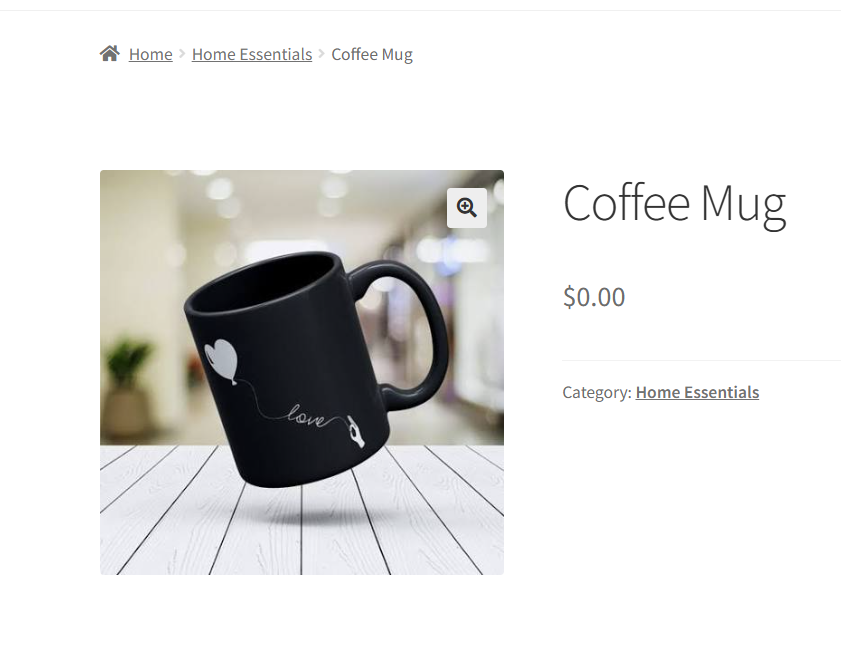
After enabling the option, the price is replaced with the Call for Price label.
d) Enable Custom Call for Price Text for Variations
↑ Back to topOnce enabled, you can configure a custom Call for Price message for individual variations. 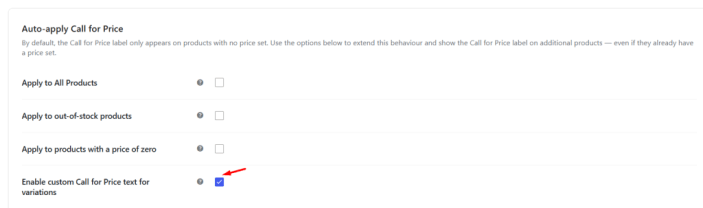
This option adds a Custom Call for Price field for each variation on the Edit Product page.
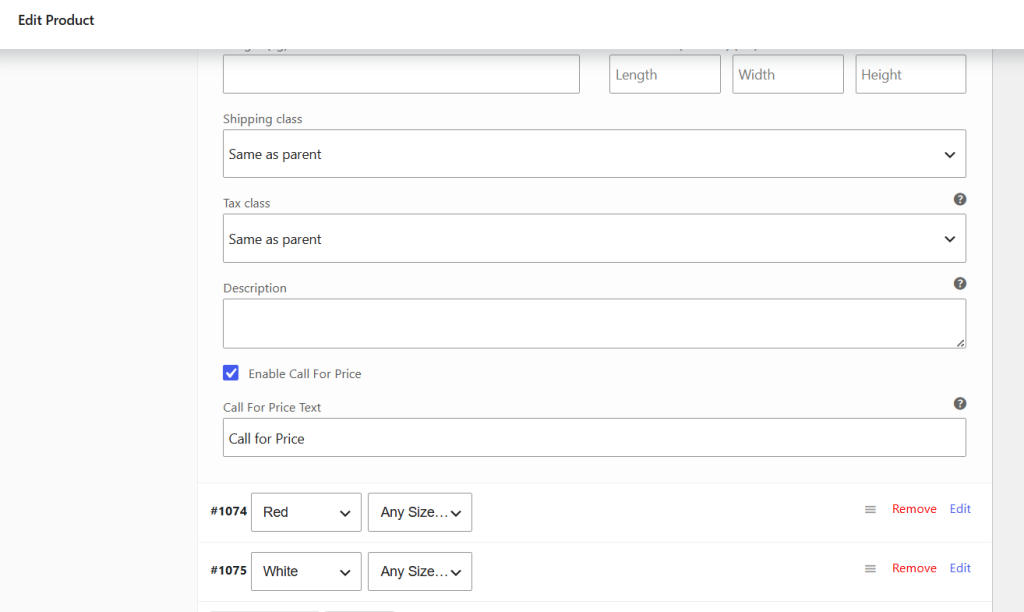
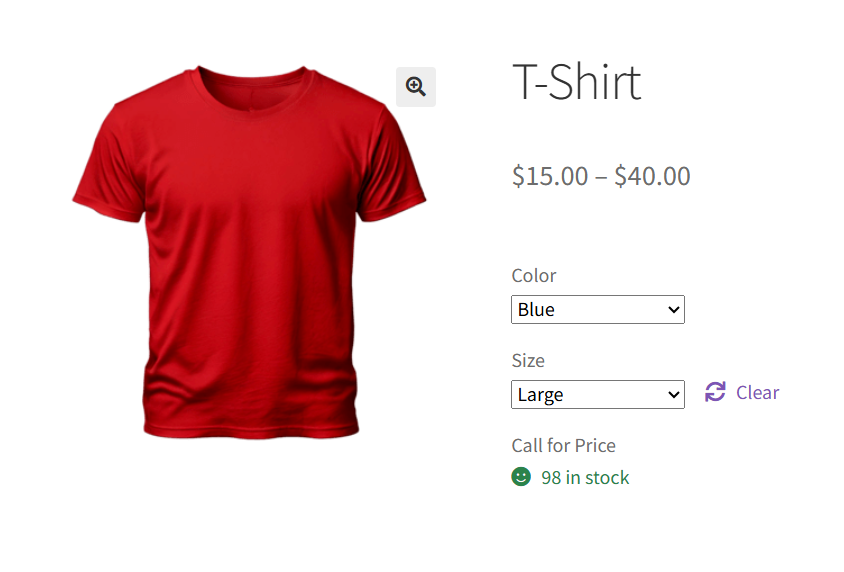
The configured message is displayed on the Single Product page for that variation, regardless of whether the variation has an empty price, a price of 0, or any other price. This allows you to override the default Call for Price label for specific variations without affecting the rest of the product.
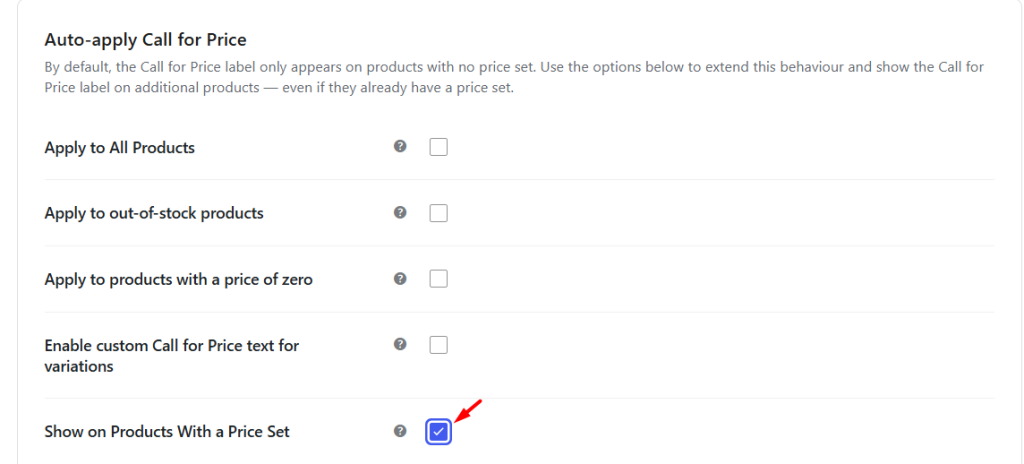
e) Show on Products with a Price Set
↑ Back to topEnable this option to display the Call for Price label for products that already have a price configured.
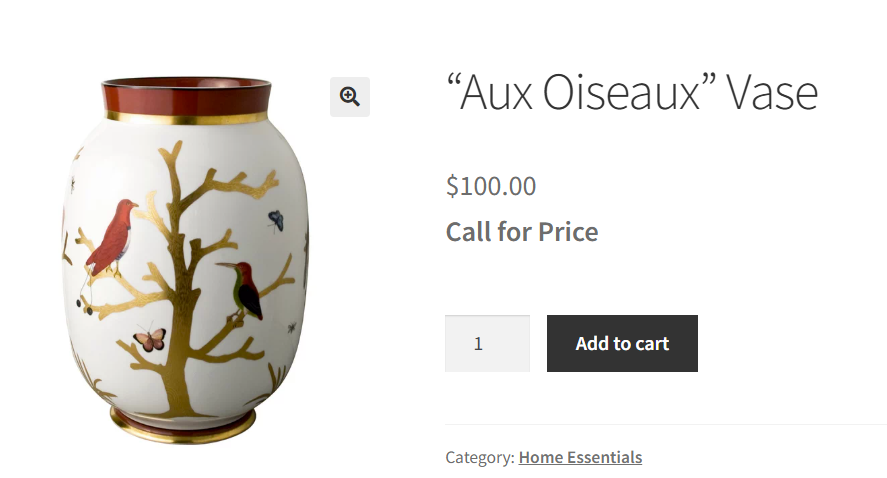
When enabled, the product price continues to be displayed on the Single Product page, and the Call for Price label is shown below it.
f) Restrict by Category or Tag
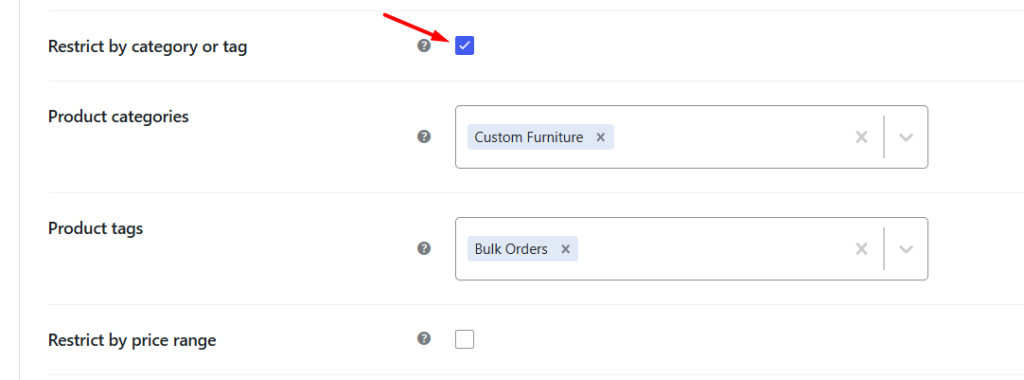
↑ Back to topUse this option to automatically apply the Call for Price functionality only to products that belong to specific product categories, product tags, or a combination of both. This allows you to target selected groups of products instead of applying the settings across your entire catalog.
You can select one or more product categories, one or more product tags, or combine both to create more specific conditions.
Product Categories
↑ Back to topSelect one or more categories from the Product Categories dropdown to apply the Call for Price settings to all products within those categories.
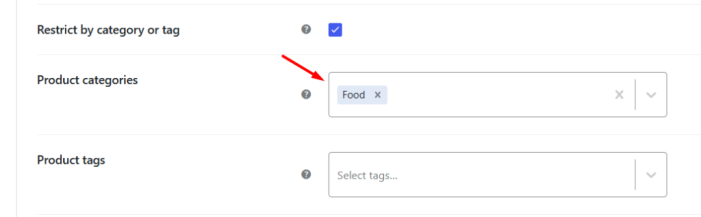
Choose the required product categories and click Save Changes.
Products belonging to the selected categories display the Call for Price label based on your plugin configuration. Products in other categories continue to display their regular prices and purchasing options.
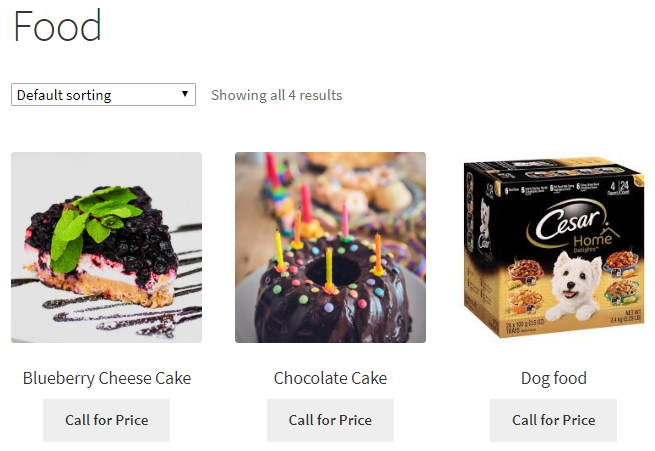
Product Tags
↑ Back to topSelect one or more product tags from the Product Tags dropdown to apply the Call for Price settings only to products with those tags.
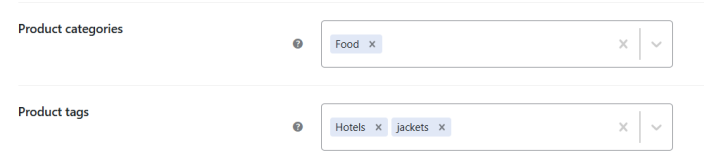
Choose the required product tags and click Save Changes.
Products assigned to the selected tags display the Call for Price label, while products without those tags continue to display their regular prices.

g) Restrict by Price Range
↑ Back to topUse this option to automatically apply the Call for Price functionality to products whose prices fall within a specified range.
Enter the minimum and maximum product prices to define the range. Any product priced within the selected range will display the Call for Price label according to your plugin configuration, while products outside the range will continue to display their regular prices.
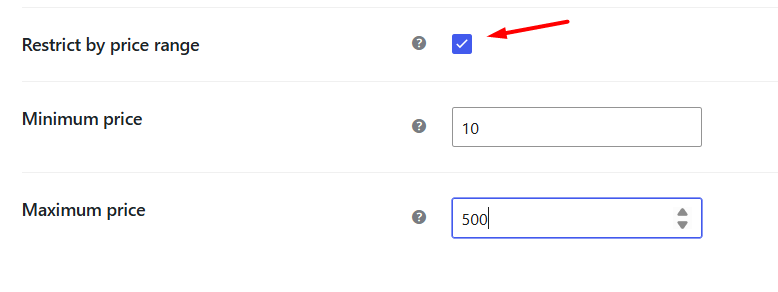
Enter the required values in the Minimum Price and Maximum Price fields, then click Save Changes.
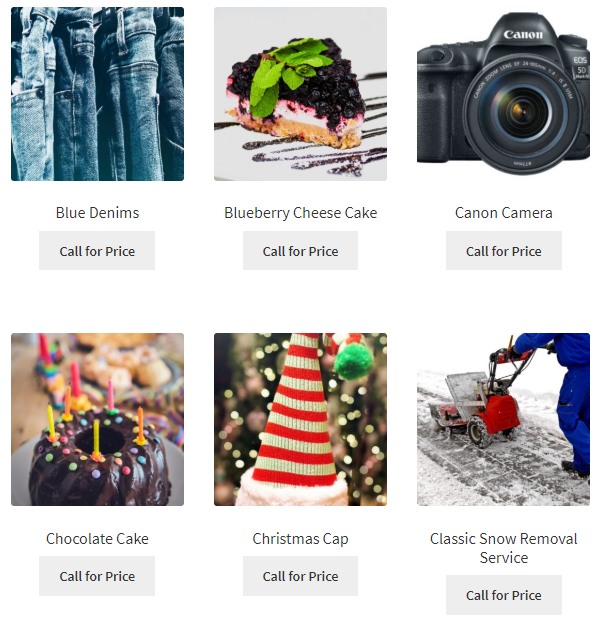
The products that fit in the price range of $10 to $500, will have Call for Price button on the Shop page.
5. Exclusions
↑ Back to topThe Exclusions section allows you to exclude specific products or product categories from the Call for Price functionality. This is useful when you want the plugin settings to apply across your store while allowing selected products or categories to continue displaying their regular prices and purchasing options.
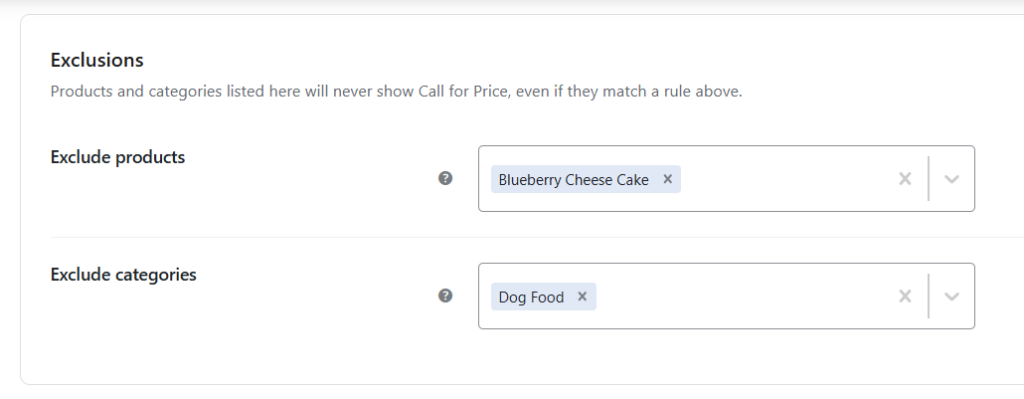
a) Exclude Products
↑ Back to topThis option allows you to exclude one or more products from the Call for Price functionality.
Simply select the products that you do not want to display the Call for Price label. The selected products will continue to display their regular prices and Add to Cart button, while the plugin settings will continue to apply to all other eligible products.
b) Exclude Categories
↑ Back to topThis option allows you to exclude one or more product categories from the Call for Price functionality.
All products belonging to the selected categories will continue to display their regular prices and purchasing options, while products in other categories will continue to follow your configured Call for Price settings.
6. Reset Usage Tracking
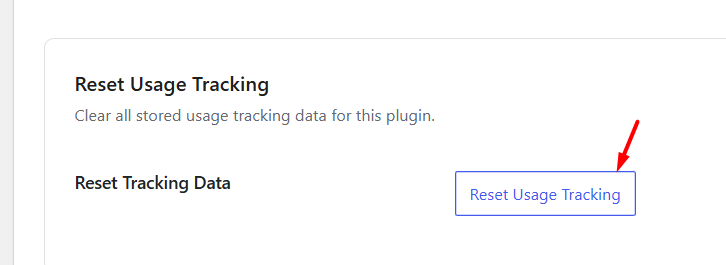
↑ Back to topThe Reset Usage Tracking section allows you to reset your usage tracking preference. Once reset, the plugin will display the usage tracking consent prompt again, allowing you to choose whether you want to share anonymous usage data.
Resetting the usage tracking preference does not reset your plugin settings or affect your store configuration.
Reset Usage Tracking
↑ Back to topClick this button if you want to review or update your usage tracking preference.
6. Reset to Defaults
↑ Back to topAs the name suggests, this option will allow you to reset all the settings to its default values.
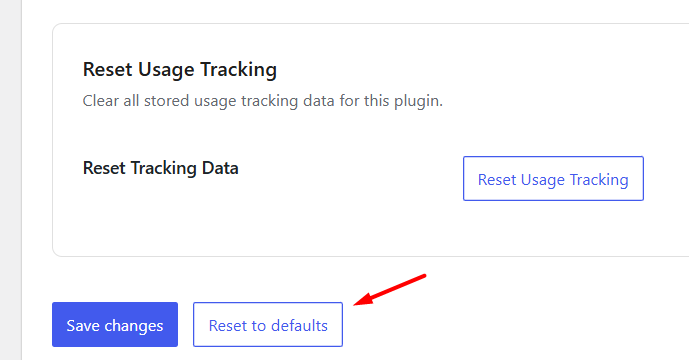
This setting is useful when you have configured multiple options and want to restore the plugin to its default configuration. Once the settings are reset, you can configure the plugin again as required.
Note: This option resets only the plugin settings. It does not modify your WooCommerce products or remove any product data.
When you use combination of general settings, you require to go back to the default values at some point. That time Reset section setting is useful. This can also be used when you want to use the Simple, Variable, Grouped and External product settings instead of general settings.
Additional Settings
↑ Back to top- Product Wise Call for Price Option
- Contact Method for Call for Price
- Call For Price Product Settings
FAQ’s
↑ Back to topView all FAQ’s from here.
Questions & Support
↑ Back to topHave a question before you buy? Please fill out this pre-sales form.

