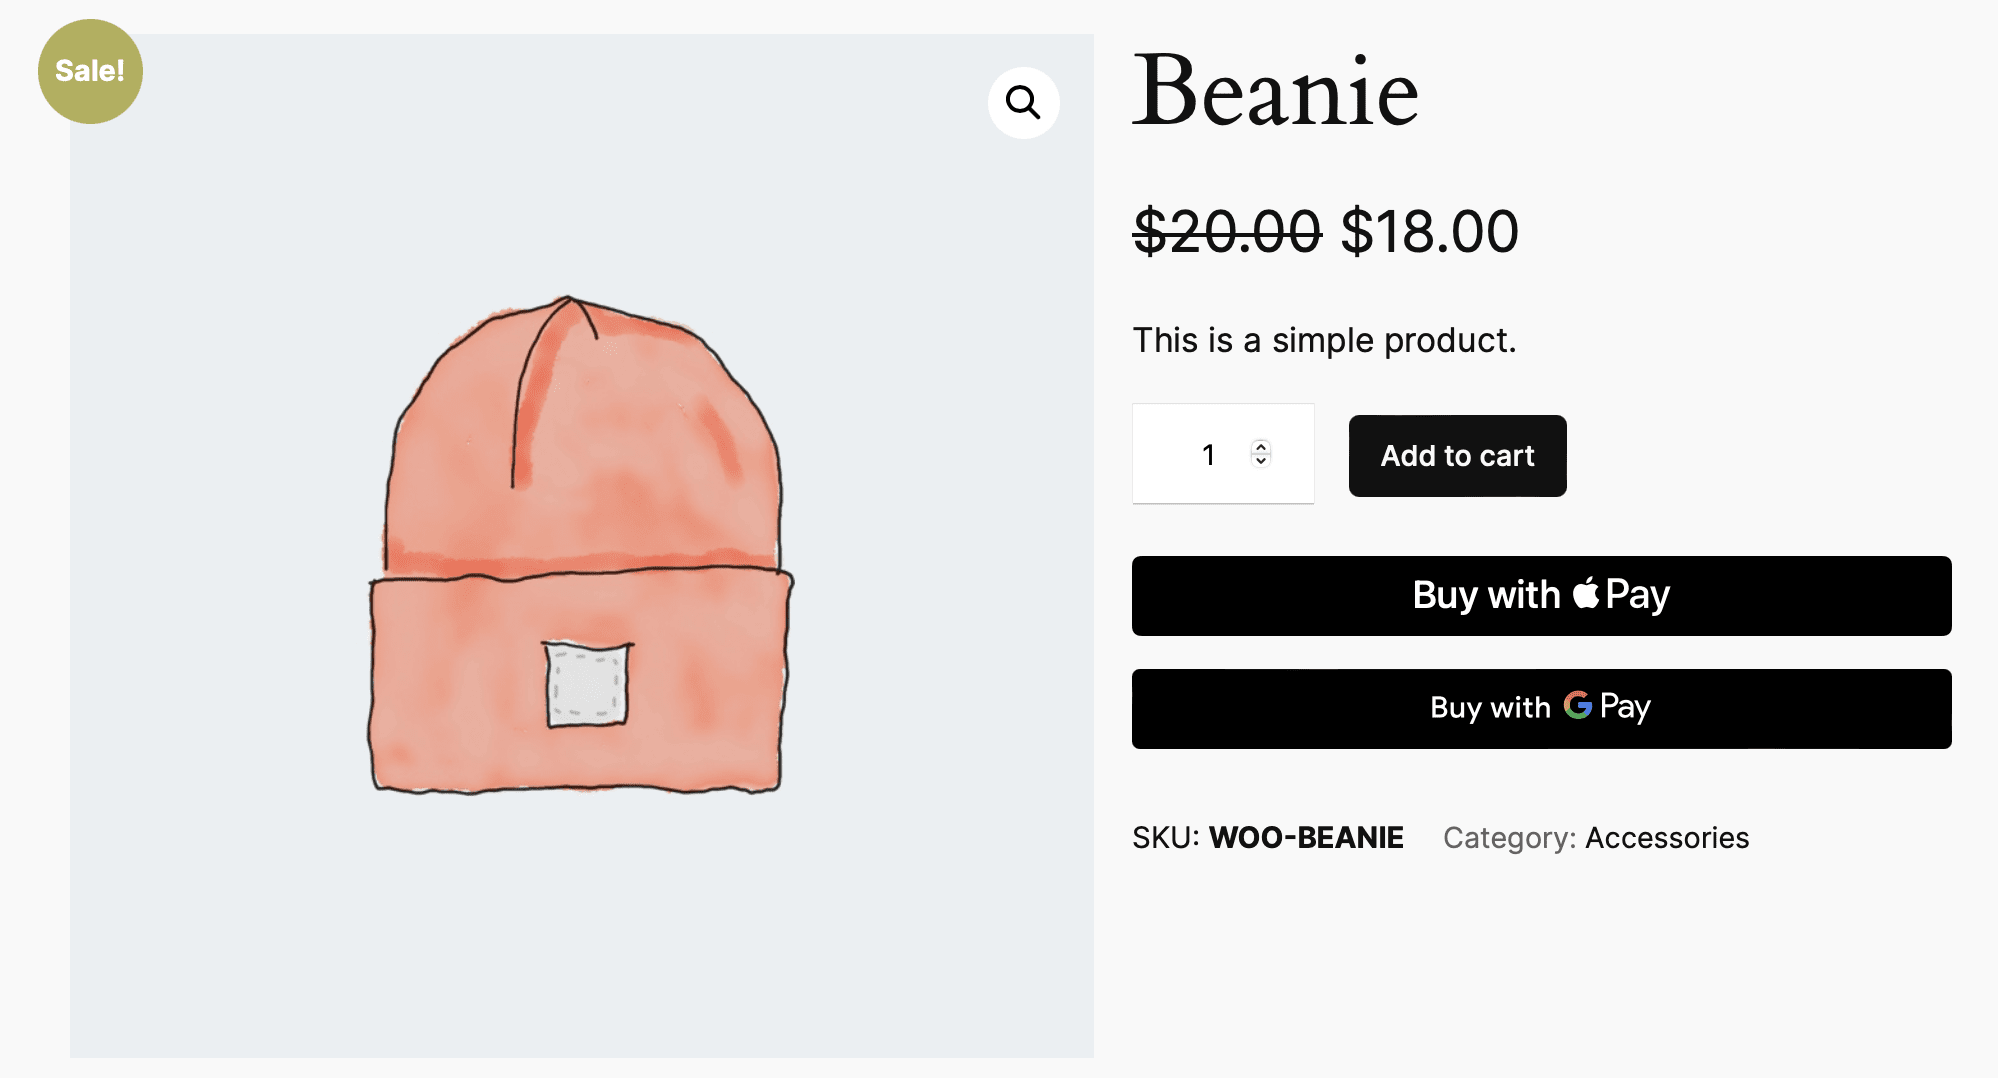
You can accept payments in your store using Apple Pay and Google Pay.
This feature is available if your store is in the United Kingdom, the United States, Canada, Ireland, France, Spain, or Australia and your currency is either USD, GBP, CAD, EUR, or AUD. Once you turn on digital wallets, your customers will see Apple Pay and Google Pay buttons on the product, cart, and checkout pages of your store, depending on what’s available to them.
Important: Digital wallet buttons will only appear if you have a compatible device and payment method in one of the supported regions.
Digital Wallet Settings
When digital wallets are enabled for your store, you’ll find these options in your gateway settings:

- Button Type: Allows you to change the text on the Apple Pay button.
- Apple/Google Pay Button Color: It lets you choose the color of the Apple Pay and Google Pay buttons separately.
- Hide Digital Wallet Buttons: This option lets you choose not to display the Apple Pay™ or Google Pay buttons.
Apple Pay button color options:
- Black
- White
- White with outline
Google Pay button color options:
- Black
- White

When customizing button colors or using custom CSS, make sure to follow Apple Pay and Google Pay brand guidelines.
Setting Up Apple Pay
↑ Back to topGetting Started with Apple Pay
For Apple Pay to work, your customers need a supported payment method from a bank or card provider listed on the Apple Pay support page and a compatible Apple device. You can use the Apple Pay Demo page on Apple.com to check if Apple Pay is available for you.
To start accepting payments with Apple Pay, a domain association file is required to be hosted on your site. The WooCommerce Square extension automatically creates this file when Digital Wallets is enabled.
Checking Your Website Verification
To ensure everything is set up correctly:
- Enable Square logging by going to WooCommerce > Settings > Square.
- Visit your Square settings or Square payment method settings. This step helps verify your site with Apple Pay.
- Check your most recent Square log under WooCommerce > Status > Logs to see if Apple Pay has been verified.

If you find an error, look for “Unable to verify domain” in your log for details. If you’ve already verified your site before turning on logging and don’t see any related logs, check again in a few hours.
Setting Up Google Pay
↑ Back to topFor Google Pay, the button appears when there’s a saved payment method in the browser or device being used. To accept Google Pay:
- Make sure digital wallets are enabled in your Square settings (WooCommerce > Settings > Payments > Square).
- Android users must have the Google Pay app installed.
- On a computer, you need a supported payment method linked to your Google account. You can manage your payment methods at https://pay.google.com. For more help, visit Google Pay Help.
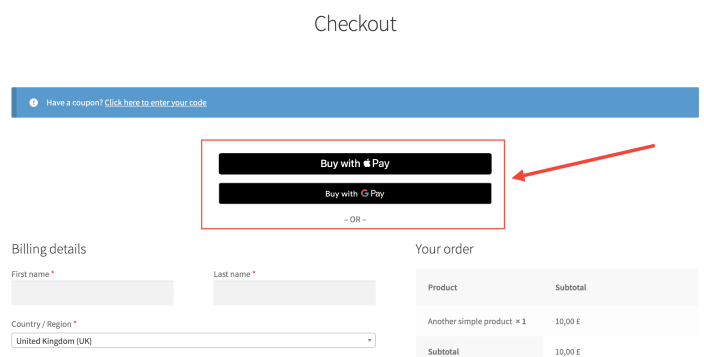
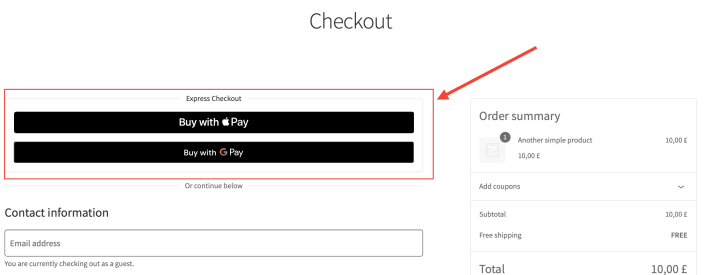
Customer experience
↑ Back to topWhen digital wallets are enabled, here’s what it looks like on the Checkout page using the Classic Checkout and block Checkout:
Troubleshooting and Frequently Asked Questions
↑ Back to topCheck our Troubleshooting and FAQs sections for more information on Digital Wallets.