Advanced Product Sorter allows your WooCommerce store to effortlessly customize the display order of your products.
Installation
↑ Back to topTo start using a product from WooCommerce.com, you can use the “Add to store” functionality on the order confirmation page or the My subscriptions section in your account.
- Navigate to My subscriptions.
- Find the Add to store button next to the product you’re planning to install.
- Follow the instructions on the screen, and the product will be automatically added to your store.
Alternative options and more information at:
Managing WooCommerce.com subscriptions.

Setup and Configuration
↑ Back to topGetting started
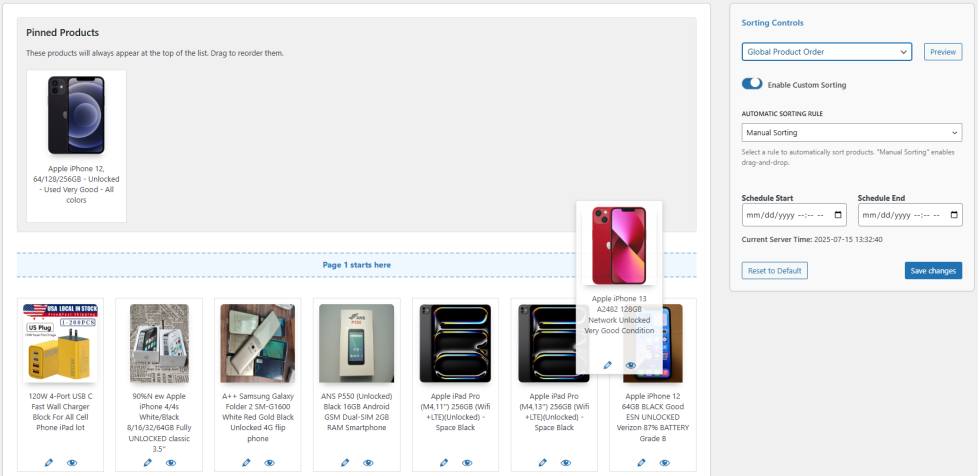
↑ Back to topTo set up your store with Advanced Product Sorter for WooCommerce:
- Go to: WooCommerce > Product Sorter .
- Use the “Sorting Controls” dropdown at the top of the sidebar to choose what you want to sort.
- After selecting a term, a toggle switch will appear. Make sure “Enable Custom Sorting” is turned on.
- You can now drag and drop products in the main area to change their order.
- Click the “Save changes” button in the sidebar. Your new order is now live!
Advanced configuration
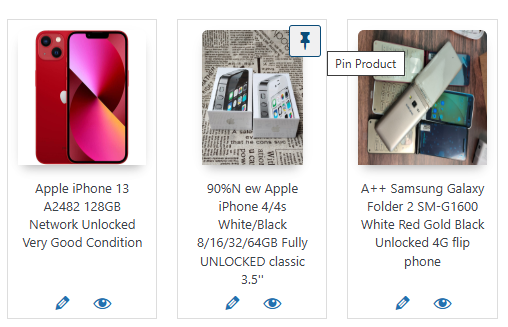
↑ Back to top1. Pinned Products
↑ Back to topPinned products always appear at the top of the list, regardless of other sorting rules. This is perfect for best-sellers or promotional items.
- To pin a product, hover over it in the main list and click the Pin icon (a thumbtack).
- The product will move to the “Pinned Products” section at the top.
- You can drag and drop products within the Pinned Products section to reorder them.
- To unpin, simply click the “Unpin” button on a pinned product.
2. Automatic Sorting Rules
↑ Back to topInstead of manual sorting, you can apply automatic rules. In the sidebar, under “Automatic Sorting Rule”, you can choose to sort by:
- Product Name (Asc/Desc)
- Price (Asc/Desc)
- Date Added (Asc/Desc)
- Total Sales (Popularity)
- Average Rating
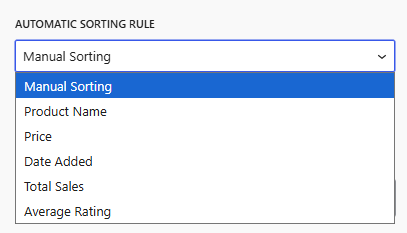
Note: When an automatic rule is active, manual drag-and-drop is disabled, but you can still pin and unpin products.
3. Scheduling
↑ Back to topThe scheduling feature allows you to apply a specific sort order for a limited time.
- Schedule Start: Select a date and time for your custom sorting to become active.
- Schedule End: Select a date and time for the sorting to revert to the WooCommerce default.
- The Current Server Time is displayed to help you set the schedule accurately.
- Leave fields blank to have no start or end limit.
Usage
↑ Back to topThe sorting order you define in the Product Sorter is automatically applied to your public-facing shop and category pages.
When a customer visits a page with a custom sort order, they will see the products arranged exactly as you specified.
FAQs
↑ Back to topHelp customers by answering commonly asked questions.
What happens if I don't set a custom order for a category?
If a category does not have its own specific rule, it will use the rules you’ve set for “Default Sorting”. If “Default Sorting” is also not configured, it will use the standard WooCommerce sorting.
How do I reset the sorting for a category?
Select the category, and in the sidebar, click the “Reset to Default” button. This will remove all manual sorting, pinned products, and settings for that specific category.
Does this work with product variations?
The plugin sorts the main variable product. It does not sort individual variations within a product page.