Improve the WooCommerce user registration experience for customers by displaying custom fields to customers based on conditions.
Installation
↑ Back to top- Download the WooCommerce registration fields plugin and have your .zip file
- At the WordPress admin panel, go to the Plugins section and click ‘Add New’ to upload and install the plugin you just downloaded from WooCommerce.
- Upload the .zip file to proceed with the installation.
- Wait until the plugin installs. After successful installation, activate the plugin and move on to configuration settings.
Configuration
↑ Back to topTo configure the extension, go to WooCommerce > Settings within the WordPress admin panel and click on the Registration Fields tab. You will find the following tabs: General Settings, Custom Fields, Default Fields, Manage Roles, New User Settings, Email Settings, Configuration.
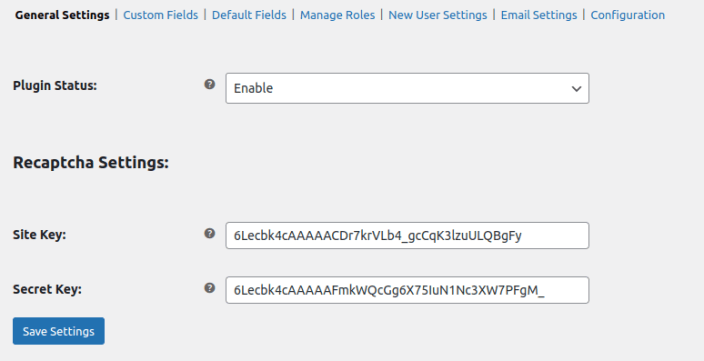
General Settings
↑ Back to topPlugin Status: Option to enable or disable the plugin.
ReCaptcha Settings
- Site Key: Insert site key
- Secret Key: Insert the provided secret key
Custom Fields
↑ Back to topIn this tab, you can add, edit, and manage custom user registration fields for WooCommerce. It also lets you organize field order through sorting and supports 18 different field types. Additionally, you can apply conditional logic to show or hide fields based on user input.
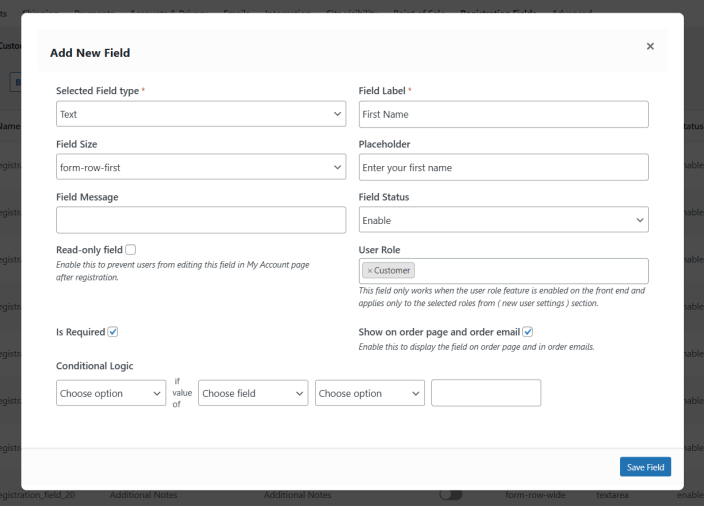
Click the Add Field button to create a new field. A modal will appear with the following options:
- Selected Field Type: Choose the type of field you want to add, such as text, checkbox, select box, and more.
- Field Label: Enter the label that will be displayed to the customer on the registration form.
- Field Size: Set the width of the field on the form, such as full-width or half-width.
- Placeholder: Add placeholder text to guide customers on what to enter in the field.
- Field Message: Enter a helper message to provide additional context below the field.
- Field Status: Enable or disable the field from displaying on the registration form.
- Read-Only Field: Check this option to prevent customers from editing the field after registration in the My Account page.
- User Role: Restrict the field to specific user roles, so it only appears for selected roles on the registration form.
- Is Required: Check this option to make the field mandatory before the form can be submitted.
- Show on Order Page and Order Email: Enable this to display the field’s data on the admin order page and in order emails.
- Conditional Logic: Set conditions to show or hide the field based on the value of another field.
Once configured, click Save Field to add it to your registration form.
Default Fields
This tab comprises default fields by WooCommerce. You can edit and manage the sorting of the fields with the drag and drop feature.

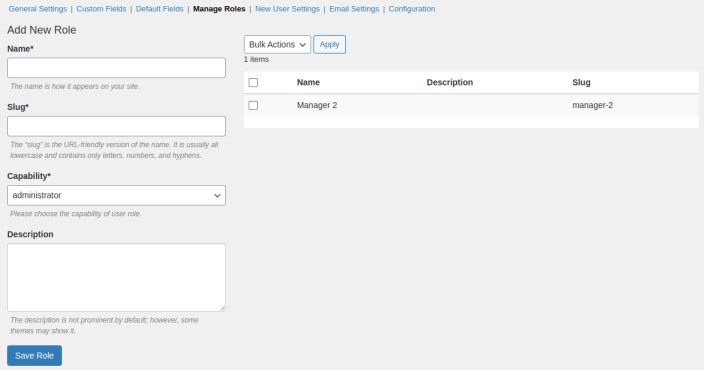
Manage Roles
It allows you to add a new role by using your store capabilities or delete the existing one.
New User Settings
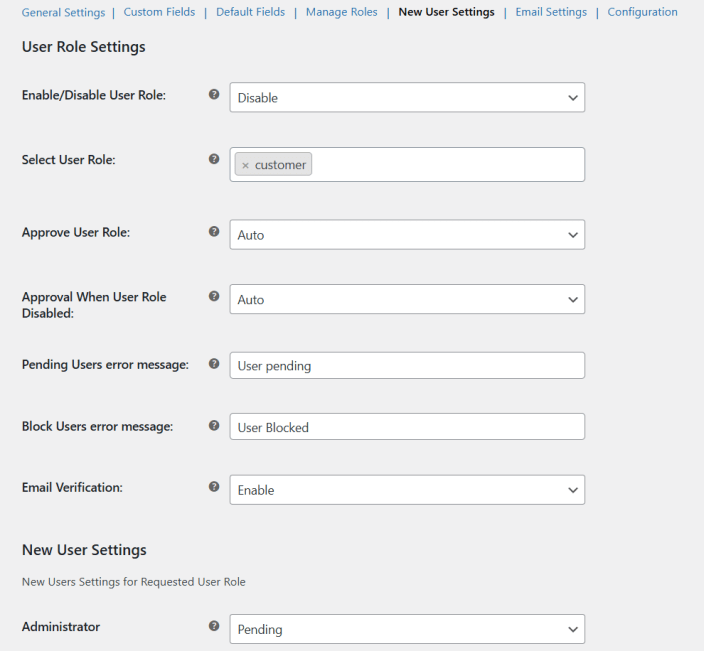
↑ Back to topThis tab lets you configure user role settings and approval behavior for newly registered customers on your WooCommerce store.
User Role Settings
- Enable/Disable User Role: Enable or disable the user role selection on the registration form.
- Select User Role: Choose which user roles will be available for customers to select during registration.
- Approve User Role: Set the approval method for user roles to either Auto or Manual.
- Approval When User Role Disabled: Define the default approval method when the user role feature is disabled.
- Pending Users Error Message: Enter the message displayed to users whose accounts are still pending approval.
- Block Users Error Message: Enter the message displayed to users whose accounts have been blocked.
- Email Verification: Enable or disable OTP-based email verification during registration to ensure only valid email addresses are accepted.
New User Settings
This section lets you define the default approval status for each user role when a new user registers and requests that role. You can set each role to Auto-approved or Pending, giving you full control over who gets access and when.
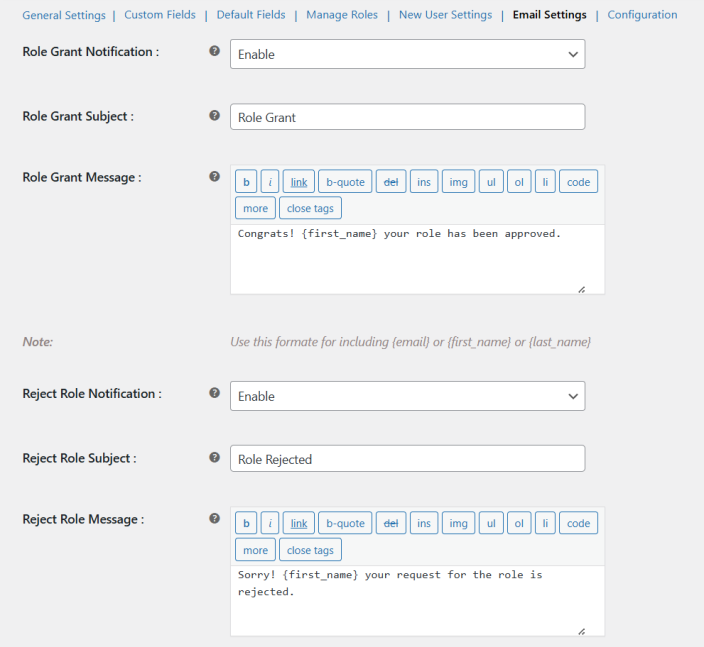
Email Settings
This functionality enables you to set email notifications for Role Grant, Reject Role, Approve User, Block User, and Limited Access. It also allows you to customize the subject of the email and the email text.
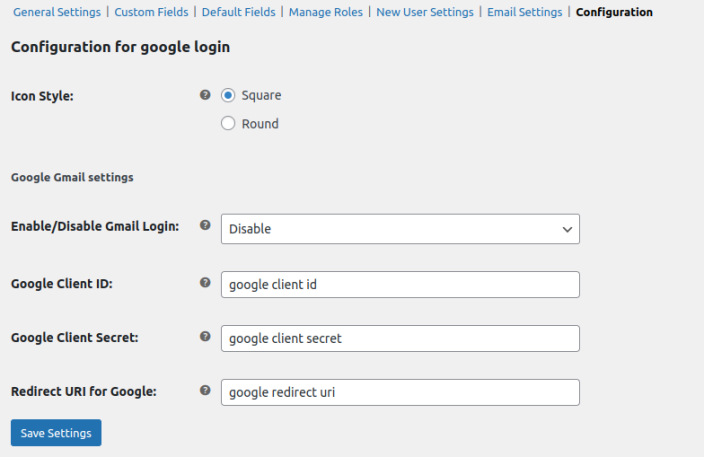
Configurations
- Icon Style: Set the icon style for the social icon. Choose from square or round.
Google Gmail Settings:
Redirect URI for Google: Add Redirect URI for Google.
Enable / Disable Gmail Login: Enable Disable Gmail login.
Google Client ID: Add Google Client ID.
Google Client Secret: Add Secret Key