Custom Orders for WooCommerce transforms your WooCommerce store into a powerful made-to-order business platform. It enables customers to submit detailed custom product requests, facilitates communication through built-in messaging, and allows you to set custom pricing with secure payment links.
Installation
↑ Back to topTo start using a product from WooCommerce.com, you can use the “Add to store” functionality on the order confirmation page or the My subscriptions section in your account.
- Navigate to My subscriptions.
- Find the Add to store button next to the product you’re planning to install.
- Follow the instructions on the screen, and the product will be automatically added to your store.
Alternative options and more information at:
Managing WooCommerce.com subscriptions.

Setup and Configuration
↑ Back to top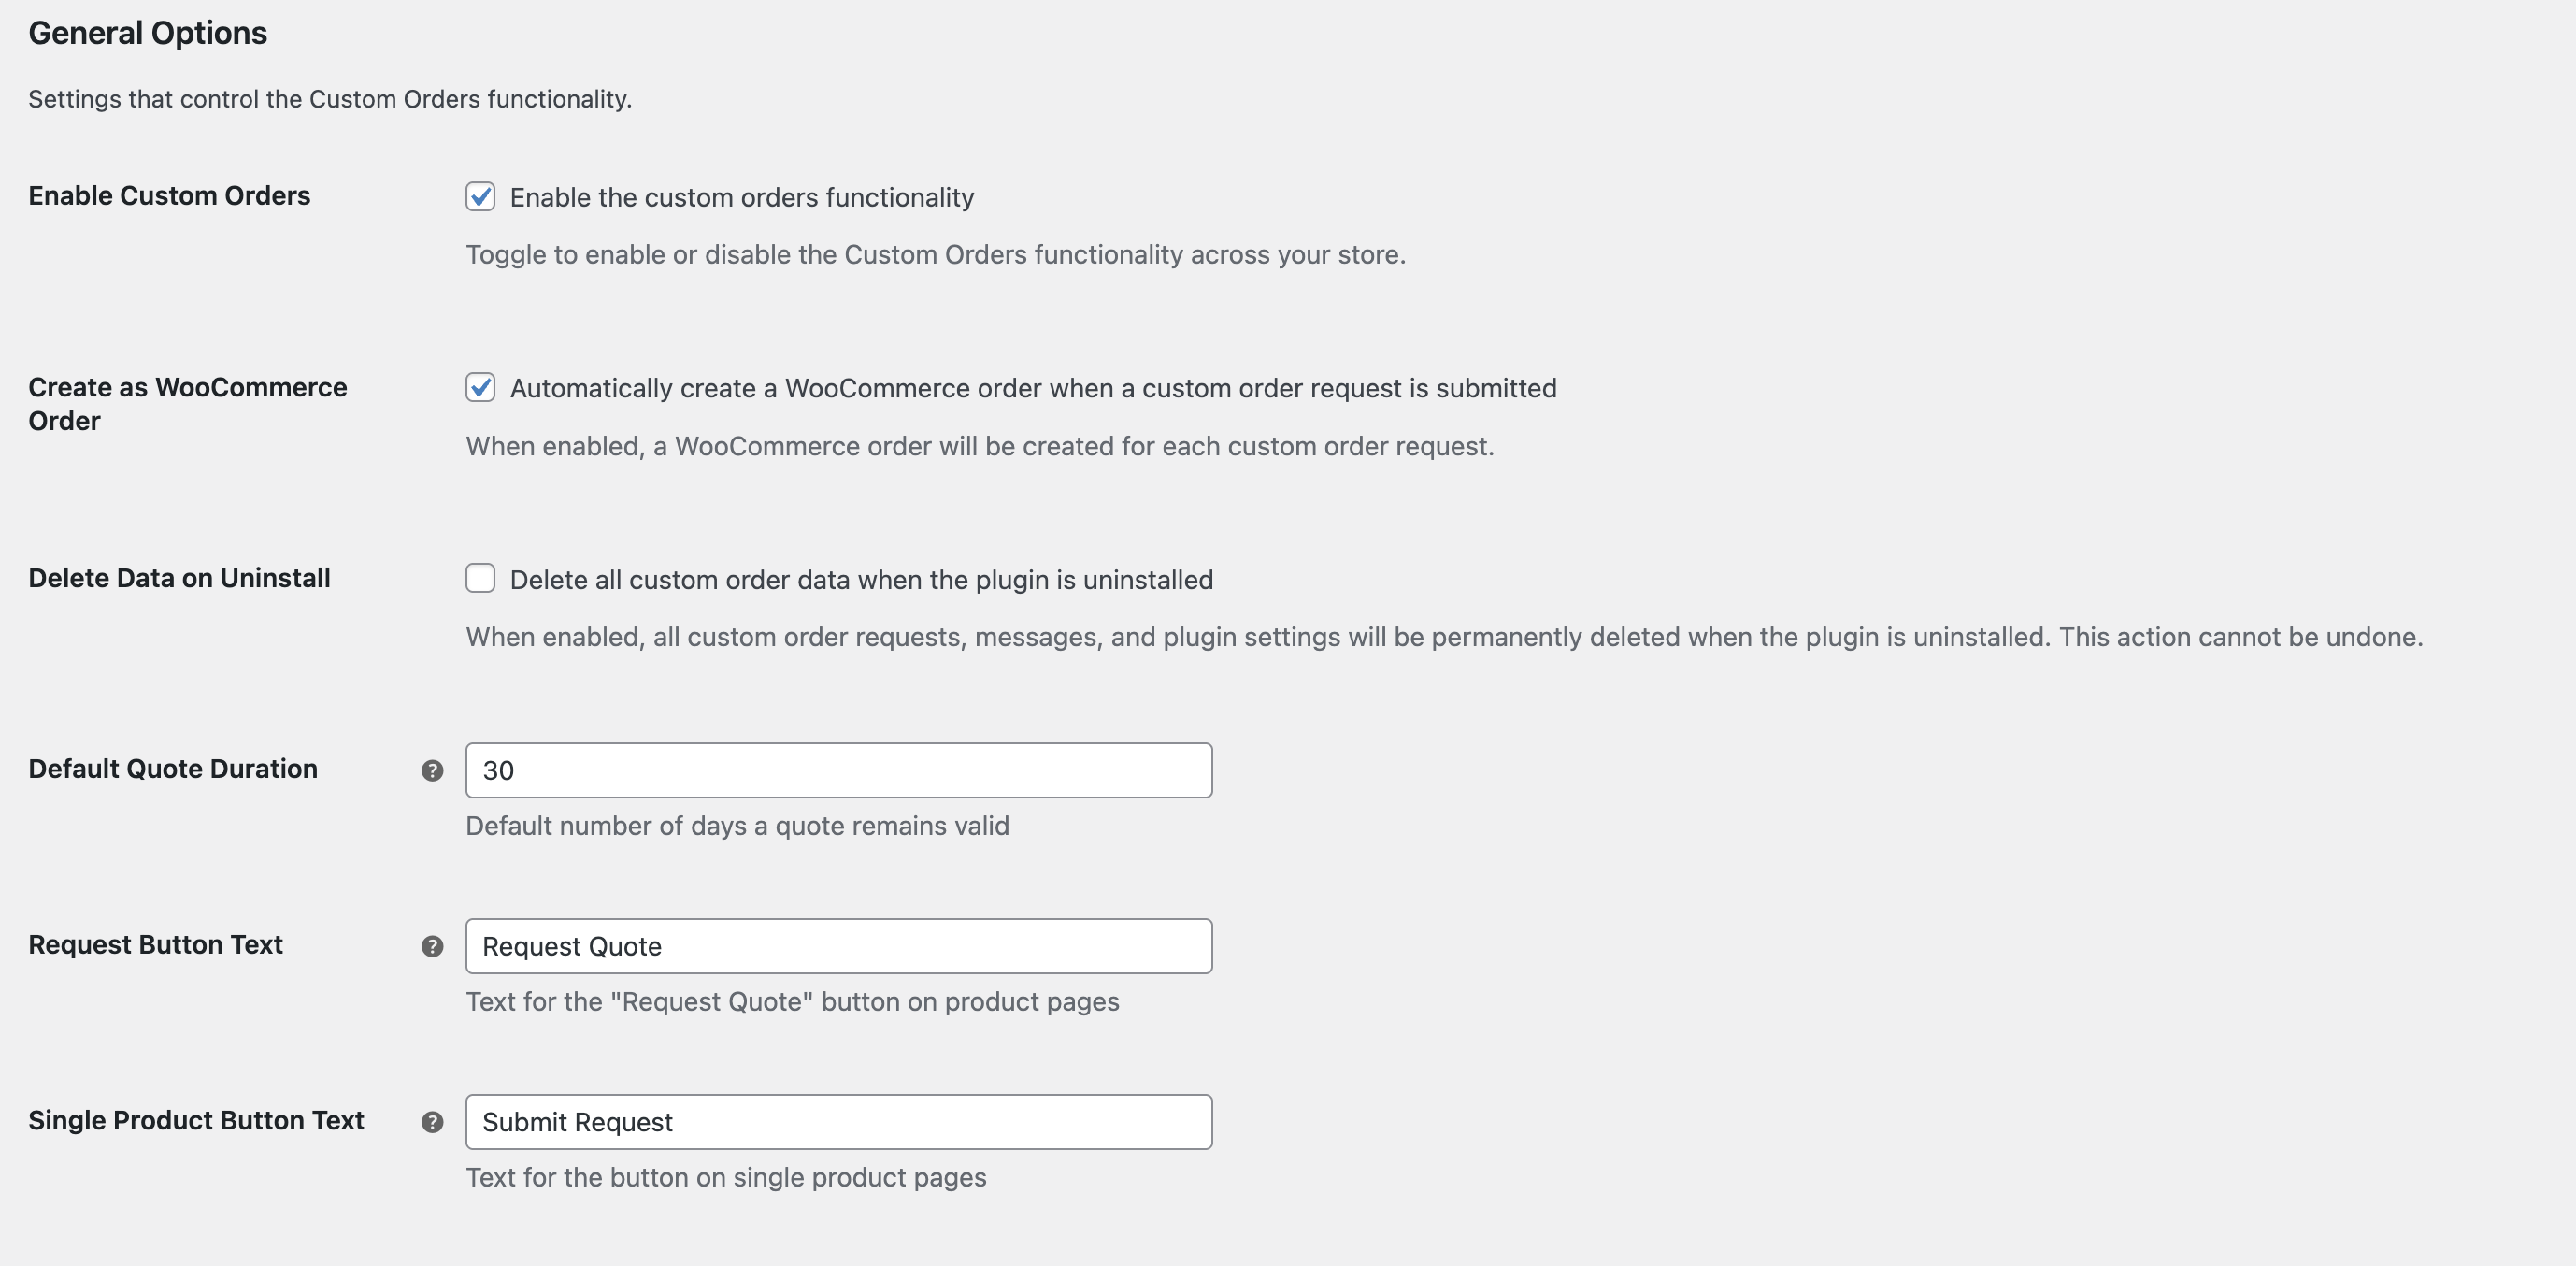
Getting Started
↑ Back to topTo get started with Custom Orders:
- Go to: WooCommerce → Settings → Products → Custom Orders.
- Enable the plugin by checking Enable Custom Orders.
- Configure options like quote duration, abandoned request management, and file upload limits.
- Save changes.
Create a Custom Order Product
↑ Back to top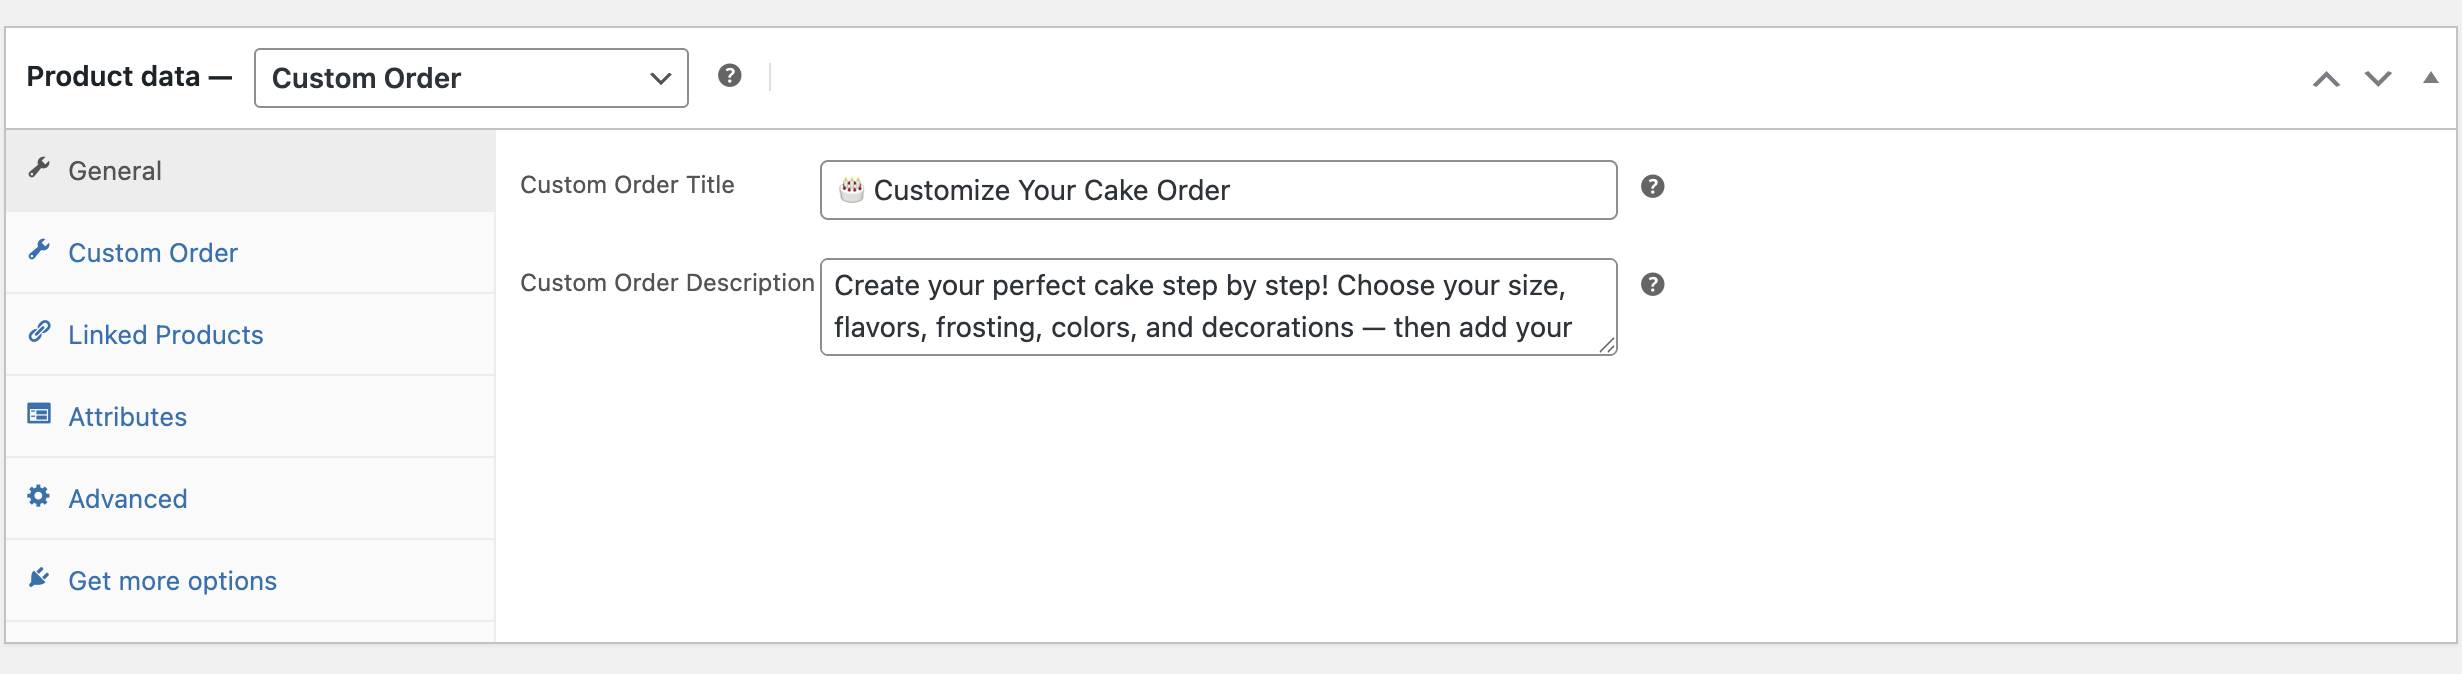
- Navigate to Products
- Go to WordPress Admin → Products → Add New
- Enter a descriptive product name (e.g., “Custom Wedding Ring Design”)
- Product Description
- Write a compelling description explaining your custom service
- Include your process, typical timeline, and what customers can expect
- This appears on the product page before the request form
- Select Product Type
- In the Product Data section, select “Custom Order” from the dropdown
- This unlocks the Custom Order tab with specialized settings
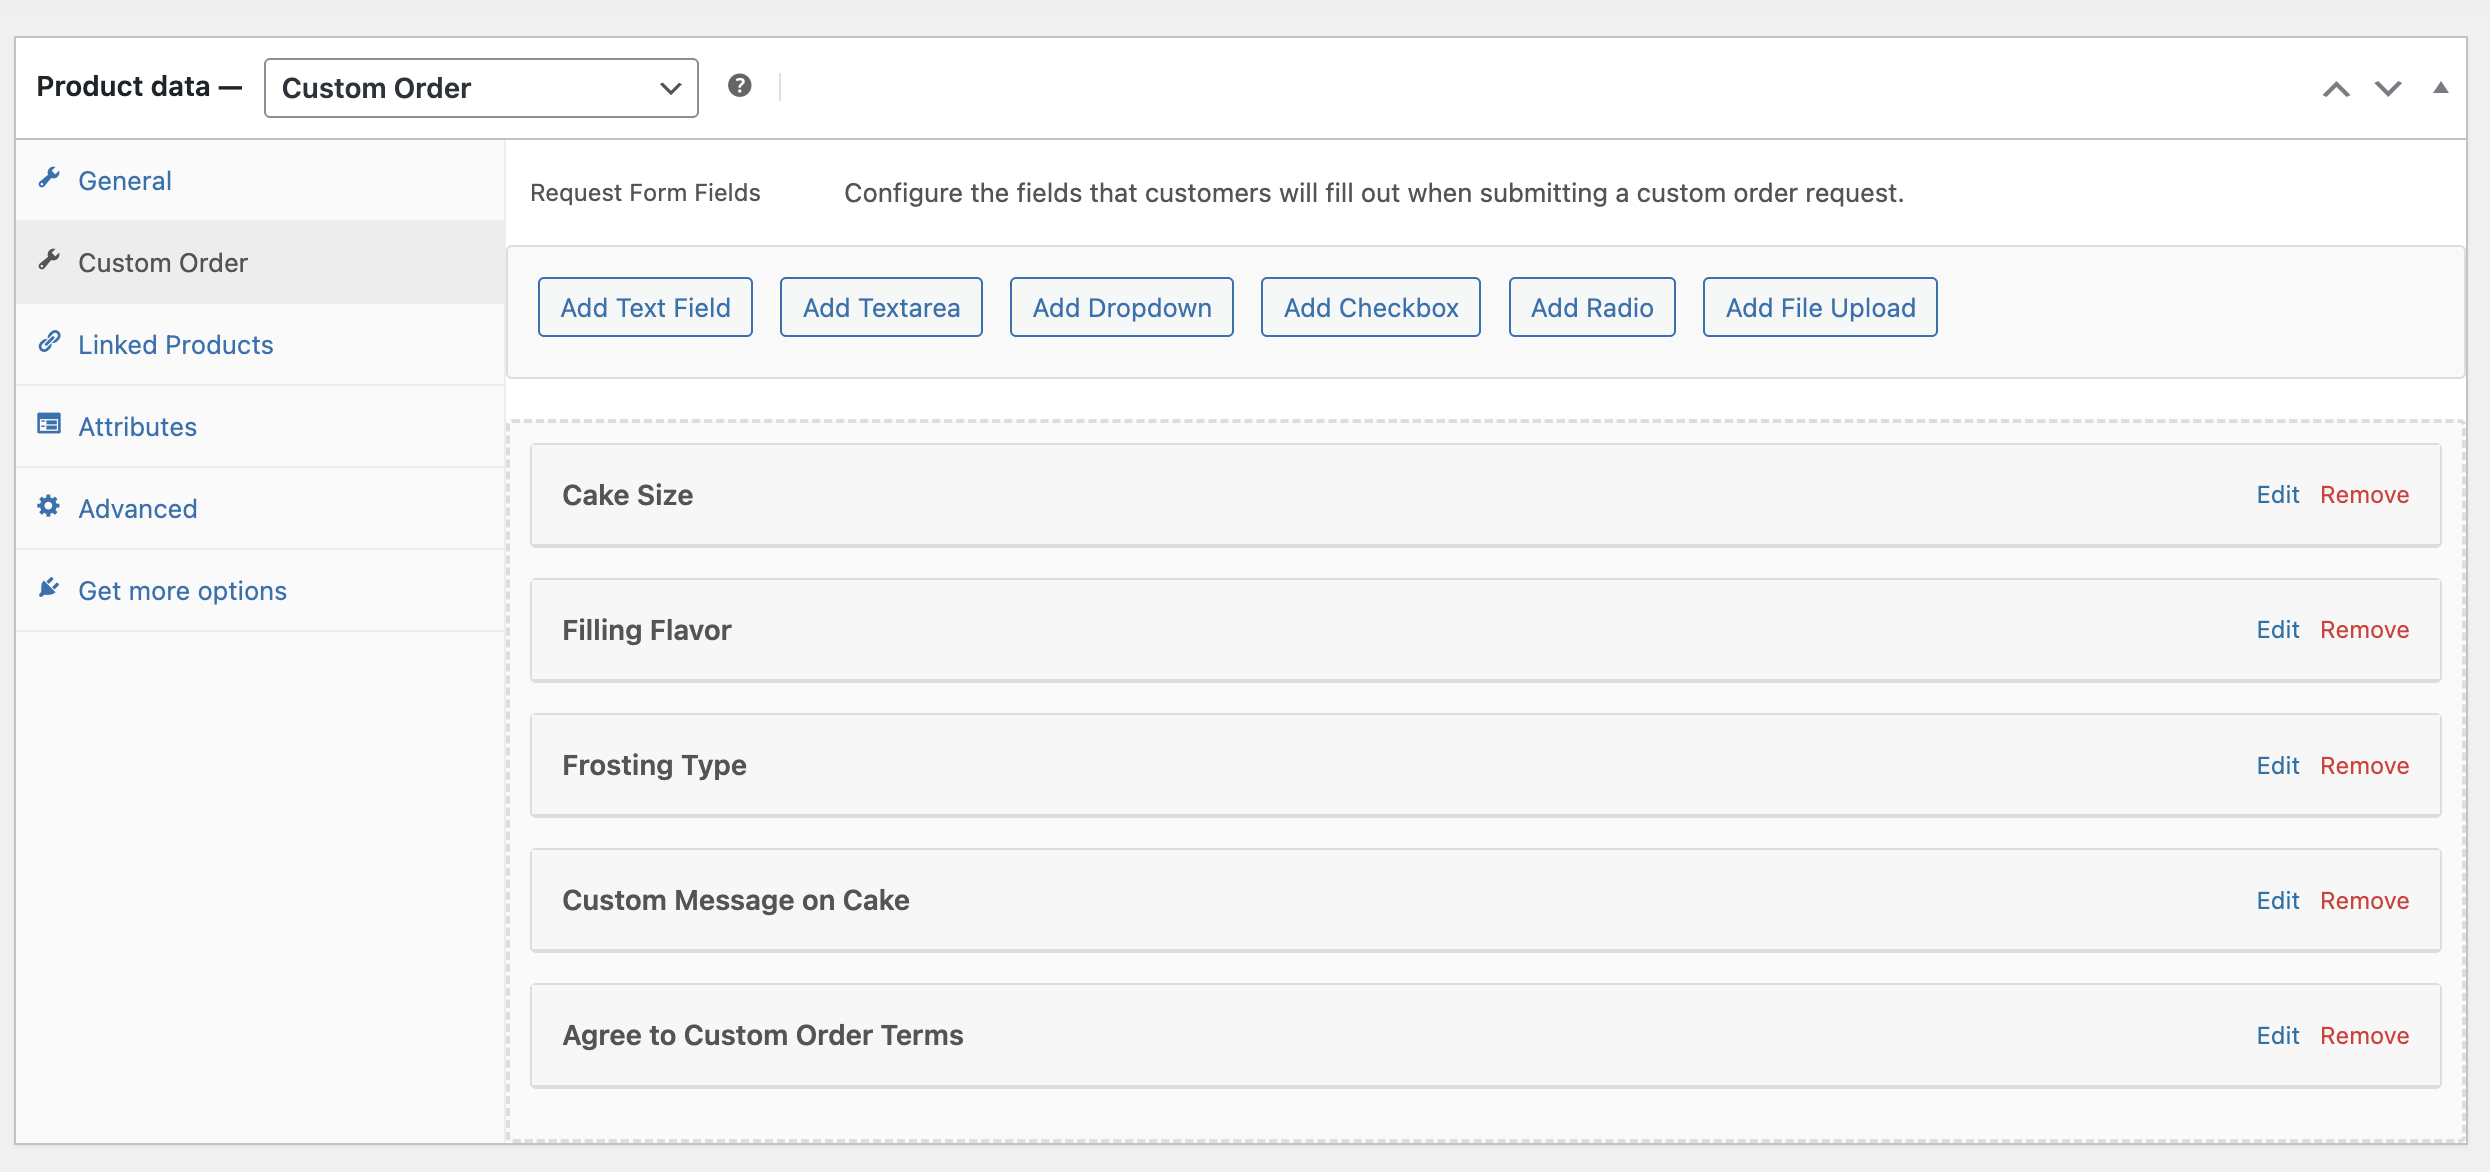
- Add Custom fields
- Here you can add custom fields to help users create further explain what they would like done.
Usage
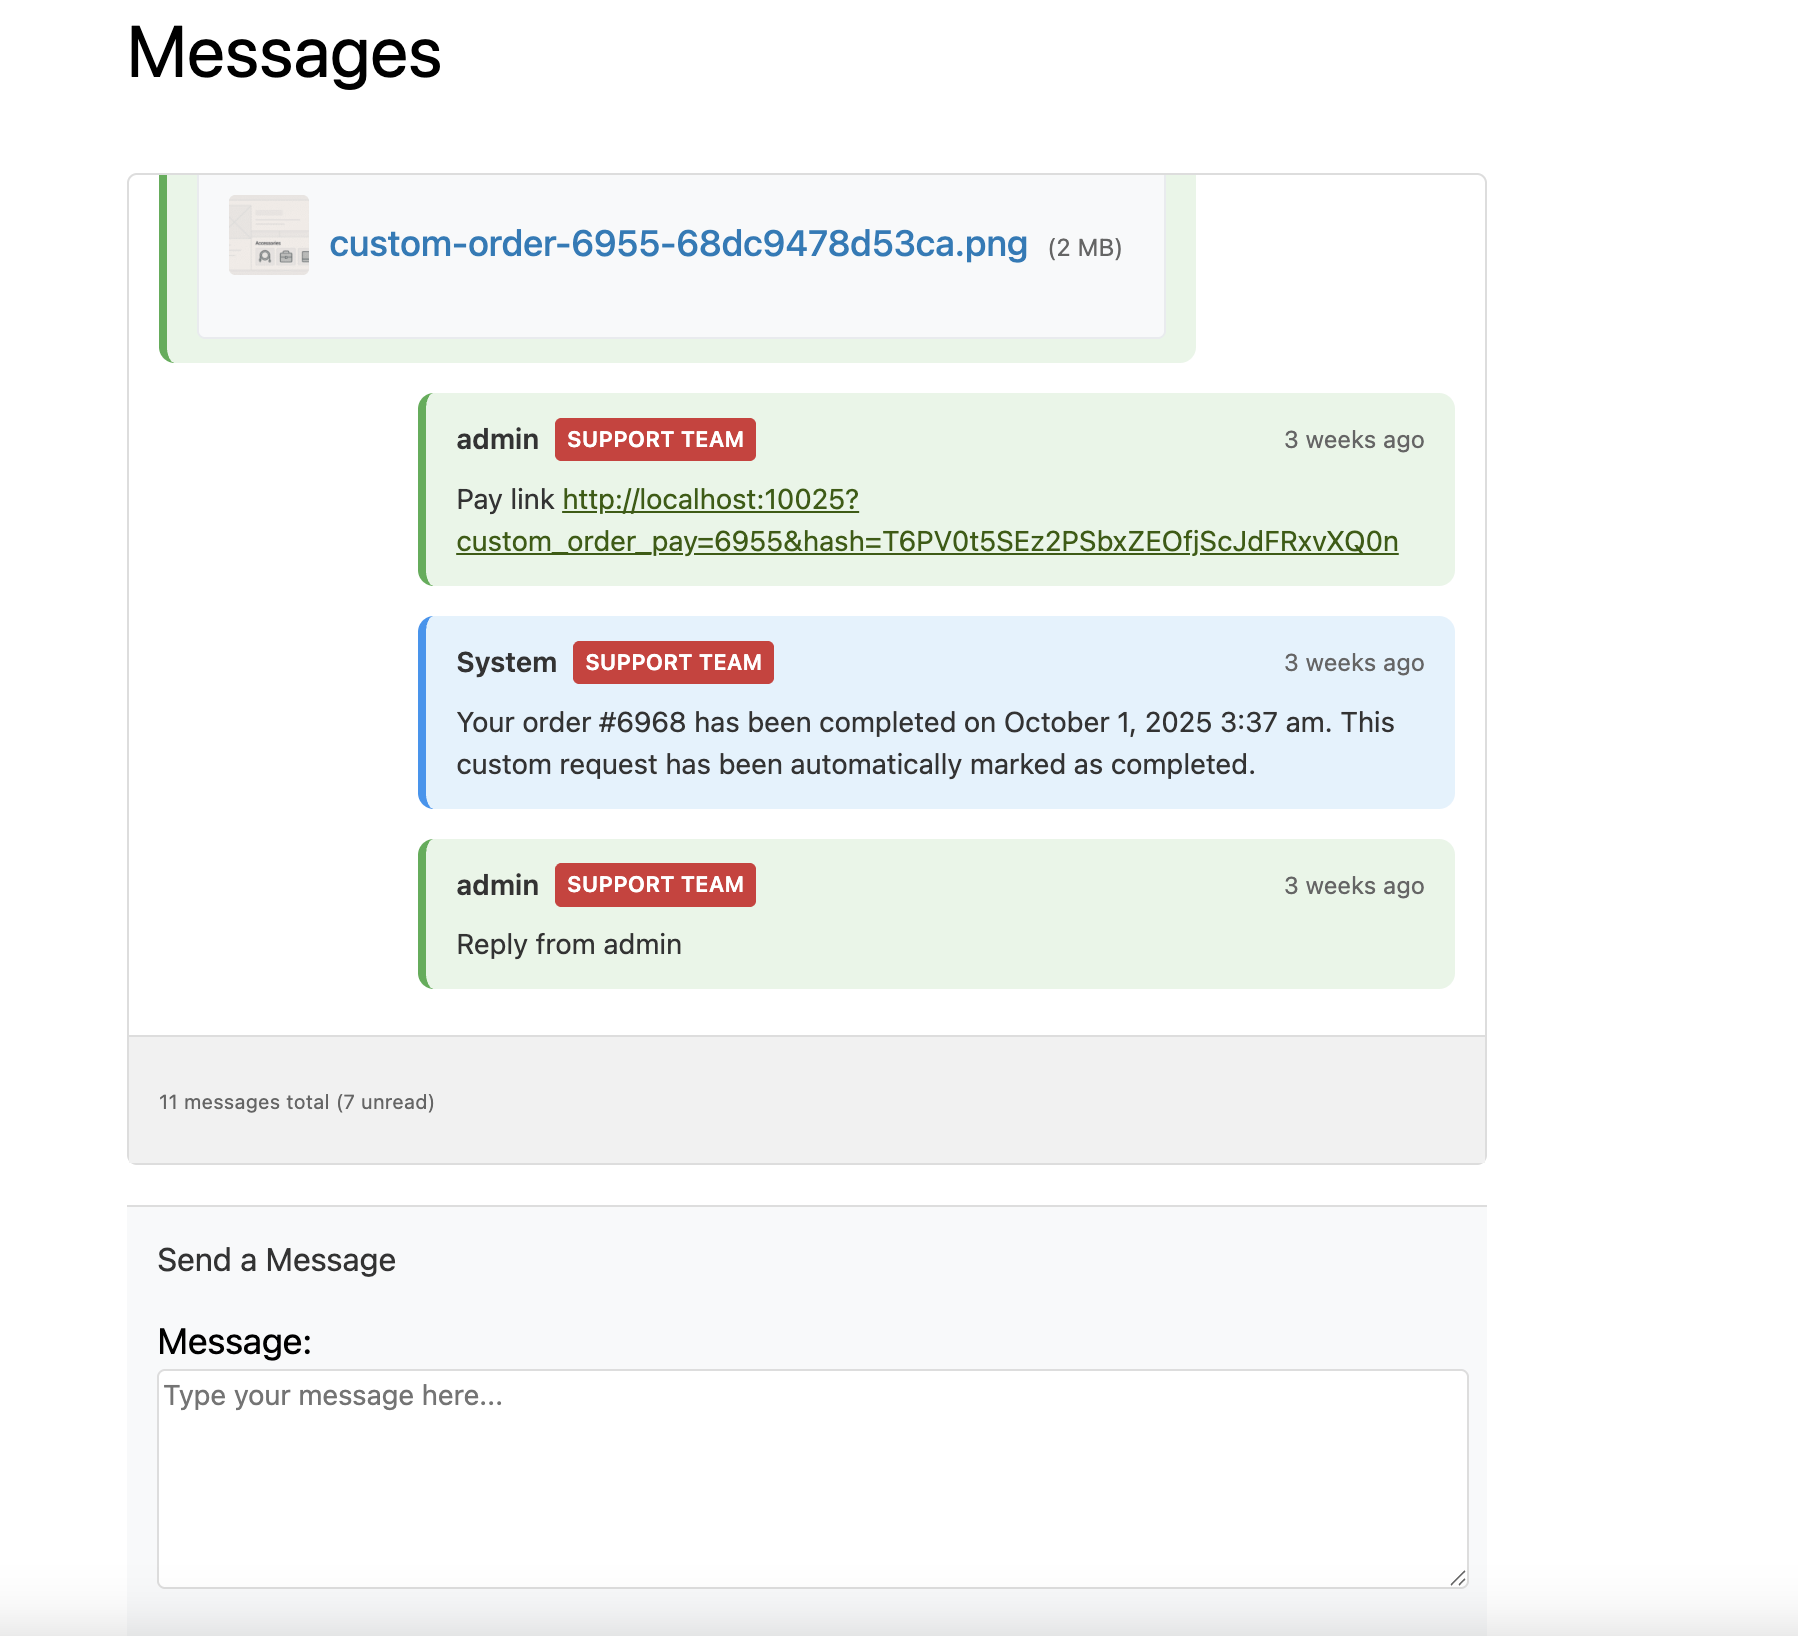
↑ Back to topOnce your “Custom Order” product type have been configured, customers will see a detailed request form, submit their requirements, and communicate directly with you through the built-in messaging system.

Admin Workflow:
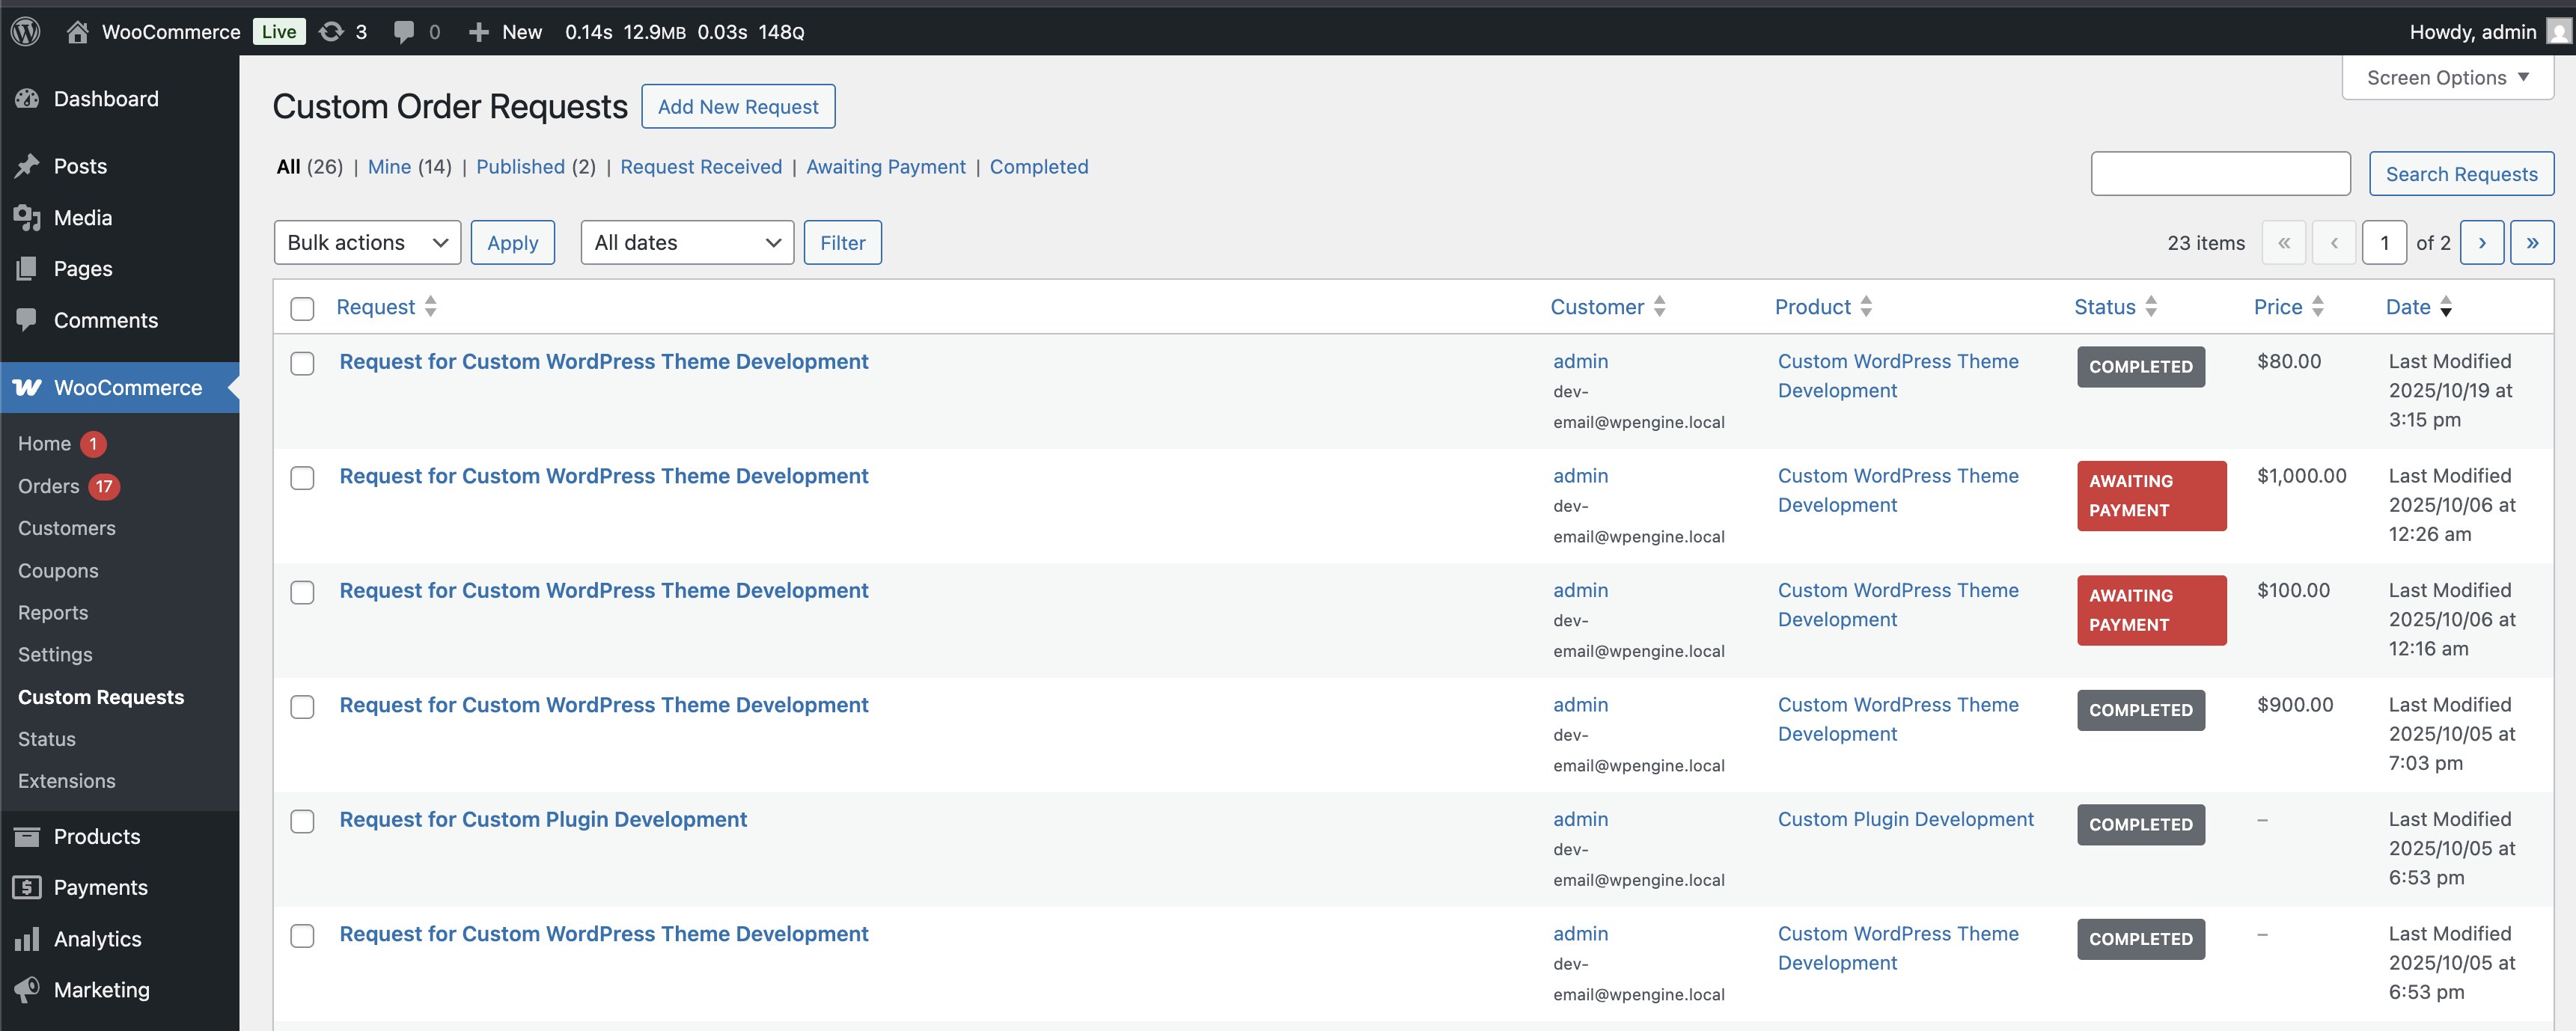
- Assign statuses such as Pending, In Progress, Quoted, Paid, or Completed.
- Generate secure payment links directly from the request dashboard.
- Communicate with customers using the threaded messaging interface.

Customer Experience: Customers access their requests under My Account → Custom Requests to check messages, download attachments, and complete payment.
Troubleshooting
↑ Back to topPlugin Not Working?
Verify WooCommerce is active and updated, ensure Custom Orders is enabled, and check for plugin conflicts.
File Upload Issues:
Increase your PHP upload limit, confirm allowed file types, and check directory permissions.
Emails Not Sending:
Verify WooCommerce email settings and SMTP configuration.
Payment Link Errors:
Ensure SSL is active and payment gateways are configured properly.
FAQs
↑ Back to topBelow are answers to common questions about the Custom Orders plugin.
General
Can I use this with any WooCommerce theme?
Yes this was tested with several themes.Can customers edit their requests after submission?
They can discuss modifications in the message center.
Technical
Can I require deposits instead of full payment?
You can use the custom payment link to accept deposits and use traditional WordPress means to collect the difference.