Product designer for WooCommerce allows your customers to design various products on your online store, such as caps, t-shirts, cards, cups, and more!
Installation
↑ Back to top- Download the Product Designer for WooCommerce plugin from your WooCommerce dashboard.
- At the WordPress admin panel, go to Plugins > Add New > Upload and select the ZIP file you just downloaded.
- Click Install Now, and then Activate Plugin.
Configuration
↑ Back to topAfter installation of the WooCommerce product designer, click on WooCommerce in the WordPress Admin panel. Here you can see two new options: Clipart and Clipart Categories. From here, you can upload the cliparts and assign categories to them.
For further configuration, navigate to WooCommerce > Settings > Product Designer > General Settings and Customization.
General Settings:
↑ Back to top- Enable/Disable: A Checkbox to enable or disable the WooCommerce product customizer plugin. You also need to enable the product designer at the product level for each product.
- Pixabay API key: Insert the Pixabay API integration key. You will get the key after making an account on Pixabay.
- Allowed Image Extensions: Set allowed image extension for upload, i.e, png, jpg, jpeg,svg.
- Customize Product Button Label: Set the text of customize button.
- Share Design Button Label: Enter personalized text for the share design button.
- Choose Style: Choose the style of product customizer you want to show. Upon selecting the modern editor, it will show a light and dark theme design.

How to get the Pixabay Key?
↑ Back to top- Follow these steps to get your Pixabay key to easily integrate into your product designer for WooCommerce.
- Go to the Pixabay website and click on the Join button. If you already have an account, then log in.
- After logging in, click on the Explore button at the top. You will see the API option in the About section.
- On the API page, click on the Get Started button. Then scroll down in the table, you will see your API key.
- Copy that key and paste it into the plugin General Settings option.
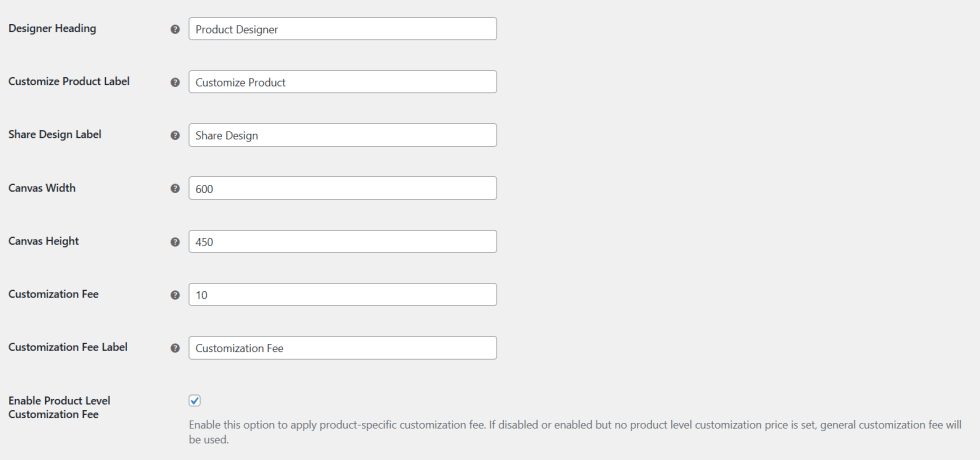
Customization
↑ Back to top- Designer Heading: Set the custom heading for the product designer
- Customize Product Label: Set the custom text of the product customization button
- Share Design Label: Customize the text of the share button text
- Canvas Width: Customize the width of the canvas.
- Canvas Height: Set the height of the canvas.
- Customization Fee: Set the fee for product customization. It counts as the cost of the customization.
- Customization Fee Label: Enter a custom label for the customization fee.
- Enable Product Level Customization Fee: Checkbox to enable customization fee at the product level. If the fee is not set for the specific product general price will be used.
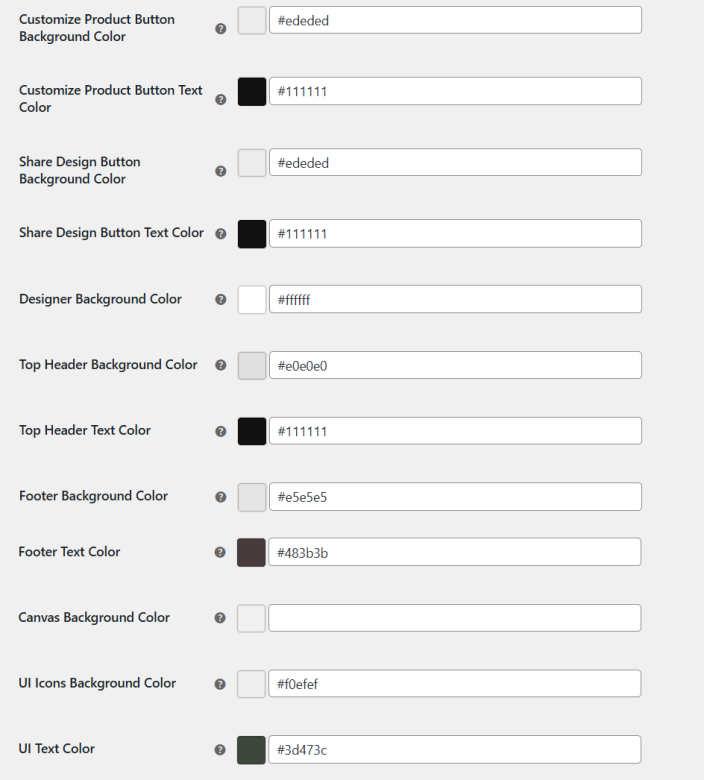
- Customize Product Button Background Color: Choose the background color for the customize button displayed on the product page
- Customize Product Button Text Color: Set the text color of the product page customize product button.
- Share Design Button Background Color: Select the share button background color.
- Share Design Button Text Color: Choose the text color of share button.
- Designer Background color: Choose the background color as per your store theme.
- Top header background: Customize the header background color to align with the store’s appearance.
- Top Header Text Color: Set the text color of the top header.
- Footer Background Color: Choose the footer background color on the customization window.
- Footer Text Color: Personalize the text color of the footer as per your preference.
- Canvas background color: Select the background color of the canvas.
- UI Icons Background Color: Customize the background of the UI icons to match the store theme.
- UI Text Color: Set the UI icons’ colors.
Note: Color customization options will only work for the classic customizer.
Enable Product Designer on Any Product
↑ Back to topTo enable the WooCommerce product customizer on your products. Go to the Products in the WordPress Admin Panel. You can add a new product or edit an existing product.
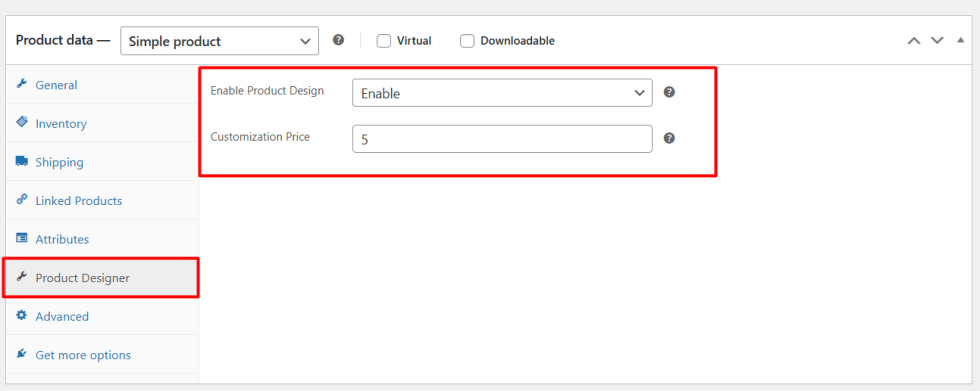
Scroll down to Product Data and click on the Product Designer tab. Here you can enable or disable the designer for the specific product.
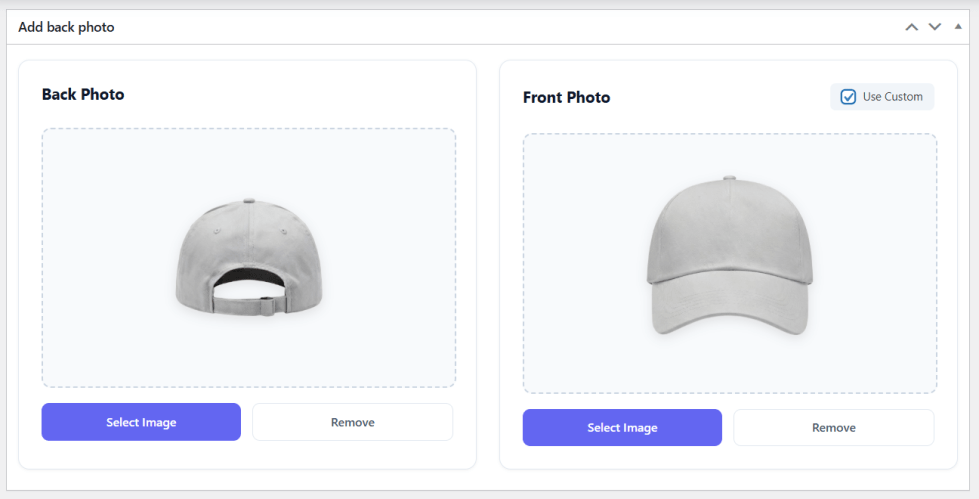
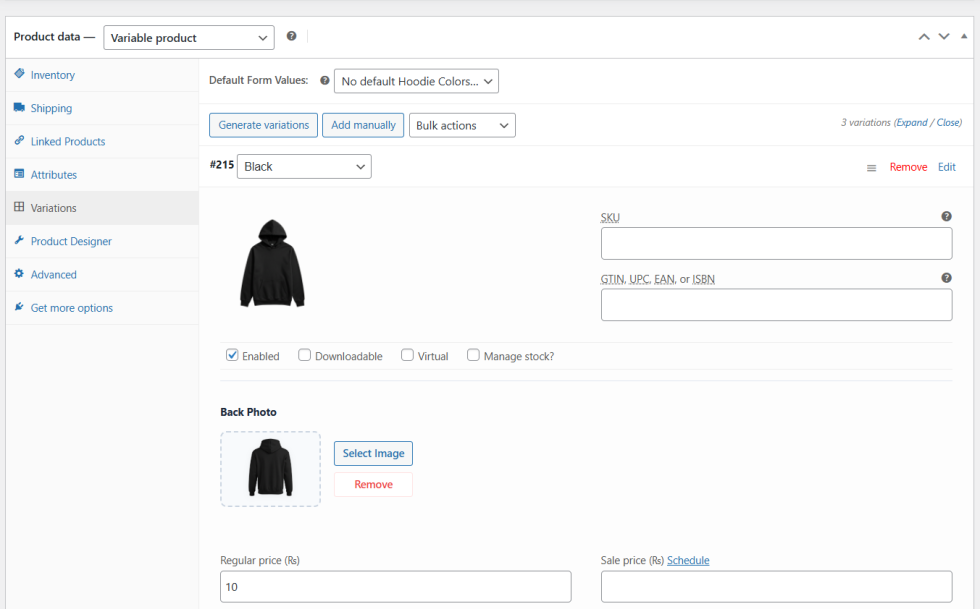
Add Front and Back Images on Simple and Variable Products
↑ Back to topWooCommerce product designer plugin allows administrators to add front and back images for both simple and variable products. For variable products, you can add front/back images by going into the variations tab.
Simple Product
↑ Back to topIn a simple product, if the front image section is left empty, it will consider the product image as the front image.
Variable Product
↑ Back to topIn a variable product, each variation product image will be shown as the front photo.
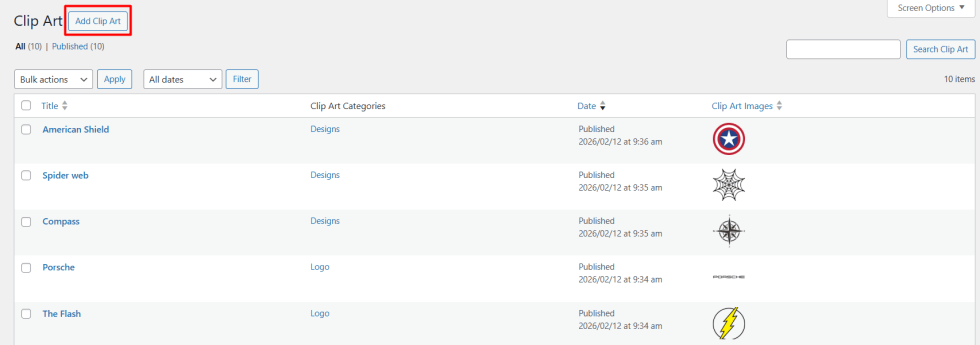
Add Clip Arts
↑ Back to topAt the back-end, go to WooCommerce > Add Clip Art. Here, you can upload the clip art image and define the name as well. It is mandatory to set the category of a clip to display it on the frontend.
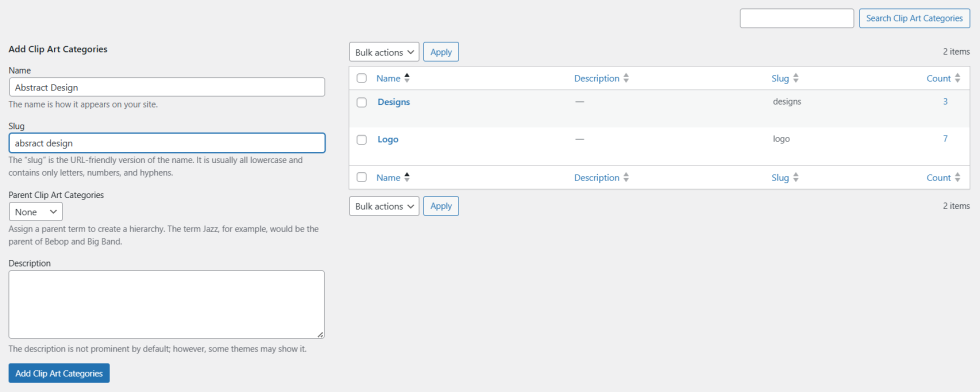
Add Clip Art Categories
↑ Back to topClick on clip art categories to add a new category for clip art e.g. cars, animals. planes etc.