Extra Product Options helps you add multiple product options and custom fields with conditional logic to your WooCommerce product pages. It is also known as YayExtra and available in free and pro versions.
Option Types supported:
- Text
- Number
- Checkbox
- Radio Button
- Button Option
- Swatches Option
- Dropdown List
- File Upload Option
- Date Picker Option
- Time Picker Option
Quick Setup
↑ Back to topThe setup process is simple and intuitive:
- Go to WooCommerce → YayExtra menu
- Create a new option set (a group of product options)
- Add an option type as radio buttons, swatches, upload field, etc.
- Enable price adjustment if needed
- Assign the current option set to a category of products or manually selected products
- Click on assigned products to view your new product page with added extra product options!
Detailed Documentation
↑ Back to topInstallation
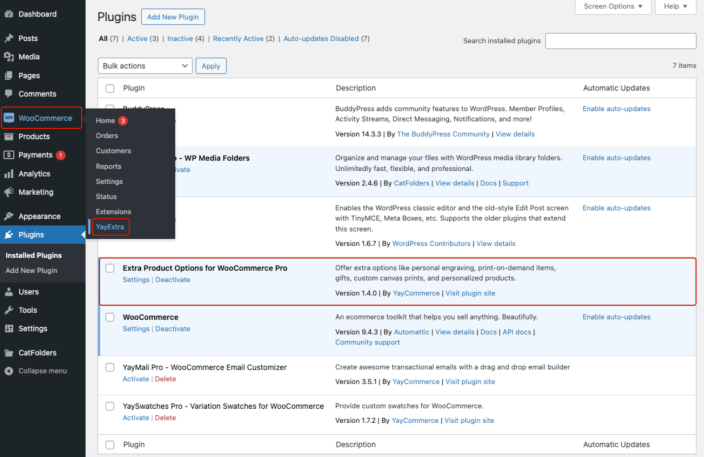
↑ Back to top- Download the extension from WooCommerce dashboard.
- From your WordPress admin dashboard, go to Plugins → Add New Plugins → Upload and select the ZIP file you just downloaded.
- Click Install and then Activate.
- Head to WooCommerce → YayExtra or click Settings to access the extra options customizer.
How to Update
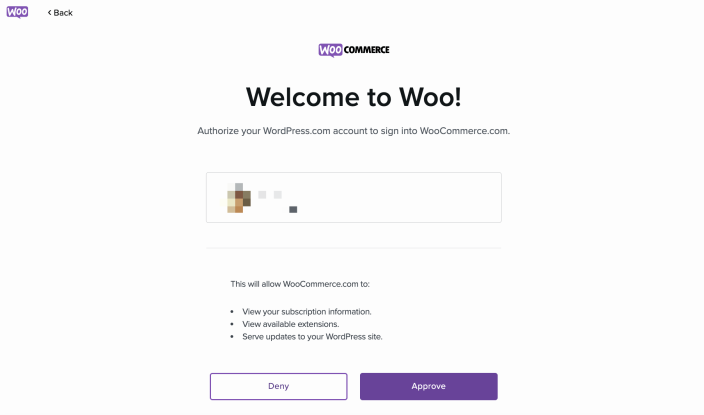
↑ Back to topLinking your WooCommerce.com account to your site is essential to ensuring proper updates through your WordPress dashboard.
- Log into your site and navigate to WooCommerce > Extensions.
- Open the WooCommerce.com Subscriptions tab.
- Click the Connect button and sign in with your WordPress.com credentials.
- Confirm the connection by selecting the Approve button.
Alternatively, you can update the plugin directly from your WordPress admin dashboard by either:
- Downloading the product .zip file to install the latest version on your site manually, or
- Click Update Now next to the banner announcing the new version to apply the update.
Overview
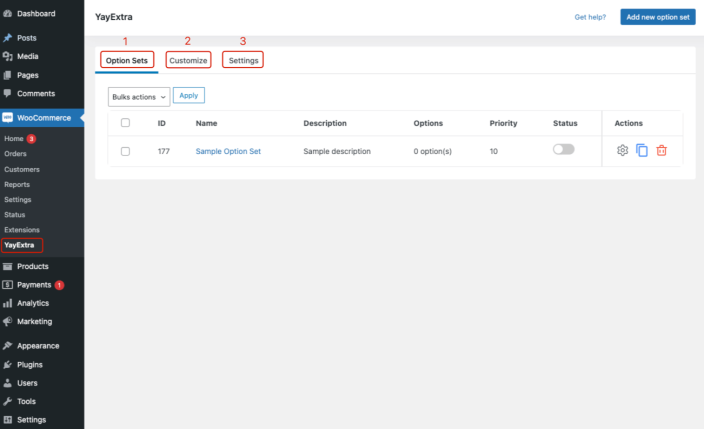
↑ Back to topThe extra options customizer interface is organized into three key sections:
- Option Sets
- Customize
- Settings
YayExtra provides a diverse range of option types designed to meet the unique requirements of every user. Here are some of the most common:
- Text Option: This option allows users to enter short text inputs. It is helpful for gathering names, custom messages, or other brief details.
- Number Option: Enables users to enter numeric values.
- Checkbox Option: Displays a series of checkboxes that users can select from, suitable for multiple-choice selections where more than one option can be chosen.
- Button Option: Features a button users can click to trigger an action, such as adding an item to the cart or submitting a form.
- Swatches Option: Shows a range of color or image options for users to choose from, commonly used for selecting product colors or visual preferences.
- Dropdown List Option: This one’s perfect when you have a list of options and want to keep things neat because it presents a dropdown menu of choices.
- File Upload Option: Allows users to upload files, such as images or documents, often used for custom orders or submitting relevant files.
- Date Picker Option: Provides a calendar interface, enabling users to select a specific date.
- Time Picker Option: Lets users choose a specific time, often paired with the date picker, to schedule appointments or select time slots for services.
Other configurable settings include marking fields as required, adding a custom CSS class, setting placeholder text, and applying conditional logic.
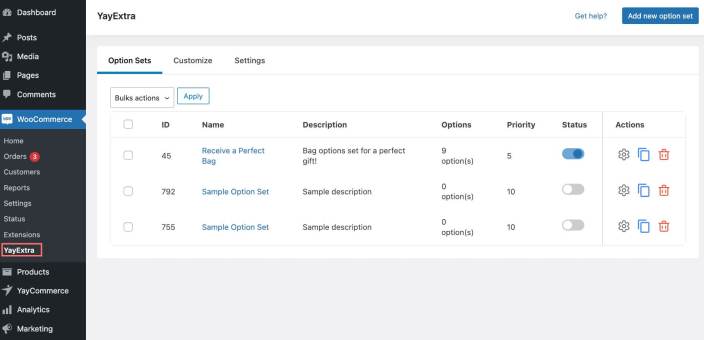
Manage Option Sets
↑ Back to topYayExtra allows users to create and manage extra custom fields of WooCommerce products in an admin panel.
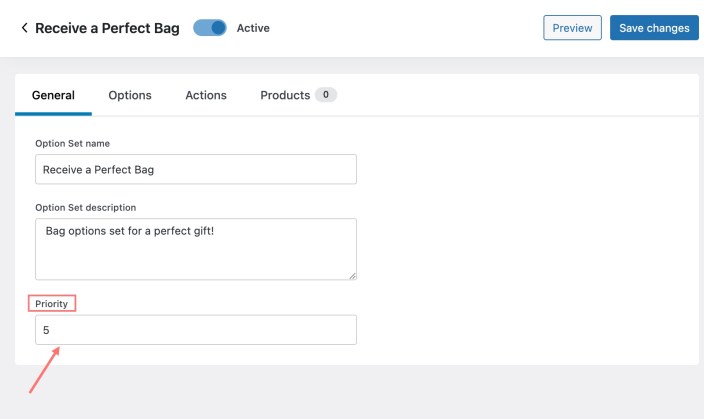
General Option Setting
When creating a new option set, YayExtra will navigate users to the first step:
- Name the field: A clear name immediately conveys the purpose of the option set, making it easier for users to grasp its functionality.
- Add the description: This sets the meaning and purpose of the whole option set for your internal reference.
- Define priority: When multiple plugins add options with the same name or similar functionality, priority helps determine which option set takes precedence.
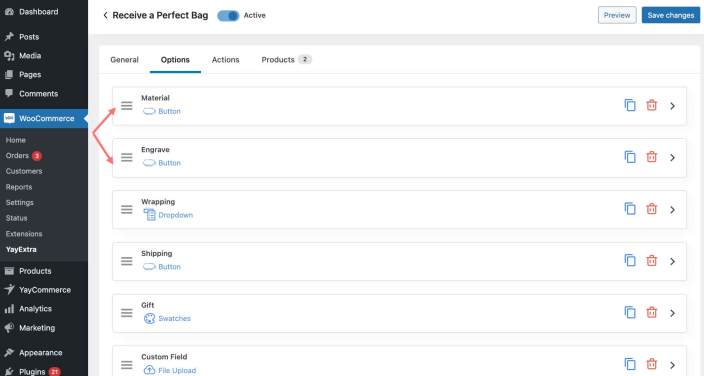
Configure and Manage Custom Fields
To add the custom field for this set, move to the second tab > Add new option. YayExtra will automatically create a new Text Field.
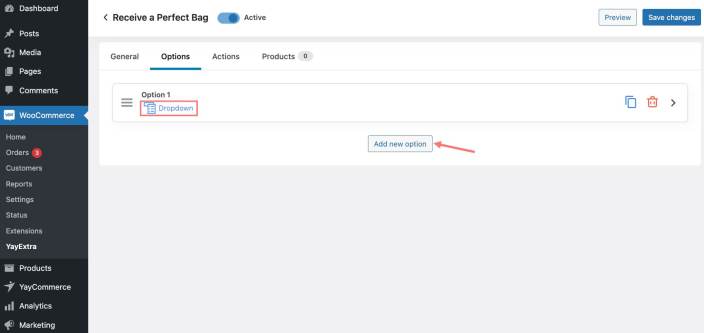
To configure this option, expand it and change the name, option type, and other settings.
Now, let’s take a look at the whole panel of each option.
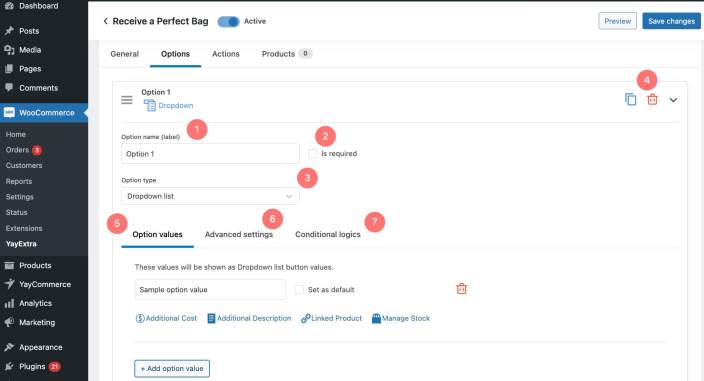
- In this box, you can give the name of the option set, for your reference purpose.
- If you enable this box, this option will be required to be attached to the main product.
- This dropdown list allows you to choose from the different option types available for use, including Text, Number, Checkbox, Radio Button, Button, Swaps, Dropdown List, Date Picker, Time Picker, File Upload, etc.
- These three icons on the left side of the panel include the Duplicate icon for creating a copy of an Option, the Delete icon for removing an Option, and the Expand/Close icon for accessing additional settings or minimizing them.
- This sub-tab will become visible for use depending on the option type. If you choose the “Text” or “Number” option, it will be hidden. With other options, this tab will change to work with each suitable option.
- In this section, you can also set extra costs, descriptions, and linked products for each option value.
- The Advanced Settings sub-tab allows you to configure various options, including a class name for CSS purposes, as well as setting minimum and maximum character limits for Number or Text Options. You can also customize the shape, direction, and other settings for Swatches Options.
- This tab allows you to set conditional logic, enabling this option to display or hide for customers when they meet the specified conditions. The conditions depend on other options in this set.
Add Discount or Fee to Product Fields
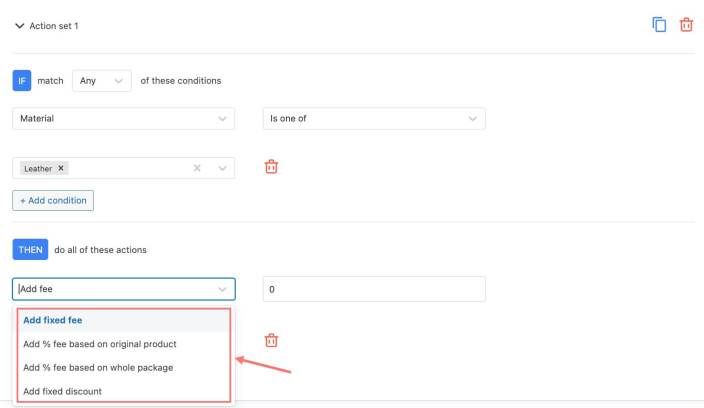
↑ Back to topMove to the next tab, you can apply a fee or discount for each option by setting up the conditions and the actions. You may add multiple conditions/actions in one group (applied to one field). The relation between them is any/all.
In the “Action” section, YayExtra provides four rules to configure. It will be active when the conditions match those above.
Assign Products for Option Set
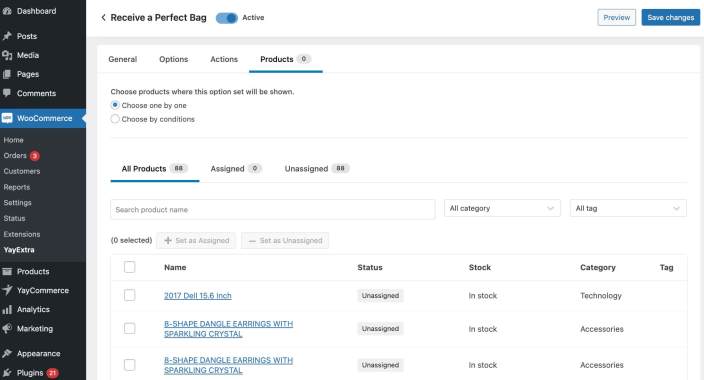
Once you’re done, now you can assign an Option set to your products. There are two ways available to choose products to assign, including Choose one by one and Choose by conditions.
- Choose one by one
If you check this box, you will see three tabs, including “All Products,” “Assigned,” and “Unassigned.” To assign a specific product, you can search for it by name or filter by category and tag.
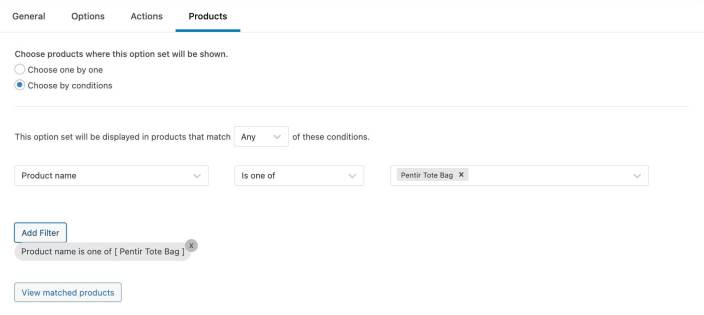
- Choose by conditions
If you choose this option, you can assign an Option set to products that match specific conditions, including Product name, Product category, and Product tag.
Click Save and now you’re ready to accept new orders with extra product options!
Further Customization
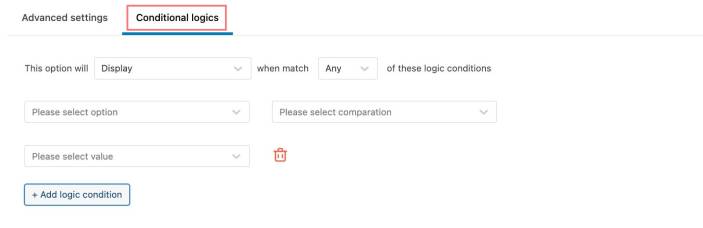
↑ Back to topConditional Logic
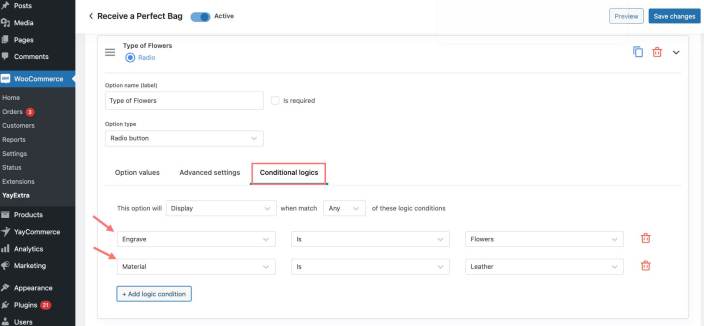
↑ Back to topIf you want to create a rule to show/hide option items, YayExtra supports you by using conditional logic feature.
Navigate to the Conditional Logic section in the settings of each item. The option items will always be displayed when no conditions are set by the users. You can assign one or more conditions to each option to control when it should be shown or hidden, based on the selections of other option items.
Sort Option Sets
↑ Back to topWith YayExtra, you can sort option sets and items as desired using the sorting feature.
- Sorting option sets
If you would like to assign some option sets to the same product and arrange these sets as you want, let’s walk through simple steps.
Go to YayExtra dashboard > Setting section of each field > Change the ordinal number on ”Priority” > Hit the “Save” button.
- Sorting option items
With each item in the option set, you can sort them accordingly by using the drag and drop function. Hit the Save button and then you can see the result in front end.
Customize the Appearance of Custom Fields
↑ Back to topYayExtra allows users to customize the appearance of extra custom fields in the PRO version.
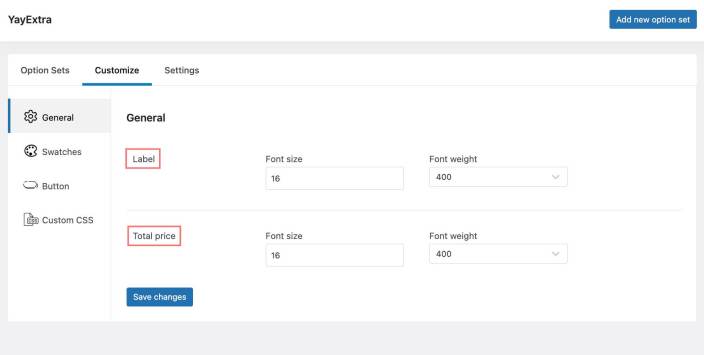
On the admin panel, you can customize all styles through some tabs, such as General, Swatches, Button, and Custom CSS.
- General
In this tab, you can modify the size of the label and the total price.
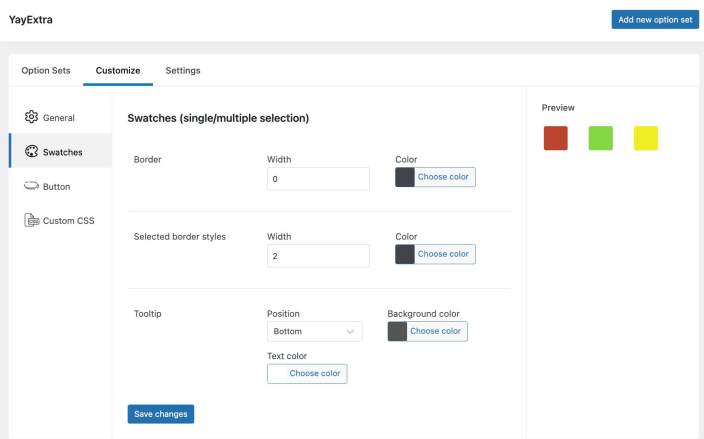
- Swatches
This tab allows users to custom style for the Swatches option, it also displays a preview section to see what you changed.
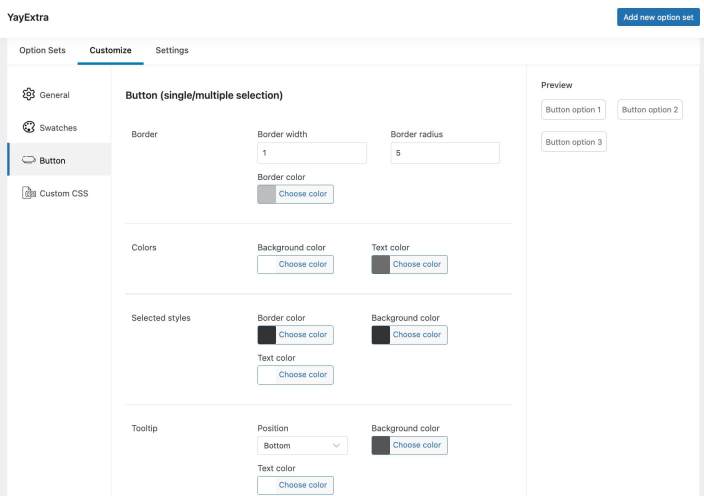
- Button
You can modify the button’s size, border, position, and color. The preview section will be displayed on the right side of the panel.
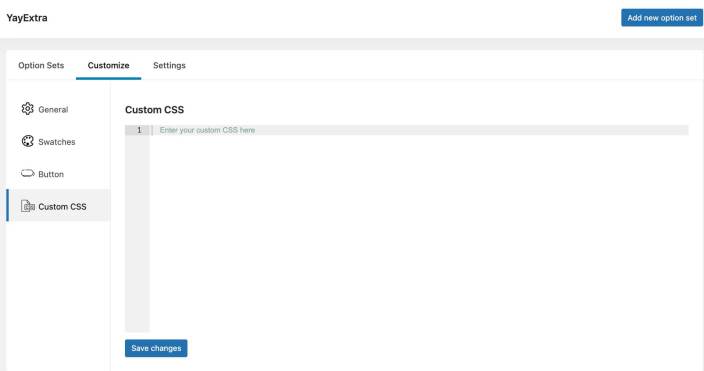
- Custom CSS
YayExtra also offers a Custom CSS tab, which allows the customization of styles for the options.
Global Settings
↑ Back to topMove to the final tab of YayExtra, you have the option to show/hide product fields some other things.

- This option allows show/hide options fields in the single product page based on user roles. If the setting values in the two settings (Show/Hide) are the same, the “Hide option sets for roles” setting will be applied.
- Enable it so your customers can see the additional price as the tooltip in each field.
- With each option chosen, the extra subtotal will display below all fields.
- Below the extra subtotal, YayExtra will count the total price and display it for customers.
- Check this box, in your mini cart, you can see extra option items.
- When a selected option increases the cost, the price on the product page will update automatically. Please note that this adjustment applies only to additional costs and linked products, not to fees or discounts.
- This section will define the condition for showing option sets. It depends on all applicable option sets, the First applicable option set, the most options, or the fewest options.
- Can import/export option sets by uploading your JSON file.
Extra Options on the Checkout Page
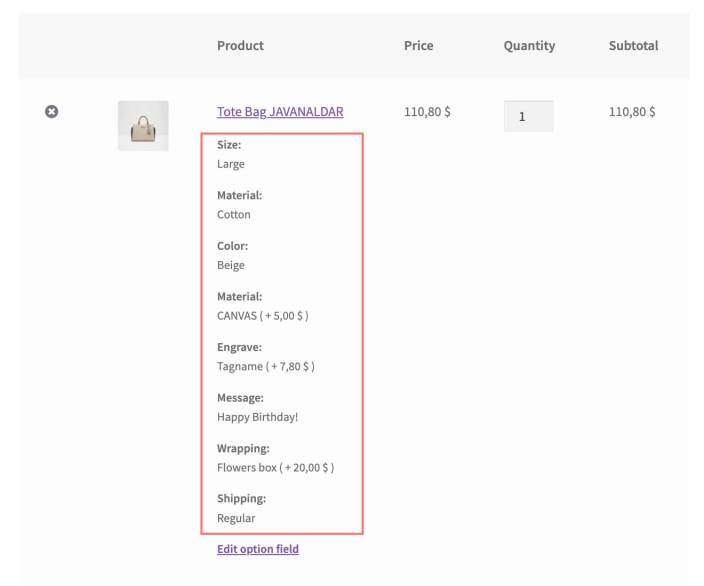
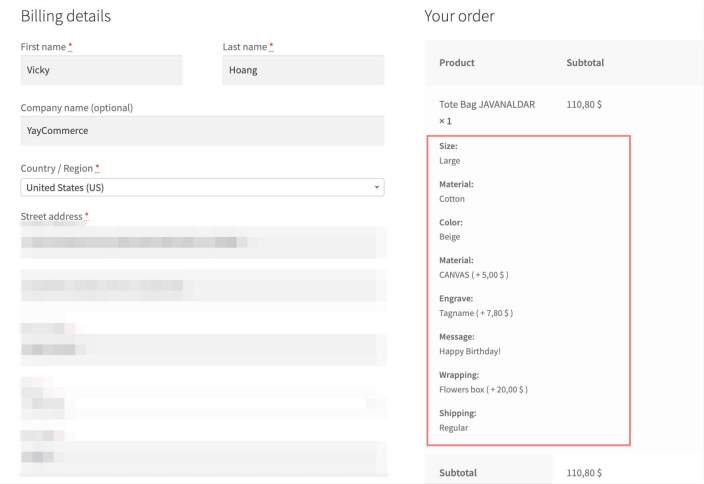
↑ Back to topOnce you’re done with your setup, try to add a sample product to the cart. YayExtra will display extra option values on both the cart page and the checkout page.
- On the cart page
- On the checkout page
Troubleshooting
↑ Back to topExtra options and extra fees not reflected in the cart
If the orders that you have received do not catch the fields that the customer has filled while placing the order, the issue may be caused by caching. It might have saved older data. On the customize panel of your Product page, try to enable the “Ajax Single Add to Cart” function.
With extra options selected on the product page, add to cart button is not working
If the “Add to Cart” button is not working when extra options are selected on the product page, it may be due to an issue with variation products. To resolve this, ensure that the variation products are set up correctly. This includes:
- Adding all necessary variations.
- Verifying that WooCommerce attributes are properly assigned to the variations.
- If variations are not required, consider changing the product type to “Simple product.”
Frequently Asked Questions
↑ Back to topHow do I hide the additional price displayed in the radio buttons?
After configuring your extra fields, go to the Settings tab in YayExtra. Locate the option labeled “Show additional price text on option value” and disable it. Once this setting is turned off, YayExtra will function as expected without displaying the additional price in the radio buttons.
Can I set availability for specific days of the week with the date picker option?
Currently, YayExtra does not support setting availability based on specific days of the week (e.g., Monday, Tuesday, Wednesday). Instead, it allows you to define availability using specific calendar dates (e.g., 08, 09, 10).
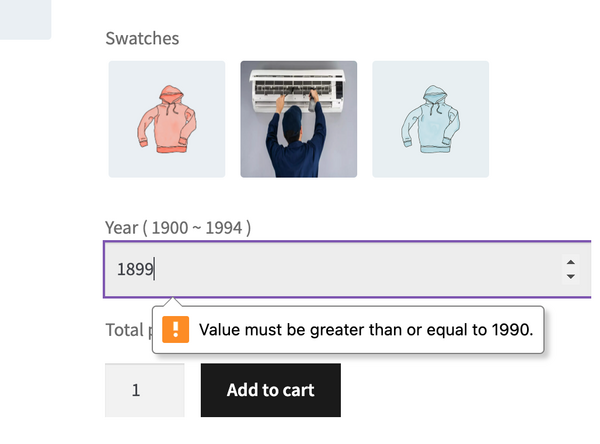
How to restrict a number field between two values on an add-on?
In the advanced setting of the “Number” field, you can modify the value on the min and max number text box. For example, the number is a year and should be between 1900 and 1994, let’s check the images below.
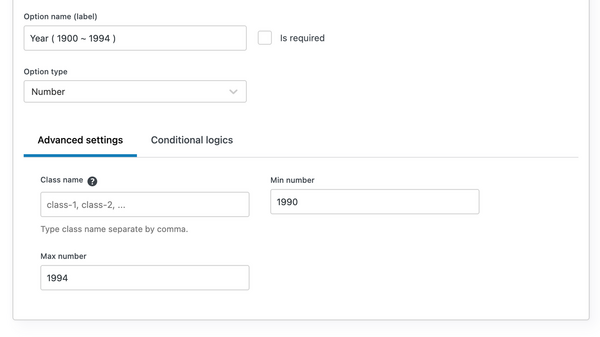
And the validation looks like this on product page:
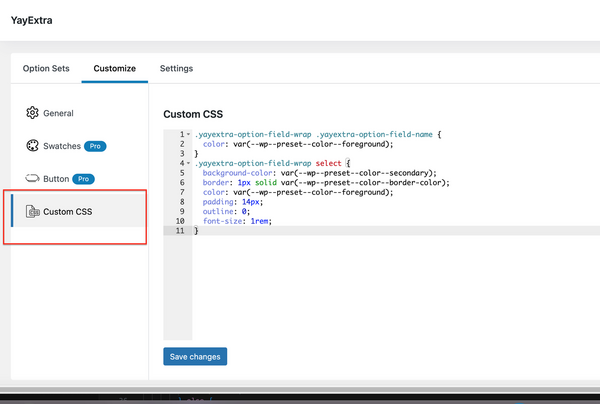
How can I change the style of drop-down without following the theme style?
By default, the style of YayExtra follows the theme style of your WordPress site. You can use this CSS to customize it:
Is it possible to have an option to hide the “Edit option field” in the Cart?
You can use this CSS to hide it.
.yayextra-option-edit-link,
.yayextra-option-edit-link-minicart
{
display: none;
}
How do we turn off the sliding down-the-cart function?
You can add the CSS below to hide it.
.ast-sticky-add-to-cart form .yayextra-option-field-wrap,
.ast-sticky-add-to-cart form .yayextra-total-price{
display: none !important;
}
Can we arrange the options in the sorting of the option set according to preference?
In the panel of the option set, you can drag and drop the options to sort them and arrange them in the order you want.
Can we hide the tooltip of extra options in the plugin?
Yes, you can add CSS to hide it. Please contact us for the CSS support.
Need help with CSS, troubleshooting, or code snippets?
Please get in touch and let us know right away!
– Live Chat: 1-1 VIP Support at YayCommerce.com
– Email: support@yaycommerce.com