Fattura Elettronica API enables your WooCommerce store to automatically issue and transmit Italian electronic invoices from your Orders.
Installation
↑ Back to topTo start using a product from WooCommerce.com, you can use the “Add to store” functionality on the order confirmation page or the My subscriptions section in your account.
- Navigate to My subscriptions.
- Find the Add to store button next to the product you’re planning to install.
- Follow the instructions on the screen, and the product will be automatically added to your store.
Alternative options and more information at:
Managing WooCommerce.com subscriptions.

Setup and configuration
↑ Back to top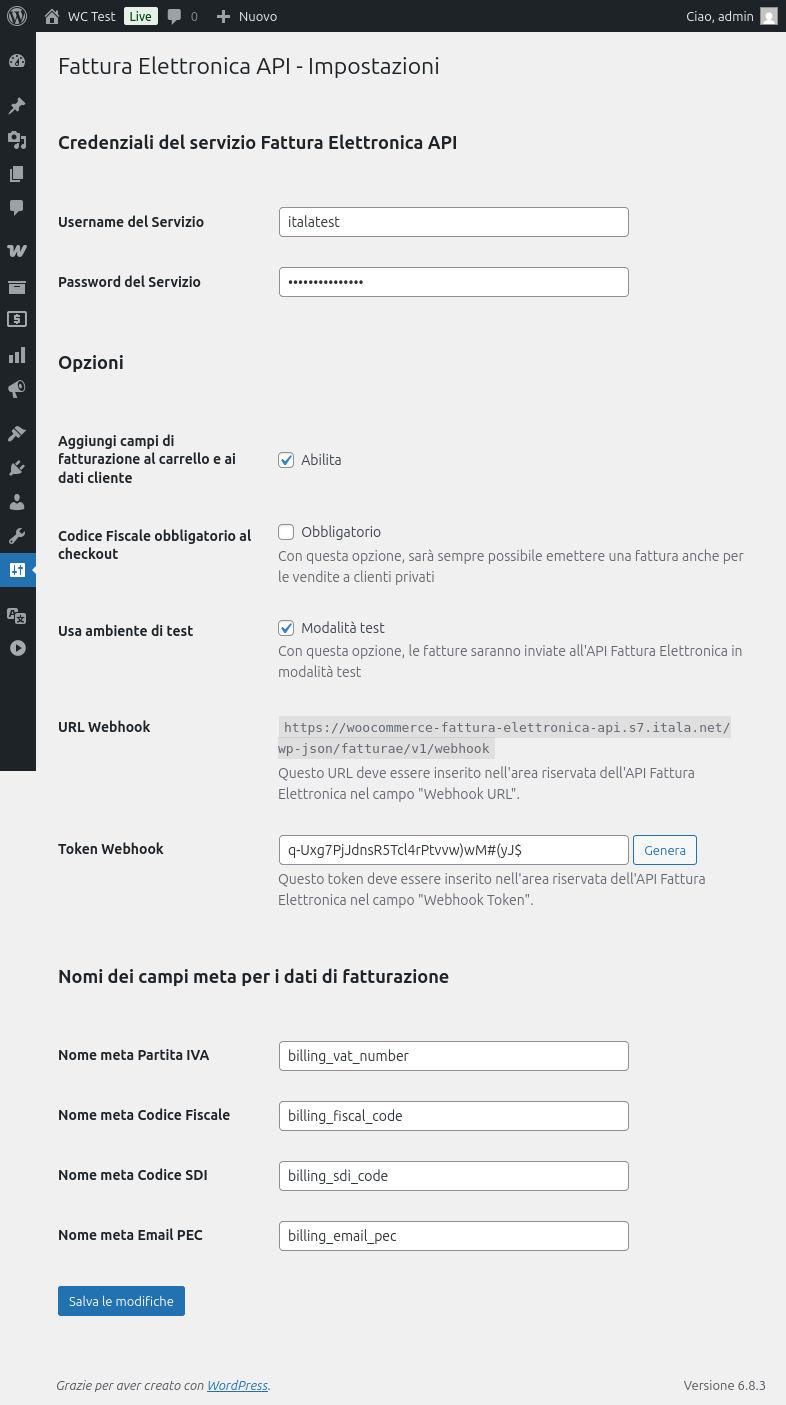
Getting started
↑ Back to topTo set up your store with Fattura Elettronica API:
- From your store’s WP Admin dashboard, navigate to Settings > Fattura Elettronica API.
- Enter the Username and Password provided by the fattura-elettronica-api.it service.
- Choose whether you want the extension to generate the Fiscal Data fields on the checkout page.
- Copy the Webhook URL and Webhook Token into the fattura-elettronica-api.it control panel.
- Save changes.
Advanced configuration
↑ Back to topWe recommend starting by testing the API connection using the Use Test Environment option.
Once you’ve completed your invoice tests, return to the settings page and disable the Use Test Environment option.
If you want to issue an invoice for every order, you can enable the Tax Code Required at Checkout option, ensuring you can always generate an invoice even for private customers.
You can also modify the default meta field names for the Fiscal Data associated with Orders and Customers.
Credit notes
↑ Back to topAfter issuing an invoice for an order, you can also issue a credit note for that same order, inside the Admin Order page.
Support
↑ Back to topPlease contact our technical support if you encounter any issues.