Google Sheets Connector plugin enables to easily sync WooCommerce orders and products with Google Sheets in real-time or on a schedule, giving store owners better visibility, faster updates, and simplified order and inventory management
Installation
↑ Back to topTo start using a product from WooCommerce.com, you can use the “Add to store” functionality on the order confirmation page or the My subscriptions section in your account.
- Navigate to My subscriptions.
- Find the Add to store button next to the product you’re planning to install.
- Follow the instructions on the screen, and the product will be automatically added to your store.
Alternative options and more information at:
Managing WooCommerce.com subscriptions.

Configurations
↑ Back to topGoogle Sheets API Key Generation & Connection
↑ Back to topFollow the steps below to connect your WooCommerce store with Google Sheets.
Step 1: Log in to Your Google Account
↑ Back to topSign in to your Gmail account that you want to use with Google Sheets.
Step 2: Open Google Cloud Console
↑ Back to top- Go to:
https://console.cloud.google.com - Log in using your Gmail account if you are not already logged in.
Step 3: Set Up Billing (Required by Google)
↑ Back to top- Google may ask you to add credit/debit card details.
- This is required even for free usage.
- You can safely use Google services under the free quota.
- Do not enable any paid services.
- You can create multiple projects under the free quota.
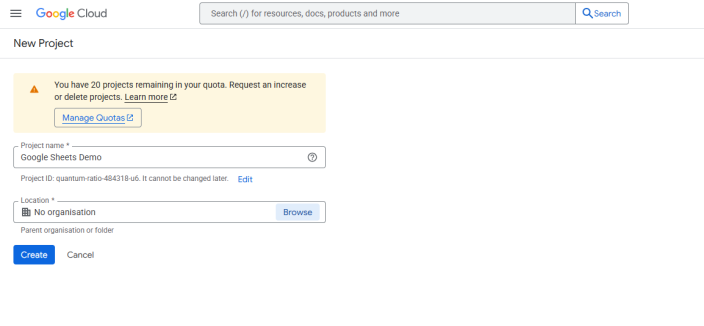
Step 4: Create a New Project
↑ Back to top- Click New Project or open the Project Picker.
- Enter:
- Project Name
- Location
- Click Create.
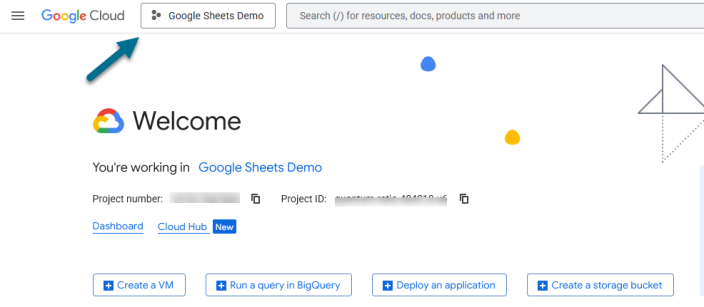
Once created, select the project from the popup or from the Project Picker at the top-left.

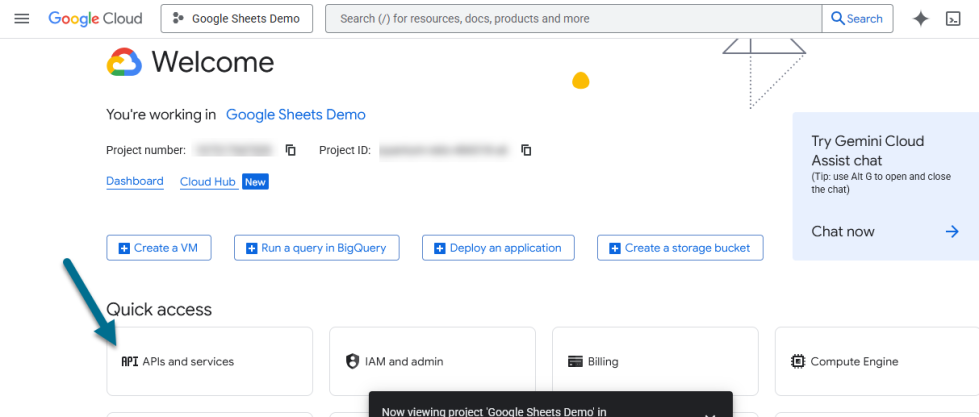
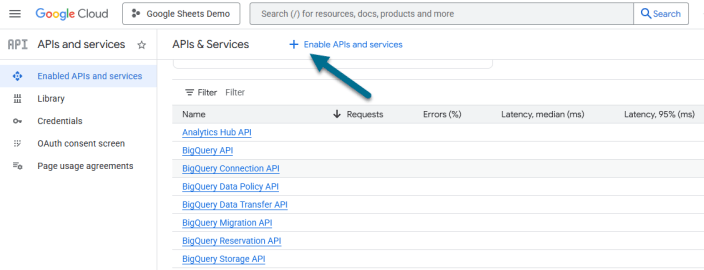
Step 5: Enable Google Sheets API
↑ Back to top- Open the selected project.
- Go to APIs & Services.
- Click Enable APIs and Services.
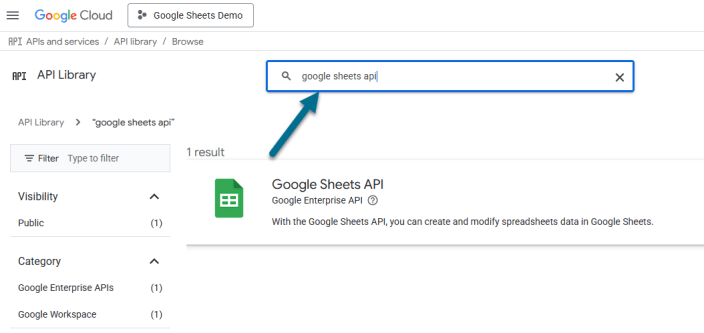
- Search for Google Sheets API.
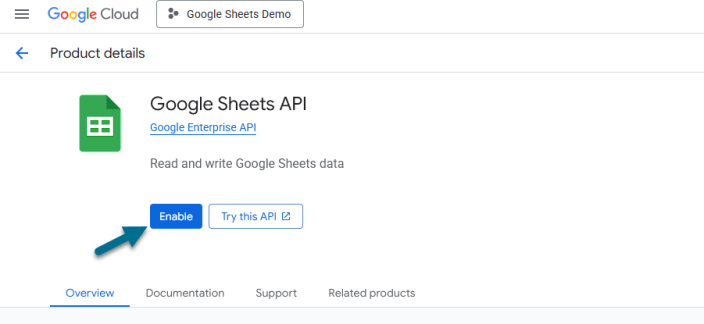
- Click on Google Sheets API.
- Click Enable.
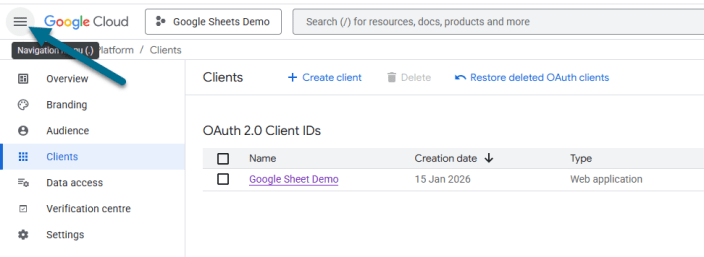
Step 6: Configure Google Auth Platform
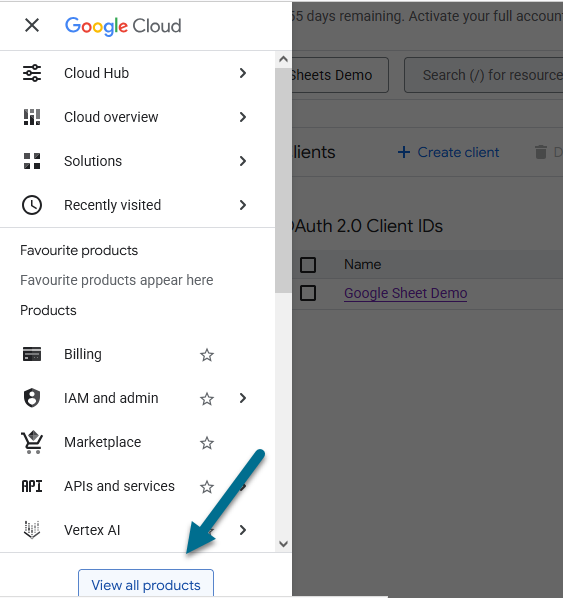
↑ Back to top- Open the Navigation Menu (☰).
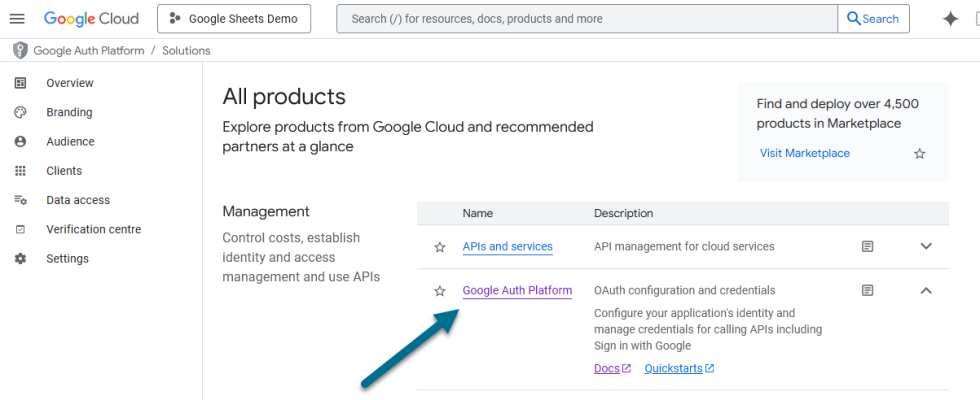
- Click View All Products.
- Select Google Auth Platform.
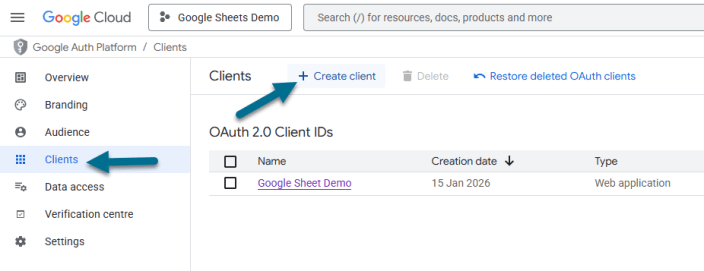
- Go to the Clients tab.
- Click + Create Client.
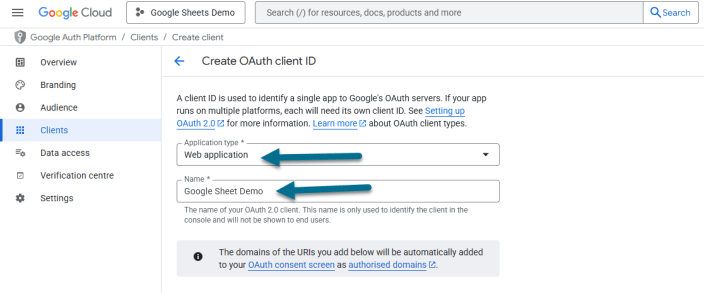
Client Configuration
↑ Back to top- Application Type: Web
- Name: Any name you prefer
Authorized Redirect URL
You can use your own site URL in the following format:
https://woocommerce.extifyplugins.net/google-sheets-connector/wp-admin/admin.php?page=wc-settings&tab=google_sheets
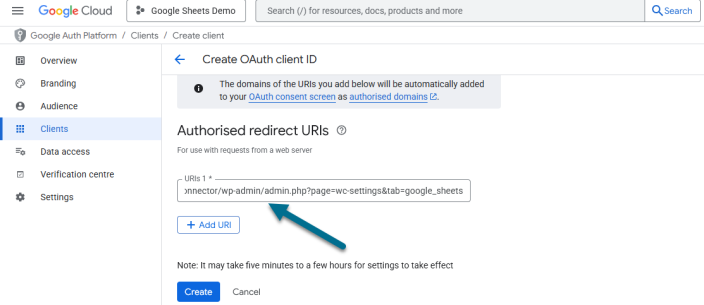
Click Create.
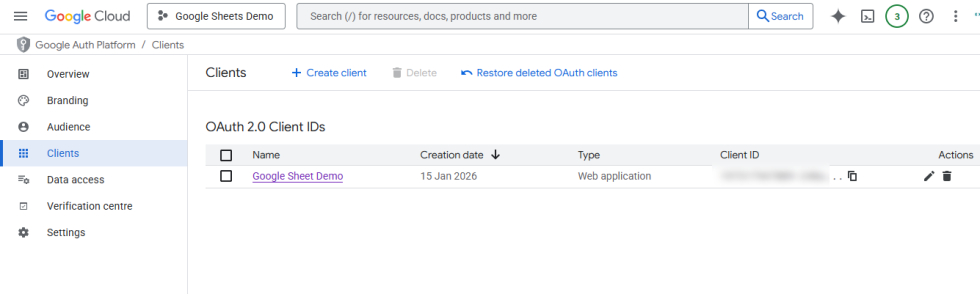
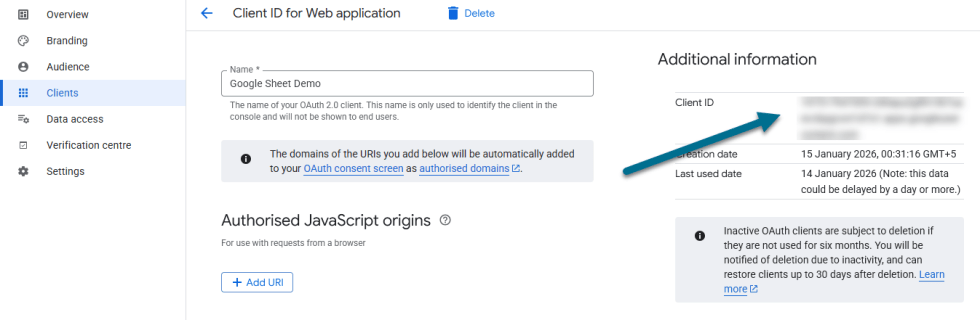
Step 7: Get Client ID & Client Secret
↑ Back to top- Click on the newly created client.
- Copy the following details:
- Client ID
- Client Secret
You will need these in the plugin settings.

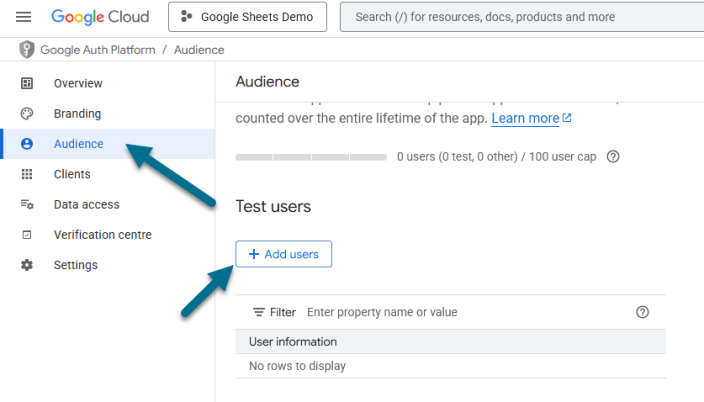
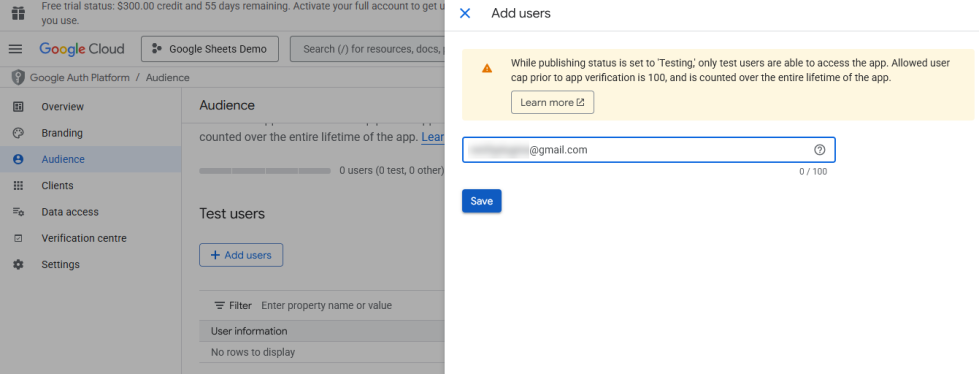
Step 8: Add Test User
↑ Back to top- Go to the Audience tab.
- Add a Test User.
- Enter the same Gmail ID you used earlier.
- Click Save.
Step 9: Create a Google Sheet
↑ Back to top- Open Google Drive.
- Create a new Google Sheet.
- Keep this sheet open.
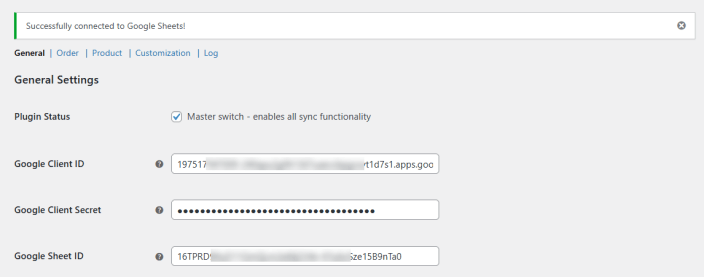
Step 10: Add Details in Plugin Settings
↑ Back to top- Open WooCommerce → Settings → Google Sheets Connector.
- In the General tab, enter:
- Google Client ID
- Google Client Secret
- Google Sheet ID
How to Get Google Sheet ID
↑ Back to top- Open the Google Sheet.
- Copy the text between
/d/and/editin the URL. - Paste only this value as the Google Sheet ID.

Step 11: Save Settings & Connect
↑ Back to top- Click Save Changes.
- Clear cache if caching is enabled.
- Go to Connection Status.
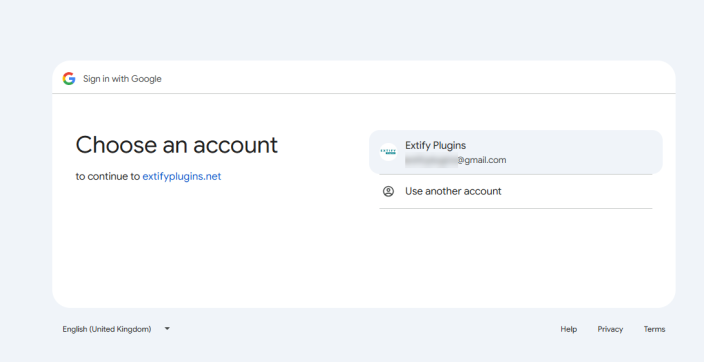
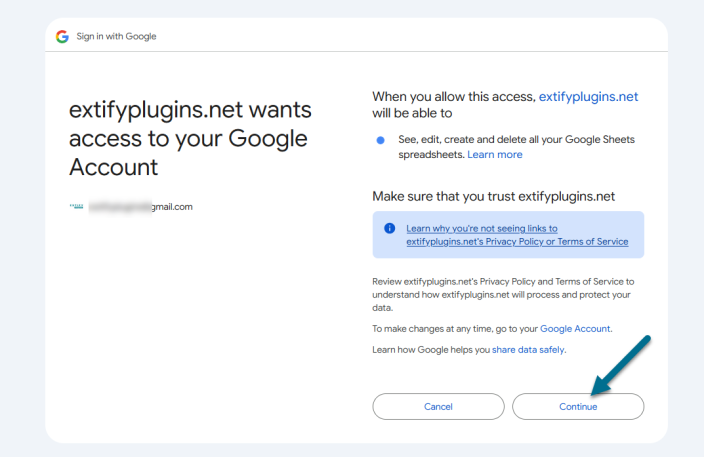
- Click Connect to Google.
- Select your Google account.
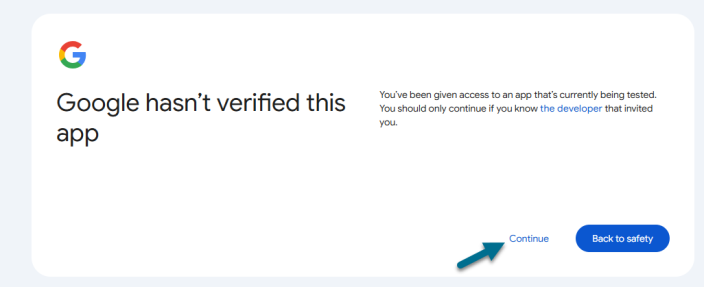
- Click Continue to allow access.
⏳ Note: Google APIs may take up to 5 minutes to activate. If it doesn’t connect immediately, please wait and try again.

Step 12: Connection Successful
↑ Back to topOnce connected, you can:
- Verify Sheet Access
- Rename Sheet
- Clear Sheet Data
- Open Google Sheet

When renaming, a popup will appear and the sheet name will update automatically.
Step 13: Start Syncing Orders & Products
↑ Back to top- Use the Order Sync option to sync WooCommerce orders.
- Synced orders will appear in Google Sheets.
- You can also sync products in the same way.

General Settings
↑ Back to topGo to WooCommerce > Settings > Google Sheets
Here, you will find all the general settings for Google Sheets Connector plugin.
- Real-time Sync – Enable to sync orders instantly whenever their order status changes.
- Scheduled Sync – Select how often WooCommerce data should sync automatically:
- Every 15 Minutes
- Hourly
- Twice Daily
- Daily
- Separate Sheets per Status – Creates individual sheet tabs for each order status (Completed, Processing, Pending, On-Hold, Cancelled, Refunded, Failed).

- Two-Way Sync – Enables syncing changes made in Google Sheets back to WooCommerce.
Note: Changes made in the sheet will directly update WooCommerce data once you Sync option in Order & Product settings. - Product Sync – Syncs the WooCommerce product catalog to Google Sheets and creates a dedicated Products sheet.
- Order Statuses to Sync – Select which order statuses should be included in the synchronization process.
- Connection Status – Displays the current Google Sheets connection state and allows you to connect or disconnect the integration.
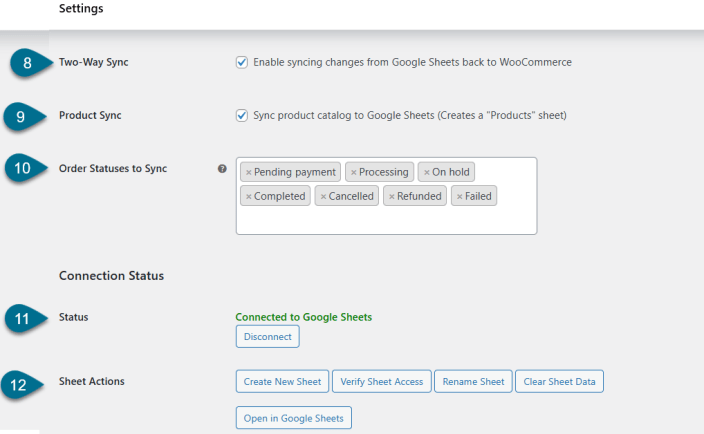
- Sheet Actions
- Create New Sheet: Creates a new Google Sheet for syncing data
- Verify Sheet Access: Checks whether the plugin has permission to access the selected sheet
- Rename Sheet: Updates the name of the connected Google Sheet.

- Clear Sheet Data: Removes all synced data from the sheet
Note: This action permanently deletes data from the Google Sheet and cannot be undone. You have to sync the data again. - Open in Google Sheets: Opens the connected sheet in a new browser tab
Orders Sync with Google Sheet
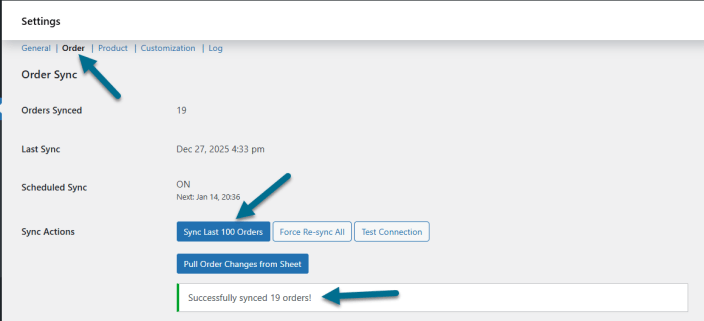
↑ Back to topGo to WooCommerce > Settings > Google Sheets > and then Order
In this section, you can view order sync status with Google Sheet and allows you to manually control sync actions.
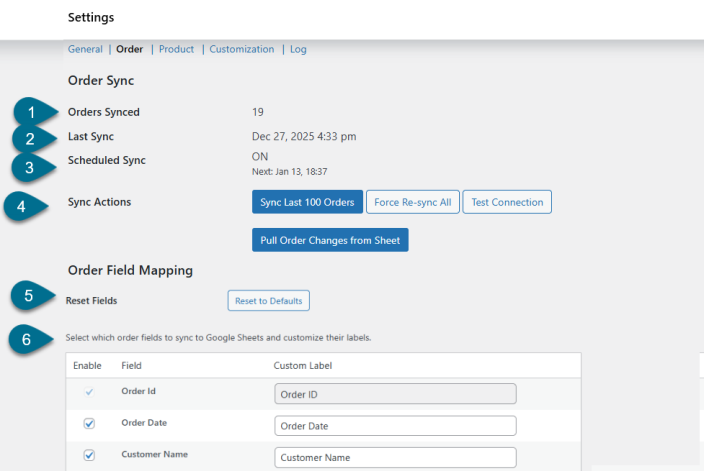
- Orders Synced – Displays the total number of orders synced during the last synchronization (e.g., 19 orders).
- Last Sync – Shows the date and time when the most recent order sync was completed.
- Scheduled Sync – Indicates whether scheduled synchronization is currently enabled.
- Next Sync – Displays the scheduled date and time for the next synchronization.
- Sync Actions – Sync Orders as per your requirment
- Sync Last 100 Orders: Manually syncs the most recent 100 WooCommerce orders to Google Sheets.
- Force Re-sync All: Re-syncs all orders regardless of previous sync status.
- Test Connection: Verifies the connection between WooCommerce and Google Sheets.
- Pull Order Changes from Sheet: Imports order updates from Google Sheets into WooCommerce Note: This action only works when Two-Way Sync is enabled in the General Settings tab.
- Reset Fields – Resets all order field mappings and labels back to their default configuration. Note: Any custom field selections or custom labels will be permanently removed.
- Select Order Fields – Choose which order fields should be synced to Google Sheets.
- Order Field Mapping – Check to enable the field and optionally assign a custom label for how it appears in Google Sheets.
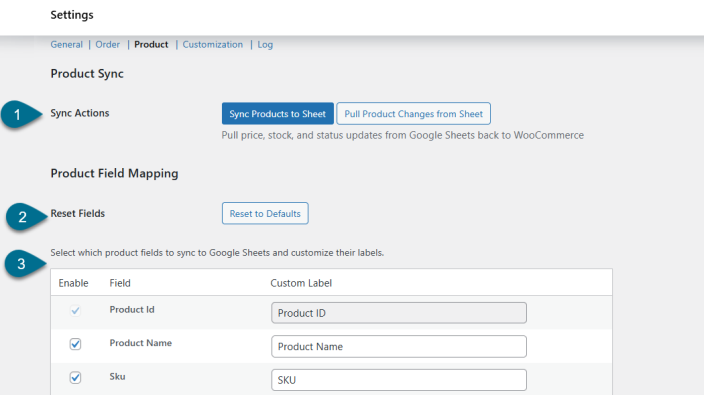
Products Sync with Google Sheet
↑ Back to topGo to WooCommerce > Settings > Google Sheets > and then Product
In thi section, you can synchronize WooCommerce products with Google Sheets and manage product data updates.
- Sync Actions – Sync products as per your requirement.
- Sync Products to Sheet: Pushes WooCommerce product data to Google Sheets.
- Pull Product Changes from Sheet: Pulls price, stock, and product status updates from Google Sheets back to WooCommerce.
Note: This action requires Two-Way Sync to be enabled in the General Settings tab.
- Reset Fields – Resets all product field mappings and labels back to their default configuration. Note: Any custom field selections or custom labels will be permanently removed.
- Product Field Mapping – Select which product fields should be synced to Google Sheets and customize their labels. Select Fields to optionally assign customized labels as they appear in Google Sheets.Like Product Name, ID, SKU, Stock Quantity etc.
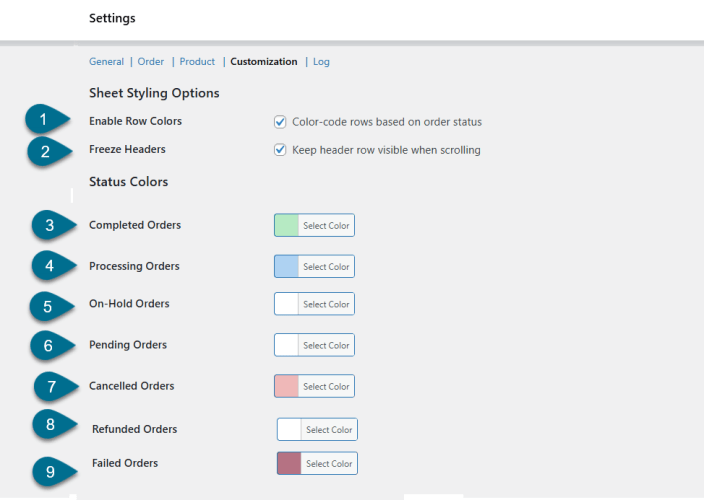
Customise Google Sheet Appearance
↑ Back to topGo to WooCommerce > Settings > Google Sheets > and then Customization.
This section allows you to customize the appearance of your Google Sheets for better readability and visual clarity.
- Enable Row Colors – Select to automatically color-code rows based on the order status
- Freeze Headers – Select to keep the header row visible while scrolling through the sheet
- Completed Orders – Select the color to apply to rows with Completed order status
- Processing Orders – Select the color to apply to rows with Processing order status
- On-Hold Orders – Select the color to apply to rows with On-Hold order status
- Pending Orders – Select the color to apply to rows with Pending order status
- Cancelled Orders – Select the color to apply to rows with Cancelled order status
- Refunded Orders – Select the color to apply to rows with Refunded order status
- Failed Orders – Select the color to apply to rows with Failed order status
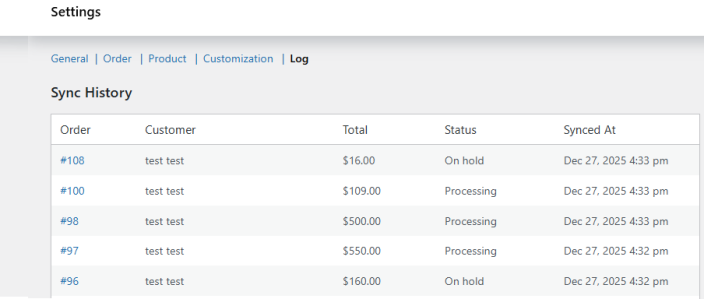
Log (Track Order Sync Activity)
↑ Back to topGo to WooCommerce > Settings > Google Sheets > and then Log
This section displays synchronization logs and helps you track order sync activity.
- Sync History – Shows a detailed list of orders that have been synced with Google Sheets.
- Order – Displays the WooCommerce order ID
- Customer – Shows the customer name associated with the order
- Total – Displays the total order value
- Status – Shows the current order status at the time of synchronization
- Synced At – Displays the date and time when the order was synced to Google Sheets