1. Overview
↑ Back to topInfluence Rewards adds weighted customer voting to WooCommerce. You create proposals; customers vote with influence determined by their purchase history (spend, orders, or items). Use it for roadmap input, product selection, or community decisions.
2. Installation
↑ Back to topMarketplace Install:
- Purchase/activate via WooCommerce.com Subscriptions system.
- Navigate to WooCommerce > Extensions > My Subscriptions and activate.
- Plugin auto-updates if subscription active.
Manual Install (if provided a ZIP):
- Plugins > Add New > Upload Plugin.
- Upload ZIP, Install, then Activate.
3. Concepts
↑ Back to top- Proposal: A voting instance (single or multiple choice).
- Voting Power: Numeric weight per user; modes:
- Total Orders
- Total Spent
- Total Items Purchased
- Weight Rate: Multiplier applied per unit (e.g., 1 power per order).
- Active Date Range: Optional start/end window; outside window voting is disabled.
- Single Choice: Auto Yes/No or custom? (Single choice internally defaults Yes/No; multiple choice accepts custom options.)
- Multiple Choice: Custom option list; optional multi-select toggle.
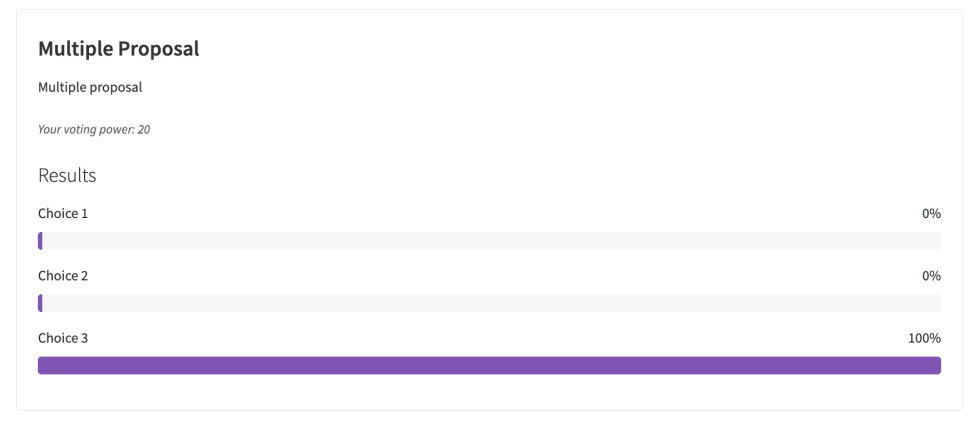
- Results: Aggregated per option (total weighted power & percentage).
4. Configuration (Settings Tab)
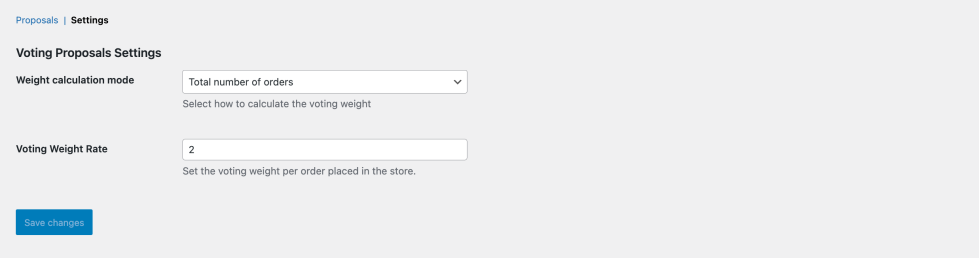
↑ Back to top- Weight Calculation Mode
- Choose how Voting Power is derived.
- Voting Weight Rate
- Displays the appropriate rate field for the active mode:
- Total Spent: power per currency unit (e.g., per $1).
- Total Orders: power per order.
- Total Items: power per line item purchased (completed orders only).
- Displays the appropriate rate field for the active mode:
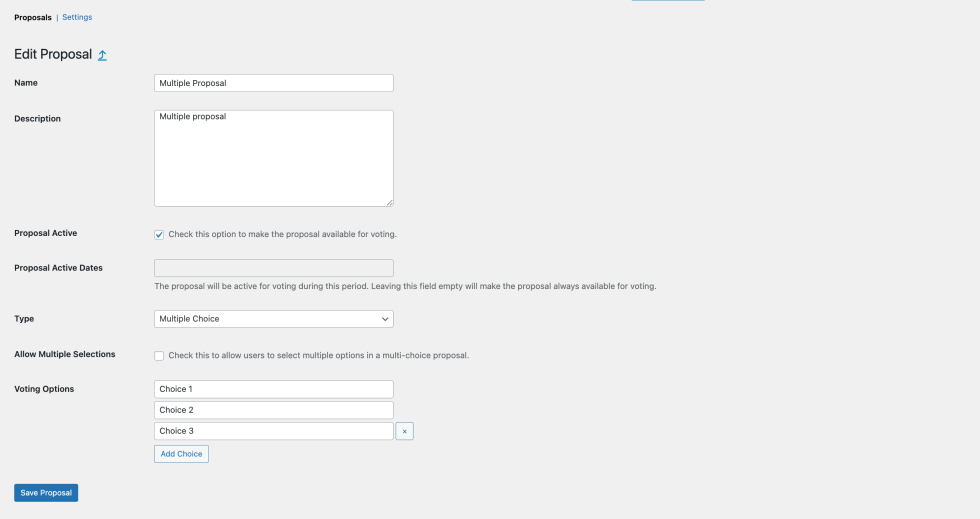
5. Creating a Proposal
↑ Back to top- Name (required) – internal & displayed title.
- Proposal Type:
- Single Choice (Yes / No auto options).
- Multiple Choice (define custom options).
- Description – visible to voters.
- Active? – Indicate if the proposal is active for voting.
- Active Date Range – start / end (leave blank for always-on when active).
- Allow Multiple Selections (for Multiple Choice).
- Voting Options (for Multiple Choice) – add label/value pairs:
6. Managing Proposals
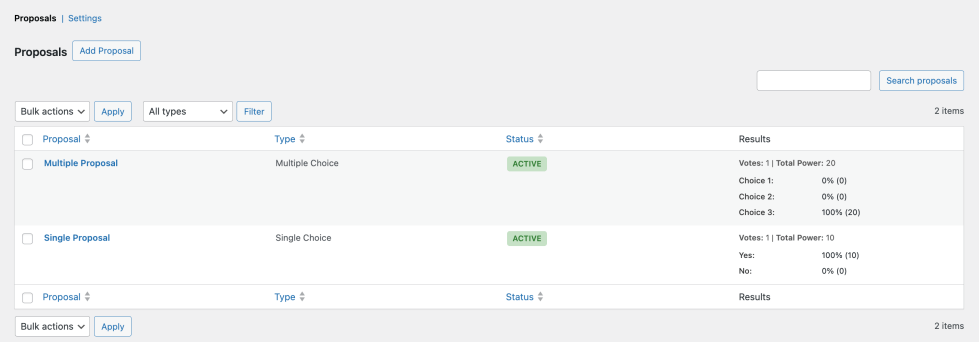
↑ Back to topProposals Table Columns:
- Name
- Type
- Status (Active / Closed)
- Total Votes (count of distinct voters)
- Total Power (sum of weighted power)
- Per Option Summary (label: %)
7. Displaying a Proposal (Frontend)
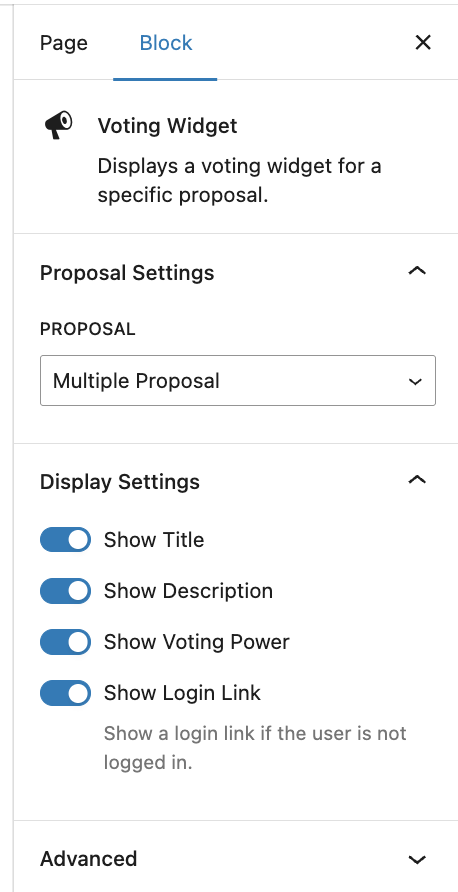
↑ Back to topOption A: Block Editor (Recommended)
- Edit a Page/Post.
- Add block: “Voting Widget”.
- In sidebar controls:
- Select Proposal
- Toggles: Show Title, Show Description, Show Voting Power, Show Login Link
Option B: Shortcode
Use the shortcode: [voting_loyalty_widget id=”123″]. Replace 123 with the proposal ID (find in admin row links or hover).
8. Customer Voting Experience
↑ Back to top- Logged-out user: sees login prompt (if login link toggle enabled).
- Logged-in user with 0 power: sees message preventing voting.
- Eligible user: selects option(s) and clicks Submit Vote.
- Post-submission: vote form hidden; results remain.
9. Voting Power Calculation Details
↑ Back to topCalculation of the voting power depending on the mode:
- Total Orders power = rate * number_of_orders (It takes into account orders in the completed status)
- Total Spent power = rate * total_spent (WooCommerce’s lifetime spent metric)
- Total Items power = rate * sum_of_item_counts (It takes into account orders in the completed status)