Overview
↑ Back to topBigin by Zoho CRM Integration for WooCommerce plugin comes packed with powerful transaction data handling features, including the ability to create custom feeds, map WooCommerce fields to Bigin modules, and sync historical data using One-Click or Bulk Sync options.With this plugin, you can configure feeds, which are rule-based workflows that determine how your WooCommerce store data is transferred to Bigin by Zoho CRM you can set up sequential events that run once data from specific sources is synchronized. You can also sync account (company) details, product details, and pipeline data.
The highlighting features of the plugin are-
- Sync your WooCommerce data like customer details and orders to BIgin by Zoho with simple one-click data for instant synchronization or bulk sync for scheduled synchronization of massive data.
- Multiple sync options include instant and background sync, plus you get condition filters to control which data to sync and when to sync.
- A detailed view of logs is available so you can keep track of everything, spot and fix any synchronization issues.
- Option to create custom feeds and map your data based on events like when an order is updated, or when a refund is initiated etc, This helps keep your crm always updated with the latest info.
Setup and Configuration?
↑ Back to topConnecting your WooCommerce store to Zoho Bigin involves installing our Integration for Bigin by Zoho CRM Plugin.
Step 1 – Install the Plugin
↑ Back to top- Download the .zip file from your WooCommerce account.
- Log into your WordPress Dashboard and navigate to Plugins > Add New

- Click on the Upload Plugin button at the top and upload the .zip file of the plugin.
- Install the plugin and click Activate to get started.
Step 2 – Connect to Zoho Bigin
↑ Back to topUsing the plugin functionality, you can easily connect your Zoho Bigin account to your WooCommerce store.
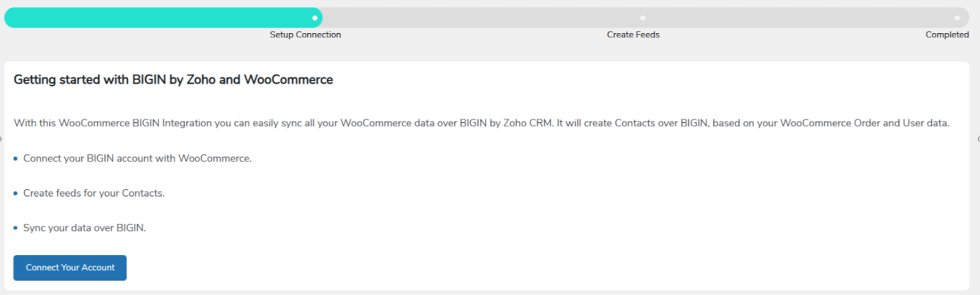
Click on “Connect Your Account.”
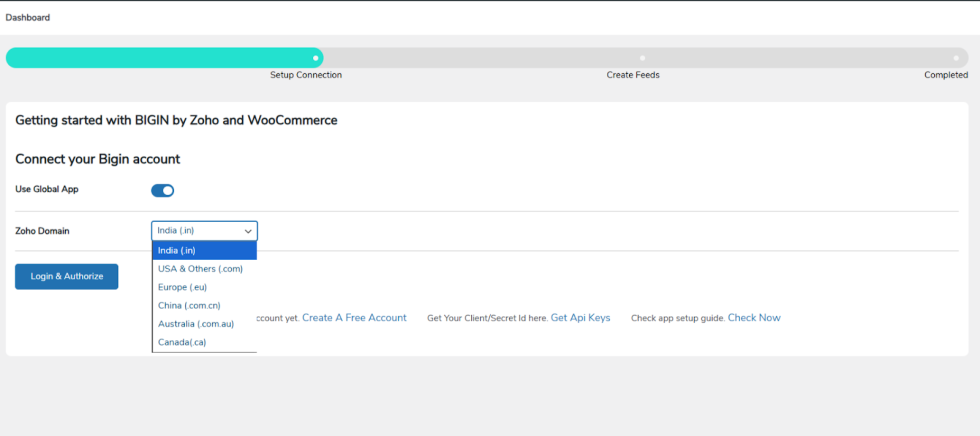
Select your country-specific domain from the available options, then click “Login & Authorize” and grant authorization.
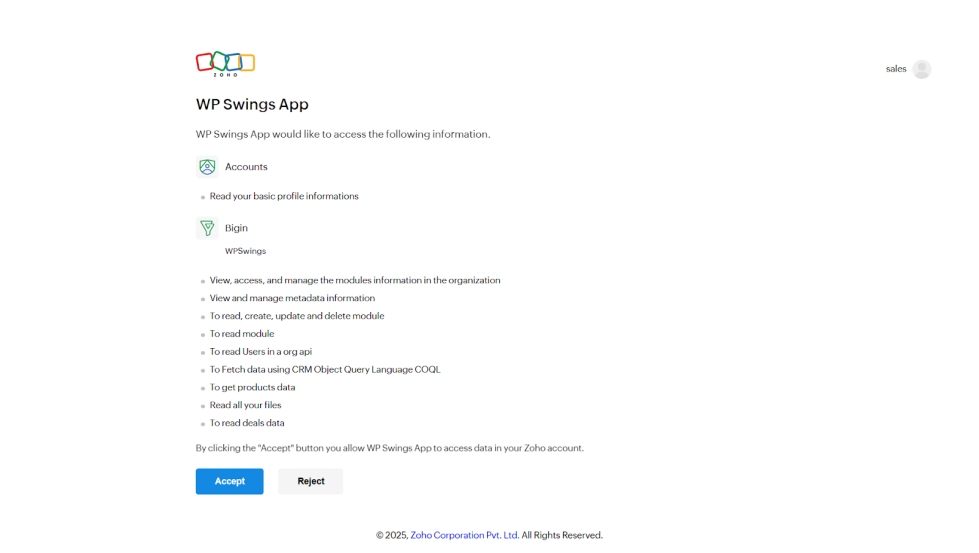
You’ll be redirected to the Zoho Bigin authentication portal (as shown in the screenshot above). Verify your account details and, once confirmed, click “Accept.”
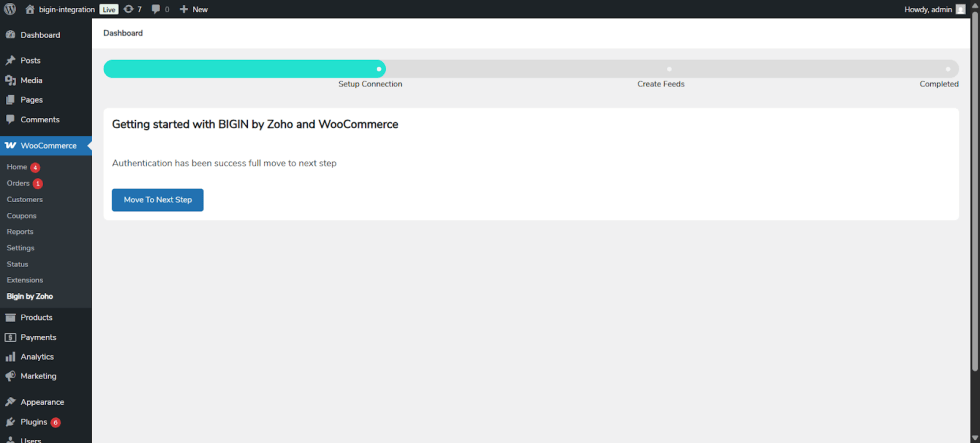
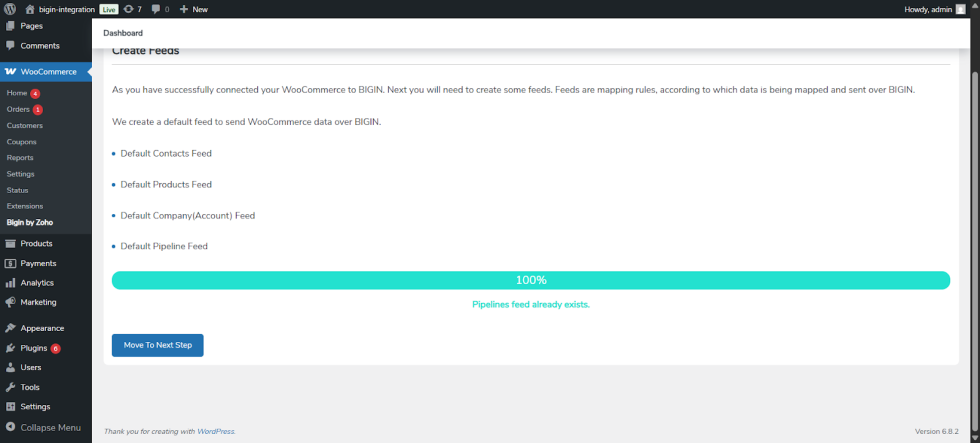
After successful authentication, you’ll be redirected back to the plugin. Click “Move to the Next Step.”
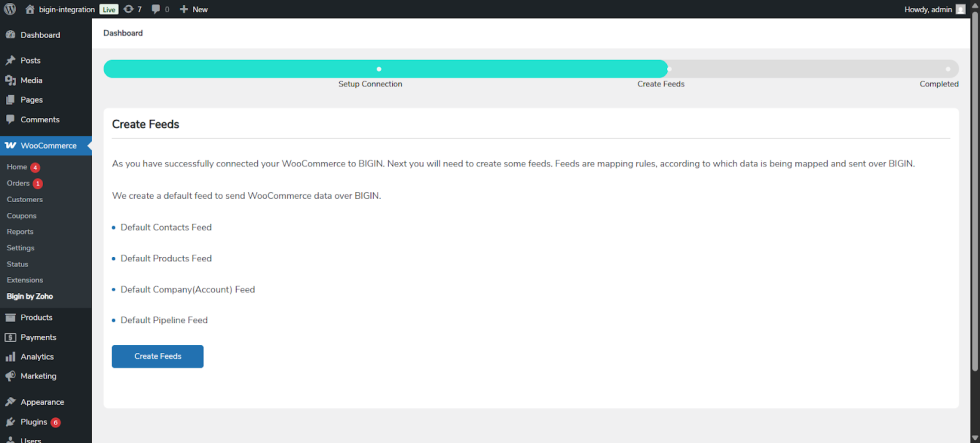
You’ll be prompted to create feeds. The default feeds are Contacts, Products, Accounts (Company), and Pipelines. Click “Create Feeds.”
Lastly, after completing all the required processes, you’ll be redirected to the plugin’s actual dashboard, which looks like the above.
Dashboard
↑ Back to top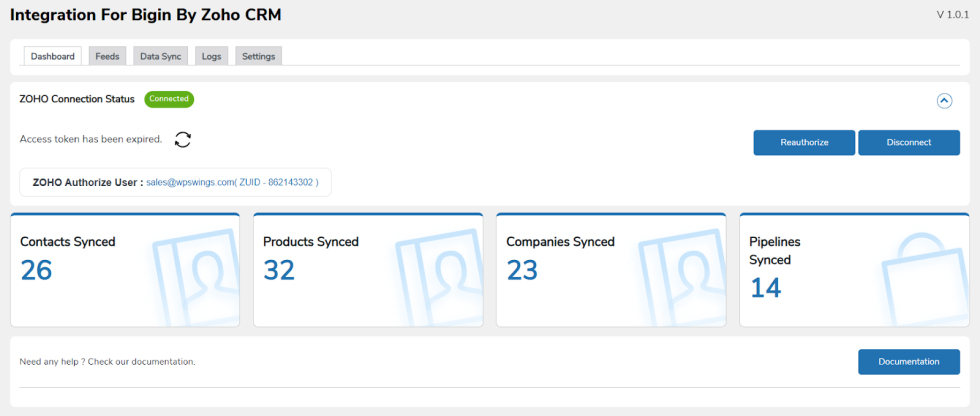
In the dashboard, you’ll find details such as synced contacts, products, companies, and pipelines.
At the top, you can see the authorized user’s name and their ID. You also have the option to reauthorize or disconnect the account.
Feeds
↑ Back to top
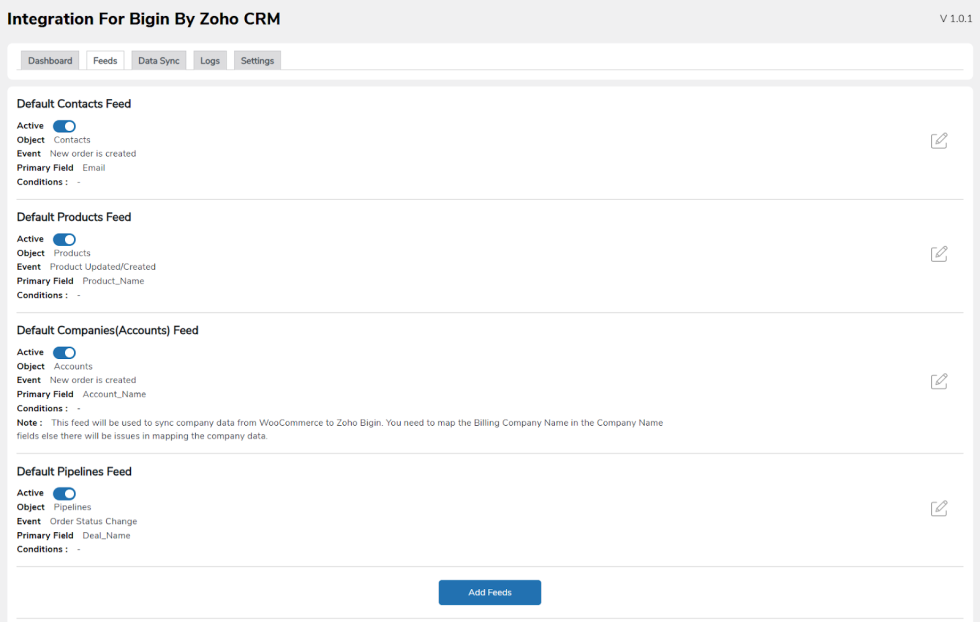
This is the very next tab in the plugin backend section. This involves you creating feeds that control the overall data synchronization process for your WooCommerce objects.
Here you can see 4 feeds available: Pipeline Feed, Products Feeds, Account (company) feeds, and Contact feeds to sync different types of data.
These fields are automatically created during the setup process of the plugin.
In the future, we will be adding multiple feeds to synchronize various types of objects and data.
Feed Options
↑ Back to topIn this section, we’ll explore the different options available under a specific feed. For this explanation, I’ll be using the Product Feed as an example, but the options remain the same across all feeds, including Pipelines, Contacts, and Accounts (company).
Some options that are new and unique in each feed will be explained, respectively.
Click on the edit icon to start editing this feed.
Once you click on the edit icon, you will see a ton of options. Let’s see each of them in detail.
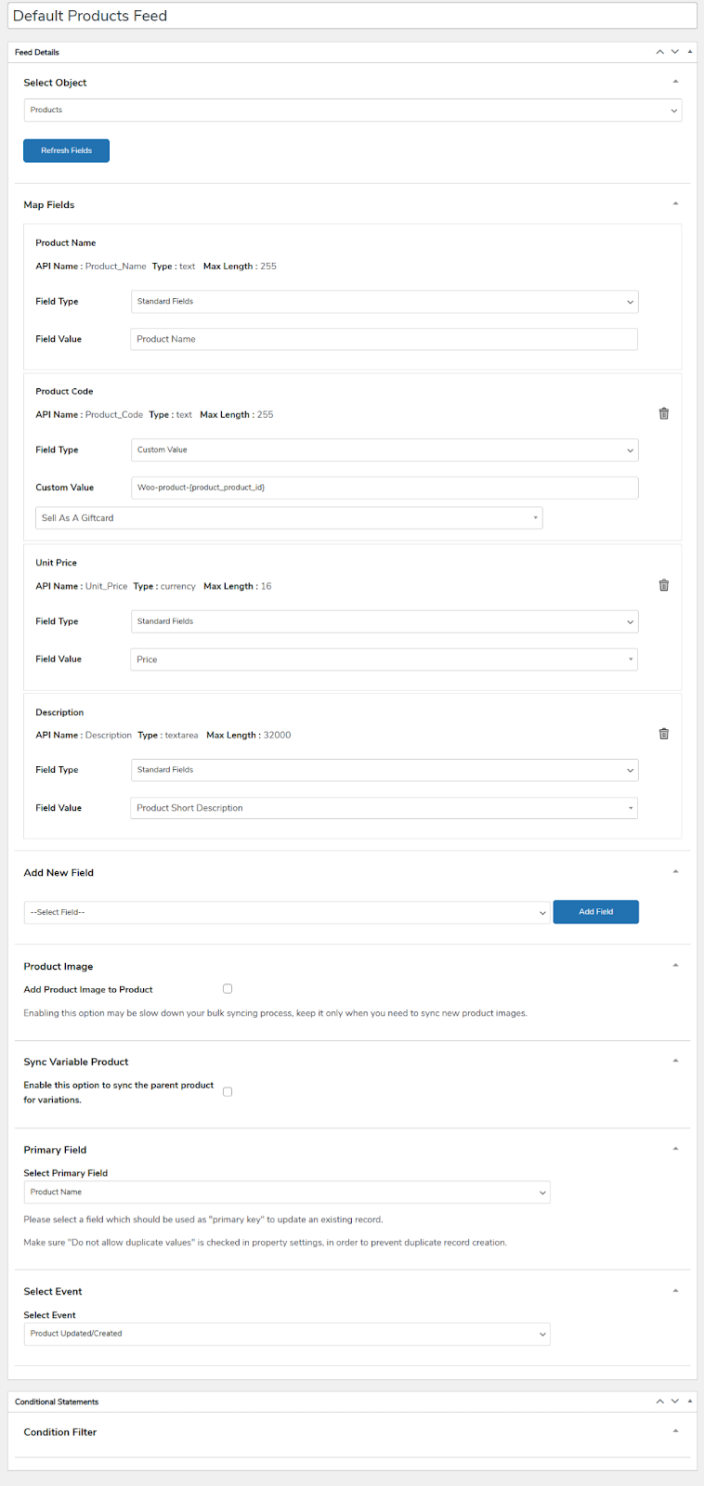
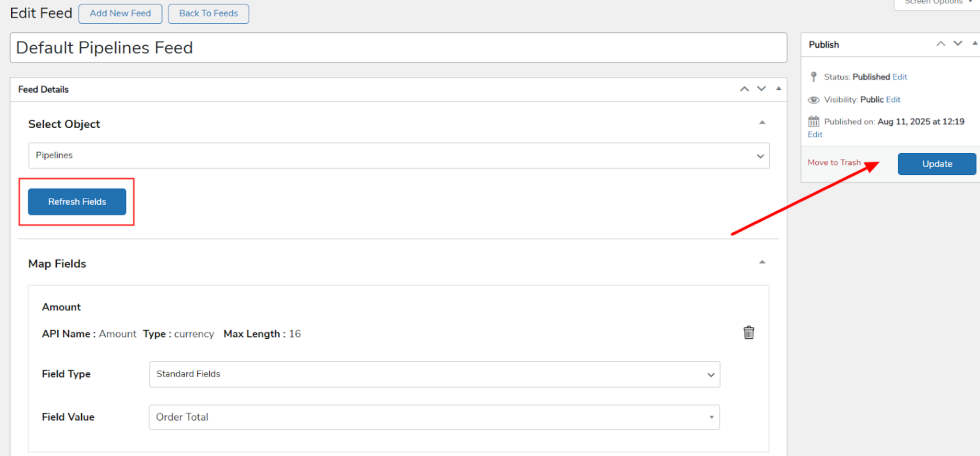
1. Select Object
↑ Back to top
Here, you have to select the synchronization object; the current objects are product, contacts, and accounts.
2. Map Fields
The next option you have is to map respective fields to their respective values; you can map them as per your requirements.
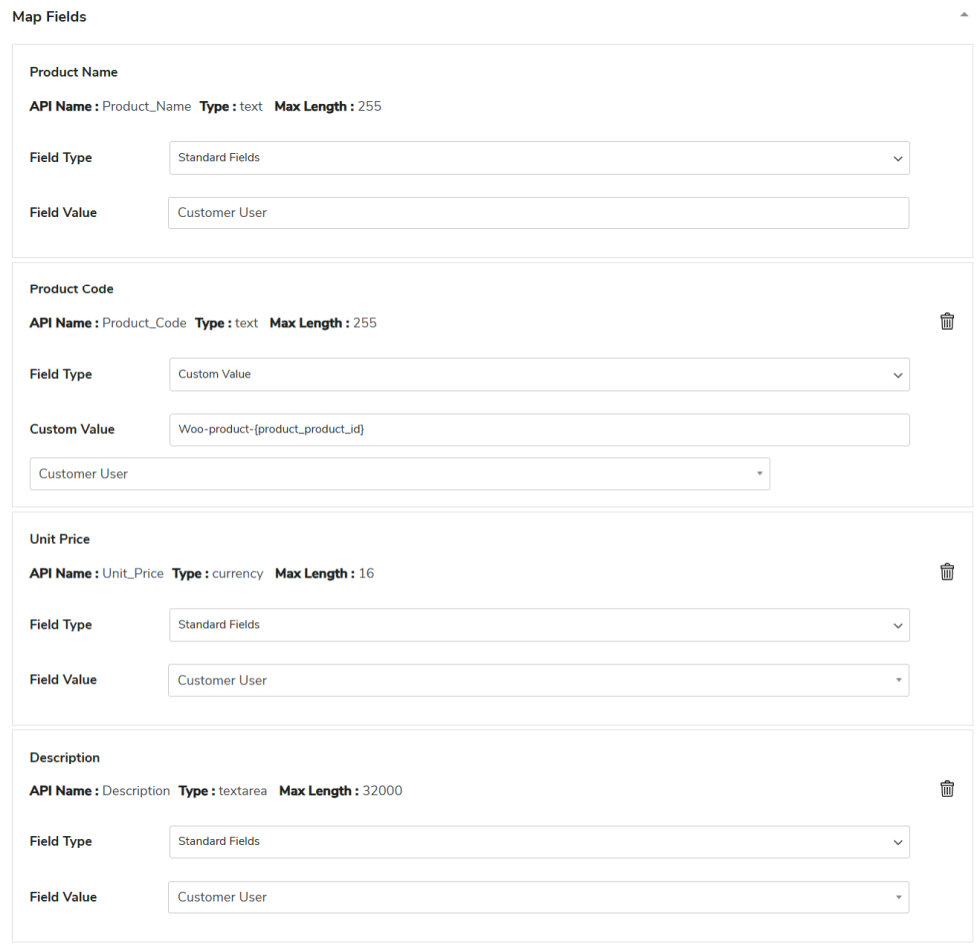
In the field type option, you can select a standard field type or custom value, and in the field value section, you can define the field value.
3. Add Fields
In this section, you get the option to add additional fields to map in the synchronization process.

4. Product Image
In this section, you get the option to synchronize product images along with additional data that you have initially mapped in the feed section.

Keep in mind that this could increase the time in bulk synchronization.
5. Sync Variable Products
If you like to sync multiple variations of a product along with the initial data, you can check this option.

6. Primary Fields
You can choose a field that will act as the “Primary Key” to identify and update existing records.
For example, you might use fields like “Product Name” or “Product Code,” since these are usually unique for each customer or order

Also, make sure the “Do not allow duplicate values” option is enabled in the field’s settings.
This prevents the system from creating duplicate records when syncing data.
7. Select Events
In this section of the Select Event Settings, you need to choose an event that will trigger the synchronization of your WooCommerce data with Bigin.

These event settings are important because they help capture and record real-time data whenever a transaction or activity occurs in your store.
8. Conditional Filters
With conditional filters, you can control when data should sync from WooCommerce to Bigin. The sync will only occur if the conditions you set are met.
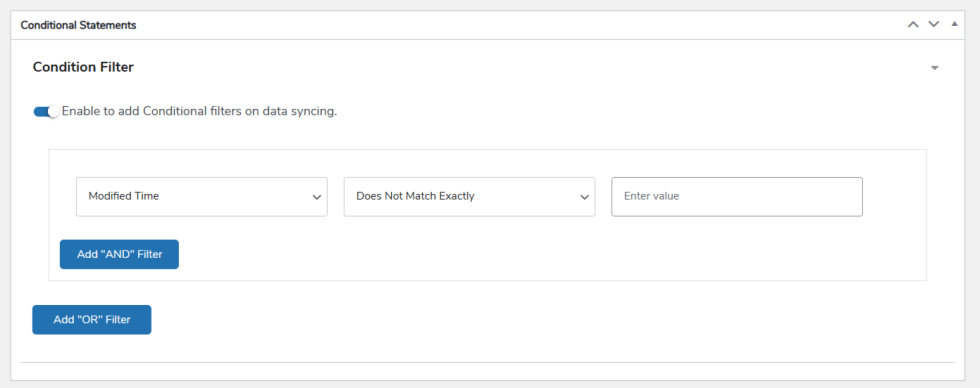
You can choose specific fields, define the type of condition, and enter the values that should be matched.
Plus, you can combine multiple conditions using AND / OR logic to create more advanced rules for syncing.
Note: If there’s an existing account in Bigin and the data matches the primary record, the data will be updated. No new data will be created
Sync Shipping Details
↑ Back to topZoho Bigin Integration plugin allows you to sync all shipping details from your WooCommerce store to Zoho Bigin. This can be done either via bulk sync or instant sync, giving you flexibility based on your workflow.
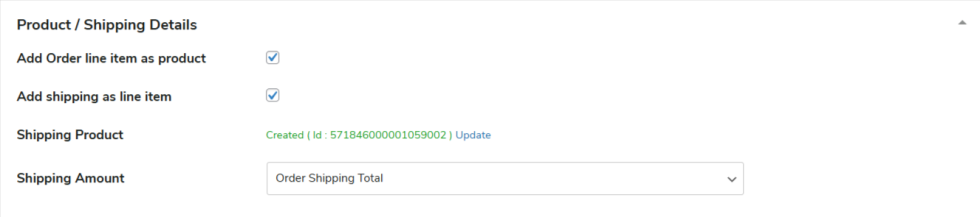
Settings Overview:
- Add Order Line Item as Product: Enable this option to include each order line item as a product in Zoho Bigin.
- Add Shipping as Line Item: Check this option to sync shipping costs as a separate line item within the order.
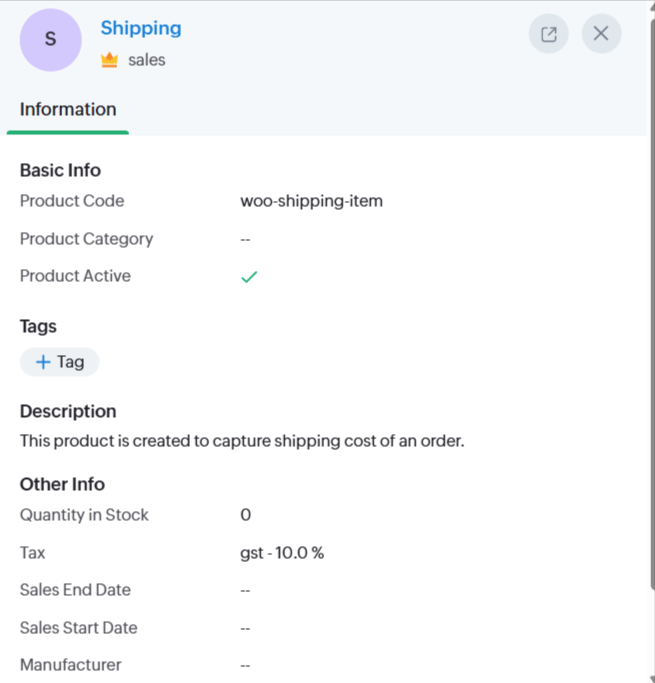
- Shipping Product: This field shows the shipping product created in Zoho Bigin. You can create a new shipping product or update an existing one if needed.
- Shipping Amount: Select whether you want to sync the Order Shipping Total or Shipping Total including Tax.
You can track shipping details precisely, either as part of the order or as a separate product, ensuring your sales data in Zoho Bigin fully matches your WooCommerce store.
Here is how a shipping product will show over bigin.
Map Woo Order Statuses in Pipeline
↑ Back to topFor instance, “Pending Payment” orders are assigned to the “Needs Analysis” stage, indicating that more details are needed, while “Processing” orders are mapped to the “Proposal/Price Quote” stage, where the customer is reviewing the offer. “Completed” orders move to “Closed Won,” signaling a successful sale, whereas “Cancelled,” “Refunded,” and “Failed” orders are synced to “Closed Lost,” indicating a lost deal.
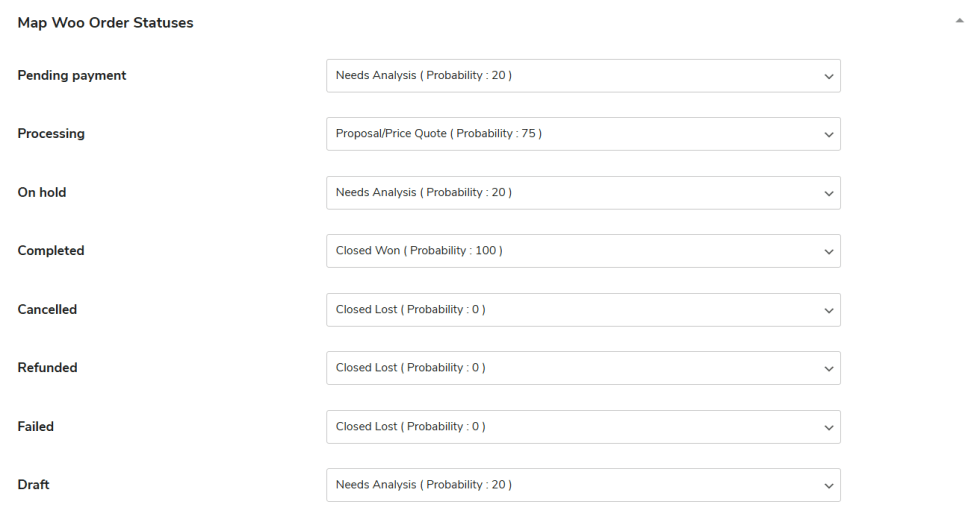
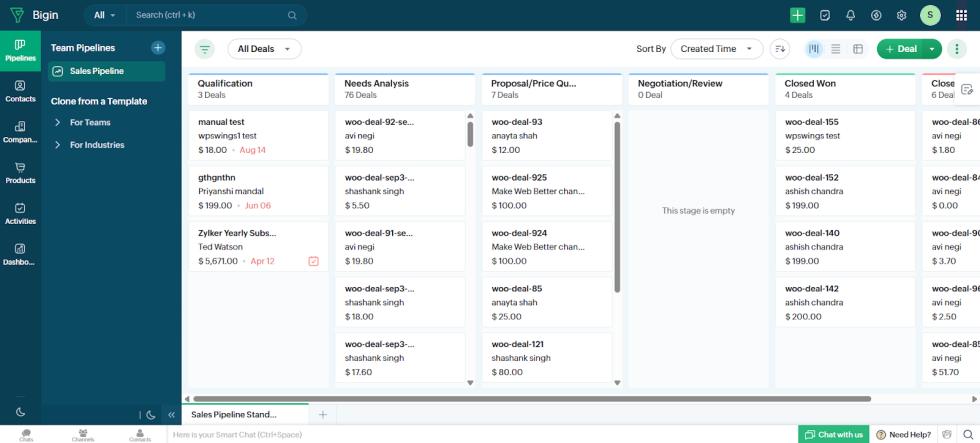
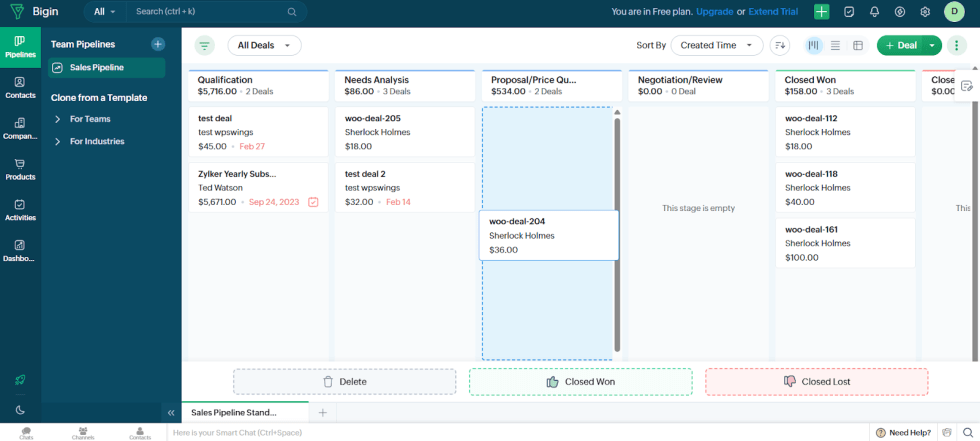
This integration simplifies your workflow by automatically aligning WooCommerce order statuses with Zoho Bigin’s sales pipeline stages, improving order management and tracking.
Here is how it’ll show over the Begin dashboard.
Sync Refund Reasons
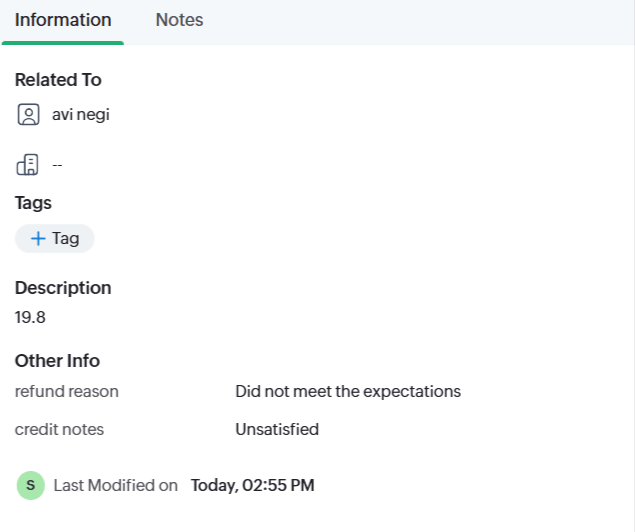
↑ Back to topYou can sync refund details from WooCommerce directly into Zoho Bigin, including essential information like the refund amount, reason, notes, and date
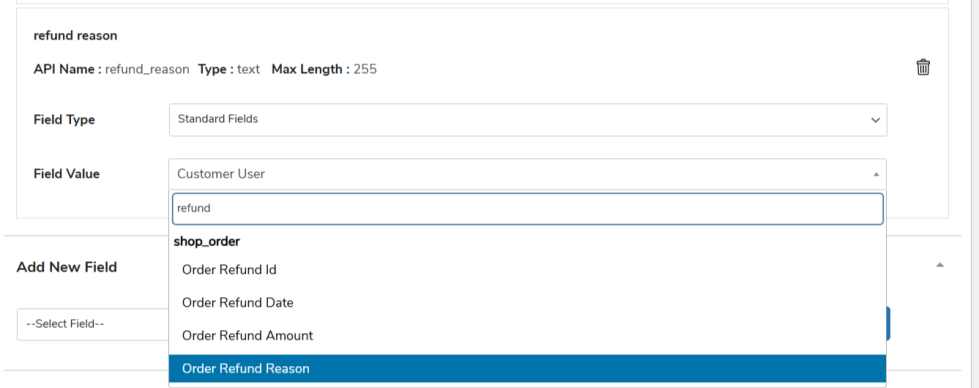
Just map them to their respective fields and start syncing using either one click or bulk sync.
Here is how the details will show on the Bigin dashboard.
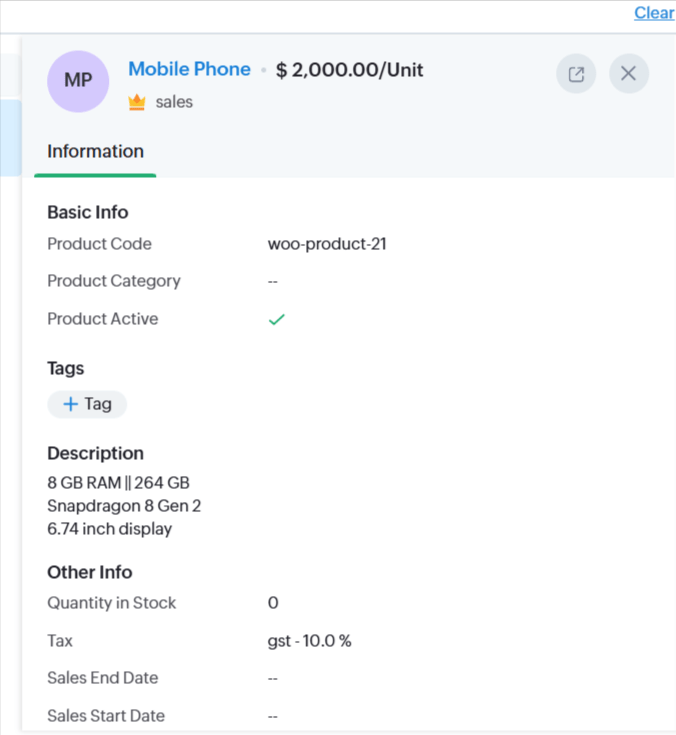
Sync Tax Details
↑ Back to topWith the Zoho Bigin Integration plugin, you can easily sync tax rates from your WooCommerce store to Zoho Bigin. You can set up different tax rates in WooCommerce, such as Standard, Reduced, or Zero rates, and map them directly to Zoho Bigin.
This ensures that the correct tax information is applied when customers make a purchase

If you create new tax rates in Zoho Bigin, you can select them in the plugin settings. If you don’t see the new rates, you can refresh the fields to update the list.
Here is how these applied taxes will show on products over Bigin.
MultiCurrency Setup
↑ Back to topZoho Bigin Integration plugin supports multiple currencies, making it easy to manage international sales. When syncing data, both the store’s base currency and the customer’s shopping currency are shown in Zoho Bigin.
To make this work, you need to create multiple currencies in Bigin as per your requirements and activate them.
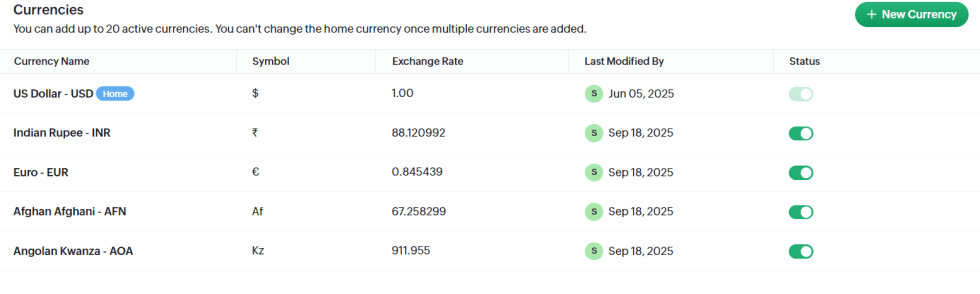
Once activated, go to the plugin’s pipelines feed and add a new currency feed.
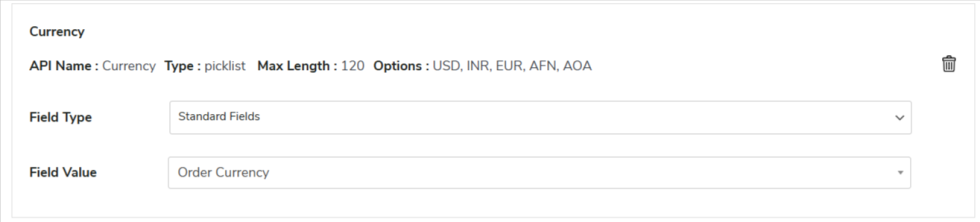
In this feed, you’ll see options for all the currencies you’ve added in Bigin, as shown in the screenshot above.
Note: If these options aren’t showing up, try refreshing your fields. Also, if you’ve made any other changes in your Bigin dashboard, like updates to currency, taxes, or anything else, make sure to refresh the fields so everything stays up to date.
Finally Update the feed, and sync via once click or bulk sync. You can also utilize other options for later syncronization like when an event occurs or using background sync.
Data Sync
↑ Back to topThis is the next tab in the plugin backend that serves the data synchronization purpose for your WooCommerce store over Bigin. You can choose between two methods depending on your needs:
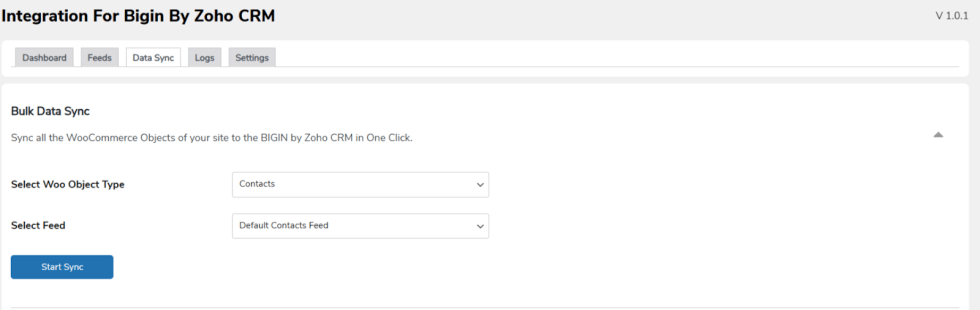
Bulk Data Sync: This type of synchronization process involves historical data sync. You can easily make use of this feature available in the plugin if you have a large amount of historical data.
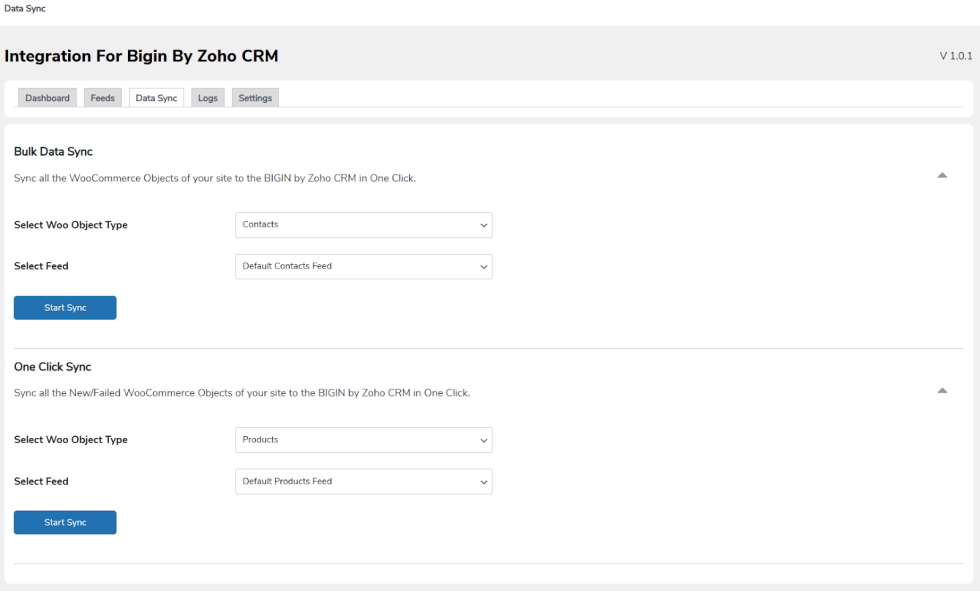
As the name suggests, the feature offers easy bulk data synchronization. You just need to provide the specific Object and the respective Feed associated with that to get started with the process.
One-Click Sync: Due to network or other constraints, procedures might miss or fail to record(newly added data) a few data chunks while recording data from your WooCommerce store utilizing Bigin by Zoho CRM.
Here comes the One-Click Sync.
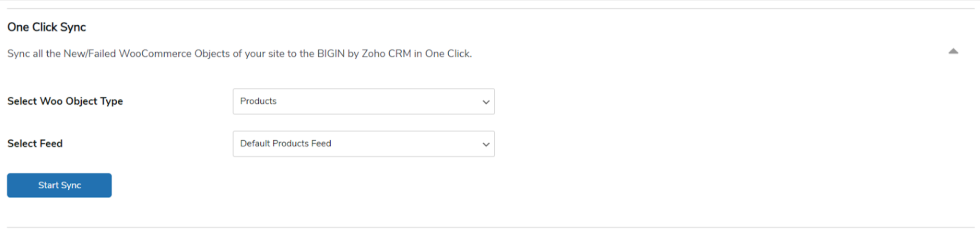
This synchronization process lets you easily sync all your missed or failed data and assists you in successfully completing your data recording process.
Logs
↑ Back to topThis is the very next tab available in the plugin backend, which offers a detailed log table of all your data transactions performed.
This detailed report of your sync logs contains descriptive data about the errors that were generated based on various defined criteria like Objects, Object ID, Feed, and so on.
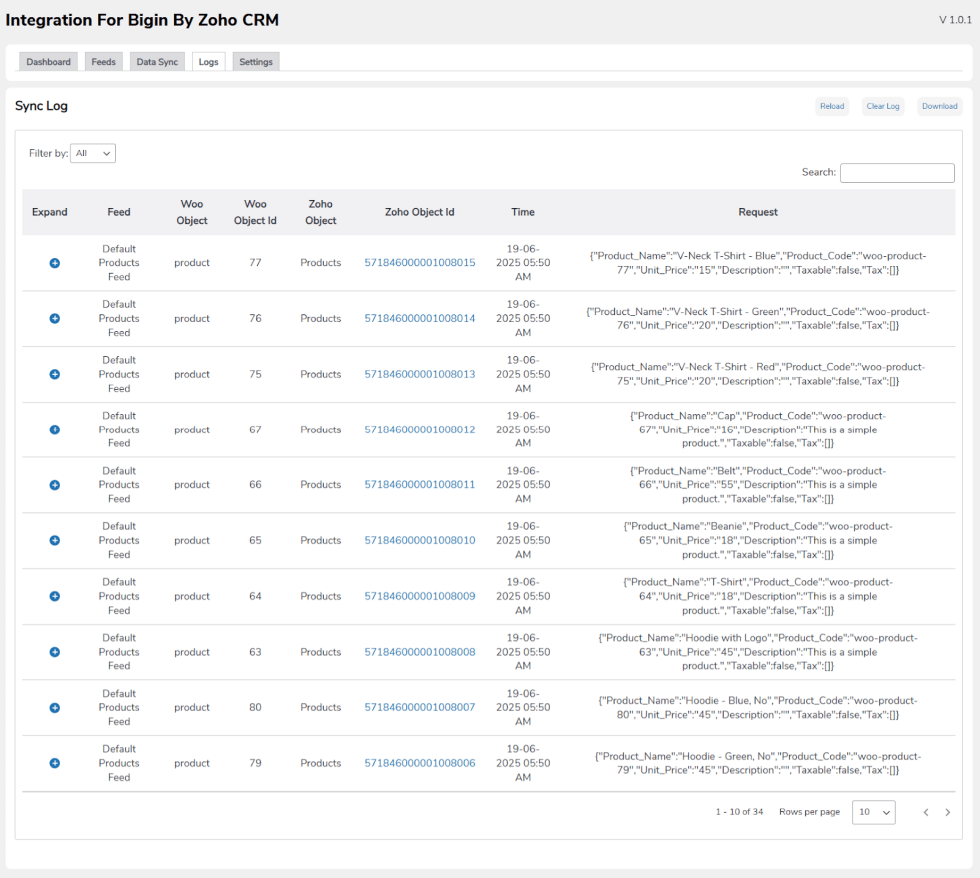
Log data consists of an error filter, along with other specific controls available in this section, including Reload for syncing data refresh without reloading the page, Clear Log for deleting synced log data, and Download for easy downloading of synced data for further use.
This can be a useful tool for assisting you in having a clear knowledge and analysis of all your recorded transactions, as well as telling you a lot about what went wrong so you can quickly find out the problems and troubleshoot.
Settings
↑ Back to top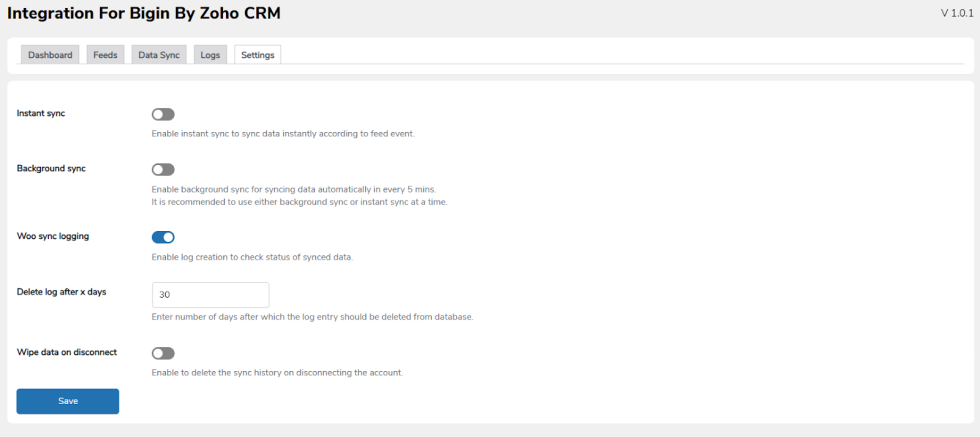
This is the last tab in the plugin backend section, which offers effective setup options for the plugin features and functionality. It includes setting options like-
Enable Instant Sync: This is the toggle-based feature that offers easy enabling/ disabling of the Instant Sync feature of the plugin.
Enable Background Sync: This is also a toggle-based feature that offers easy enabling/disabling of the Background Sync feature of the plugin.
Enable WooSync Logging: This is a toggle-based functionality that allows you to easily enable/disable the WooSync Log table data in the plugin’s Logs tab, just below the synced data log.
Delete Log after X Days: This setting option allows you to input the specified number of days after which you want your Logs data to be cleared automatically.
Wipe Complete data on Disconnect: This is a toggle-based feature that lets you simply enable or disable the thorough deletion of plugin-related data while disconnecting.
Synchronize product stock in WooCommerce: Toggle this option to enable two-way stock synchronization between Zoho Bigin and WooCommerce. When you turn it on, any stock update made in Zoho Bigin will automatically update the product stock in your WooCommerce store.
Synchronize Pipeline Stages in Woocommerce: Toggle this option to enable two-way syncing for pipeline stages between Zoho Bigin and WooCommerce.
When it is active, linked stages and order statuses will stay updated on both platforms
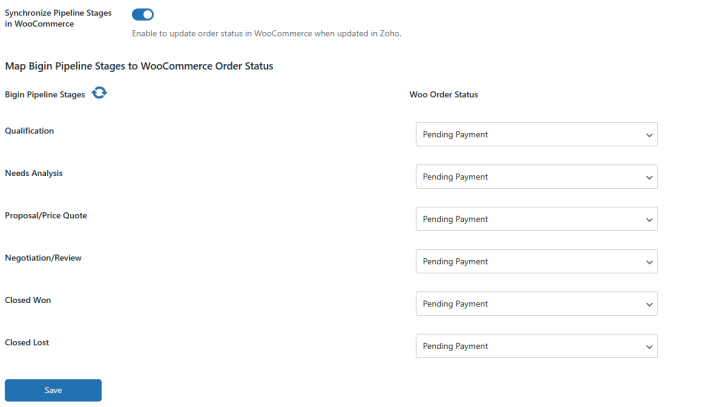
For example, if the “Qualification” stage in Bigin is connected to the “On Hold” status in WooCommerce, moving an order to “Qualification” in Bigin will automatically change it to “On Hold” in WooCommerce.
The update also works the other way, so both systems stay in sync.