Installation
↑ Back to topTo start using a product from WooCommerce.com, you can use the “Add to store” functionality on the order confirmation page or the My subscriptions section in your account.
- Navigate to My subscriptions.
- Find the Add to store button next to the product you’re planning to install.
- Follow the instructions on the screen, and the product will be automatically added to your store.
Alternative options and more information at:
Managing WooCommerce.com subscriptions.

Configuration
↑ Back to topNavigate to WooCommerce > Settings > Ecwid to Woo to configure the plugin.
You’ll find six configuration tabs:
- API Settings
- Product Import Settings
- Orders Import Settings
- Customers Import Settings
- Run Import
- Import Status
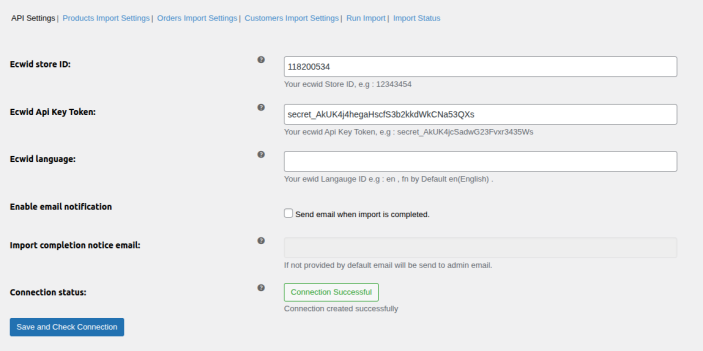
1. API Settings:
↑ Back to top- Ecwid Store ID: Enter your Ecwid Store ID (e.g., 12343454).
- Ecwid API Key Token: Enter your Ecwid API Key Token (e.g., secret_AkUK4jcSadwG23Fvxr3435Ws).
- Ecwid Language: Set language code (e.g., en, fn). Default is English (en).
- Enable Email Notification: Enable to send email when the import completes.
- Import Completion Notice Email: Specify an email address for notifications. If left blank, the admin email will be used.
- Connection Status: Displays current connection status with your Ecwid store.
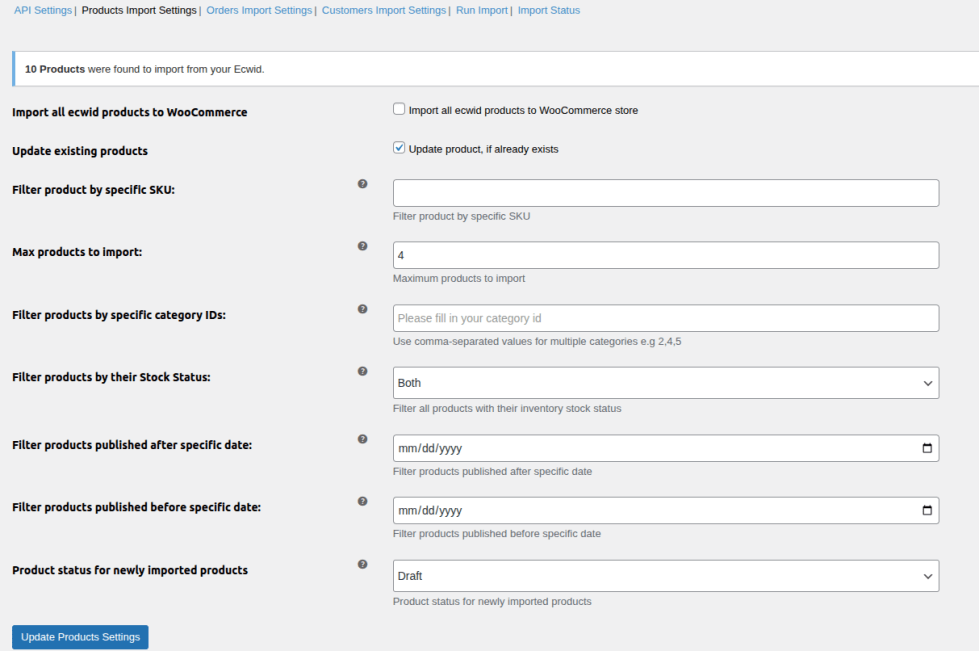
2. Product Import Settings:
↑ Back to top- Import All Ecwid Products: Import all products from Ecwid to WooCommerce.
- Update Existing Products: Update WooCommerce products that already exist.
- Filter by Specific SKU: Import only products with specified SKUs.
- Max Products to Import: Set the maximum number of products to import.
- Filter by Category IDs: Enter category IDs to filter products (comma-separated, e.g., 2,4,5).
- Filter by Stock Status: Choose from:
- Both
- In Stock
- Out of Stock
- Filter Products Published After Date: Only import products published after the selected date.
- Filter Products Published Before Date: Only import products published before the selected date.
- Product Status for Imported Products: Choose product status:
- Draft
- Published
- Same as Ecwid
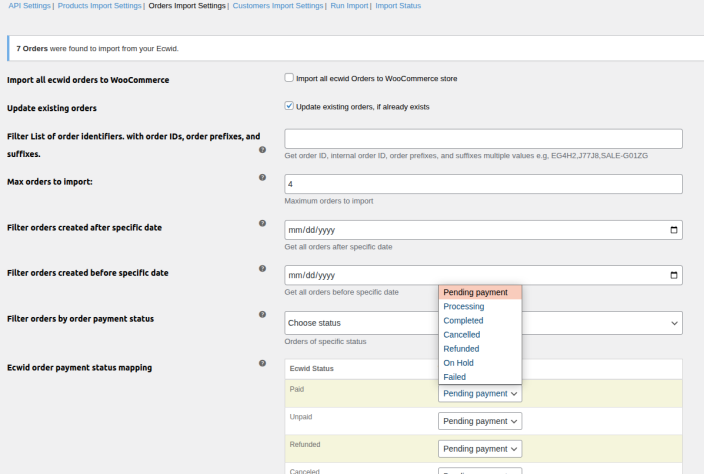
3. Orders Import Settings:
↑ Back to top- Import All Ecwid Orders: Import all orders to WooCommerce.
- Update Existing Orders: Update orders if they already exist.
- Filter by Order Identifiers: Provide order IDs, prefixes, or suffixes (e.g., EG4H2,J77J8,SALE-G01ZG).
- Max Orders to Import: Limit the number of orders to import.
- Filter Orders Created After Date: Import only orders created after this date.
- Filter Orders Created Before Date: Import only orders created before this date.
- Filter by Payment Status: Import orders with specific payment status.
- Order Status Mapping: Map Ecwid order statuses to WooCommerce order statuses.
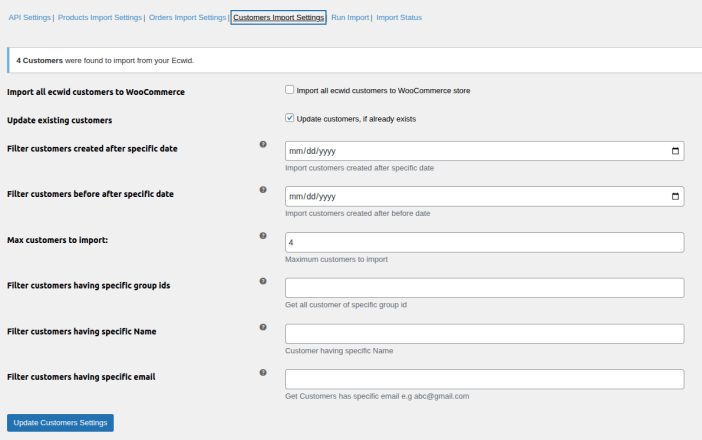
4. Customers Import Settings:
↑ Back to top- Import All Ecwid Customers: Import all customers from Ecwid to WooCommerce.
- Update Existing Customers: Update existing customers during import.
- Filter Customers Created After Date: Import only customers created after this date.
- Filter Customers Created Before Date: Import only customers created before this date.
- Max Customers to Import: Set the maximum number of customers to import.
- Filter by Group IDs: Filter customers by specific group IDs.
- Filter by Name: Import customers with a specific name.
- Filter by Email: Import customers with specific email addresses.
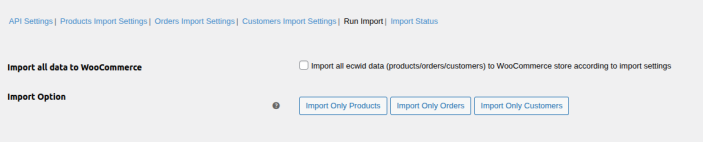
5. Run Import:
↑ Back to top- Import All Data to WooCommerce: Enable this option to import all products, orders, and customers based on configured settings.
- Import Option: Choose what to import:
- Products only
- Orders only
- Customers only
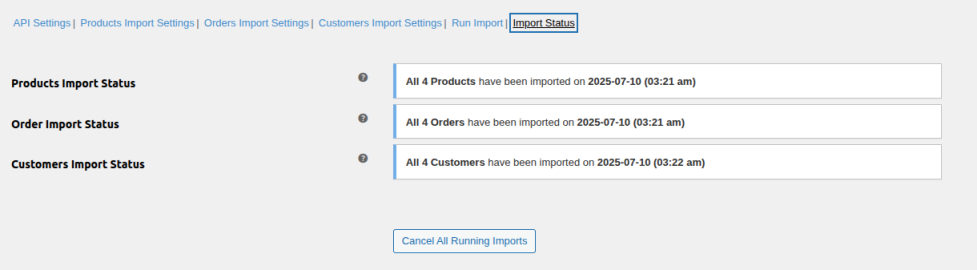
6. Import Status:
↑ Back to topMonitor the progress and status of all running imports:
- Product Import Status: Shows progress of product imports.
- Order Import Status: Displays current status of order imports.
- Customer Import Status: Shows import status of customer data.
You can also cancel ongoing imports if needed.