Top Features
↑ Back to top- Admins can create and assign warranty rules to specific products, allowing users to select options on both product and archive pages.
- Users can submit warranty claims easily, with admins receiving them directly in the dashboard for quick resolution.
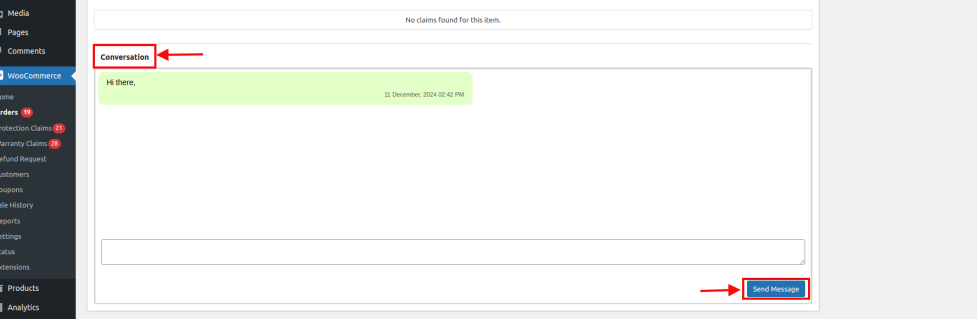
- A chat feature enables users to discuss warranty claims with admins, linked to their orders for seamless support.
- Admins can set rules for order protection fees, and users can opt for this coverage at checkout for added security.
- Admins can manage warranty claims, order protection claims, and refund requests from a single dashboard, streamlining their workflow.
- Admins can define refund periods, allowing users to request refunds directly from the dashboard within the specified timeframe.
- Admins can offer various extended support packages for virtual and downloadable products, catering to user needs.
Setup and Installation
↑ Back to top- After downloading the plugin from WooCommerce, follow the instructions below to install & activate the plugin.
- Log in to your WordPress website dashboard.
- Navigate to Plugins > Add New.
- Click the Upload Plugin button at the top of the screen.
- Upload the warranty-management-and-claims.zip file you’ve downloaded from the WooCommerce.com dashboard.
- Install and activate the plugin.
More information at: Install and Activate Plugins/Extensions.
Configure Warranty Management and Claims
↑ Back to topTo start the configurations for this plugin, navigate to WooCommerce > Settings > Warranty Management in the admin panel.
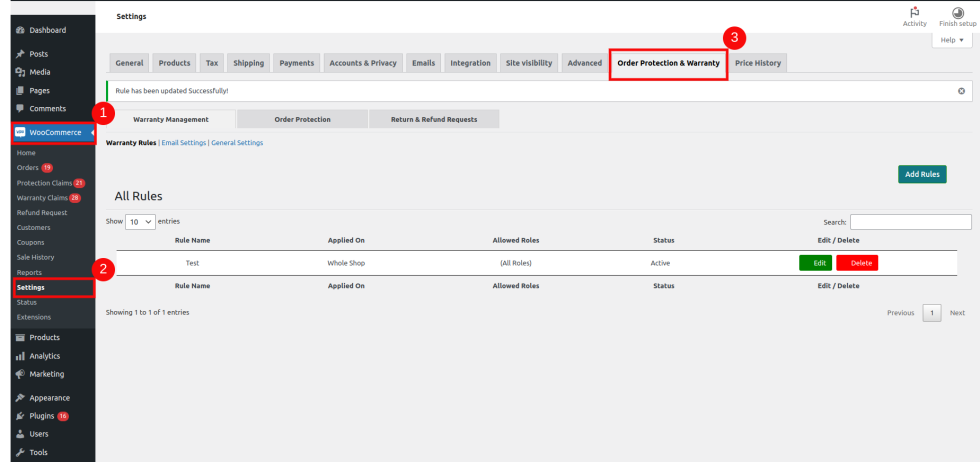
You will see three tabs: Warranty Management, Order Protection, and Return & Refund Requests. By clicking on these tabs, you can configure settings and rules for each feature separately.
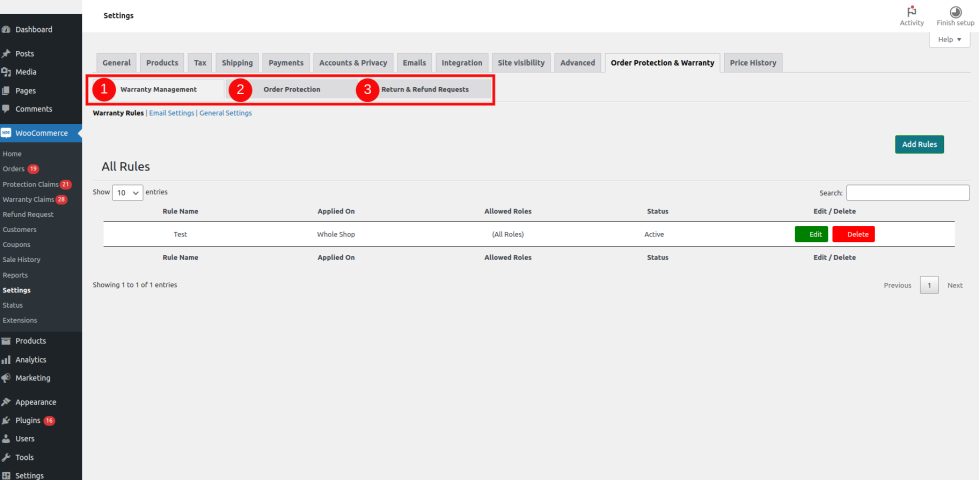
Warranty Management
In this section, you will find three additional buttons: Warranty Rules, Email Settings, and General Settings. These options allow you to configure warranty rules, email settings, and general settings, respectively.
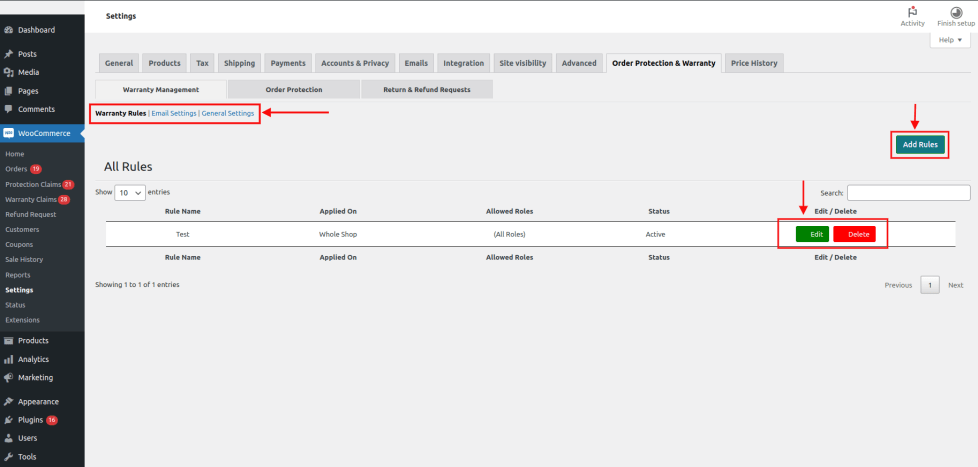
To create a new rule, click on the Add Rules button. A pop-up will appear where you can enter the rule name and choose to activate or deactivate the rule. Similarly, you can use the Add Warranty Types button to append and set warranty types as per your needs. After that, you can select specific products, categories, product tags, and user roles for the rule. Once everything is set, click on Save Rule.
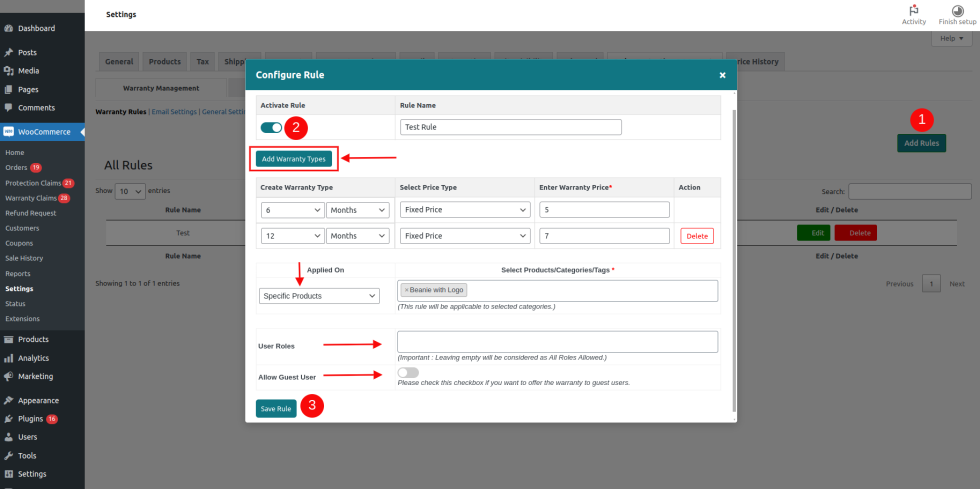
After saving the rule, it will appear in the rules table, where you can edit or delete it according to your preference.
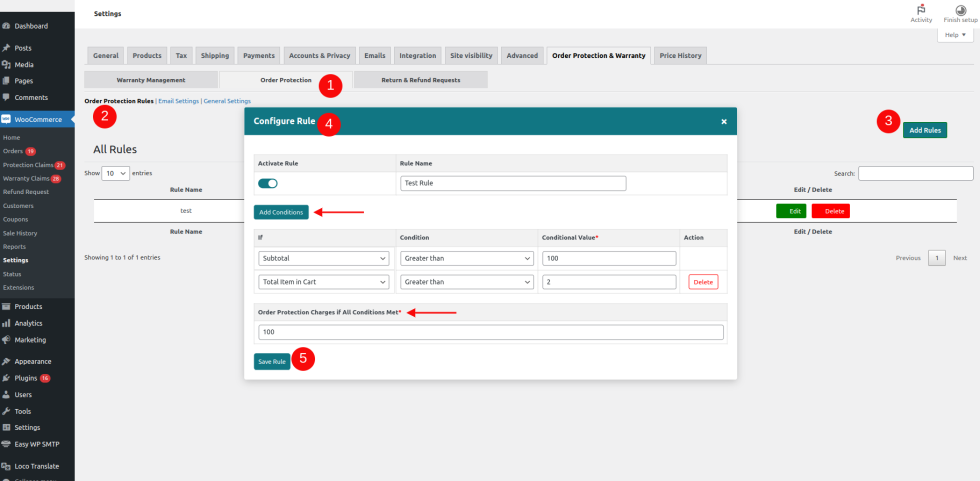
Order Protection
Similar to Warranty Management, the Order Protection section contains three tabs. You can configure rules in the same manner and later edit or delete them as required.
Return & Refund Requests
This section offers various settings that you can configure according to your preferences.
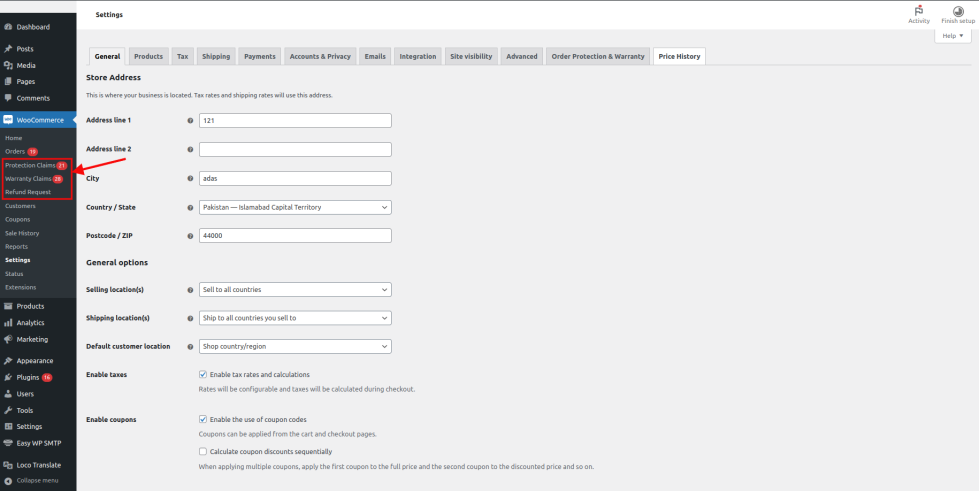
Admin View
↑ Back to topIn the admin dashboard, you can access the Warranty Claims, Protection Claims, and Refund Requests from the WooCommerce menu. By clicking on these options, you can easily view and manage these requests/claims.
On the Edit Order pages, the admin can view warranty claims and take necessary actions. Additionally, there is a chat feature that allows the admin to communicate with users regarding these claims.