WooCommerce product lead time plugin lets you display lead time to customers for the products you make after receiving the order, customized, and non-stock products.
Installation
↑ Back to top- Download Product Lead Time .zip file from your WooCommerce account.
- At the WordPress Admin Panel, go to Plugins > Add New and Upload Plugin with the file you downloaded after purchase.
- Install Now and Activate Plugin.
More information at: Install and Activate Plugins/Extensions.
Configuration
↑ Back to topSetup and Installation
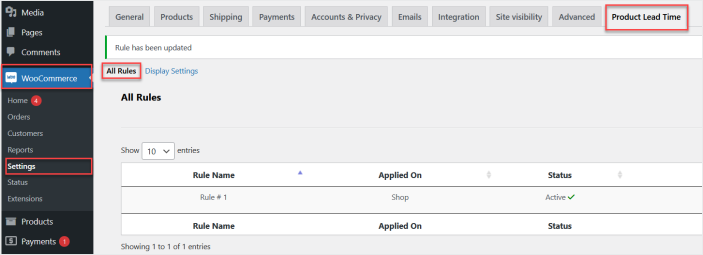
↑ Back to topAfter installation of “Product Lead Time” plugin, go to WooCommerce>Settings > Product Lead Time and click the “All Rules” tab.
All Rules:
↑ Back to top
Here you can view all the existing created rules. You can edit or delete any rule from here as well.

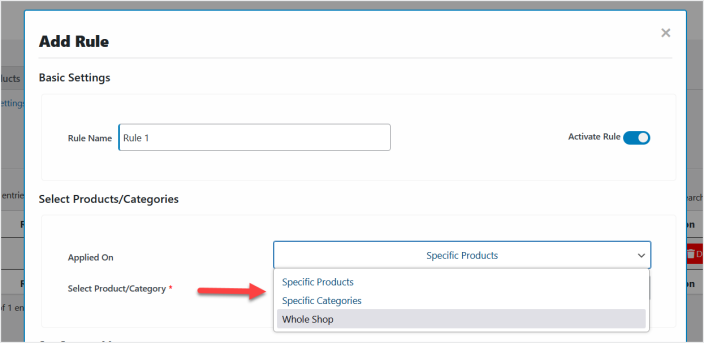
Now click the “Add Rules” button to create a new rule.

In each rule setting, you can set the rule name, activate/deactivate the rule and apply it to specific products, categories, or the whole shop.

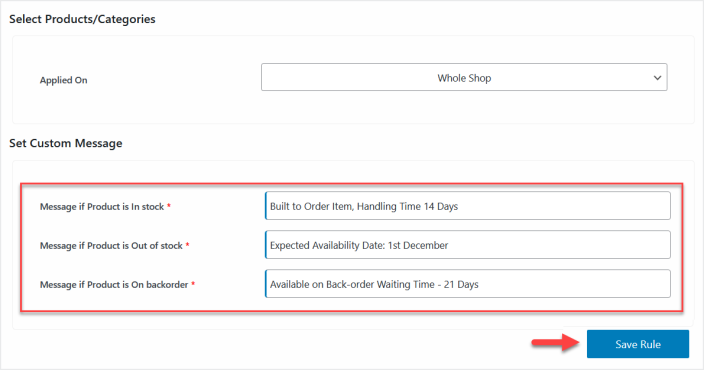
Now set the different custom messages for in-stock, out-of-stock, as well as back-order products and save the rule by clicking “Save Rule” button.

Display Settings:
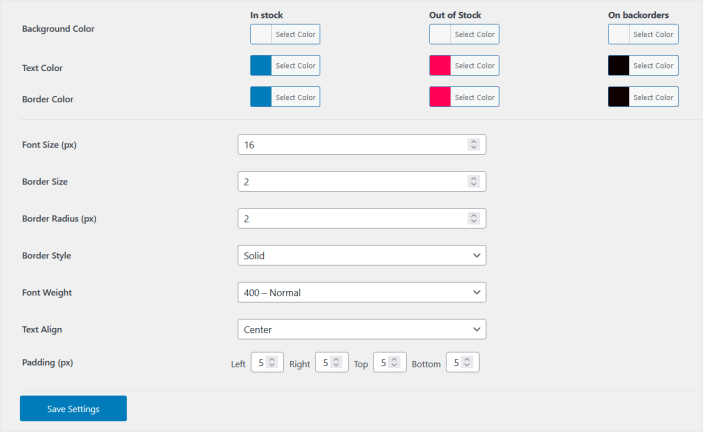
↑ Back to topNow move to the “Display Settings” tab, here you can enable or disable the display of lead time messages on shop, product, cart, and checkout page.

You can also customize the colors, styles, font size, and, alignment.

