Installation
↑ Back to topTo start using a product from WooCommerce.com, you can use the “Add to store” functionality on the order confirmation page or the My subscriptions section in your account.
- Navigate to My subscriptions.
- Find the Add to store button next to the product you’re planning to install.
- Follow the instructions on the screen, and the product will be automatically added to your store.
Alternative options and more information at:
Managing WooCommerce.com subscriptions.

Configuration
↑ Back to topAfter activation:
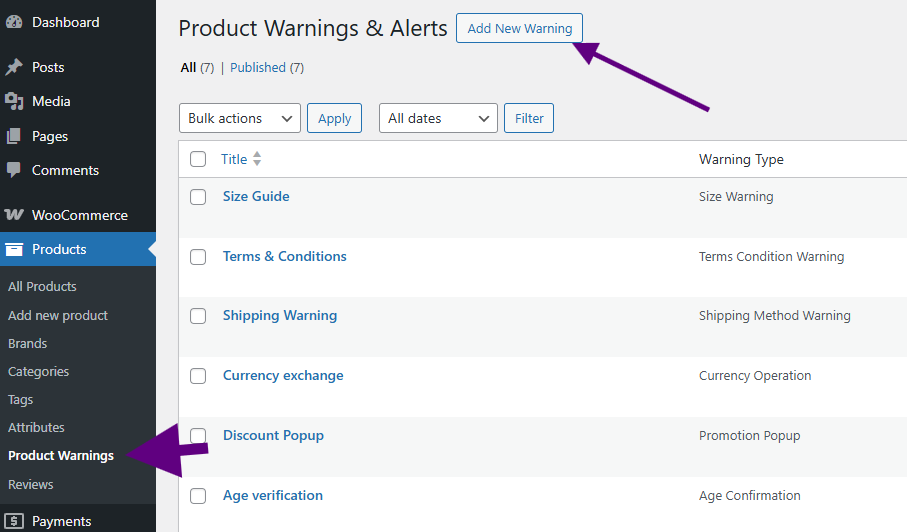
- Go to WooCommerce > Products > Warnings & Alerts.
- This is your main dashboard listing all warning rules.
- Click Add New Warning to begin configuring your first message.
Creating a Warning Rule
↑ Back to topWhen you create a warning rule, you will configure:
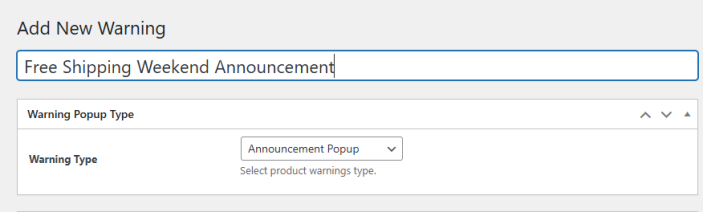
Add Title — internal label to recognize the rule and then select Warning Type.
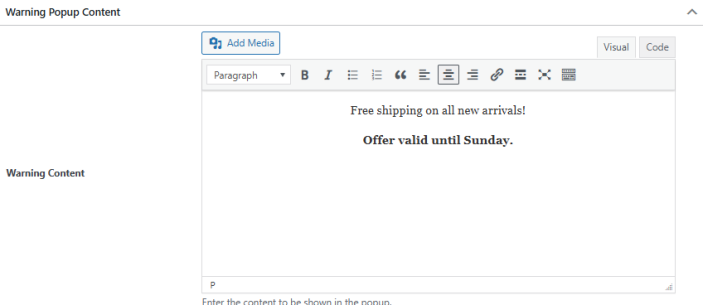
Warning Content — enter content you want to show in warning.
Add popup image, icon, buttons text etc.
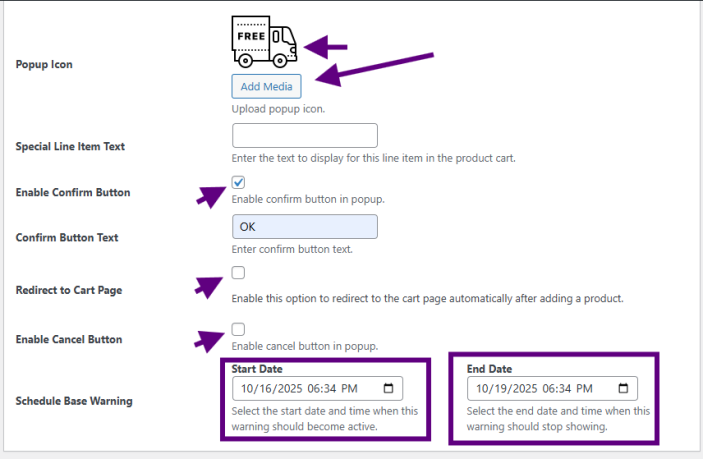
Schedule & Frequency — optional start/end dates.
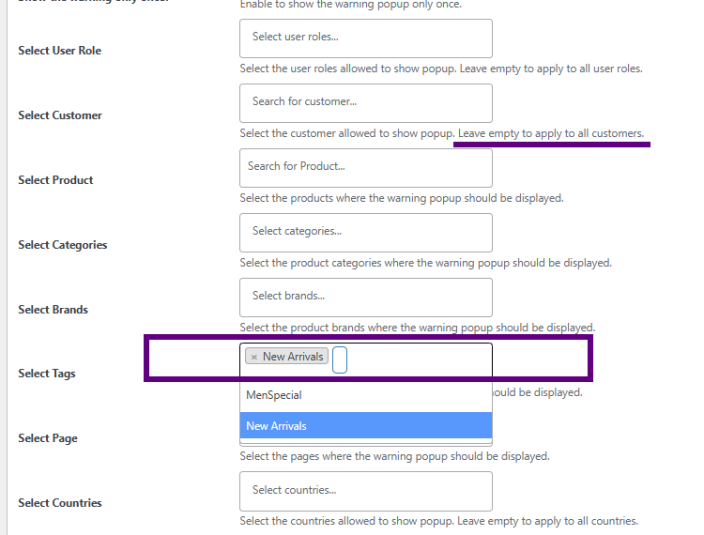
Select Warning Display Conditions — define where the warning applies eg. Category: New Arrivals.
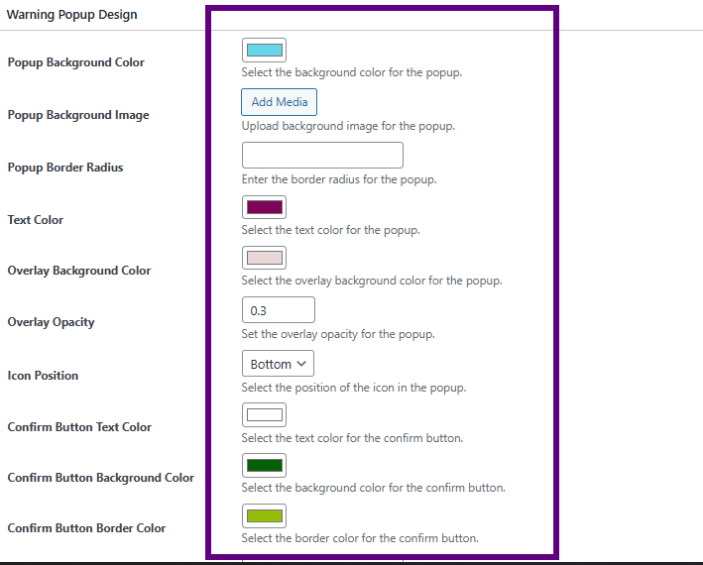
Customize Warning Design — choose how the warning appears. Choose colors, opacity, background colors, size, positioning.
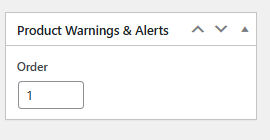
Priority / Overrides — Set rule order like you want to prioritise warning.
Once you save, the plugin will automatically evaluate and show the warning to customers when conditions match.
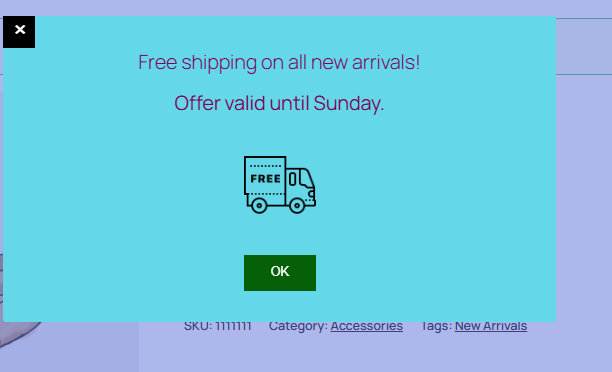
Front-end View:
Rule Options and Settings
↑ Back to topHere is a detailed breakdown of each option:
| Setting | Description |
| Conditions / Targeting | Decide where (which products, categories, tags) and to whom (roles, customers, countries) the warning should appear. |
| Message / Content | Input your warning text or HTML. You can include links, images, or short-form code. |
| Style & Appearance | Control colors, backgrounds, icons, border radius, text alignment, and button labels. |
| Schedule & Timing | Set a start date and end date. Optionally limit how many times a user sees the warning. |
| Priority / Rule Order | If multiple rules match a page, the priority setting determines which is shown. |
| Behavior on Confirm / Cancel | Define what happens when users click Confirm or Cancel (e.g., proceed, redirect, dismiss). |
Display Types and Behavior
↑ Back to topPopup Modal
↑ Back to top- Shows a dialog overlay.
- You can choose style (informative, success, error, custom) – COMING SOON
- Optional blocking (force acknowledgment before proceeding) – COMING SOON
Scheduling and Frequency Controls
↑ Back to top- Start / End Dates: Only show the warning during a specific timeframe.
- Limited impressions: Option to restrict how many times the warning shows to the same user.
Troubleshooting
↑ Back to topWarning isn’t showing
↑ Back to top- Check targeting conditions — product/category matches?
- Verify start/end dates and cookie settings.
- Make sure theme templates support inline hooks (e.g. ensure the_content or relevant hooks exist).
- Clear caching (page cache, object cache) and browser cookies.
Popup not appearing
↑ Back to top- JavaScript conflict? Check browser console for errors.
- Ensure your display type includes “popup.”
- Confirm that modal scripts/styles are loading on that page.
Multiple warnings conflicting
↑ Back to top- Use Priority / Order settings to control which rule overrides the other.
Avoid overlapping condition rules unless intended.