Advanced Order Tables for WooCommerce allows your store to create fully customizable, AJAX-powered order tables. You can build multiple tables with your own columns, filters, sorting, and export options (CSV/PDF) for different roles and contexts.
Installation
↑ Back to topTo start using a product from WooCommerce.com, you can use the “Add to store” functionality on the order confirmation page or the My subscriptions section in your account.
- Navigate to My subscriptions.
- Find the Add to store button next to the product you’re planning to install.
- Follow the instructions on the screen, and the product will be automatically added to your store.
Alternative options and more information at:
Managing WooCommerce.com subscriptions.

Basic usage
↑ Back to top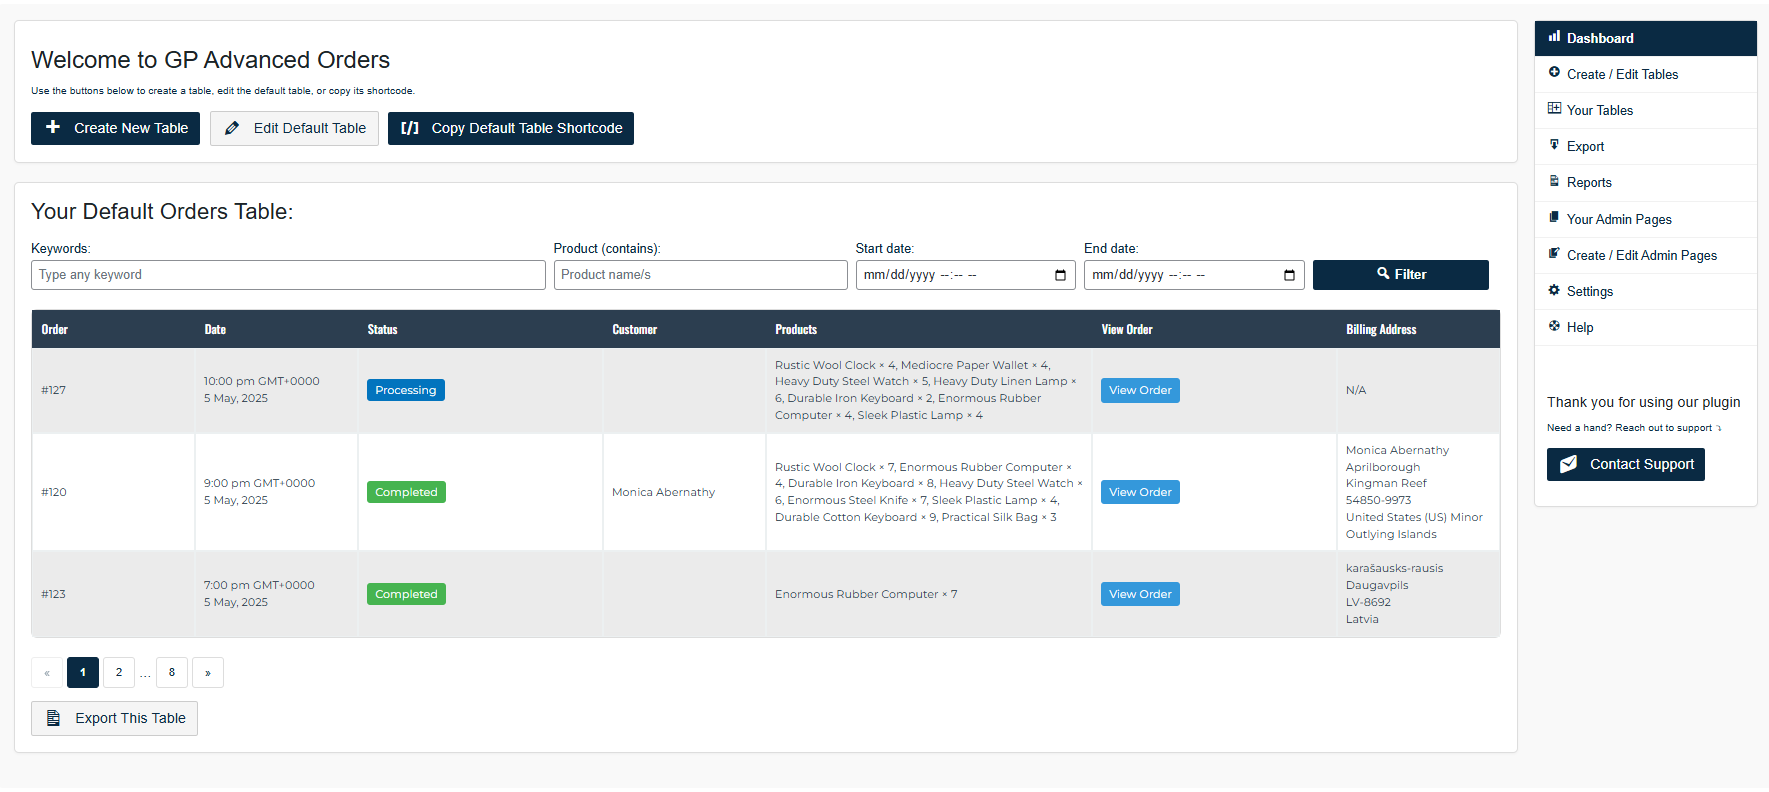
View the Default advanced order table:
↑ Back to top- From your store’s WP Admin dashboard, navigate to WooCommerce > GP Order Tables.
- The page will display the Default Table, which includes columns such as:
- Order number and customer name
- Date
- Order status
- Total
- Actions (View, Edit, Complete, etc.)
Tip:
- This is the standard WooCommerce orders screen.
- The GP Advanced Order Tables extension adds additional customizable tables, but does not remove or override this default screen.
- You can continue to use the default table if needed, or rely on GP Advanced Order Tables for more advanced views and exports.
Creating your first Orders table
↑ Back to top- From your store’s WP Admin dashboard, navigate to WooCommerce > GP Order Tables.
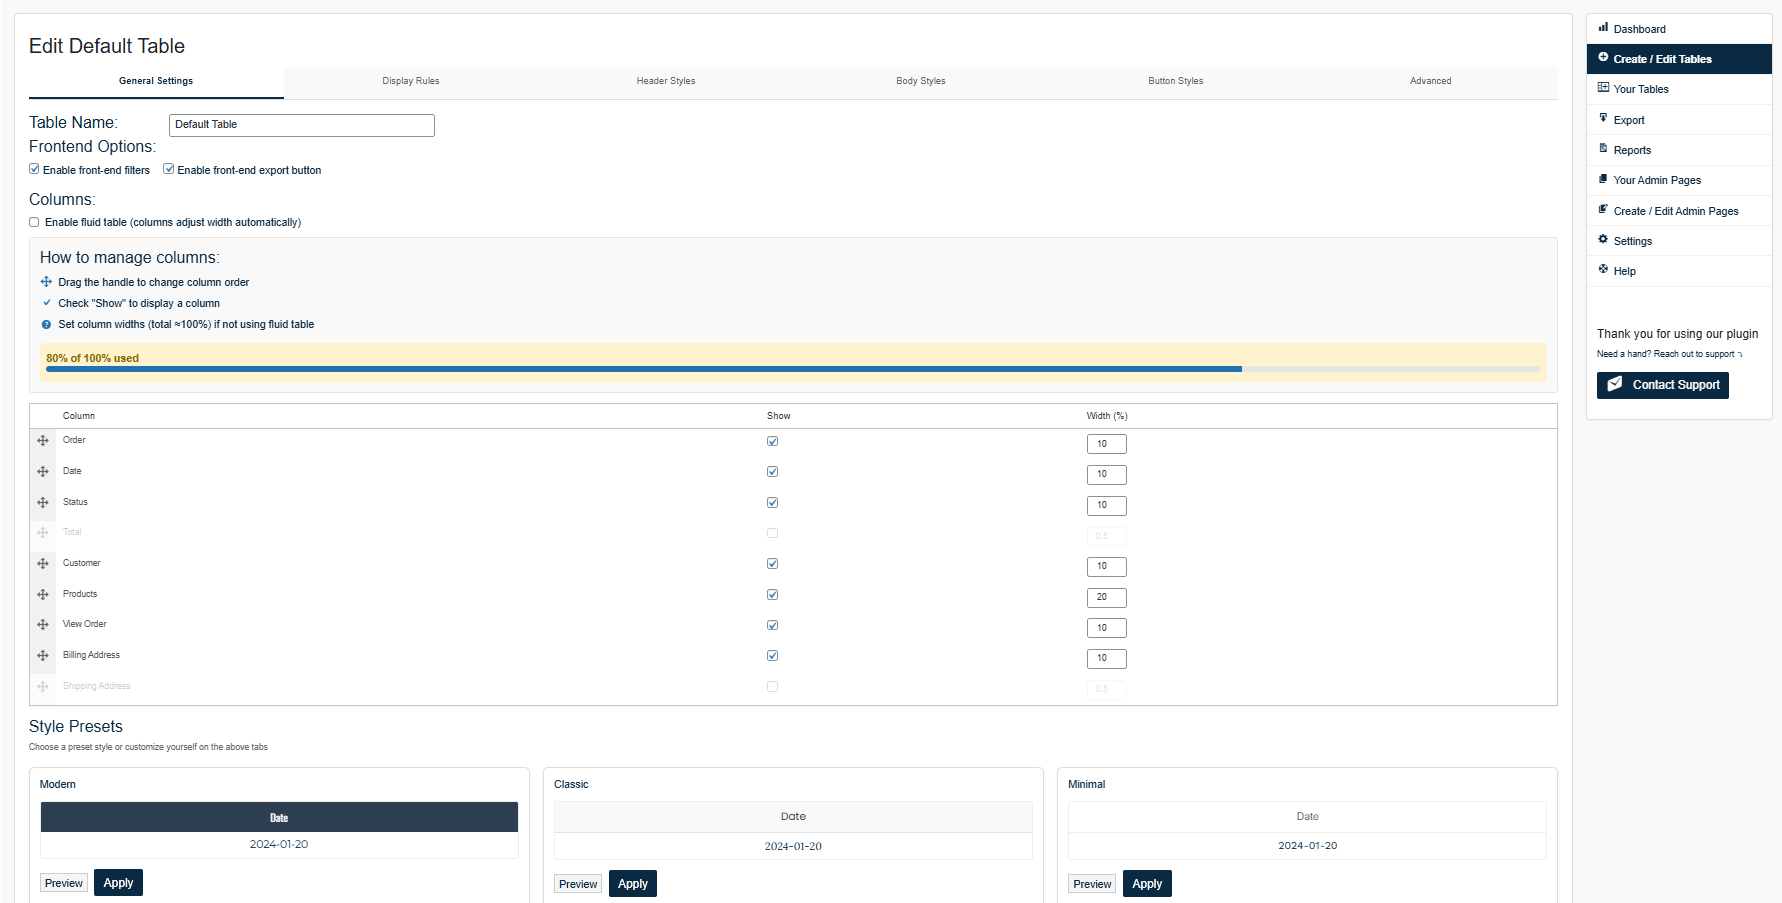
- Click Add New Table.
- Configure:
- Table Name – internal reference for your setup.
- Columns – choose which order fields to display (Order ID, Date, Customer, Total, Status, etc.).
- Reordering – Drag and drop to reorder the columns. (e.g. move price at the top to be the first row of the table.)
- Filters – add filters such as Date Range, Status, Customer, Payment Method.
- Visibility – set which user roles can see this table (Admin, Shop Manager, Sales Agent, etc.).
- Save the table.
Shortcode usage
↑ Back to top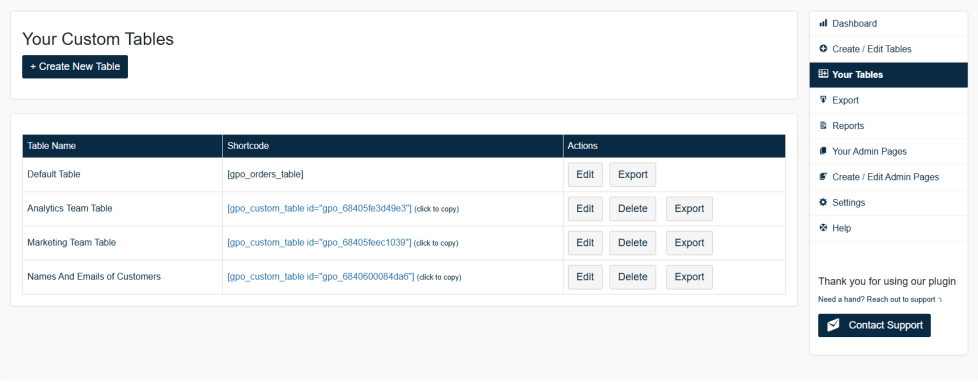
Advanced Order Tables provides shortcodes so you can display custom order tables on any page or post.
Default shortcode:
[gpo_orders_table]Custom table shortcode:
To copy the shortcode of the custom table:
- From your store’s WP Admin dashboard, navigate to WooCommerce > GP Order Tables > Your Tables
- Click on the shortcode to copy it
- The shortcode should look something like this:
[gpo_custom_table id="gpo_67b87a1dab1fe"]Exporting data
↑ Back to top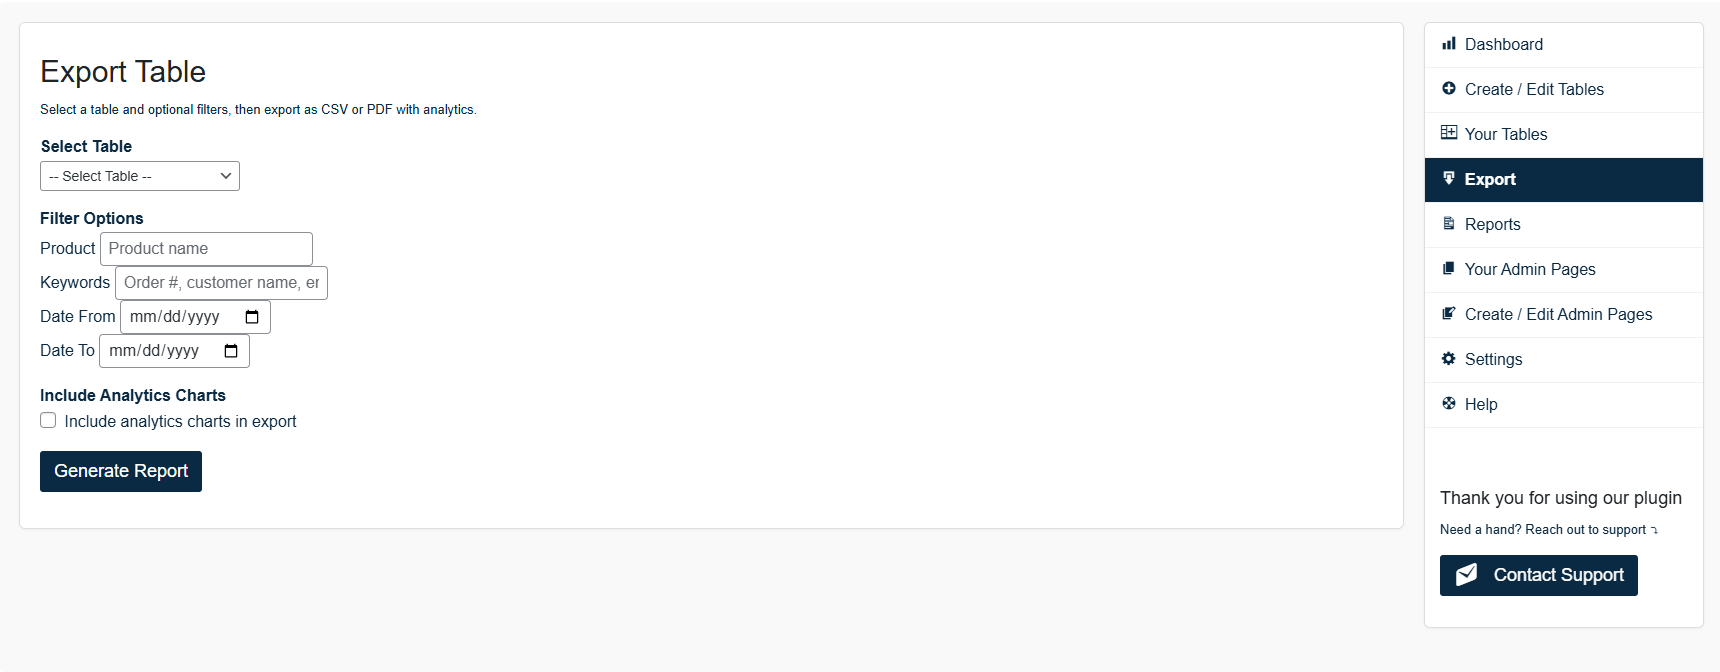
You can allow front-end users (or only admins) to export order data in CSV or PDF format. Here are the ways to export:
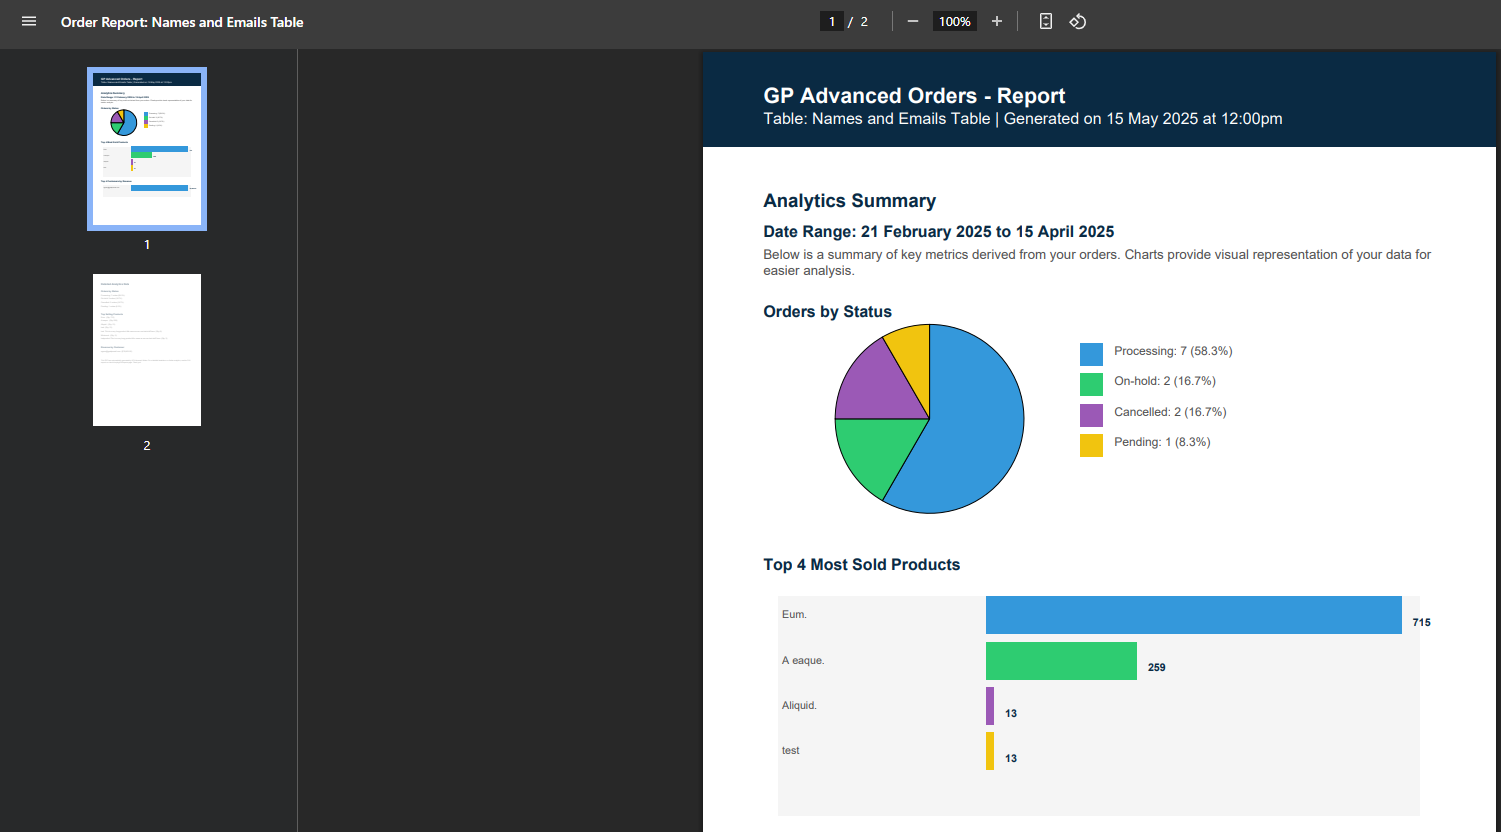
- Admin Export: From your store’s WP Admin dashboard, navigate to WooCommerce > GP Order Tables > Export Table, select the table, apply filters, and click Generate Report. This can produce CSV or PDF with optional analytics charts.
- Front-End Export: If you enabled “front-end export” for a table, visitors (or logged-in users with correct role) will see an Export CSV button in the table interface.
PDF exports can also include analytics charts (Sales by Date, Orders by Status, Top Products, and so on) if you select that option in the admin export settings.
Creating custom admin pages
↑ Back to top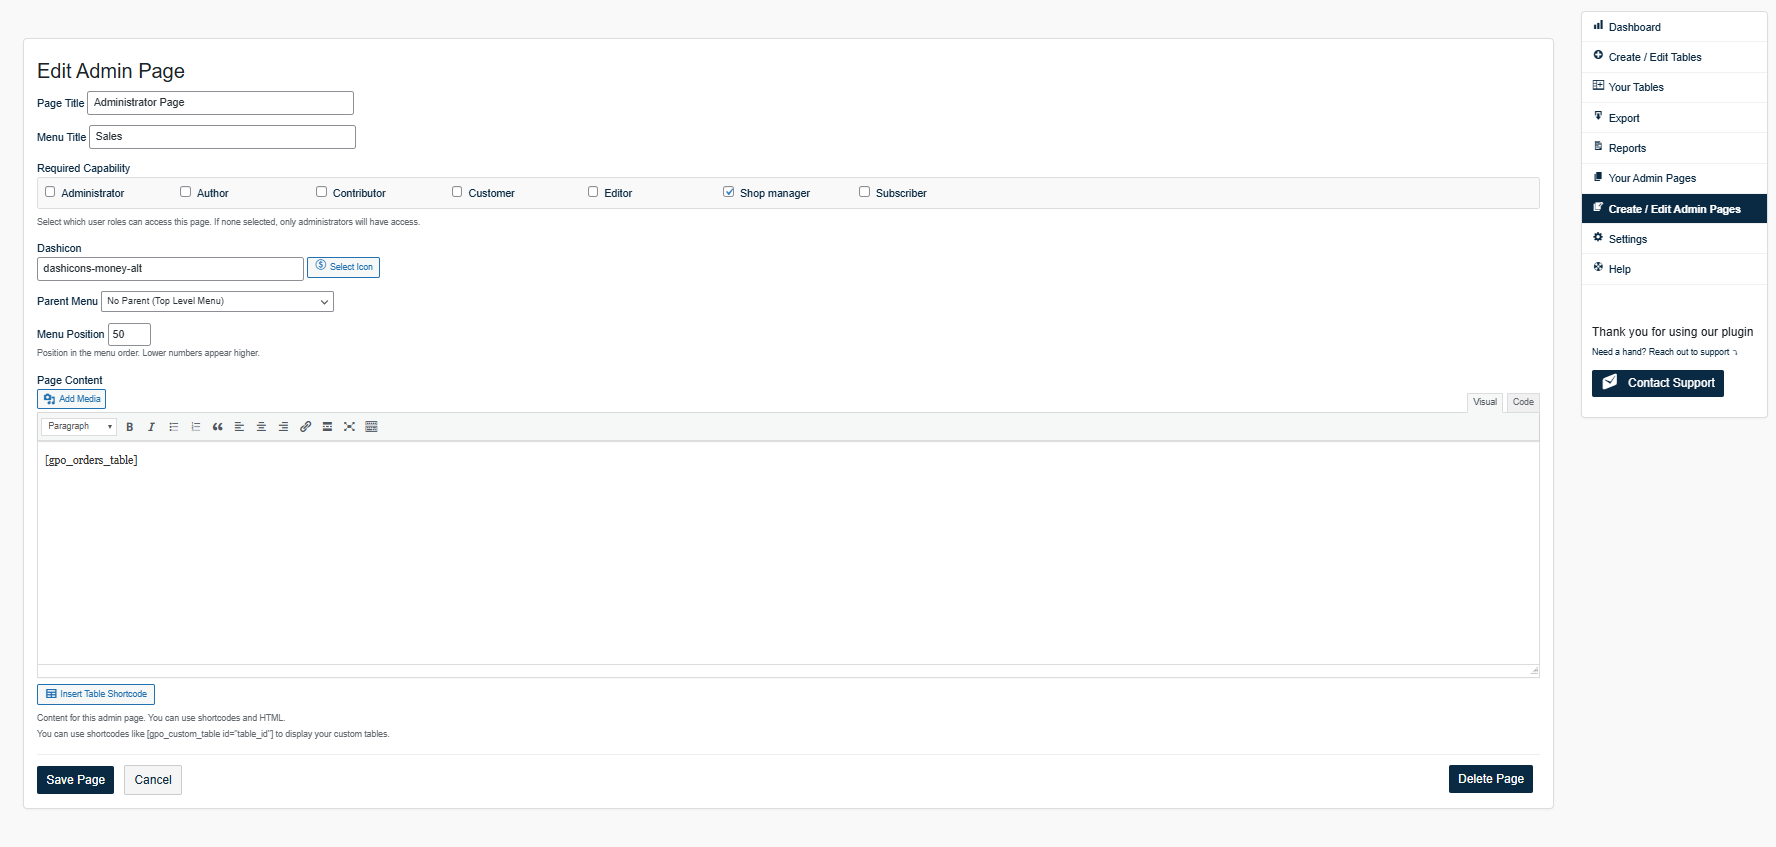
You can add new pages to your WordPress Admin and place your custom tables in them. To do that:
- From your store’s WP Admin dashboard, navigate to WooCommerce > GP Order Tables > Create/Edit Admin Pages.
- Click Create New Admin Page.
- Enter the page title, choose an icon (dashicon), and decide if it’s top-level or under an existing menu.
- Insert your desired content in the editor, you can also use the table shortcodes here if you want the orders to appear in the backend as well.
- Save, and a new admin menu item will appear!
This is great for store managers who prefer to see specific data in a custom admin screen.
Deleting tables
↑ Back to topDeleting a custom table:
- From your store’s WP Admin dashboard, navigate to WooCommerce > GP Order Tables > Your Tables.
- Locate the table and click Delete; the table is removed from the extension’s list.
- The Default Table cannot be deleted.
Troubleshooting
↑ Back to topTable not displaying
↑ Back to topCheck that the shortcode uses the correct id. Verify that the user role has permission to view the table.
Export buttons missing
↑ Back to topEnsure that CSV/PDF export is enabled in the table’s settings.
FAQs
↑ Back to topHelp customers by answering commonly asked questions.
Can I use Advanced Order Tables alongside the default WooCommerce Orders screen?
Yes. The extension does not replace the default WooCommerce Orders screen. Instead, it allows you to create additional custom tables with your own columns, filters, and layouts.
Do I need coding skills to build custom order tables?
No coding is required. Advanced Order Tables comes with a drag-and-drop table builder and simple settings, making it easy to create and customize tables without technical knowledge.
Can I export order tables to CSV or PDF?
Yes. You can export any custom table to CSV or PDF. This is ideal for reporting, accounting, or sharing data with your team.