Create customizable WooCommerce product tables to replace the default shop layout. Customers can search, filter, and place bulk orders or request quotes directly from the table.
Installation
↑ Back to top- Download the .zip file from your WooCommerce Account.
- Go to WordPress Admin > Plugins > Add New and upload the plugin file.
- Click Install Now and then Activate.
Setup and Configuration
↑ Back to topTo access the Product Table and List settings, log in to your WordPress admin panel and navigate to WooCommerce > Settings > Product Table & List tab. There you will find all the settings, i.e., General Settings, Product Tables, Display Settings, Quote Requests, and Quote Email Templates.
General Settings
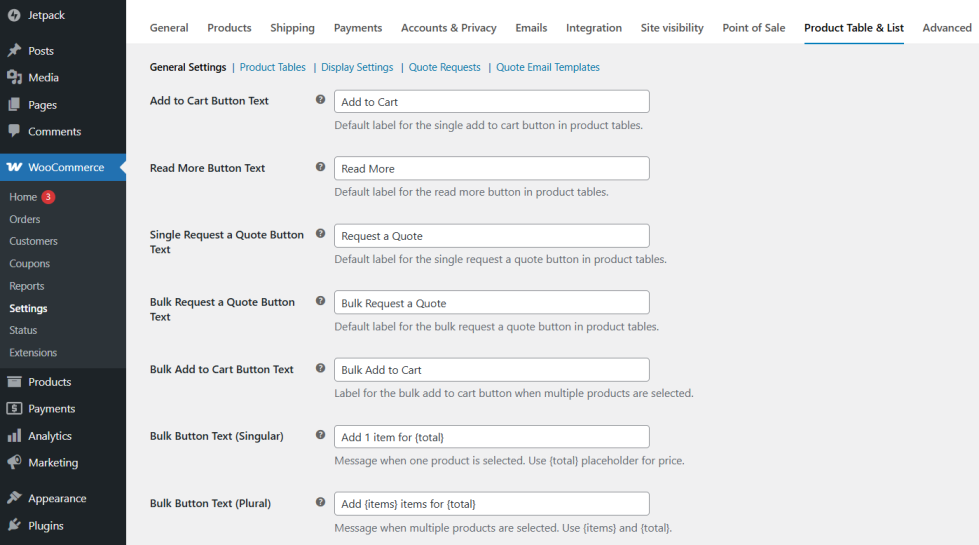
↑ Back to top- Add to Cart Button Text: Set the default label for the single Add to Cart button in product tables. Default is Add to Cart.
- Read More Button Text: Set the default label for the Read More button in product tables. Default is Read More.
- Single Request a Quote Button Text: Set the default label for the single Request a Quote button. Default is Request a Quote.
- Bulk Request a Quote Button Text: Set the default label for the bulk Request a Quote button. Default is Bulk Request a Quote.
- Bulk Add to Cart Button Text: Set the label for the bulk Add to Cart button when multiple products are selected. Default is Bulk Add to Cart.
- Bulk Button Text (Singular): Set the message shown when one product is selected. Use {total} placeholder for the price. Default is Add 1 item for {total}.
- Bulk Button Text (Plural): Set the message shown when multiple products are selected. Use {items} and {total} placeholders. Default is Add {items} items for {total}.
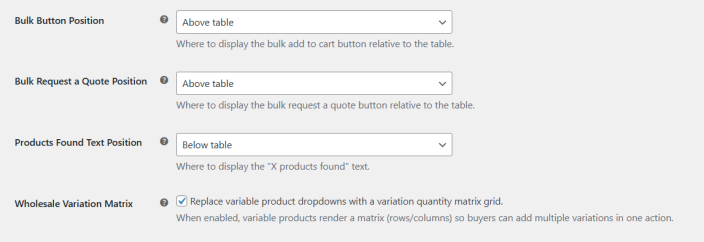
- Bulk Button Position: Choose where to display the bulk Add to Cart button relative to the table. Default is Above table.
- Bulk Request a Quote Position: Choose where to display the bulk Request a Quote button relative to the table. Default is Above table.
- Products Found Text Position: Choose where to display the products found count text. Default is Below table.
- Wholesale Variation Matrix: Check this to replace variable product dropdowns with a variation quantity matrix grid, allowing buyers to add multiple variations in one action.
- Click Save Changes.
Product Table
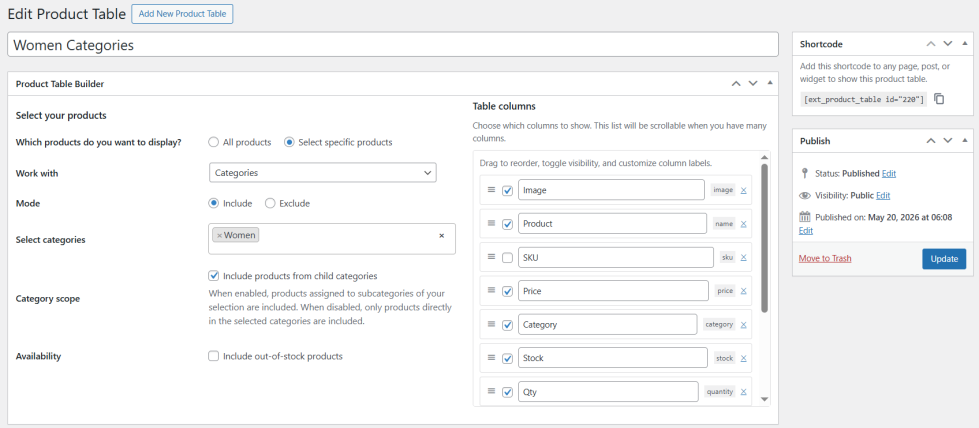
↑ Back to topGo to WooCommerce > Settings > Product Table and List > Product Tables and click Add New Table.

Product Table Builder
- Which products do you want to display: Select All products to include the full catalog, or Select specific products to choose individual items.
- Availability: Check Include out-of-stock products to show products that are currently out of stock in the table.
- Table Columns: Choose which columns appear in the table. Drag rows to reorder them. Toggle the checkbox to show or hide each column. Edit the label text to customize the column heading. Available columns include Image, Product, SKU, Price, Category, Stock, Qty, and more.
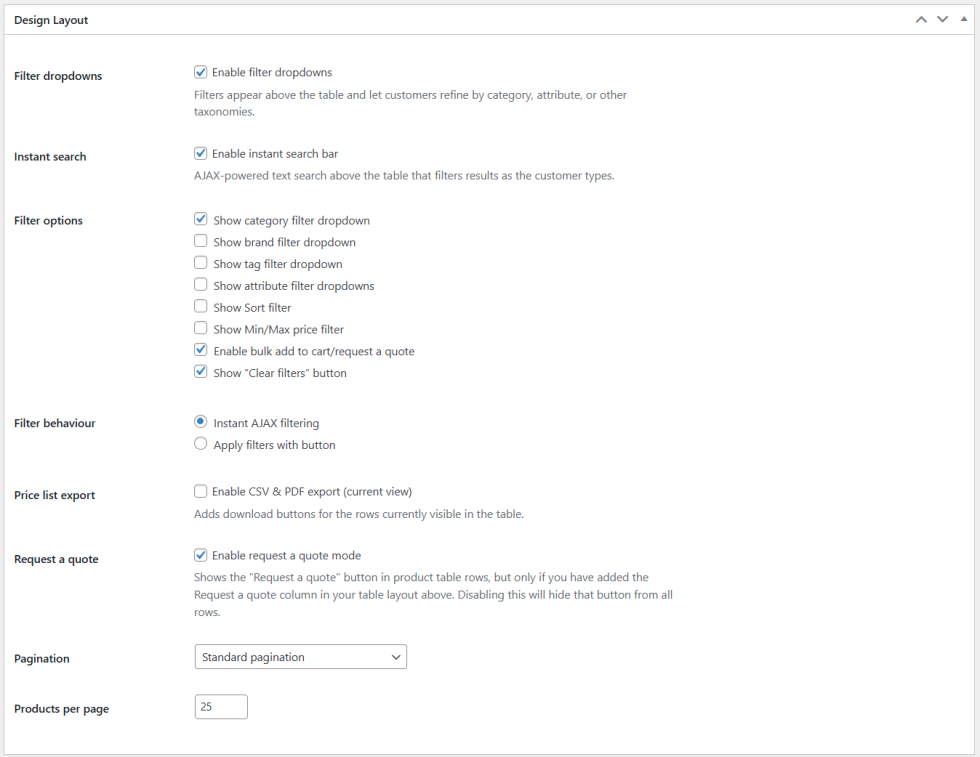
Design Layout
- Filter dropdowns: Check this to enable filter dropdowns above the table. Filters let customers refine by category, attribute, or other taxonomies.
- Instant search: Check this to enable an AJAX powered search bar above the table that filters results as the customer types.
- Filter options: Choose which filter dropdowns appear above the table.
- Check the show category filter dropdown.
- Check the box to show the brand filter dropdown in table.
- Check the show tag filter dropdown to add a tag filter.
- Checkbox to show attribute filter dropdowns to add attribute filters.
- Check the show Sort filter to add a sort order dropdown.
- Check the box to show the Min/Max price filter to add a price range filter.
- Check enable bulk add to cart/request a quote to allow multi-product selection and bulk actions.
- Check the show clear filters button to add a button that resets all active filters.
- Filter behaviour: Choose Instant AJAX filtering to apply filters immediately as selections change, or Apply filters with button to wait until the customer clicks apply.
- Price list export: Check Enable CSV and PDF export to add download buttons for the currently visible table rows.
- Request a quote: Check Enable request a quote mode to show the Request a Quote button in table rows. This requires the Request a Quote column to be added in the table layout above.
- Pagination: Choose Standard pagination or Infinite scroll.
- Products per page: Set the number of products displayed per page. Default is 25.
- Responsive mode: Choose Card layout for the recommended responsive display, or Stacked layout for a vertically stacked mobile view.
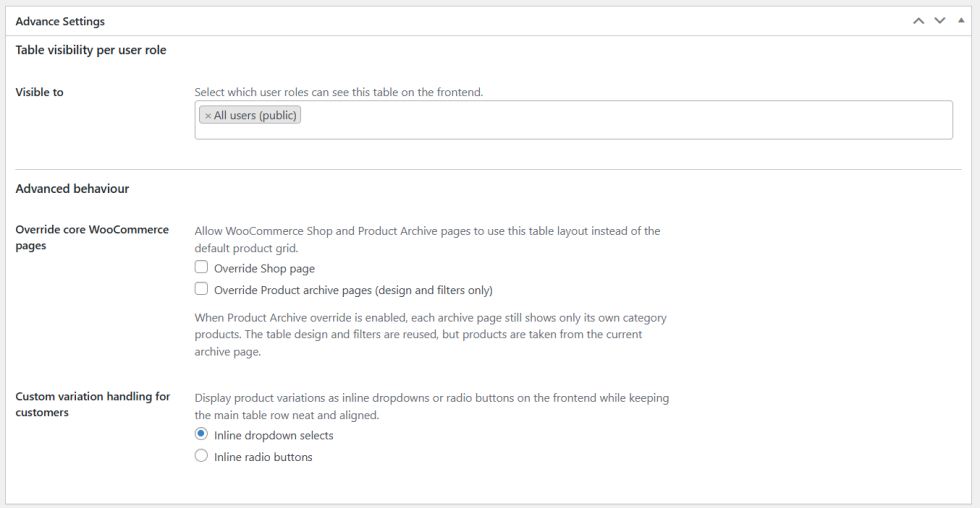
Advanced Settings
- Visible to: Select which user roles can see this table on the frontend. Default is All users (public).
- Override Shop page: Check this to replace the default WooCommerce shop page with this table layout.
- Override Product archive pages: Check this to apply the table design and filters to product archive pages. Products shown will still be taken from the current archive page.
- Custom variation handling for customers: Choose how product variations are displayed in the table. Select Inline dropdown selects or Inline radio buttons.
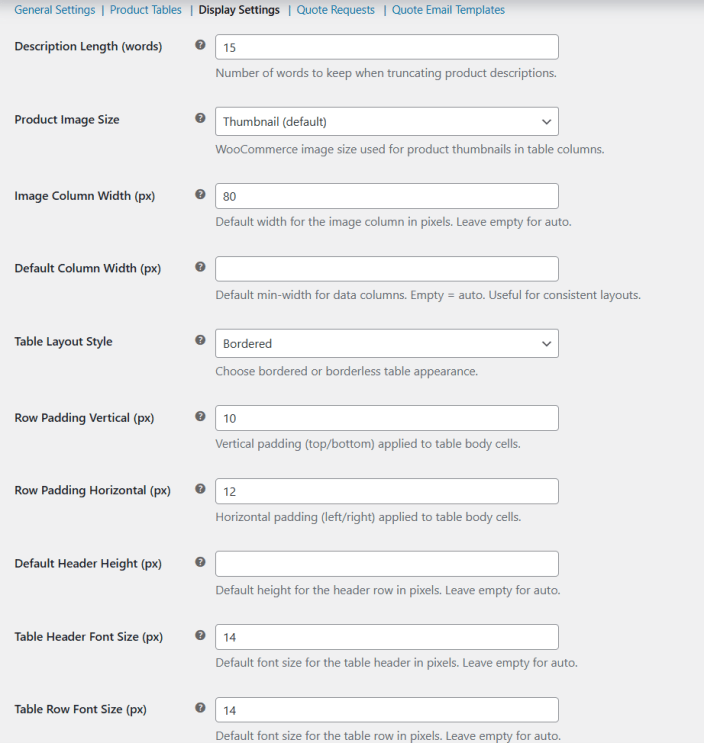
Display Settings
↑ Back to top- Description Length (words): Set the number of words to show when truncating product descriptions. Default is 15.
- Product Image Size: Choose the image size used for product thumbnails in table columns. Default is Thumbnail.
- Image Column Width (px): Set the default width for the image column in pixels. Leave empty for auto.
- Default Column Width (px): Set the default minimum width for data columns. Leave empty for auto.
- Table Layout Style: Choose Bordered or Borderless table appearance.
- Row Padding Vertical (px): Set the vertical padding applied to table body cells. Default is 10.
- Row Padding Horizontal (px): Set the horizontal padding applied to table body cells. Default is 12.
- Default Header Height (px): Set the default height for the header row. Leave empty for auto.
- Table Header Font Size (px): Set the font size for the table header. Default is 14.
- Table Row Font Size (px): Set the font size for table rows. Default is 14.
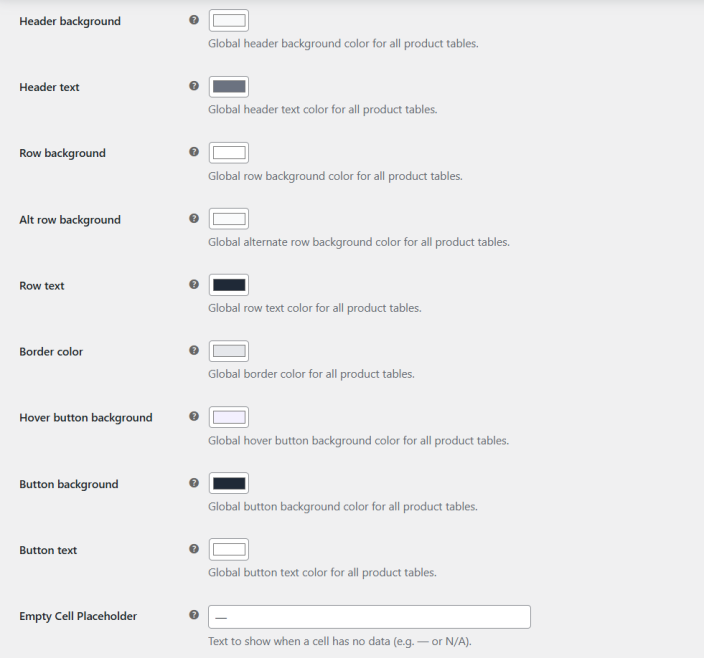
- Header background: Set the global header background color for all product tables.
- Header text: Set the global header text color for all product tables.
- Row background: Set the global row background color for all product tables.
- Alt row background: Set the global alternate row background color for all product tables.
- Row text: Set the global row text color for all product tables.
- Border color: Set the global border color for all product tables.
- Hover button background: Set the global hover button background color for all product tables.
- Button background: Set the global button background color for all product tables.
- Button text: Set the global button text color for all product tables.
- Empty Cell Placeholder: Set the text shown when a cell has no data. Default is —.
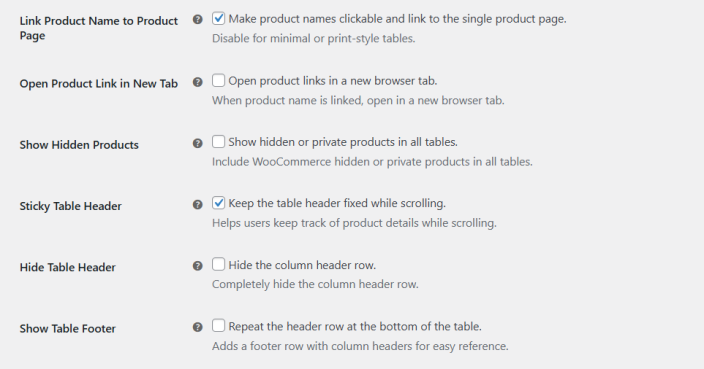
- Link Product Name to Product Page: Check this to make product names clickable and link to the single product page.
- Open Product Link in New Tab: Check this to open product links in a new browser tab.
- Show Hidden Products: Check this to include hidden or private products in all tables.
- Sticky Table Header: Check this to keep the table header fixed while scrolling.
- Hide Table Header: Check this to completely hide the column header row.
- Show Table Footer: Check this to repeat the header row at the bottom of the table for easy reference.
Quote Requests
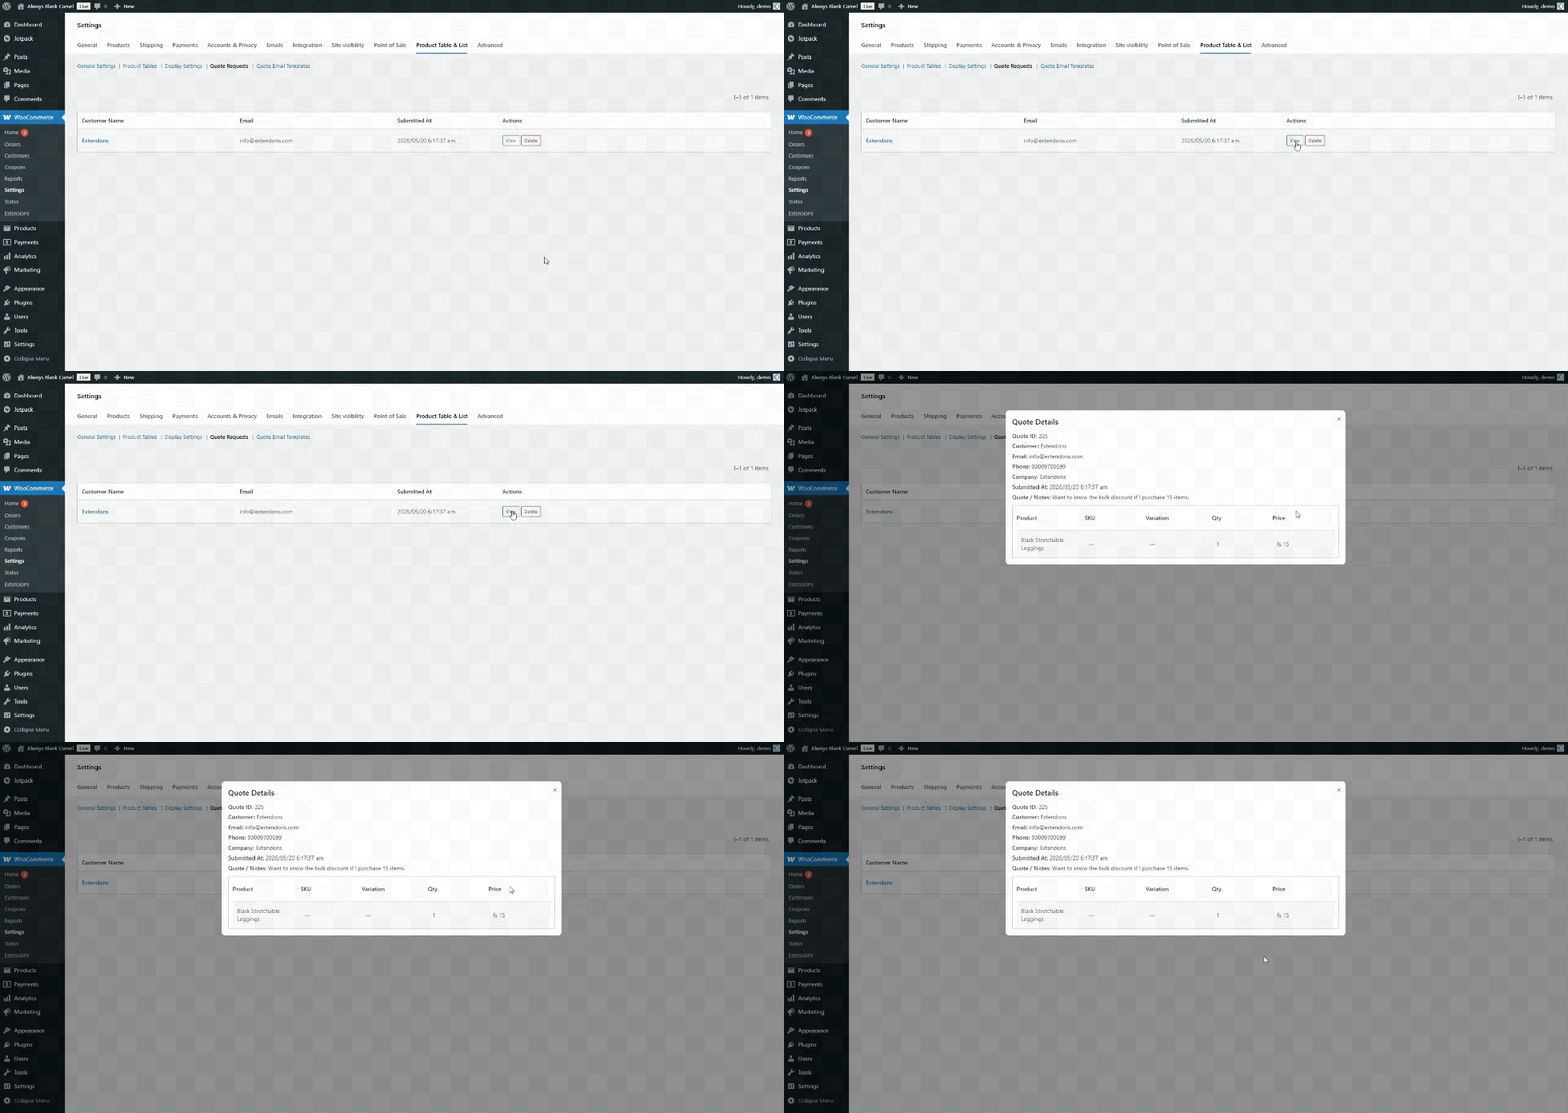
↑ Back to topGo to Product Table and List > Quote Requests to view all submitted quote requests. The dashboard displays customer name, email address, submission date, and available actions for each request.
Quote Email Templates
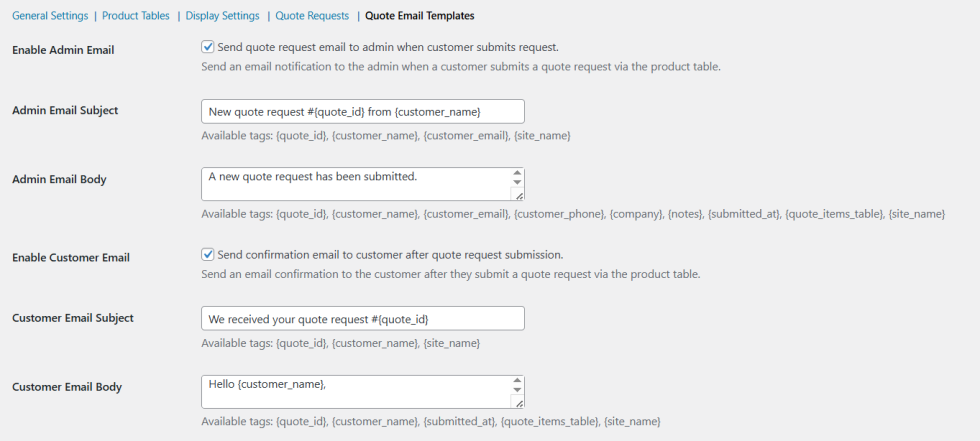
↑ Back to top- Enable Admin Email: Check this to send a quote request notification email to the admin when a customer submits a request.
- Admin Email Subject: Set the subject line for the admin notification email. Available tags: {quote_id}, {customer_name}, {customer_email}, {site_name}
- Admin Email Body: Set the body content for the admin notification email.
- Enable Customer Email: Check this to send a confirmation email to the customer after they submit a quote request. Available tags: {quote_id}, {customer_name}, {submitted_at}, {quote_items_table}, {site_name}.
- Customer Email Subject: Set the subject line for the customer confirmation email.
- Customer Email Body: Set the body content for the customer confirmation email.
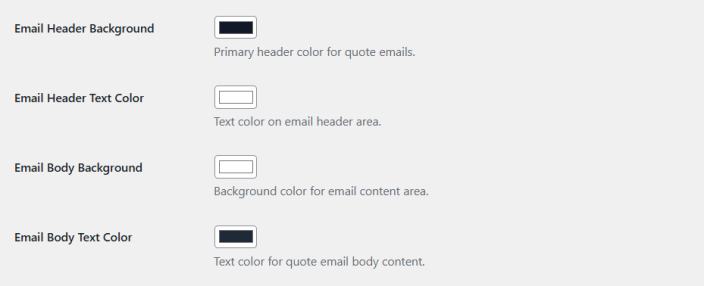
- Email Header Background: Set the primary header background color for quote emails.
- Email Header Text Color: Set the text color used in the email header area.
- Email Body Background: Set the background color for the email content area.
- Email Body Text Color: Set the text color used in the email body content.