Custom Order Status
↑ Back to topThe Custom Order Status plugin lets you create custom order statuses, automate transitions between them, and control what happens at each stage of your fulfillment workflow. This includes webhook integrations, status-based email notifications, and a drag-and-drop workflow builder.
Installation
↑ Back to top- Download the .zip file from your WooCommerce account.
- Go to: WordPress Admin > Plugins > Add New and upload the file you have downloaded.
- “Install” and “Activate” the plugin.
Configuration
↑ Back to topAfter activating the plugin, go to WooCommerce > Settings > Custom Order Status and Automation and configure the following:
Order Statuses
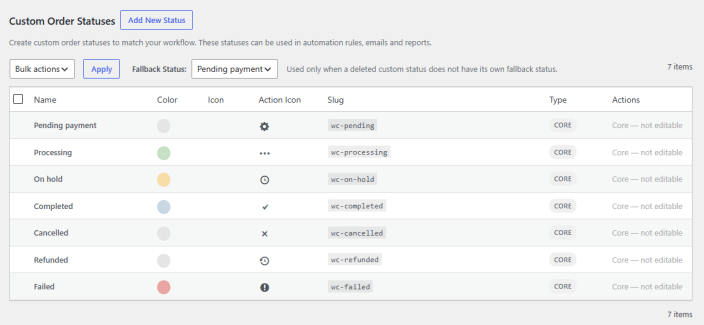
↑ Back to topThe Order Statuses page gives you a complete overview of all order statuses in your store, including both core WooCommerce statuses and any custom statuses you create. Core statuses are read-only, while custom statuses can be edited or deleted. You can also set a global fallback status, which is used when a deleted custom status has no fallback configured.
Adding a New Custom Order Status
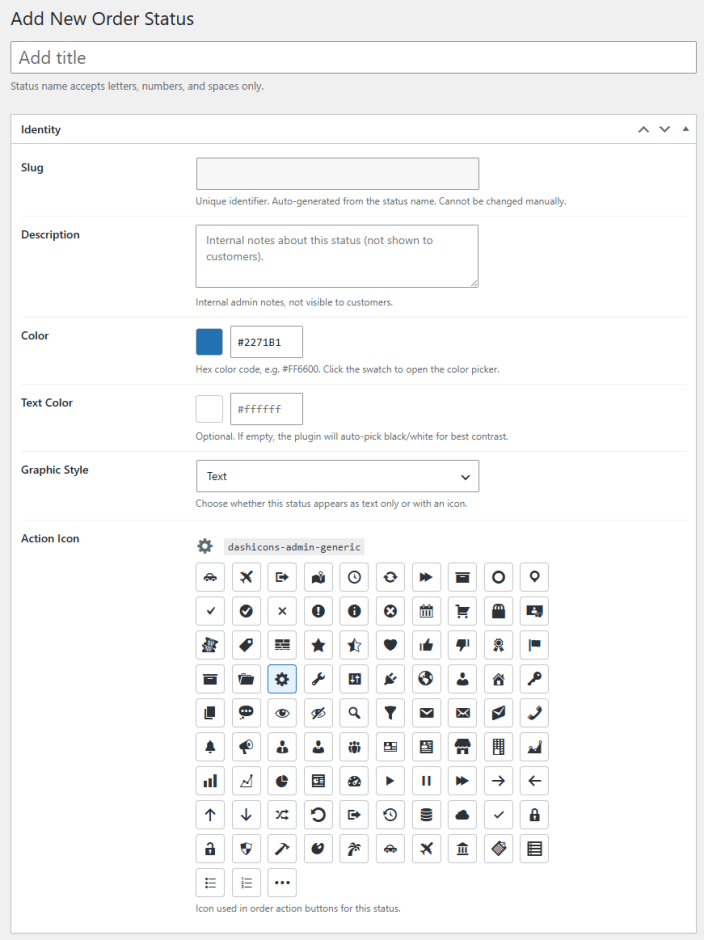
↑ Back to topTo add a new custom order status, click the Add New Status button at the top of the Order Statuses page. Here you can configure the following settings:
Title: Add a title for the custom order status
Identity
- Slug: A unique identifier for the status, auto-generated from the status name. This cannot be changed manually.
- Description: Internal notes about the status for admin reference. This is not visible to customers.
- Color: The background color for the status. Enter a hex color code or use the color picker by clicking the swatch.
- Text Color: The text color for the status label. If left empty, the plugin will automatically pick black or white for the best contrast.
- Graphic Style: Choose whether the status appears as text only or with an icon.
- Action Icon: The icon displayed for this status in the order actions area.
Workflow
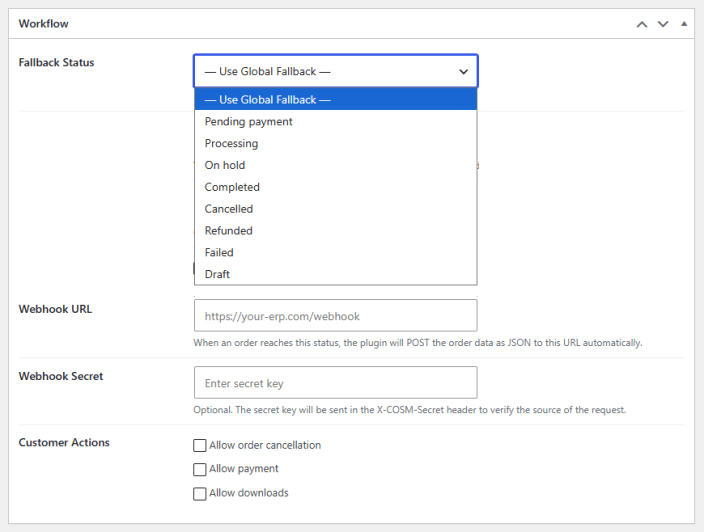
- Fallback Status: Select the status that orders will be moved to if this custom status is deleted. You can choose from the following statuses or use the global fallback:
- Use Global Fallback
- Pending payment
- Processing
- On hold
- Completed
- Cancelled
- Refunded
- Failed
- Draft
- Shipped
- Webhook URL: Enter a URL to receive order data when an order reaches this status. The plugin will automatically POST the order data as JSON to this URL.
- Webhook Secret: An optional secret key that will be sent in the X-COSM-Secret header to verify the source of the request.
- Customer Actions: Configure the actions customers are allowed to take when their order is in this status:
- Allow order cancellation
- Allow payment
- Allow downloads
Notifications
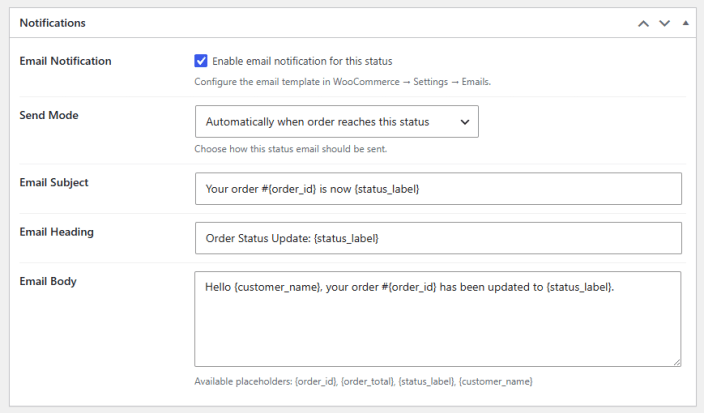
- Email Notification: Enable or disable email notifications for this status. When enabled, the email template can be configured under WooCommerce > Settings > Emails.
- Send Mode: Choose how the email should be sent for this status:
- Automatically when the order reaches this status
- Manual only (admin trigger)
- Both automatic and manual
- Email Subject: Set the subject line for the notification email. Supports dynamic placeholders.
- Email Heading: Set the heading displayed at the top of the email. Supports dynamic placeholders.
- Email Body: Enter the body content of the email. Supports dynamic placeholders.
The following placeholders are available for use in the subject, heading, and body fields: {order_id}, {order_total}, {status_label}, {customer_name}.
Order Workflow
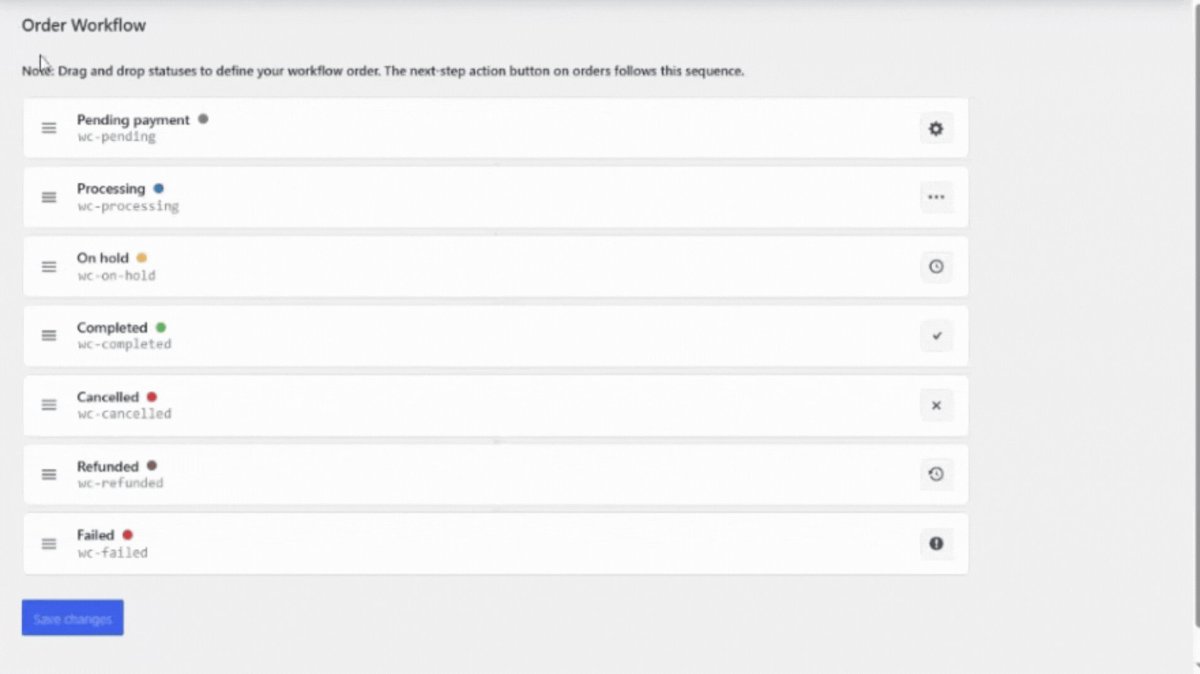
↑ Back to topThe Order Workflow page allows you to define the sequence of your order statuses using a simple drag-and-drop interface. Each status is displayed as a card showing its name, slug, color, and action icon. Drag the statuses into your preferred order to define your fulfillment flow. The next-step action button displayed on orders in the admin panel follows this sequence, ensuring your team always moves orders through the correct stages.
Automation Rules
↑ Back to topThe Automation Rules page displays all your configured automation rules. Each rule automatically transitions an order status when its conditions are met. The list shows each rule’s name, priority, from status, to status, delay, active filters, and enabled or disabled state. You can edit or delete any existing rule from this page.
To create a new automation rule, click the Add Rule button at the top of the page.
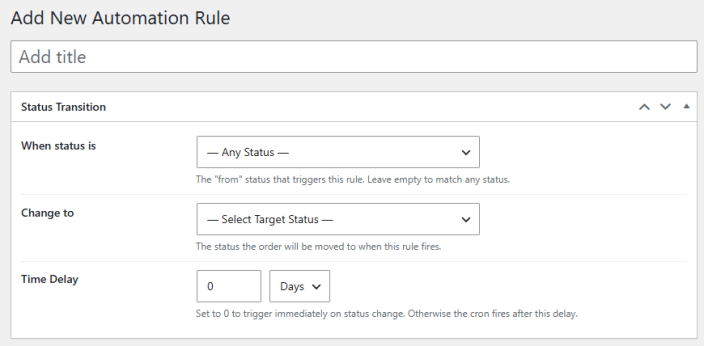
When you click Add Rule, you will be presented with a form to configure your automation rule. Start by entering a title for the rule, then configure the following settings:
Status Transition
- When Status Is: Select the source status that triggers this rule. Leave empty to match any status. Available options are:
- Any Status
- Pending payment
- Processing
- On hold
- Completed
- Cancelled
- Refunded
- Failed
- Draft
- Shipped
- Change To: Select the target status the order will be moved to when this rule fires. Available options are the same as above.
- Time Delay: Set a delay before the rule fires. Set to 0 to trigger immediately on status change. Otherwise, the cron fires after the specified delay.
Rule Applied For
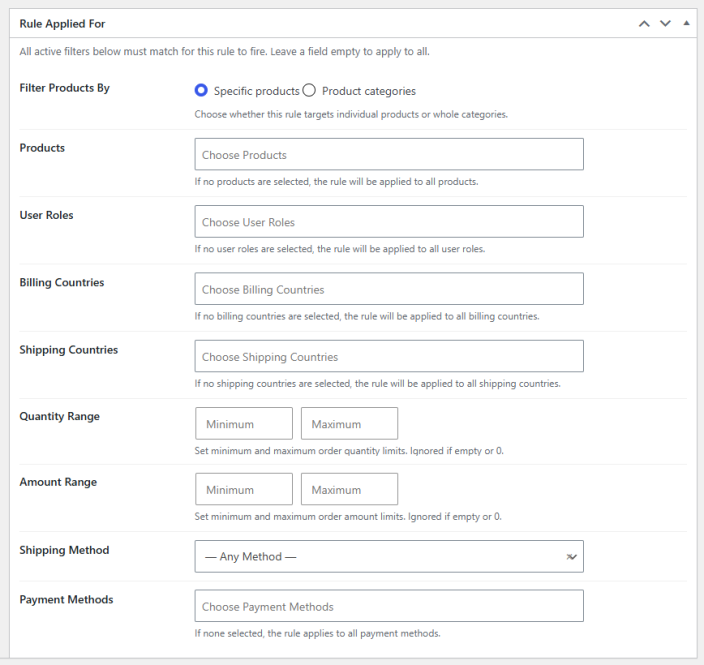
All active filters below must match for the rule to fire. Leave a field empty to apply the rule to all orders.
- Filter Products By: Choose whether the rule targets specific products or whole product categories.
- Products: Select specific products this rule applies to. If no products are selected, the rule will be applied to all products.
- User Roles: Select the user roles this rule applies to. If no roles are selected, the rule will be applied to all user roles.
- Billing Countries: Select the billing countries this rule applies to. If no countries are selected, the rule will be applied to all billing countries.
- Shipping Countries: Select the shipping countries this rule applies to. If no countries are selected, the rule will be applied to all shipping countries.
- Quantity Range: Set minimum and maximum order quantity limits for this rule. Ignored if empty or 0.
- Amount Range: Set minimum and maximum order amount limits for this rule. Ignored if empty or 0.
- Shipping Method: Select the shipping method this rule applies to. Available options are Any Method or any configured shipping methods such as Free Shipping or Flat Rate.
- Payment Methods: Select the payment methods this rule applies to. If no methods are selected, the rule will be applied to all payment methods.
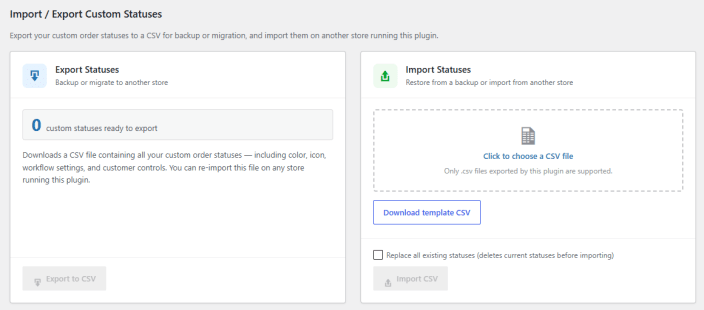
Import / Export Custom Statuses
↑ Back to topThe Import / Export page allows you to back up your custom order statuses or migrate them to another store running the same plugin.
Export Statuses
Click the Export to CSV button to download a CSV file containing all your custom order statuses, including color, icon, workflow settings, and customer controls. This file can be re-imported on any store running this plugin.
Import Statuses
To import statuses, click the file upload area to choose a CSV file exported by this plugin. You can also download a template CSV to use as a reference. Enable the Replace all existing statuses option to delete all current custom statuses before importing. Once your file is selected, click Import CSV to complete the import.