Invoice Payment Method allows WooCommerce store owners to offer Pay by Invoice as a checkout option. Customers can place orders without immediate payment and complete the payment later using an invoice.
This plugin is ideal for B2B stores, wholesale businesses, and companies that require purchase orders or manual invoice processing.
With this plugin, you can:
• Allow customers to place orders now and pay later via invoice
• Collect Purchase Order (PO) numbers and customer notes during checkout
• Automatically generate branded PDF invoices for orders
• Attach invoices to customer and admin emails
• Allow customers to download invoices from their My Account page
• Control invoice availability using advanced rule-based conditions
Installation
↑ Back to topTo start using a product from WooCommerce.com, you can use the “Add to store” functionality on the order confirmation page or the My subscriptions section in your account.
- Navigate to My subscriptions.
- Find the Add to store button next to the product you’re planning to install.
- Follow the instructions on the screen, and the product will be automatically added to your store.
Alternative options and more information at:
Managing WooCommerce.com subscriptions.

Setup and Configuration
↑ Back to topAfter activating the plugin, follow these steps to configure the Invoice Payment Method.
Step 1: Enable the Invoice Payment Method
↑ Back to topAfter installing the plugin, a new payment method called Invoice Payment will appear in WooCommerce.
Navigate to: WooCommerce → Settings → Payments
Find Invoice Payment and click Manage.
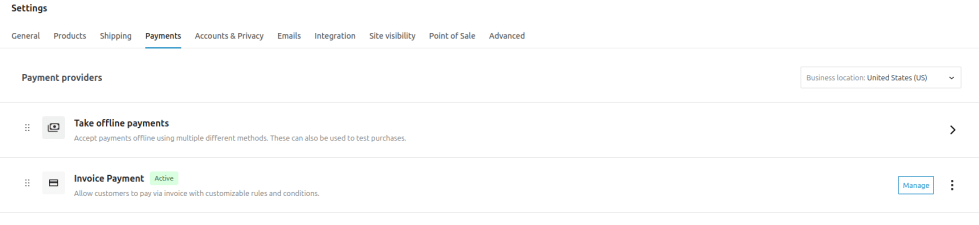
From here you can:
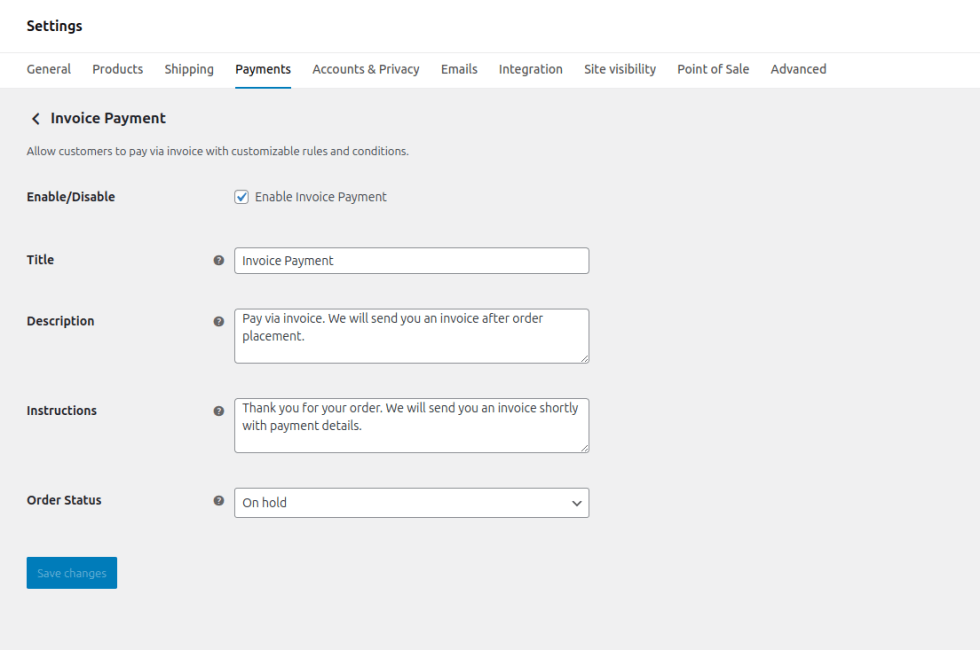
• Enable or disable the payment method
• Set the title and description shown at checkout
• Customize the thank you message displayed after order placement
• Select the default order status for invoice orders
Once enabled, customers can immediately start using Invoice Payment at checkout.
Step 2: Access Plugin Settings
↑ Back to topTo configure advanced options, navigate to:
WooCommerce → Invoice Payment
You will see three main settings tabs:
- General Settings: Configure checkout fields such as PO number and customer message.
- PDF Settings: Customize the PDF invoice layout and branding.
- Invoice Access Settings: Control how invoices are shared with customers and admins.
Step 3: Configure General Settings
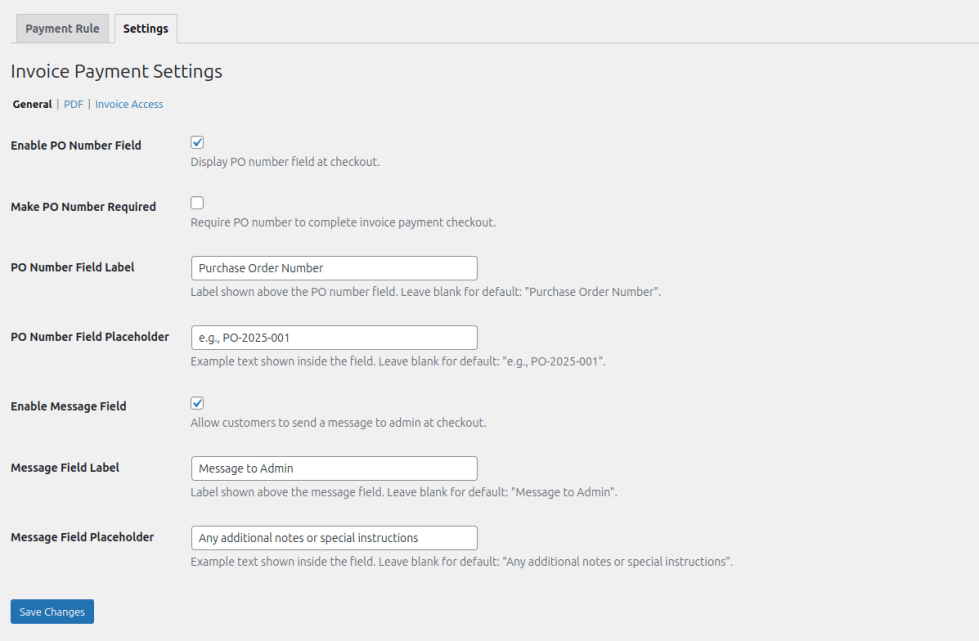
↑ Back to topThe General Settings tab controls the additional information collected when customers choose invoice payment.
Purchase Order (PO) Number
You can enable a Purchase Order number field at checkout.
Options include:
• Enable or disable the PO number field
• Set a custom field title
• Add a placeholder text
• Make the field required or optional
This helps businesses track orders using internal purchasing systems.
Admin Message Field
Customers can also add an optional message or note when placing an invoice order.
This field can be used for:
• Internal references
• Delivery notes
• Additional instructions for the store admin
Both fields can also be overridden inside rules, allowing different checkout behavior depending on the rule conditions.
If rules do not modify these settings, the global settings will apply by default.
Step 4: Configure PDF Invoice Settings
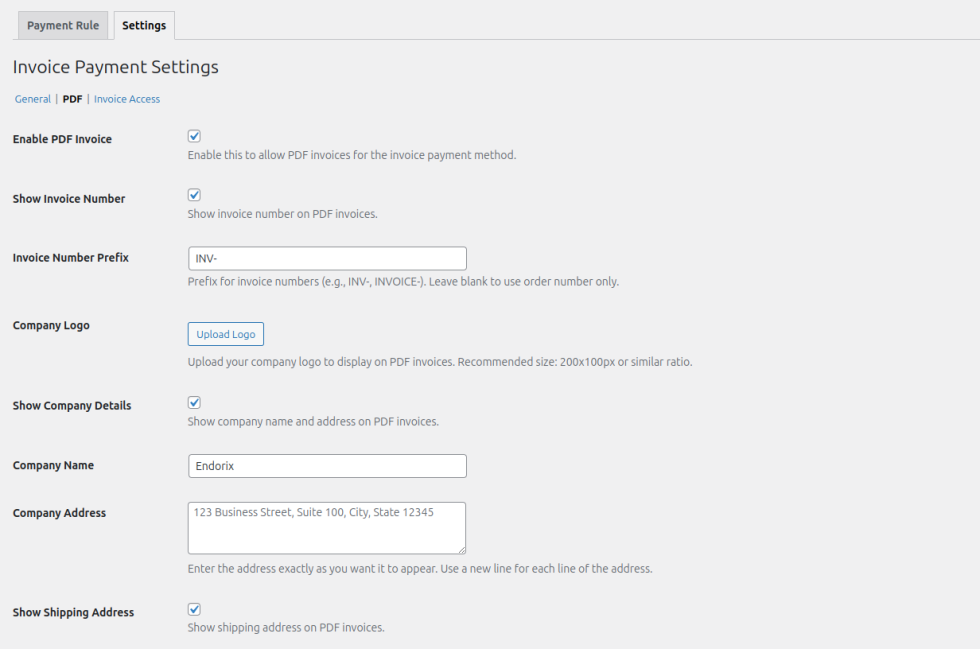
↑ Back to topThe PDF Settings tab allows you to customize invoices.
You can enable automatic PDF invoice generation for all orders placed using the invoice payment method.
Customization options include:
- Invoice number display
- Invoice number prefix (e.g., INV-1001)
- Company logo
- Company name and address
- Shipping address display
- Invoice heading text
- PDF Colors (PDF header color, Product table color)
- Terms and conditions
- Footer message

You can also choose from three professional invoice templates:
Template 1 — Simple Classic – Preview
A clean and minimal invoice layout.
Template 2 — Modern Minimal – Preview
A modern design with a lightweight layout.
Template 3 — Professional Bold – Preview
A structured layout suitable for corporate invoices.
Color customization options allow you to match invoices with your brand identity.
Step 5: Configure Invoice Access Settings
↑ Back to topThe Invoice Access Settings control how invoices are delivered to customers and administrators.
Attach Invoice to Customer Emails
When enabled, the generated PDF invoice will automatically be attached to customer emails.
This ensures customers receive the invoice immediately after placing an order.
Attach Invoice to Admin Emails
PDF invoices can also be attached to admin notification emails, making it easier for store managers to process invoice orders.
Admins can always download invoices manually from the order page if needed.
Allow Invoice Download in My Account
Customers can download their invoices from: My Account → Orders
A Download Invoice button will appear for orders placed using the invoice payment method.
This allows customers to access their invoices anytime without contacting the store.
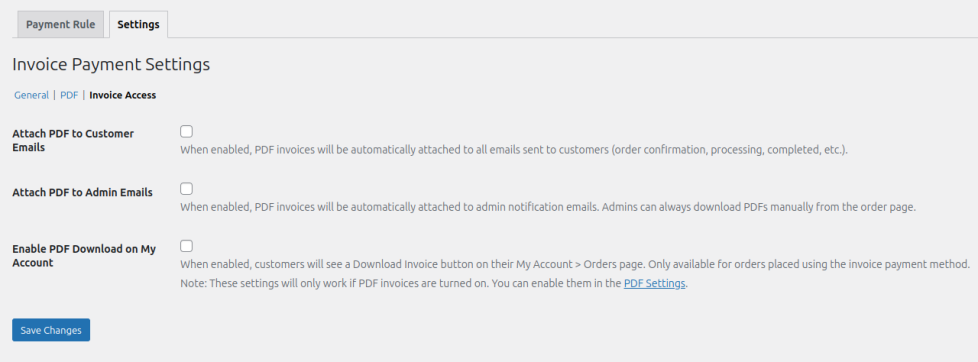
Note: Invoice access settings only work when PDF invoices are enabled in the PDF Settings tab.
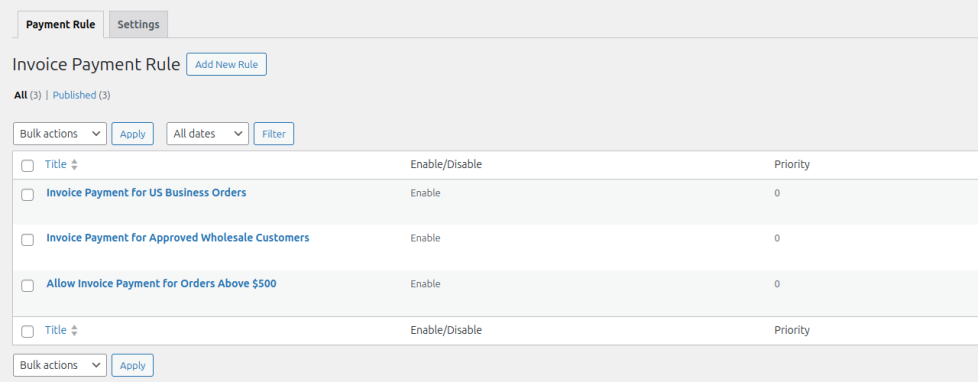
Step 6: Creating Rules (Optional)
↑ Back to topRules allow you to control when the invoice payment method should appear at checkout.
Without rules, the payment method will simply appear whenever it is enabled.
Rules are useful when you want to restrict invoice payments to certain conditions.
Examples include:
• Only allow invoice payments for specific countries
• Enable invoice payments for large orders
• Restrict invoice payments to specific products or categories
• Show invoice payment only for specific shipping methods
Rules evaluate checkout conditions in real time and automatically determine whether the invoice option should be displayed.
Step 7: Rule Structure
↑ Back to topEach rule is made up of three main parts:
1. Target: Defines who the rule applies to.
2. Conditions: Defines when the rule should trigger.
3. Actions: Defines what happens when the conditions are met.
This flexible structure allows store owners to create very specific invoice payment workflows.
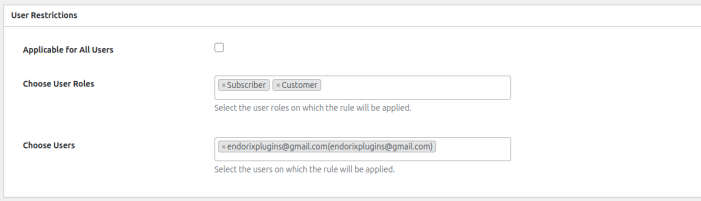
1. Target
The Target section allows you to define which customers the rule applies to.
Store owners can limit invoice payments to specific customer groups instead of allowing everyone to use them.
Examples include:
• Specific user roles (Wholesale, B2B customers, VIP customers)
• Logged-in customers only
• Guest customers
• Specific individual users
This ensures invoice payments are available only to trusted customers or approved groups.
2. Conditions
Conditions define the requirements that must be met during checkout for the rule to apply.
Multiple conditions can be combined to create more precise restrictions.
Some common conditions include:
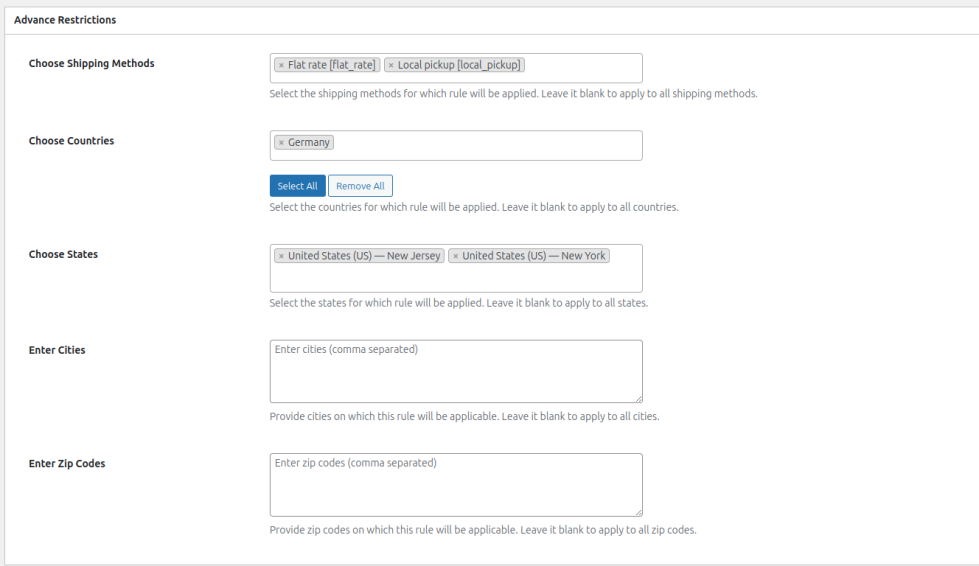
Shipping & Location
- Choose Shipping Methods: Flat rate, Free shipping, Local pickup. Select the shipping methods for which this rule will be applied. Leave it blank to apply to all shipping methods.
- Choose Countries: Select the countries for which this rule will be applied. Leave it blank to apply to all countries.
- Choose States: Select the states for which this rule will be applied. Leave it blank to apply to all states.
- Enter Cities: Provide cities (comma separated) on which this rule will be applicable. Leave it blank to apply to all cities.
- Enter Zip Codes: Provide zip codes (comma separated) on which this rule will be applicable. Leave it blank to apply to all zip codes.
Cart Restrictions
- Cart Amount Range: Set a minimum and/or maximum cart amount to determine when this rule will be applied. The calculation is based on the cart subtotal.
- Cart Quantity Range: Set a minimum and/or maximum cart quantity to determine when this rule will be applied.

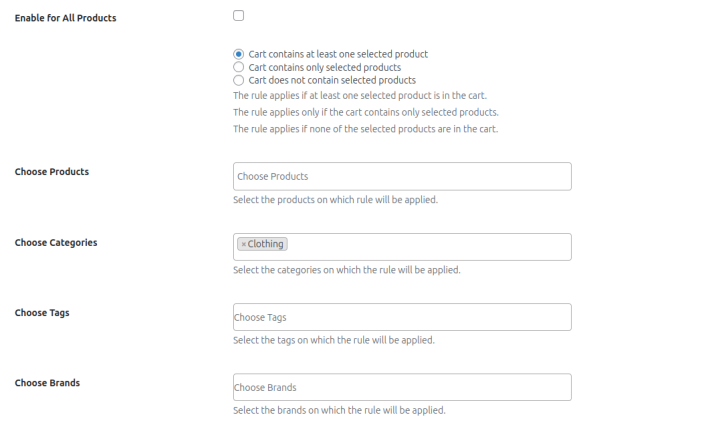
Products, Categories, Tags & Brands
You can apply the rule to all products or set specific conditions:
- Cart contains at least one selected product: Rule applies if at least one selected product is in the cart.
- Cart contains only selected products: Rule applies only if the cart has only the selected products.
- Cart does not contain selected products: Rule applies if none of the selected products are in the cart.
You can select specific products, categories, tags, or brands to which this rule will apply.
FAQs
↑ Back to top
1. Can I show Invoice Payment only for certain customers or user roles?
Yes. Using the Target section in rules, you can restrict invoice payments to specific user roles (like Wholesale or B2B), individual customers, logged-in users, or guests. This ensures only trusted or approved customers can use this option.
2. Can I control invoice availability based on cart contents?
Absolutely. You can set conditions based on cart total, quantity, products, categories, tags, or brands. For example, show Invoice Payment only for orders above $500 or only when certain products are in the cart.
3. How can I make PDF invoices match my brand?
You can fully customize your PDF invoices: choose from three templates (Classic, Minimal, Bold), add your logo, company info, invoice prefix, colors, footer message, and terms & conditions.
4. Can Invoice Payment be combined with specific shipping methods or locations?
Yes. Rules let you restrict invoice payments by shipping methods, countries, states, cities, or zip codes. For instance, you could allow it only for domestic shipments using freight delivery.