Overview
↑ Back to topInstallation
↑ Back to top- Download the extension from your dashboard
- Go to Plugins > Add New > Upload and select the ZIP file you just downloaded
- Click Install Now and Activate
- Setup the extension how you prefer by visiting Woocommerce > Settings > Integration (see next section on configuration)
Setup and Configuration
↑ Back to top- Click on the “My Apps” link on the top of the page
- Click the “Create New App” button on the top right
- Enter a meaningful name for your app along with a description if necessary (these can be anything but will enable you to identify them if, for example, you are using multiple apps for different connections)
- The “OAuth redirect URIs” field will need the address to your websites connection page. This can be found on the settings page in the WordPress admin area (WooCommerce > Settings > Integrations > FreeAgent), labelled “OAuth redirect URI”. The existing URIs within this field can be left in place (these are used for testing purposes) and you can add your own URI on a new line. It will not cause issues if you delete the existing URIs
- Finish the process by clicking “Create App”
- On the next screen you will be presented with your application credentials. Copy both the “OAuth Identifier” and “OAuth Secret” over to your FreeAgent settings page in the WordPress admin and click “Save Changes”. This will store these values in your database.
- Once the page has reloaded, click “Connect to FreeAgent” and proceed to sign in and approve your new application
Settings Screen
↑ Back to topConnection Options
- Connect FreeAgent: Asks you to log in to your FreeAgent account and allow WooCommerce access
- Disconnect FreeAgent: Disconnects the currently connected FreeAgent account. This will stop any future contacts/invoices being created and disable the synchronization between WooCommerce and FreeAgent until it is reconnected
Invoice Options
- Create Invoices: Allows the automatic creation of invoices when orders are created. If this isn’t checked invoices can only be manually created. This can be done on the order screen (detailed mode only)
- Send Invoices: Sends the created invoices to the contact from FreeAgent (detailed mode only)
- Mark Invoices as sent: Allows for invoices to be marked as “sent” (open) rather than “Draft” when they are created
- FreeAgent User Email Address: The “from” email address to be used to send emails from FreeAgent (this is required if “Send Invoices” is checked)
- Custom Invoice Reference: Allows the designation of a custom reference to be used for FreeAgent invoices. This must include the order ID somewhere in the reference
- Set Accounting Category for Invoices: Select the income category to be used for invoices (defaults to “Sales”)
- Set Default X Item Type: Set item type to appear on the invoice for products, shipping and fees (detailed mode only)
- Automatically Apply Payments to Invoices: Allows manual payments to be applied to FreeAgent invoices when a WooCommerce order payment is taken (detailed mode only)
- Select Bank Account: Determines which bank account will be used when adding payments to your FreeAgent account (an account and contact named “WooCommerce” will be generated in summarised mode)
- Set Payment Terms in Days: Sets the number of days before an invoice becomes overdue
Synchronization Options (detailed mode only)
- Synchronize Automatically: Periodically check FreeAgent invoice statuses and references to ensure they match the corresponding WooCommerce order data
- Synchronization Frequency: Determines how often FreeAgent invoices will be synchronized with WooCommerce orders
- Synchronize Now: Press this to manually run the synchronization process
Usage
↑ Back to topDetailed mode
↑ Back to topAutomatically creating invoices
If you have opted to create invoices automatically then a new invoice will be created in FreeAgent every time a new order is created. A contact will also be generated in FreeAgent using the customer’s details. If you opted to mark the invoice as “Sent” then their status will be updated to “Open”. The invoice status will be shown alongside the order on the Woocommerce > Orders screen: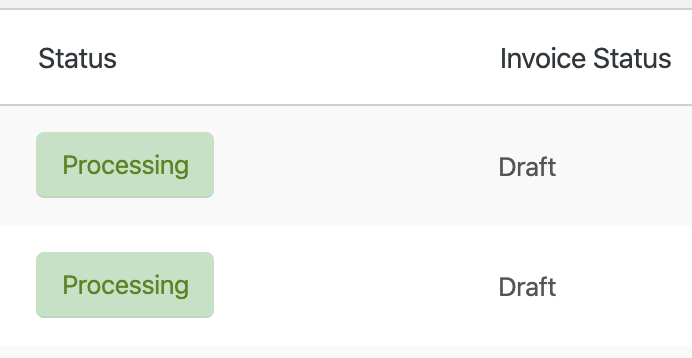
Manually creating invoices
If you opt out of automatically creating invoices for orders an extra button for these actions will become available to you. On the WooCommerce > Orders screen: And also on the dropdown on the individual order’s edit screen:
 When an order is updated the changes made to any items on the order (along with any additional items/charges) will be reflected in the invoice on FreeAgent provided the option to automatically create invoices is checked on the settings page.
Synchronizing Payments
If you choose to synchronize automatically on the settings screen when a WooCommerce order status is updated to processing/completed a manual payment is added to the corresponding invoice in FreeAgent and the invoice is marked as “Paid”. Additionally, a check will be run (frequency determined by the selected value in the dropdown) that checks WooCommerce order statuses against FreeAgent invoice statuses. If a FreeAgent invoice status has been updated and this is not yet reflected in the WooCommerce order; the details will be synchronized and the order status will be updated.Invoice Items
Each order item is added to the invoice as a separate line item with its corresponding tax rate. Please note: there is minor discrepancy in amounts between WooCommerce and FreeAgent due to the way each system handles the rounding of totals during the calculations. Moving forward, we will be looking to group order items by tax class which negates this issue.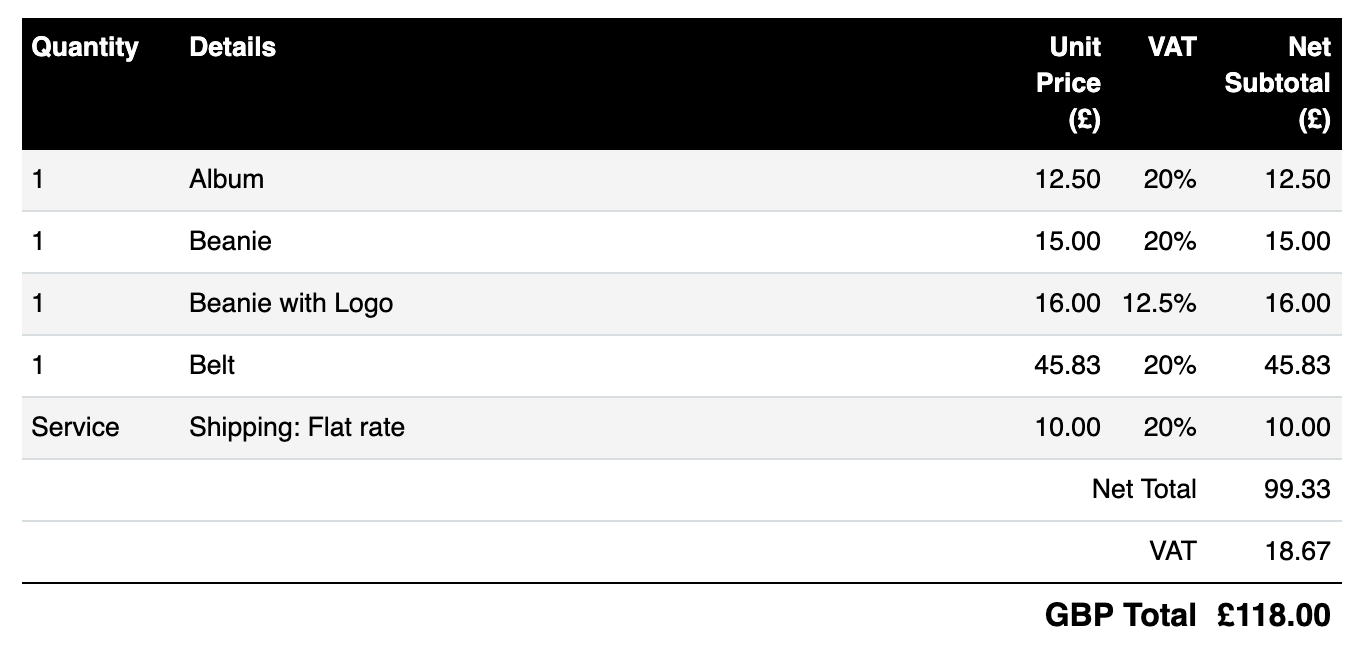
New FreeAgent Metabox
↑ Back to top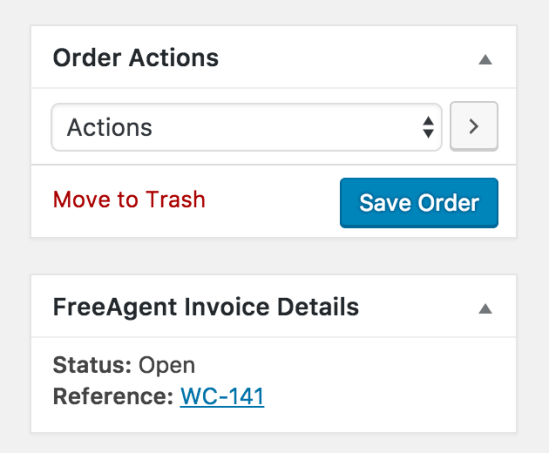
FAQ
↑ Back to topMy application has disconnected from my FreeAgent account, what can I do?
↑ Back to top- Switching to summarised mode will greatly reduce the number of requests being made to FreeAgent and help to avoid hitting API rate limit issues (this is strongly advised where possible)
- Turning off synchronization where it is not needed will also help reduce the number of requests being made. With syncronization switched on the application is checking invoices and comparing them to orders. If an invoice is updated the order status will change to reflect this. This process is ongoing until the invoice is marked as paid. If you are not updating invoices to paid this may not be a requirement and you can remove this and any associated scheduled tasks.
How can I match up my Stripe payments with my invoices/sales entries when they’re a different amount?
↑ Back to topIf Stripe charges you fees before they release the money to your bank account, you should explain the incoming transaction as the full amount of the related invoices or sales before Stripe have deducted their fees. This will create a negative transaction in your bank account which you can explain in whichever way you choose.
Please see the screenshots below, which display a £106.29 payment from Stripe that relates to a £108 sale created by FreeAgent for WooCommerce. We explain the payment at the full value of £108.00, which in turn creates an outgoing entry for £1.71, equivalent to the Stripe fees on this transaction.
* £106.29 into bank account

* Explain as £108
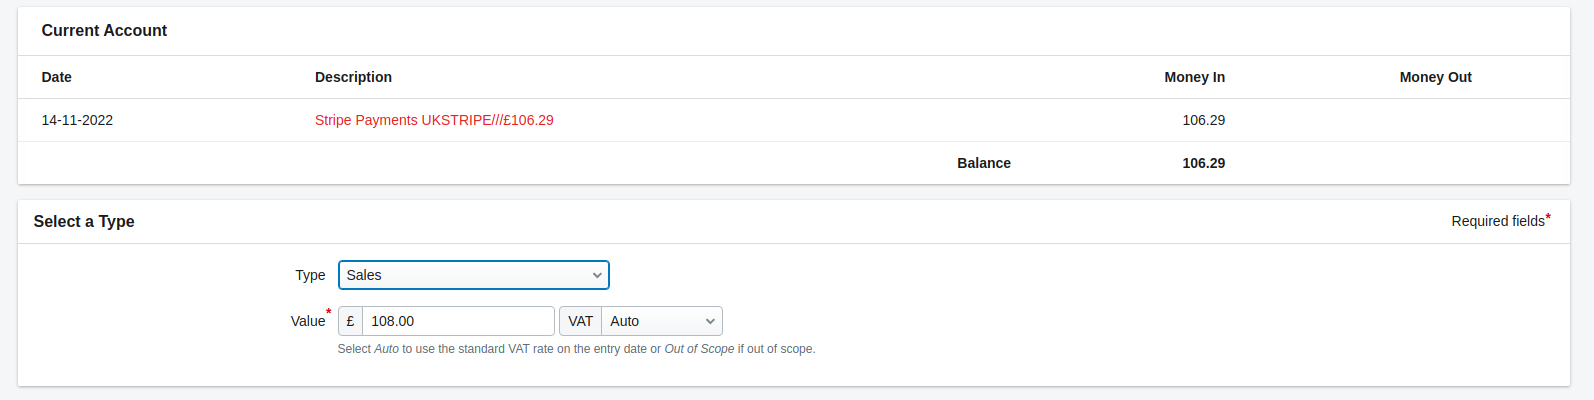
* Explain resulting debit as charges

Please note that you should seek the advice of a professional before using this method, as it may not be suitable/acceptable for your company to follow.