WooCommerce Multistore Manager plugin allows you to add unlimited stores based on shop locations and manage each store’s products, prices, stock, payment methods, and orders separately. You can also assign each store to your store managers to delegate responsibilities and ensure efficient store management.
Installation
↑ Back to topTo start using a product from WooCommerce.com, you can use the “Add to store” functionality on the order confirmation page or the My subscriptions section in your account.
- Navigate to My subscriptions.
- Find the Add to store button next to the product you’re planning to install.
- Follow the instructions on the screen, and the product will be automatically added to your store.
Alternative options and more information at: Managing WooCommerce.com subscriptions.
Configuration
↑ Back to topAfter installation, you can configure the multistore plugin. To configure the plugin, go to WooCommerce > Settings > Multistore Management and set up the following:
Important Note
To use this extension, you must have a Google API key. Go to https://console.cloud.google.com, sign in with your Google account, and create an API key. After that, enable several API services such as Map Embed API, Maps JavaScript API, Geocoding API, Places API, and Distance Matrix API.
General Settings
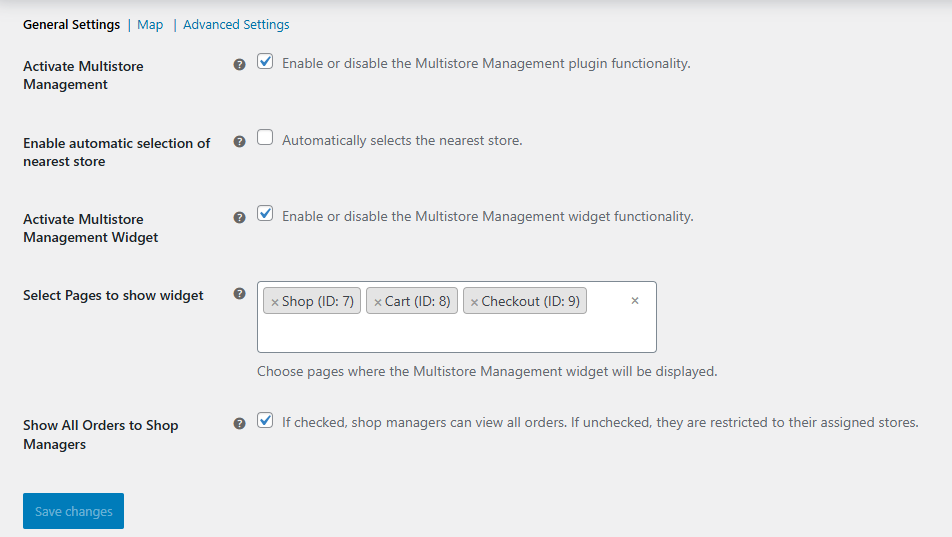
↑ Back to topAfter installing the WooCommerce multi-store manager plugin, go to WooCommerce > Settings > Multi Store Management > General Settings and configure:
- Activate Multistore Management: Enable or disable the Multistore Management plugin functionality.
- Enable Automatic Selection Of Nearest Store: Enable to automatically select the nearest store based on location.
- Activate Multistore Management Widget: Enable or disable the Multistore Management widget functionality.
- Select Pages To Show Widget: Choose pages where the Multistore Management widget will be displayed. You can display the widget on the shop, cart, or checkout pages.
- Show All Orders To Shop Managers: If checked, shop managers can view all orders. If unchecked, they are restricted to their assigned stores.
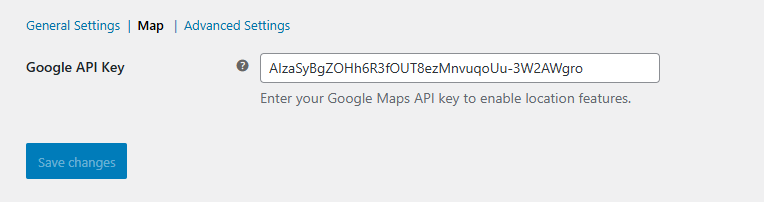
Map Settings
↑ Back to topGo to WooCommerce > Settings > Multi Store Management > Map to configure the map for your store. Here, you will need to add the Google API Key for the Map.
Google API Key: Enter your Google Maps API key to enable location features.
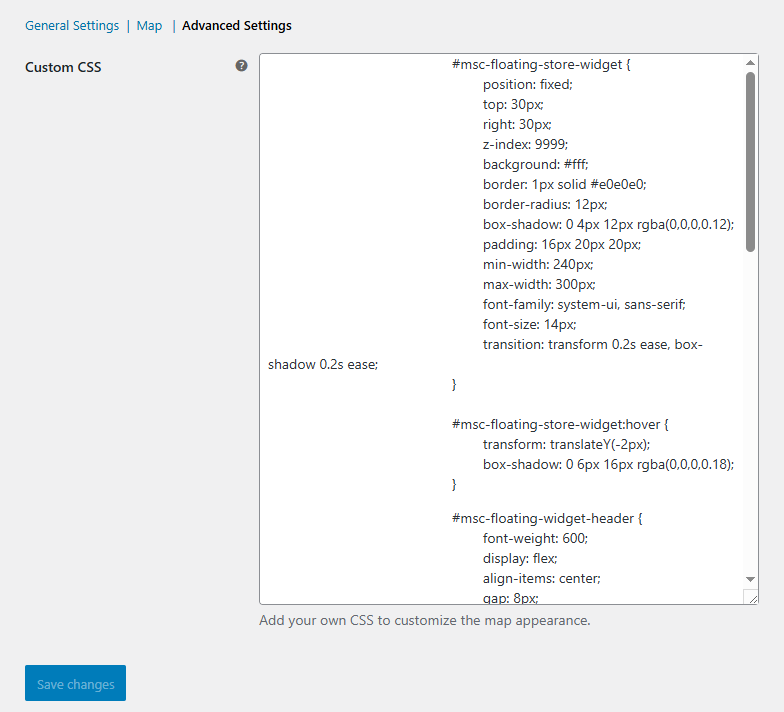
Advanced Settings
↑ Back to topGo to WooCommerce > Settings > Multi Store Management > Advanced Settings to add your own CSS to customize the map’s appearance.
Add New Stores
↑ Back to topGo to WooCommerce > Stores > Add New Store and configure the store. In each new store setting, you can set the store name, address, location (using Google Maps), and payment method. You can also assign stores to shop managers having user roles as “Store Manager”.
Manage Stores
↑ Back to topWhen creating a new store or editing an existing store, you can configure the following:
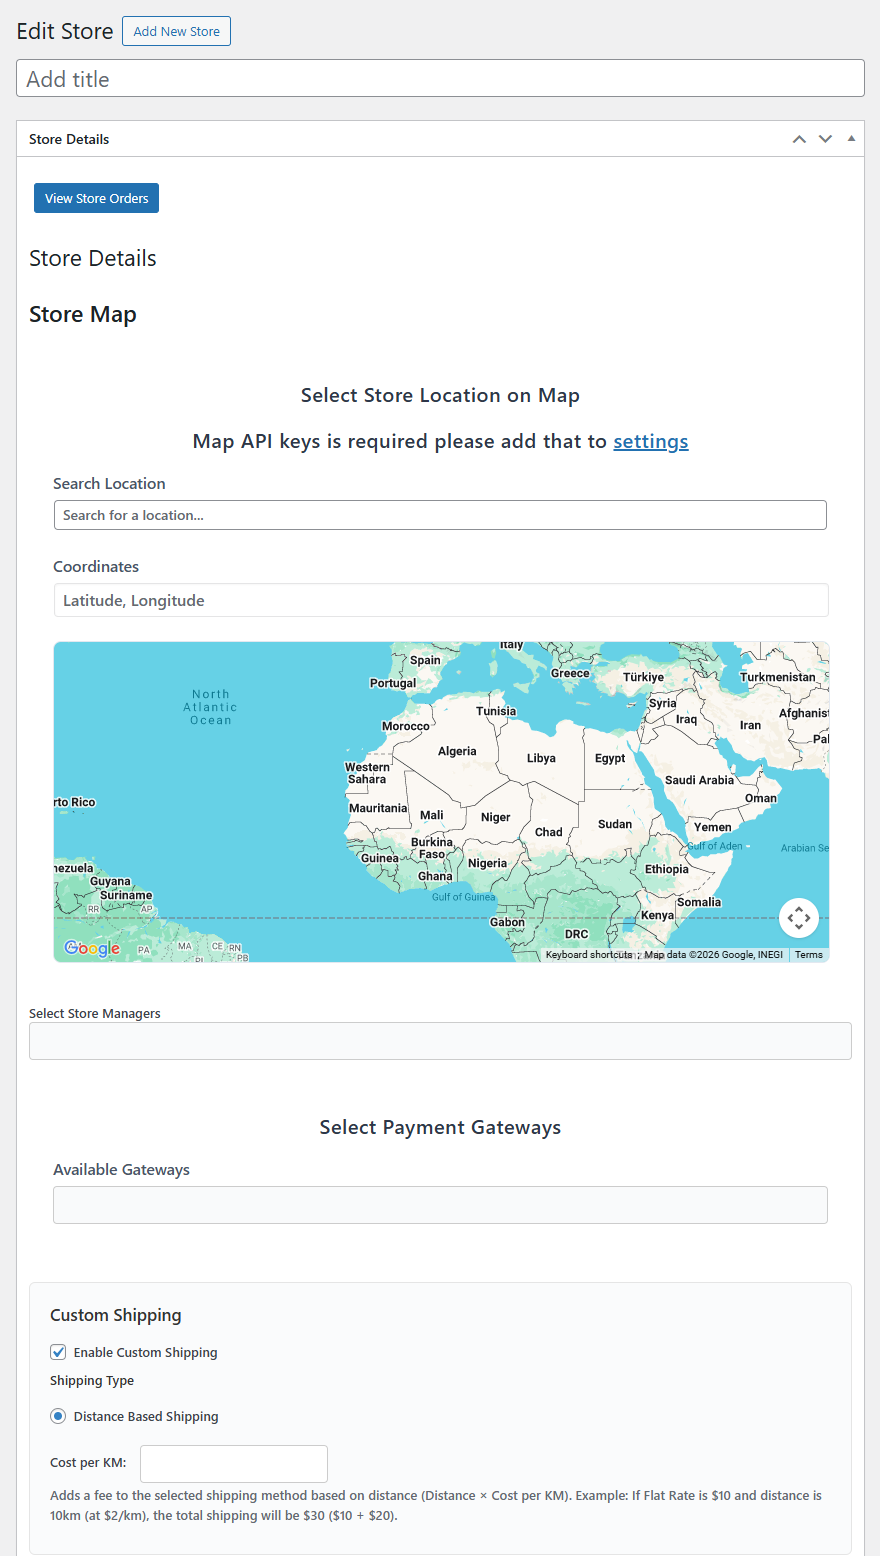
Store Details
↑ Back to top- View store order for this particular store.
- Set up Store Map: Select the location for the particular store.
- Select Store Managers: Select one or multiple store managers.
- Select Payment Gateways: Choose all the payment methods that you want to enable for the store.
- Custom Shipping: Click the checkbox to enable custom shipping for the store. If enabled, you can configure the following:
- Shipping Type: select the shipping method. Such as “Distance Based Shipping” and select the Cost per KM.
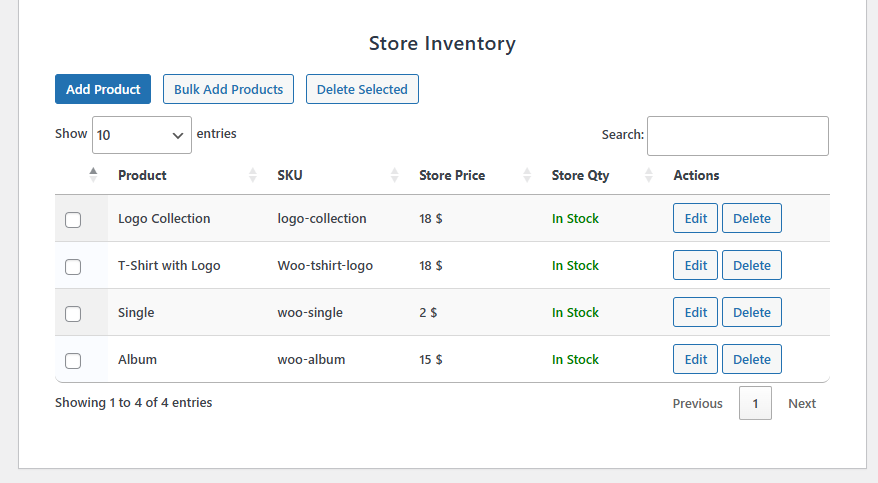
Store Inventory
↑ Back to topHer eyou can add, edit, and manage products for the store.
- Add Product: Click on Add Product, select the product, store price, and store quantity.
- Add Bulk Product: Add product in bulk to the store. Use different filters to refine and add a particular product to the store. You can choose the following filters:
- Category
- Type
- Tag
- SKU
- Price (Min/Max)
- Delete: Easily delete the selected products from the store.