The QCommerce plugin provides a powerful solution for order tracking, offering both automated and manual options for administrators to manage orders effectively.
Installation
↑ Back to topTo start using a product from WooCommerce.com, you can use the “Add to store” functionality on the order confirmation page or the My subscriptions section in your account.
- Navigate to My subscriptions.
- Find the Add to store button next to the product you’re planning to install.
- Follow the instructions on the screen, and the product will be automatically added to your store.
Alternative options and more information at:
Managing WooCommerce.com subscriptions.

Features
↑ Back to top- Real Time Ordering
- Custom User Role
- Custom Payment Status
- Custom Order Status
- Custom Email
- Contact Person – Block
- Feedback form – Block
- QCommerce – Block
Custom User Role
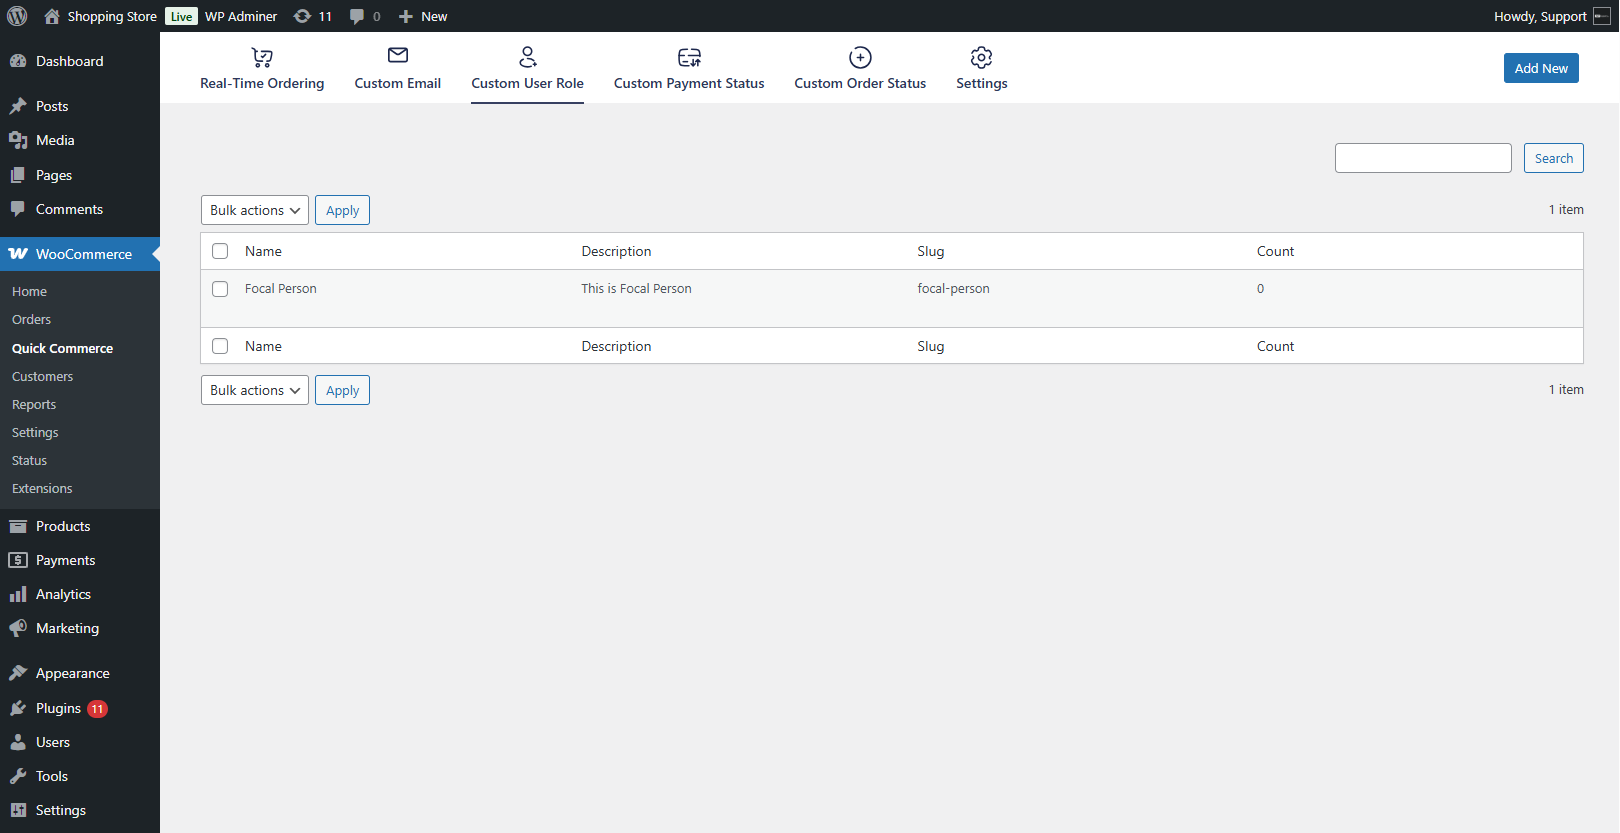
↑ Back to top- This feature enables admins to create and manage custom user roles with unique names, slugs, and descriptions.
- To add custom user roles, navigate to the WordPress Admin Dashboard > WooCommerce > Quick Commerce > Custom User Role.
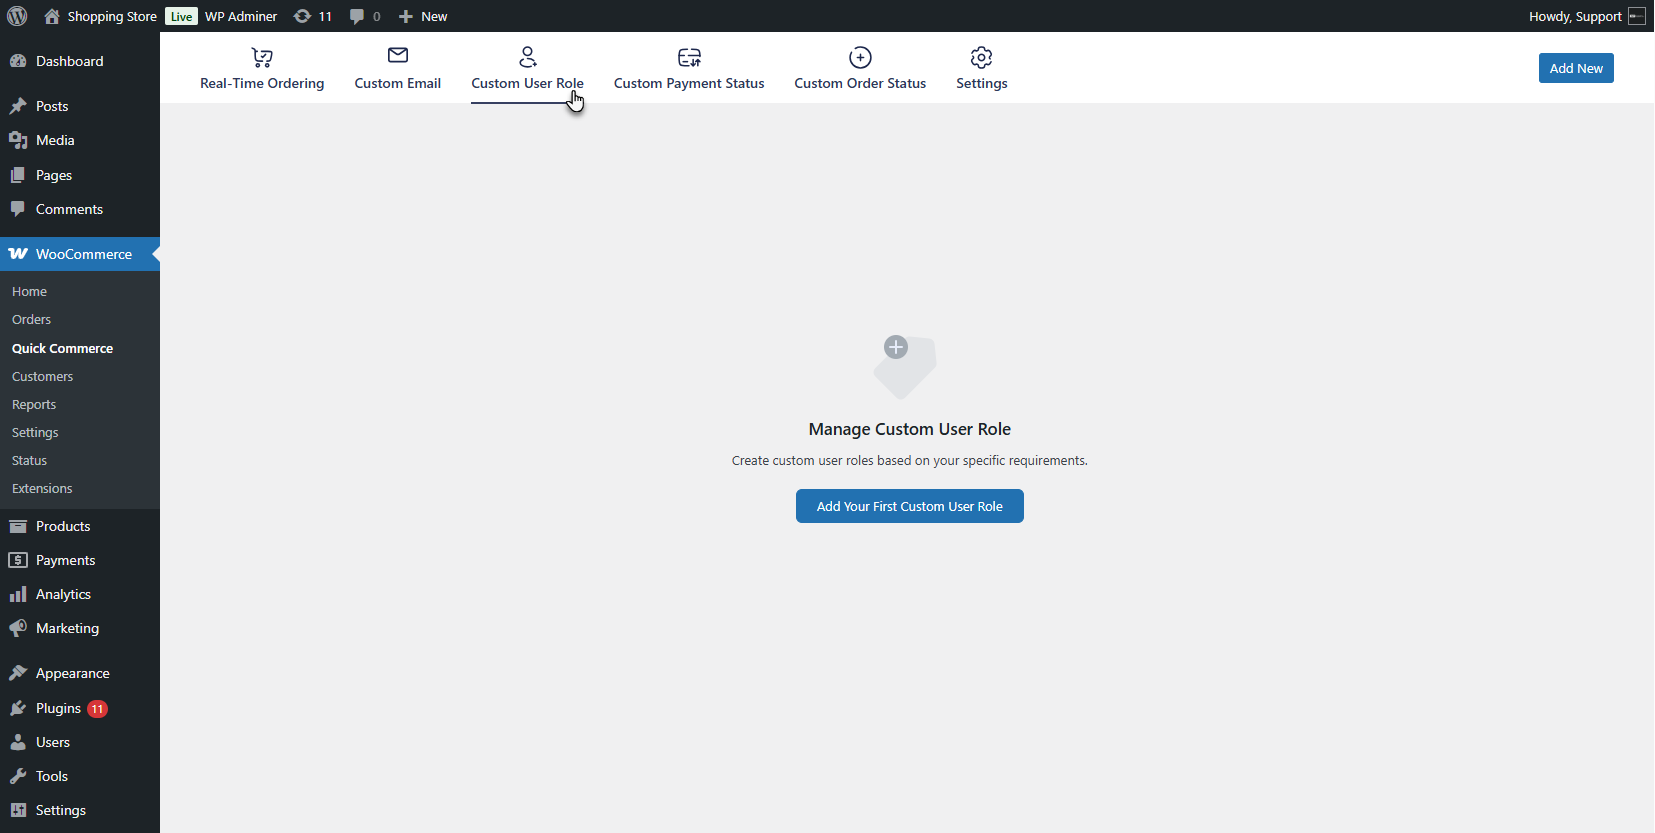
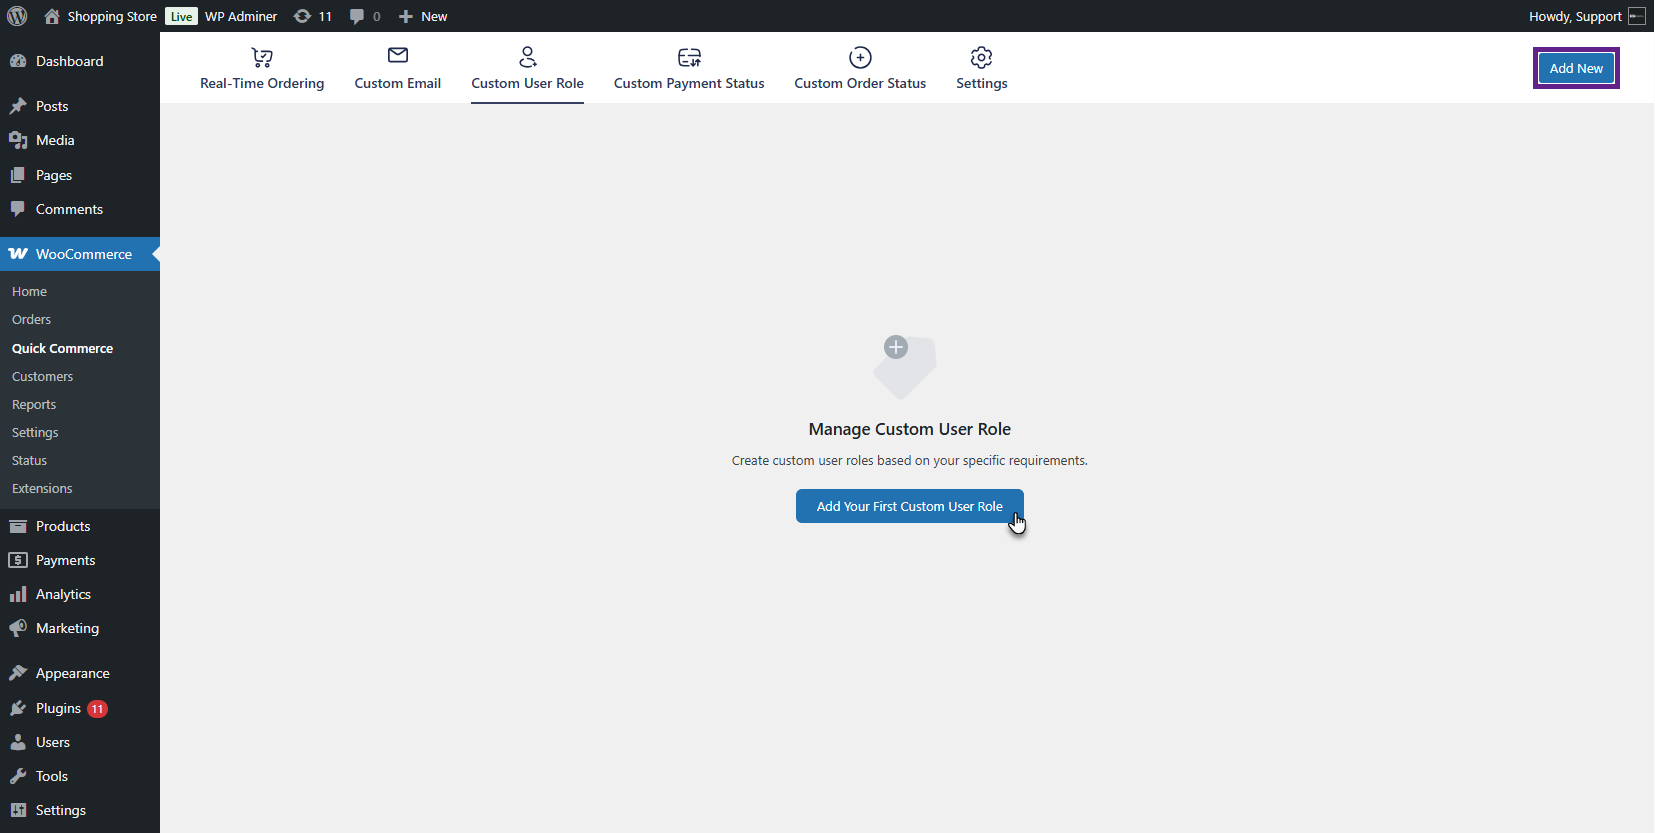
- For the first role, click the Add Your First Custom User Role button or the Add New button from the top navigation bar.
- An Add New User Role pop-up will appear. Add a name to the user role, enter a slug, add a description if needed, then click the Save button.
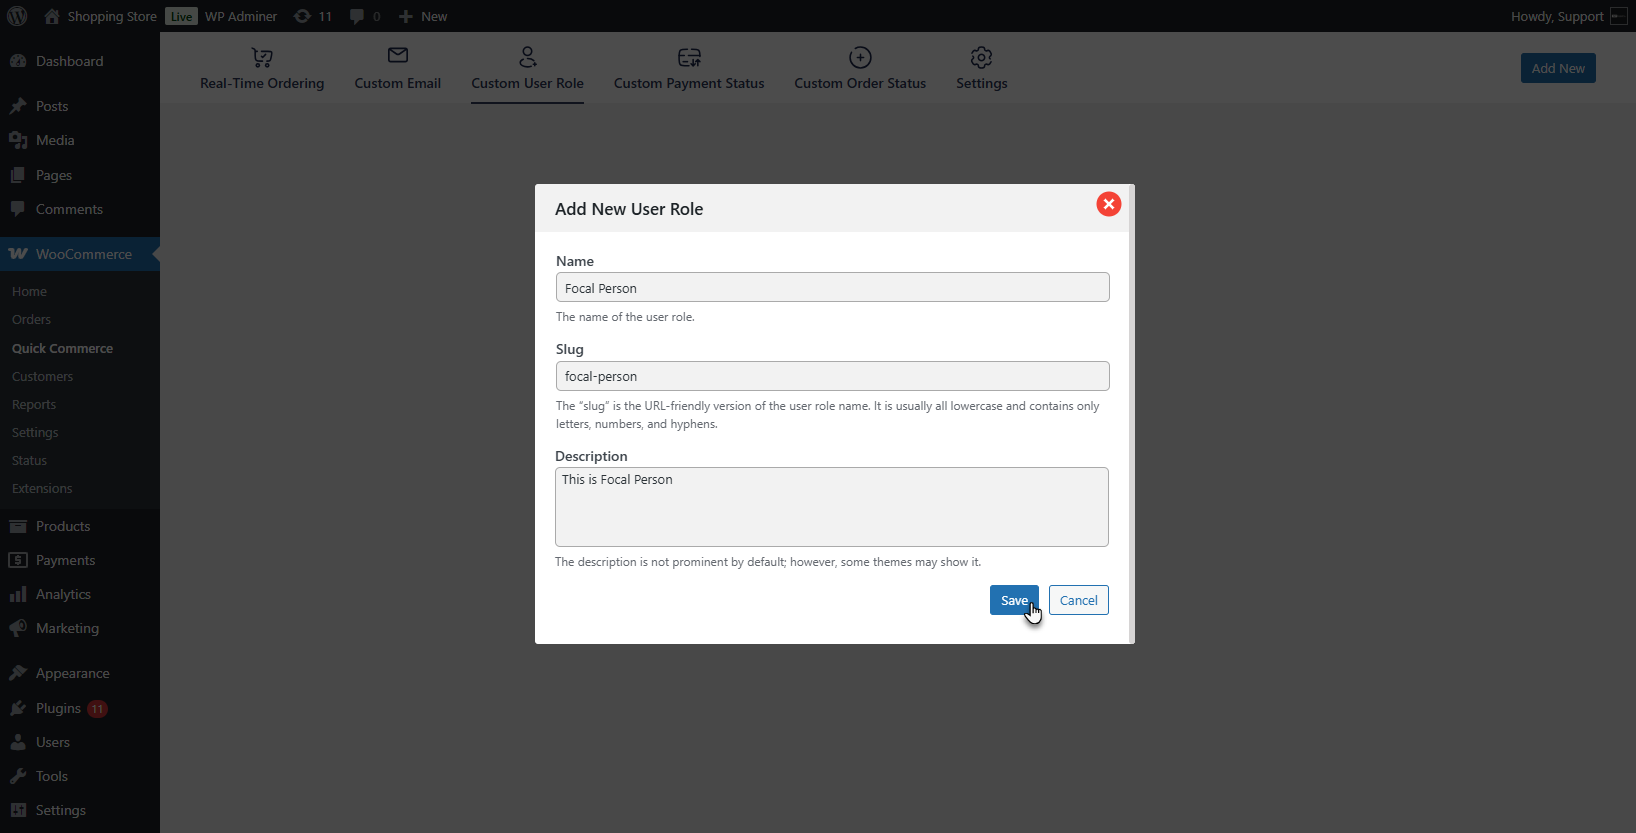
PLEASE NOTE: If the slug is not created manually, the system automatically generates it based on the title.
- The custom user role will be created and listed on the Custom User Role List page. Each role in the list will display its name, description, slug, and count, i.e., the number of users assigned to that particular role.
Custom Payment Status
↑ Back to top- This feature enables admins to create and assign custom payment statuses that accurately reflect in real-time ordering.
- To add a custom payment status, navigate to the WordPress Admin Dashboard > WooCommerce > Quick Commerce > Custom Payment Status.
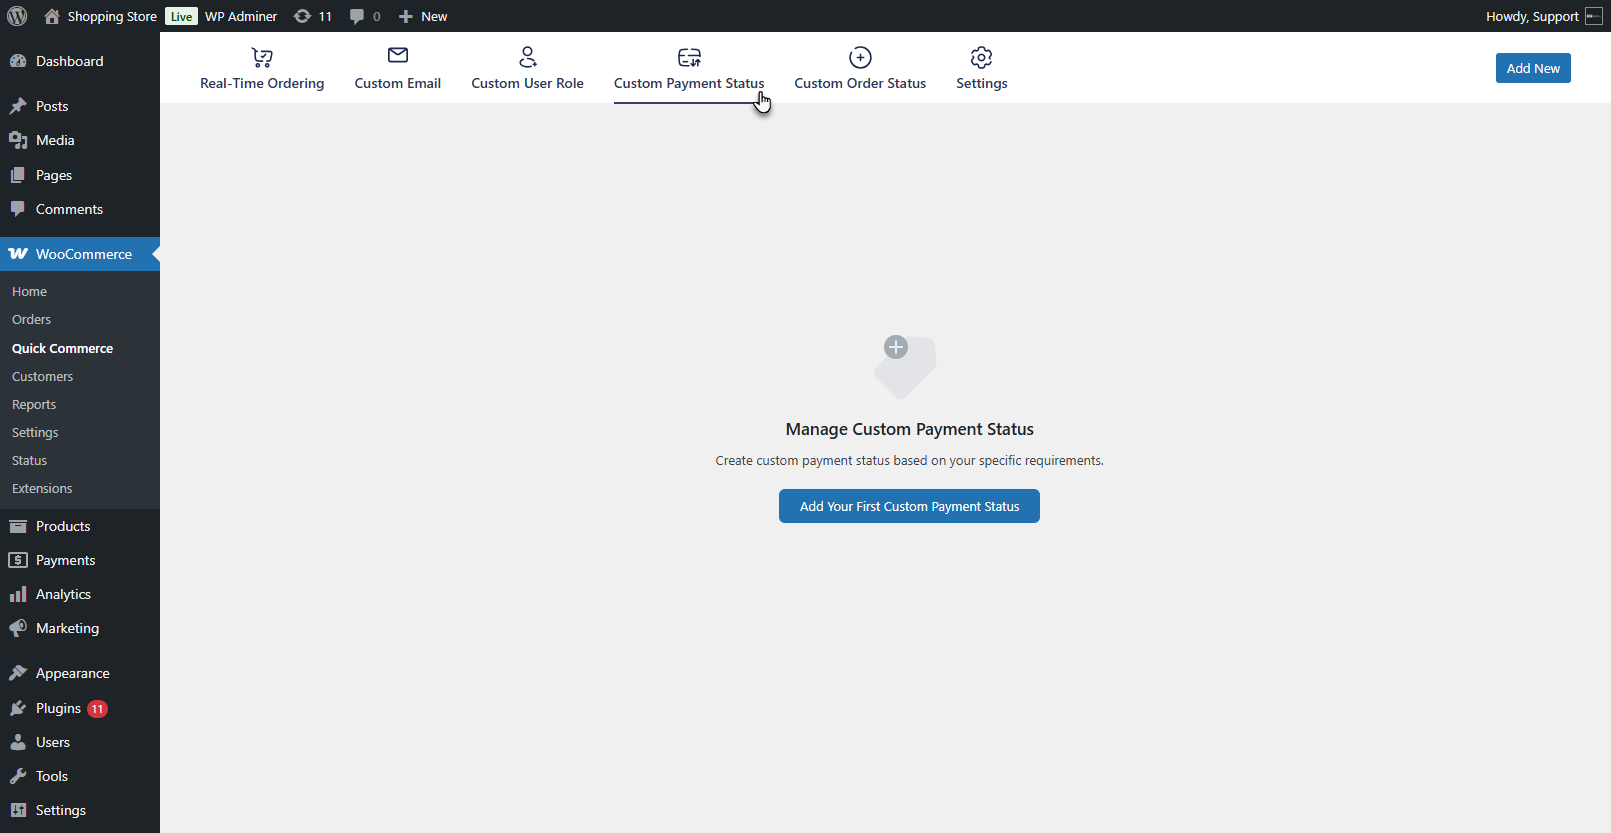
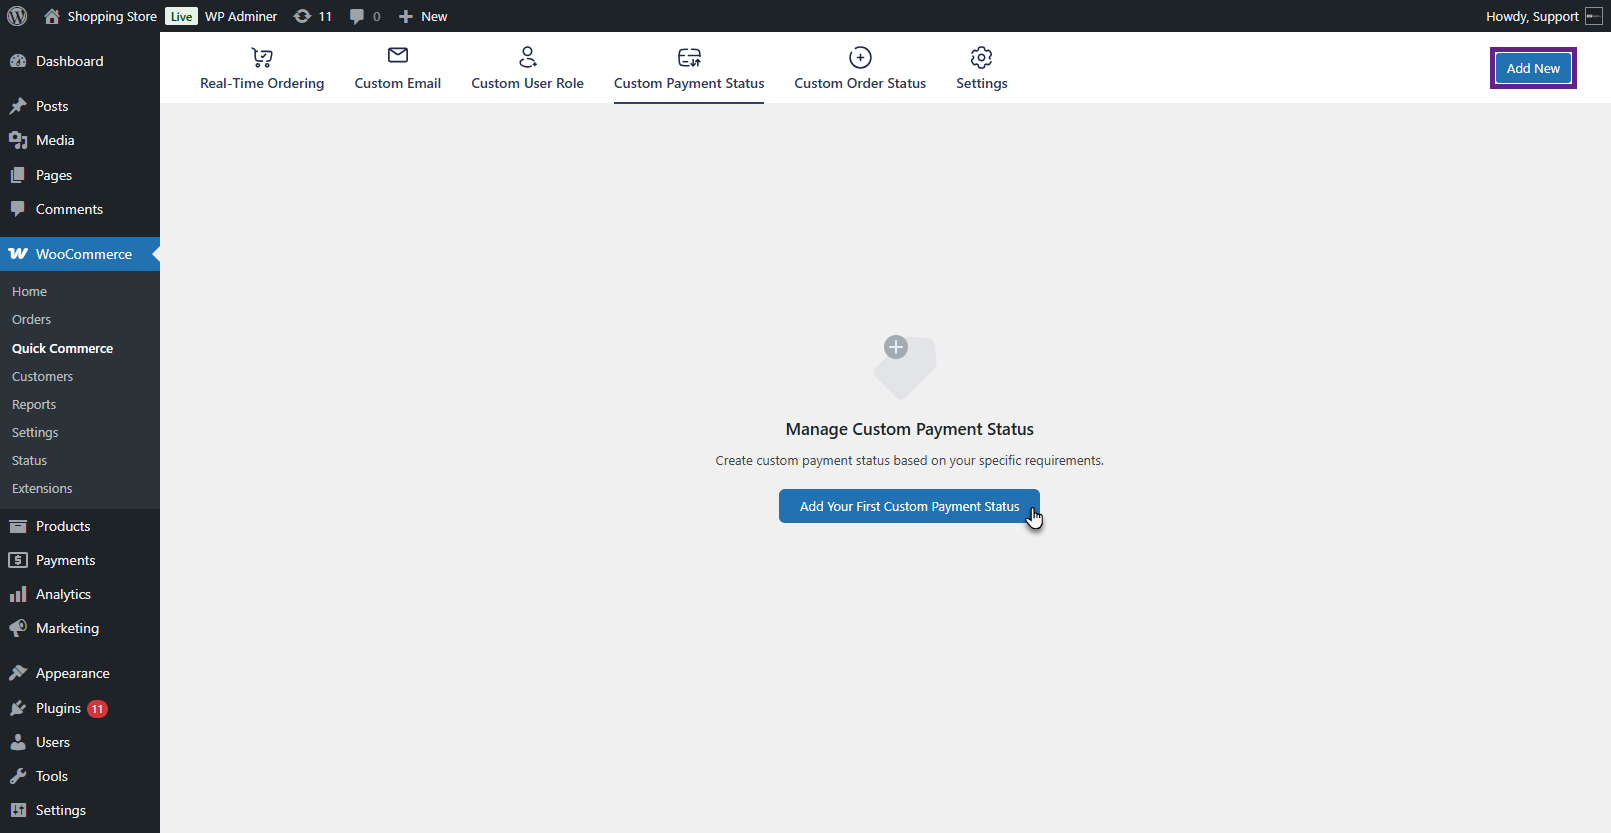
- For the first payment status, click the Add Your First Custom Payment Status button or the Add New button from the top navigation bar.
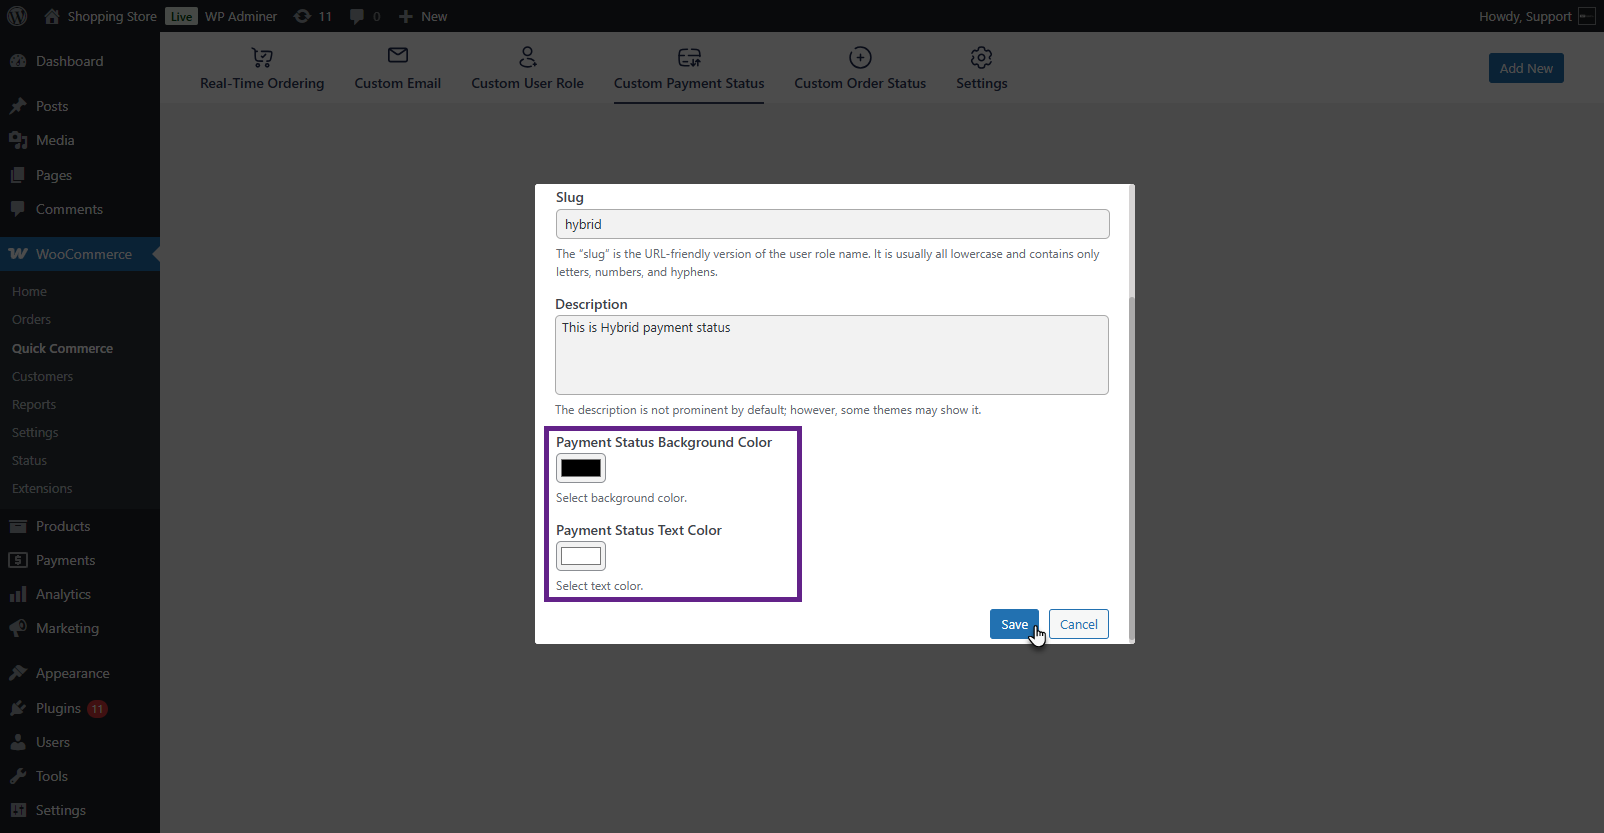
- An Add New Payment Status pop-up will appear. Add a name to the user role, enter a slug, and add a description if needed.
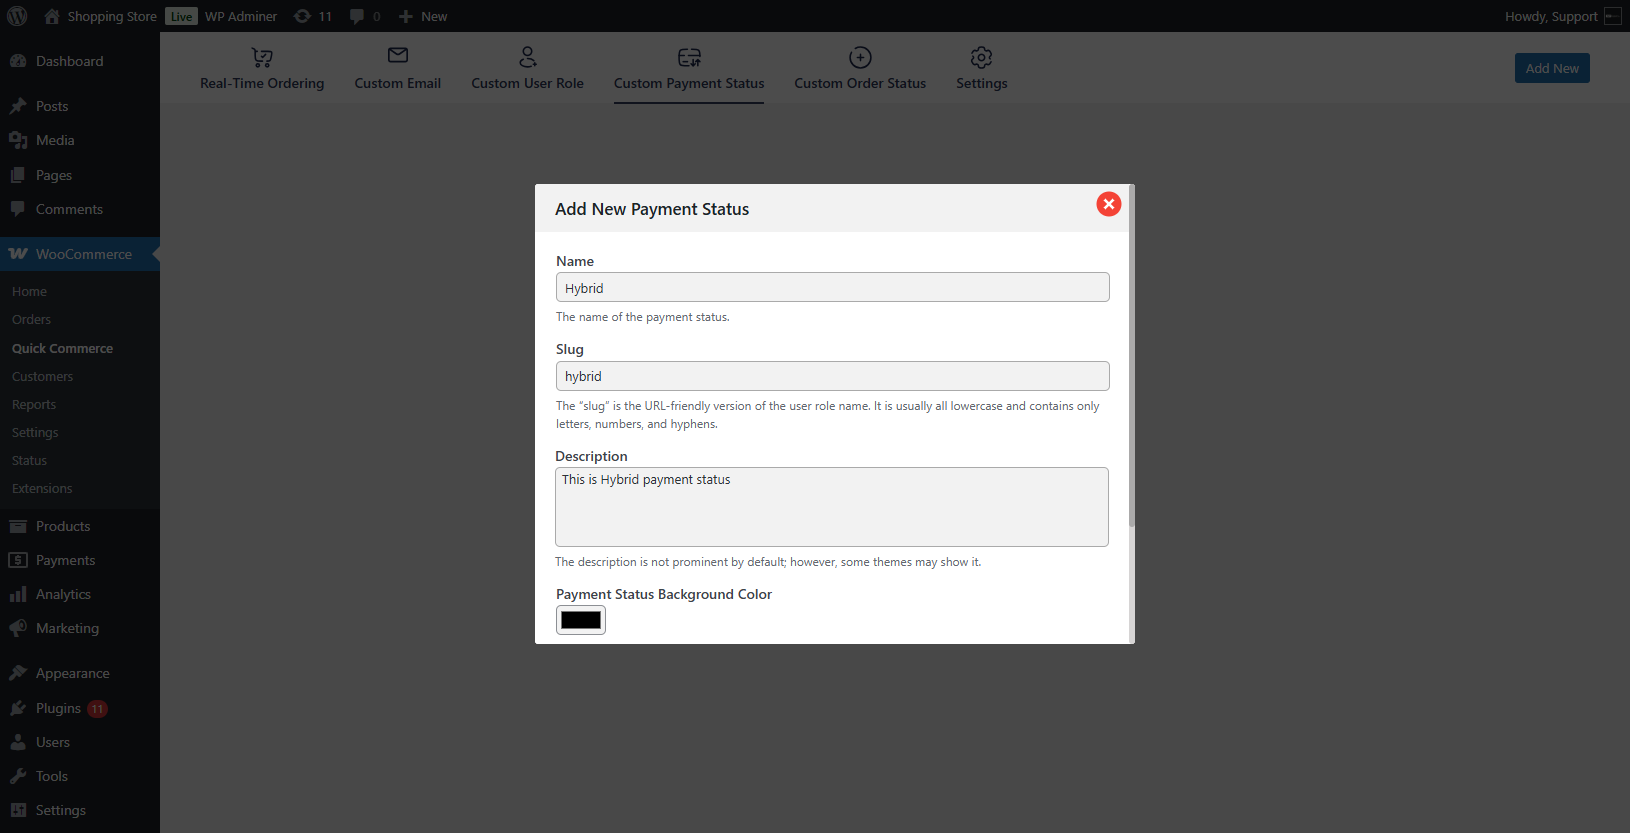
PLEASE NOTE: If the slug is not created manually, the system automatically generates it based on the title.
- The admin can set the Payment Status Background Color and the Payment Status Text Color. Then click the save button. This will appear on the Real-Time Ordering page.
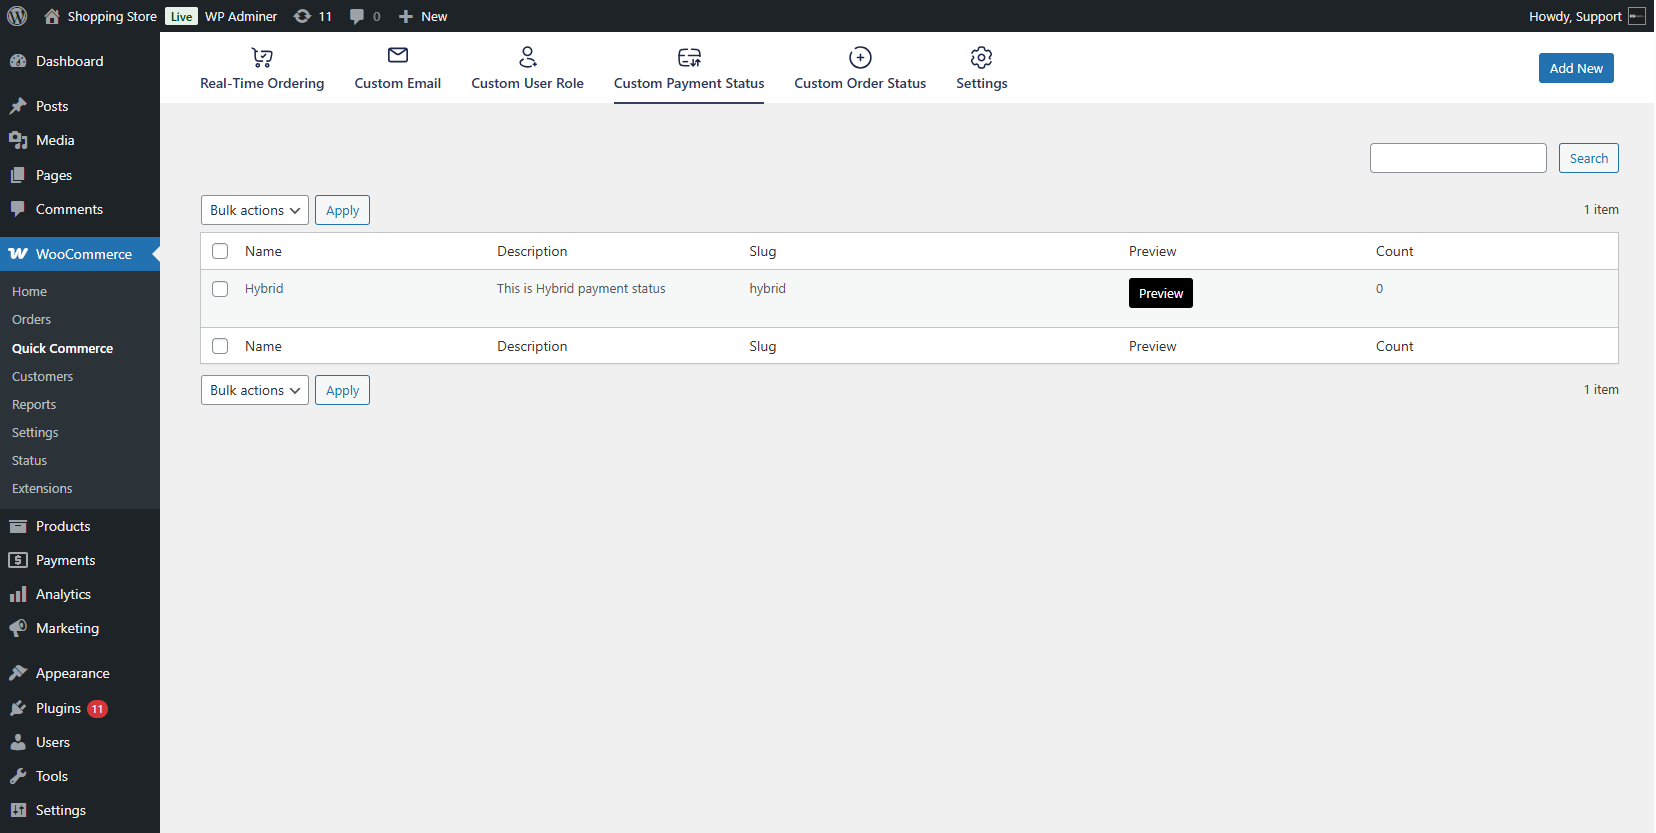
- The payment status will be created and listed on the Custom Payment Status List page. Each status in the list will display its name, description, slug, and Preview.
Custom Order Status
↑ Back to top- The feature allows the admin to override the default or create custom order statuses with configuration for priority, next status, and ETA.
- To add a custom order status, navigate to WordPress Admin Dashboard > WooCommerce > Quick Commerce > Custom Order Status.

- The Custom Order Status list page will appear. Click the Add New button from the top navigation bar to add your first custom order status.

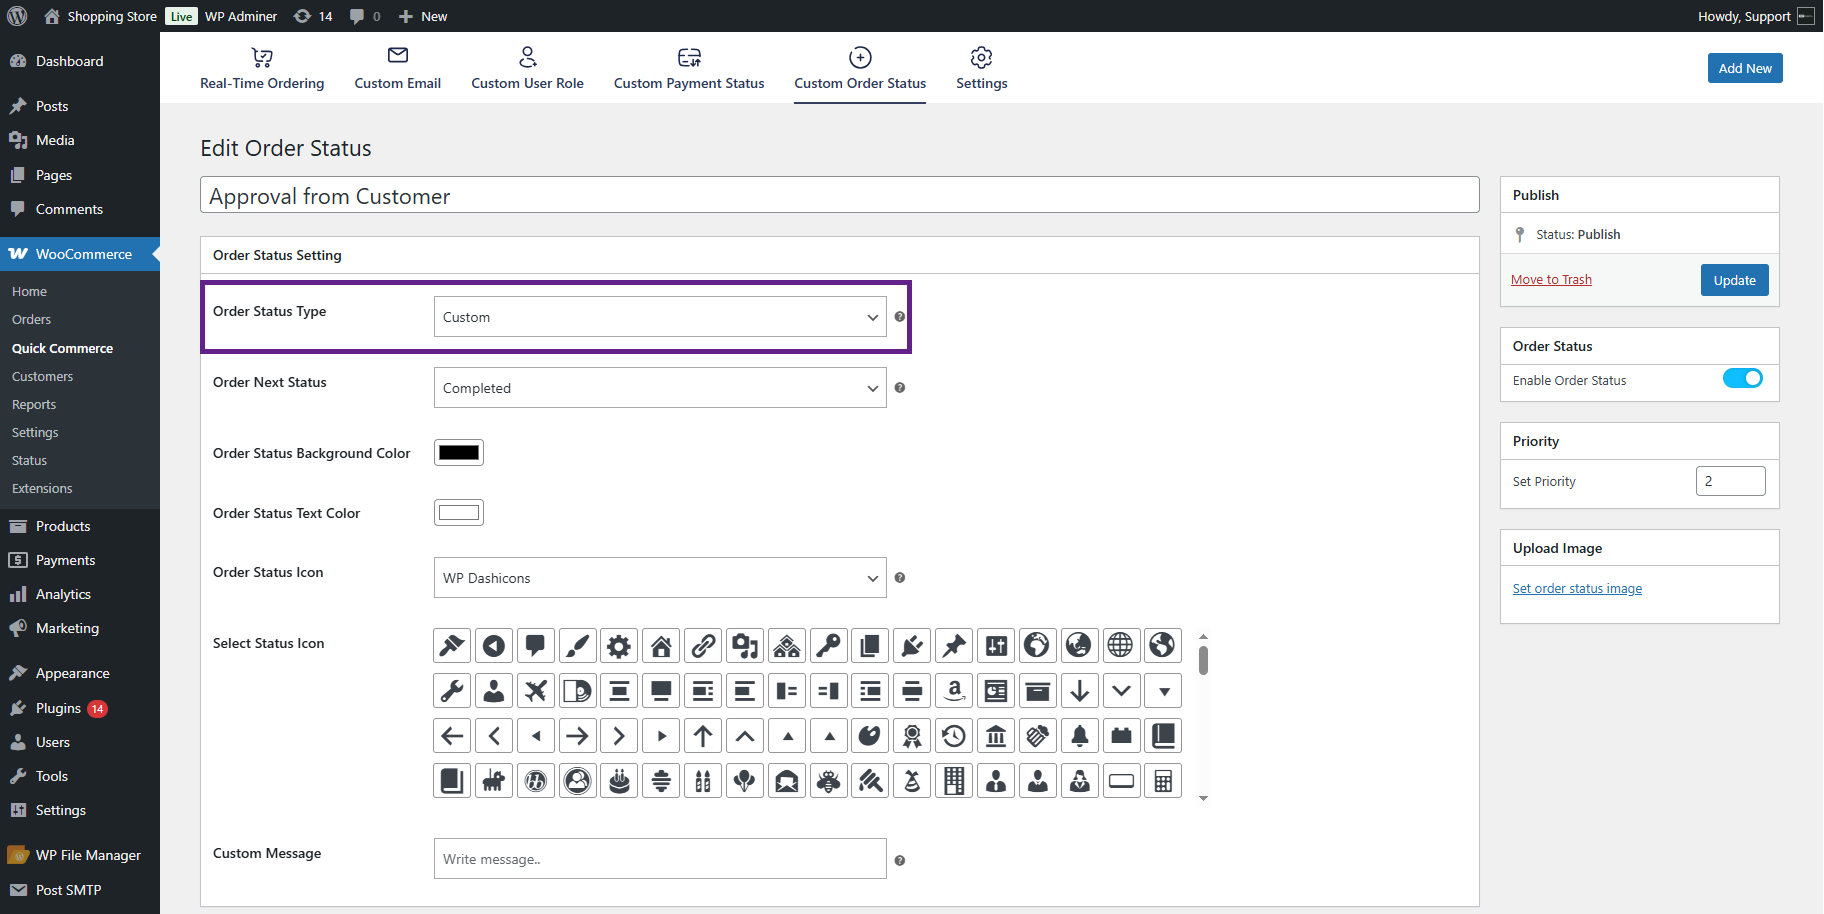
- The Add New Order Status screen will appear. Enter a title for the custom order status.
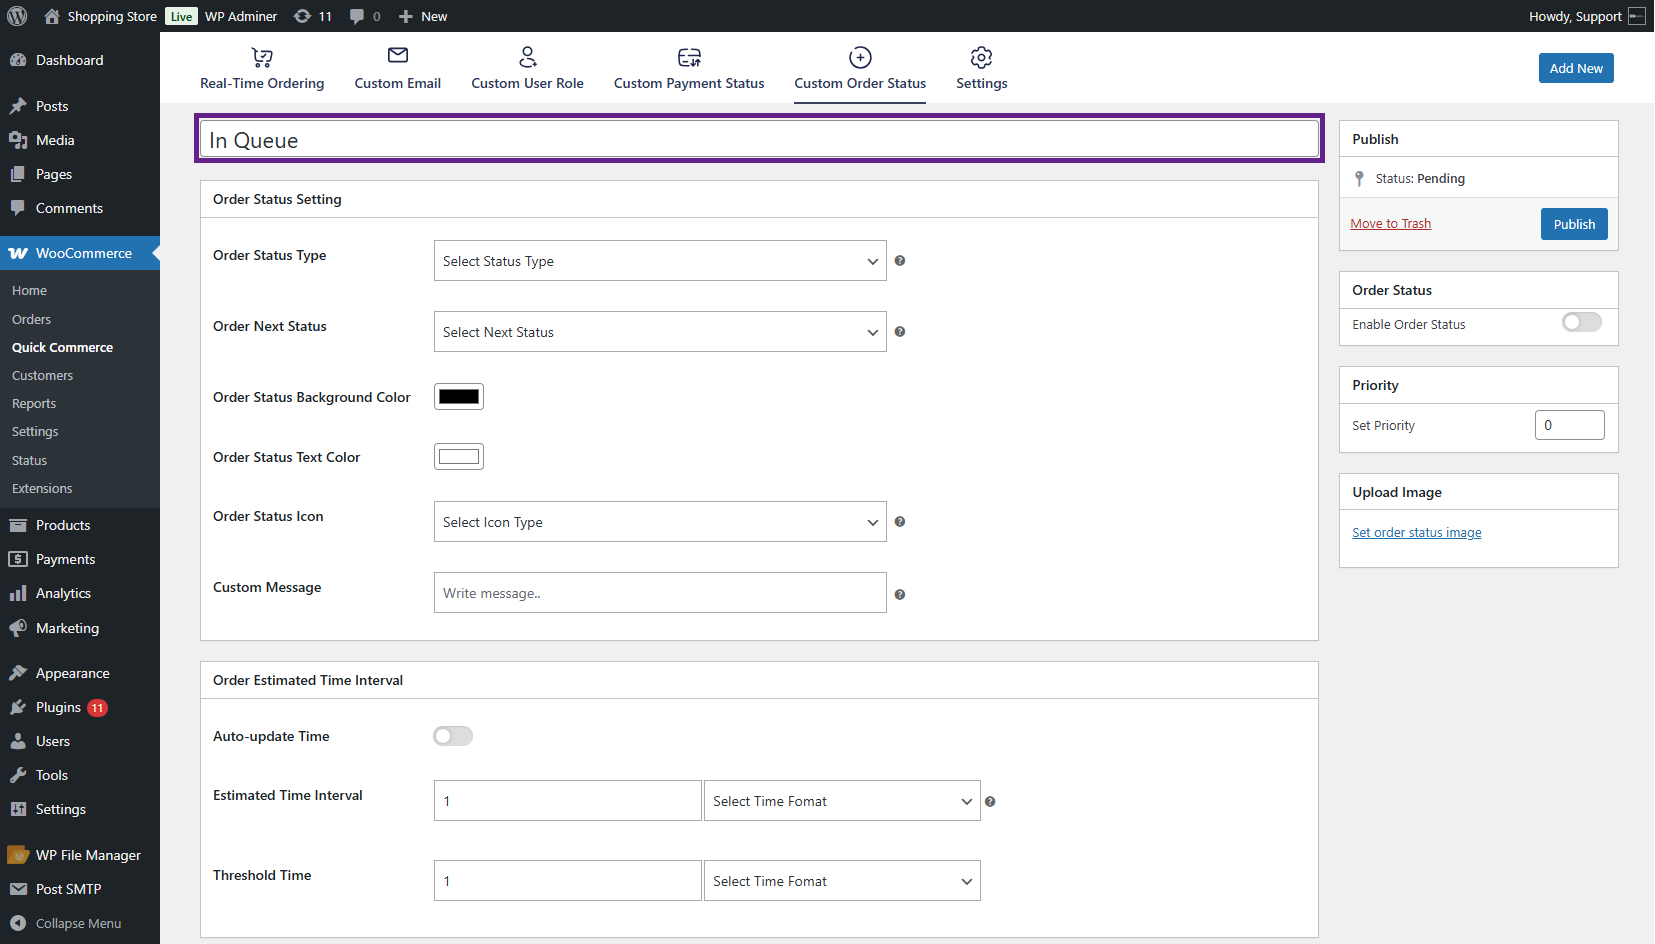
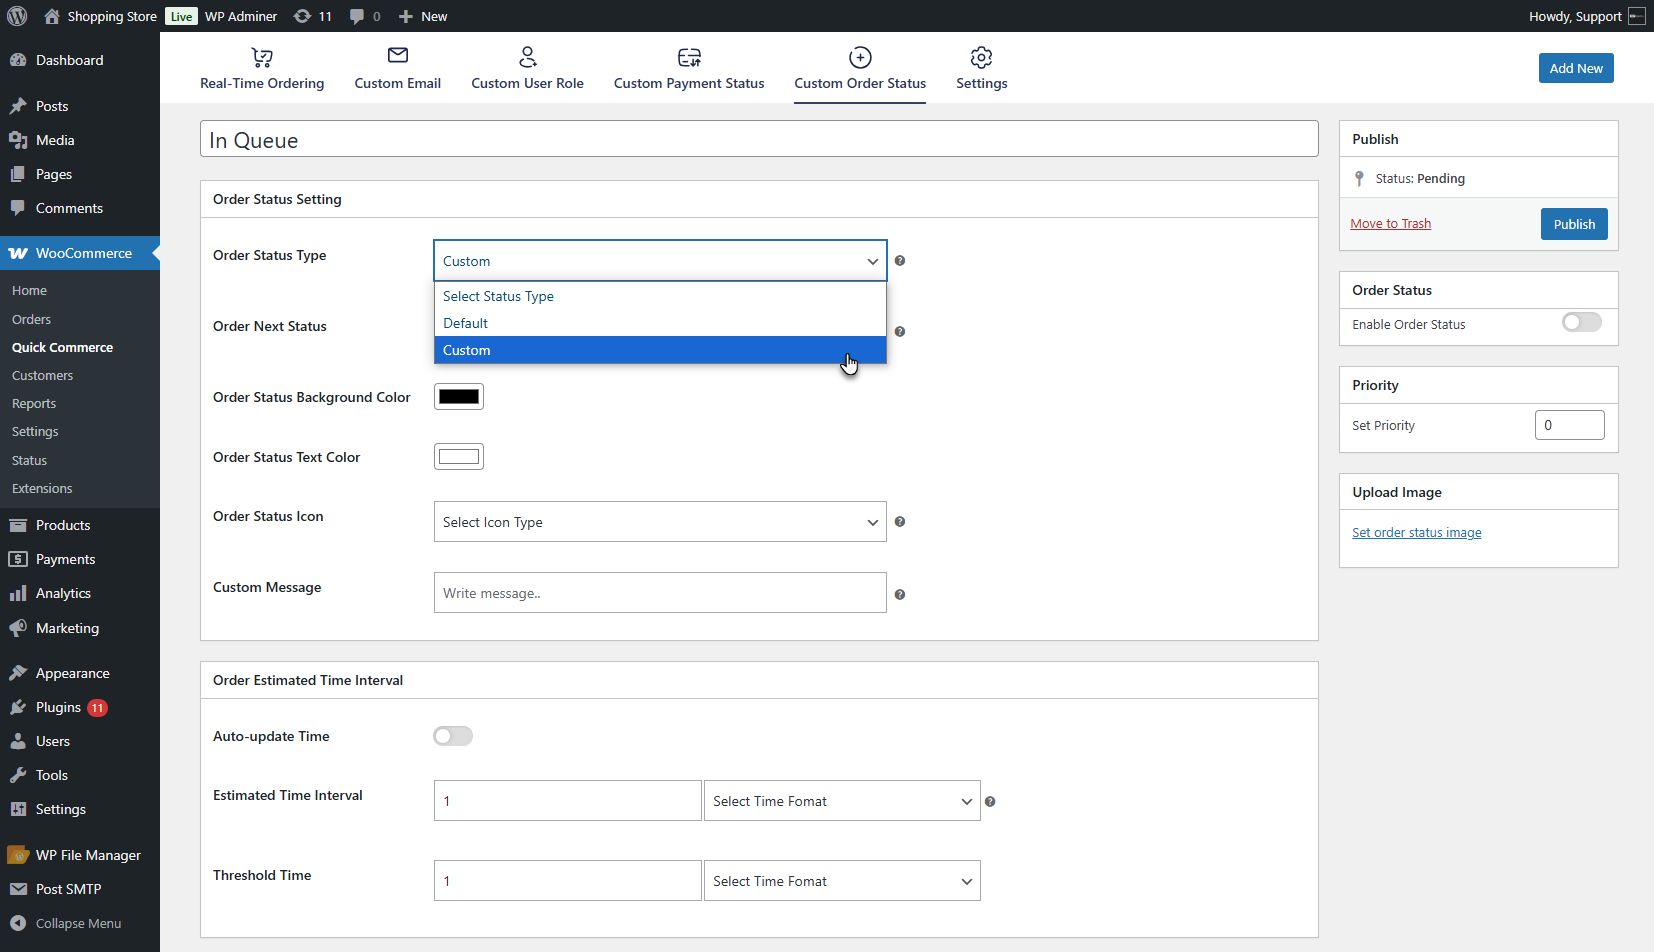
- Choose the Order Status Type from the Order Status Settings meta box dropdown.
- Options include Default or Custom. If Default is selected, the admin can override an existing WooCommerce order status and apply a custom status.
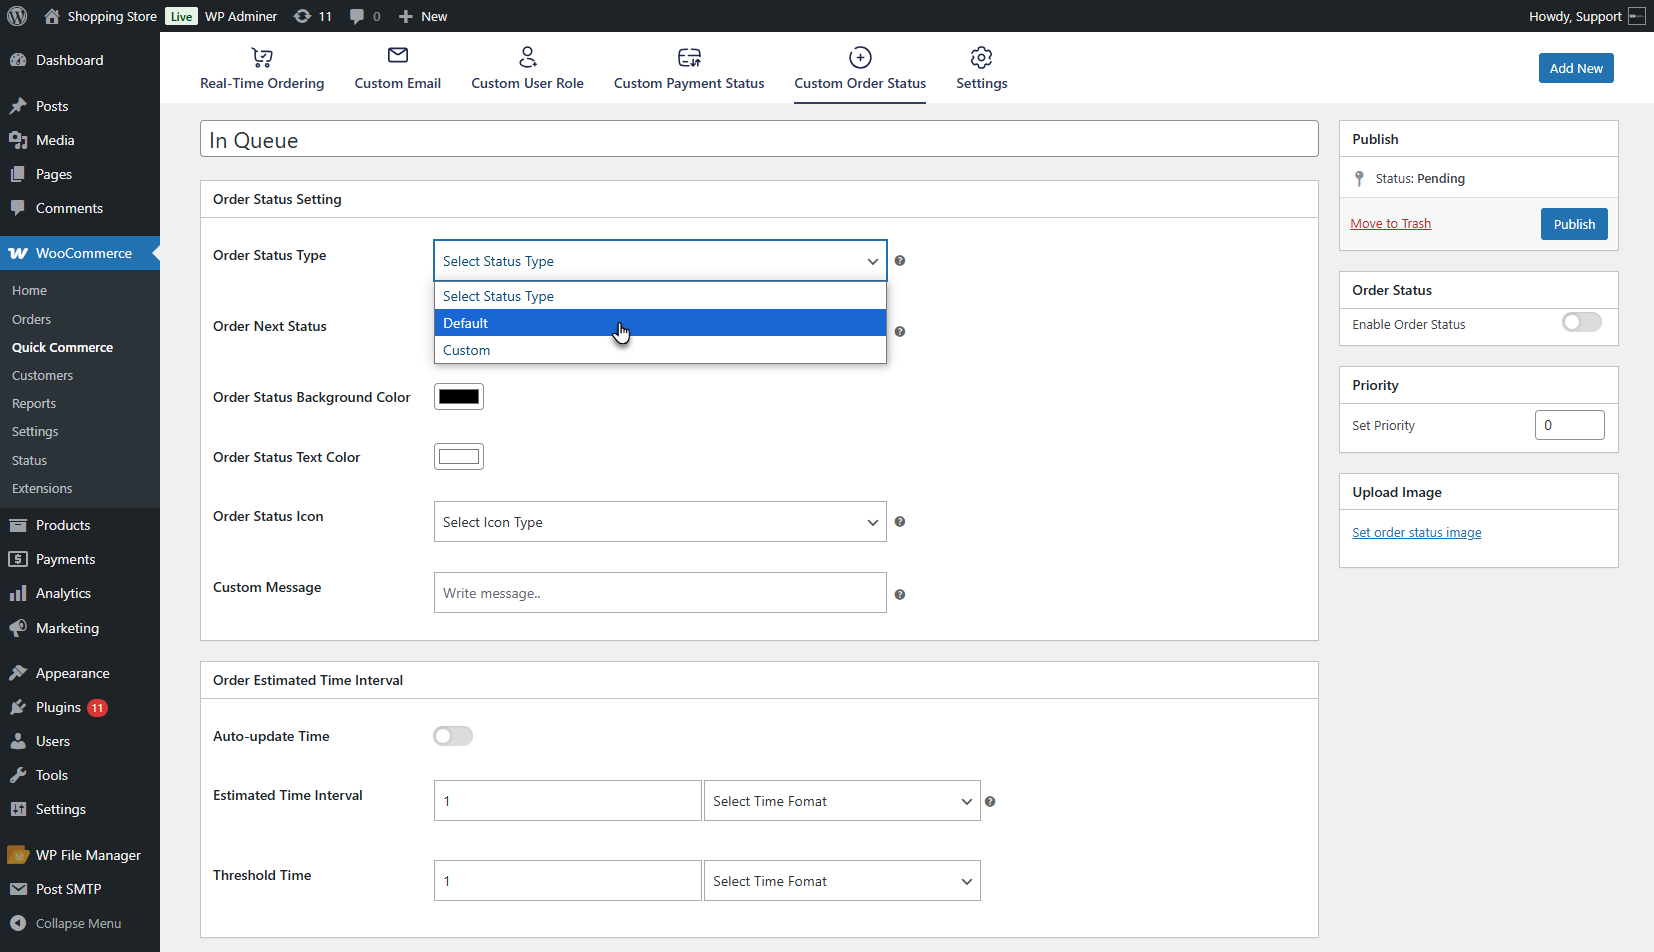
- After choosing the Default type, select the order status to override from the Select Order Status dropdown.
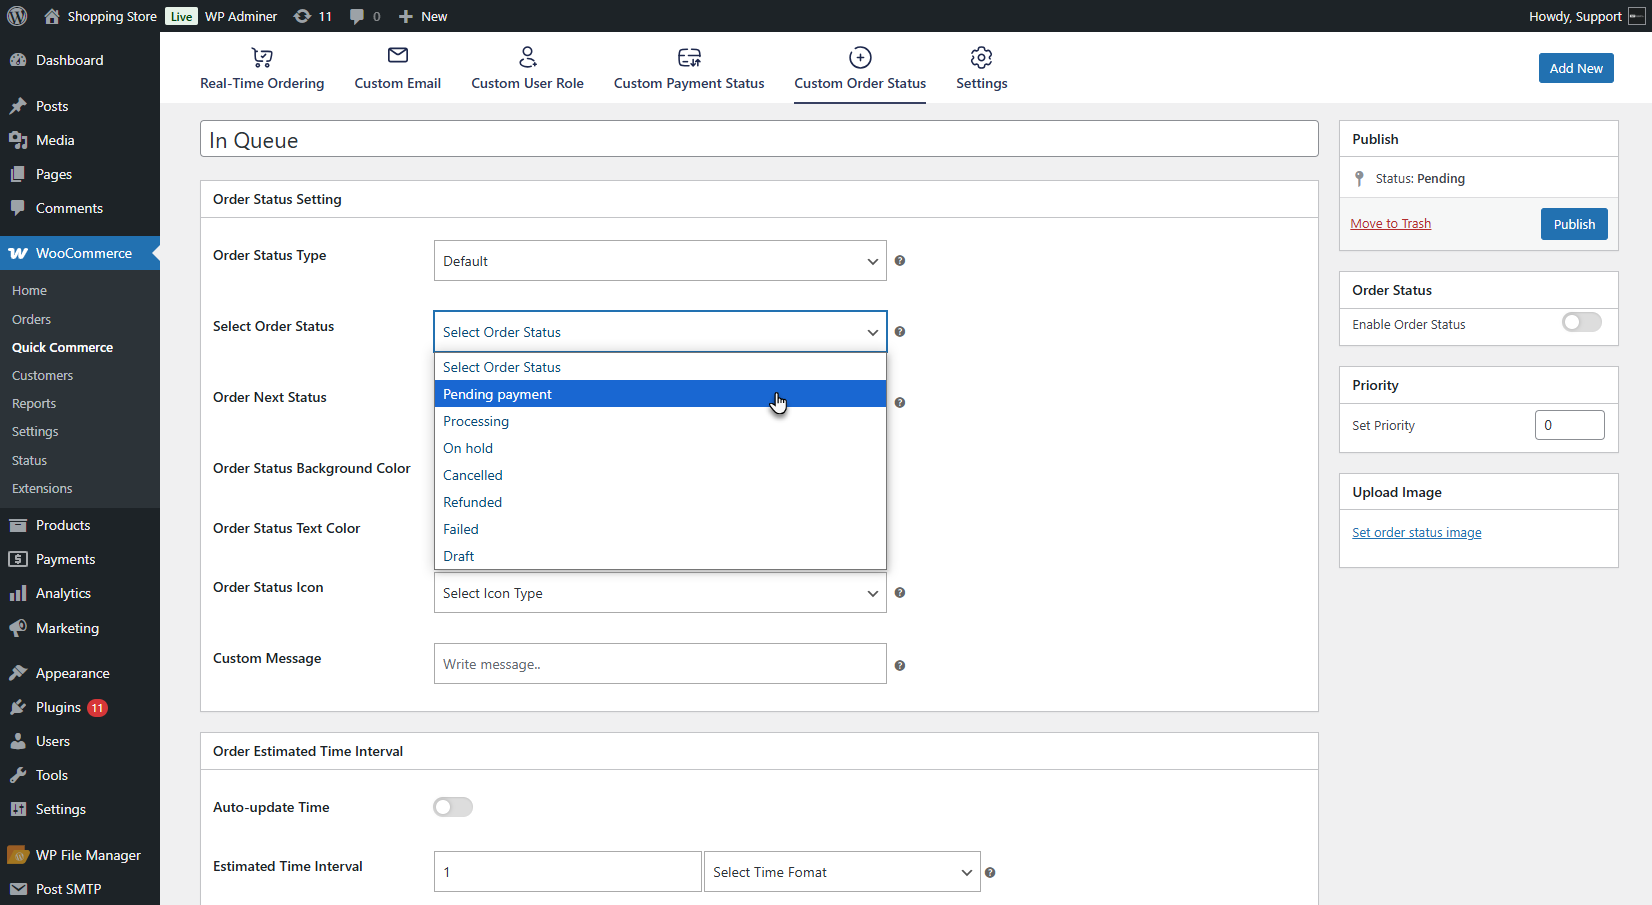
- If Custom is selected, the admin can create and add a new custom order status independently.
NOTE: For now, this flow demonstrates the process for the Default Order Status type.
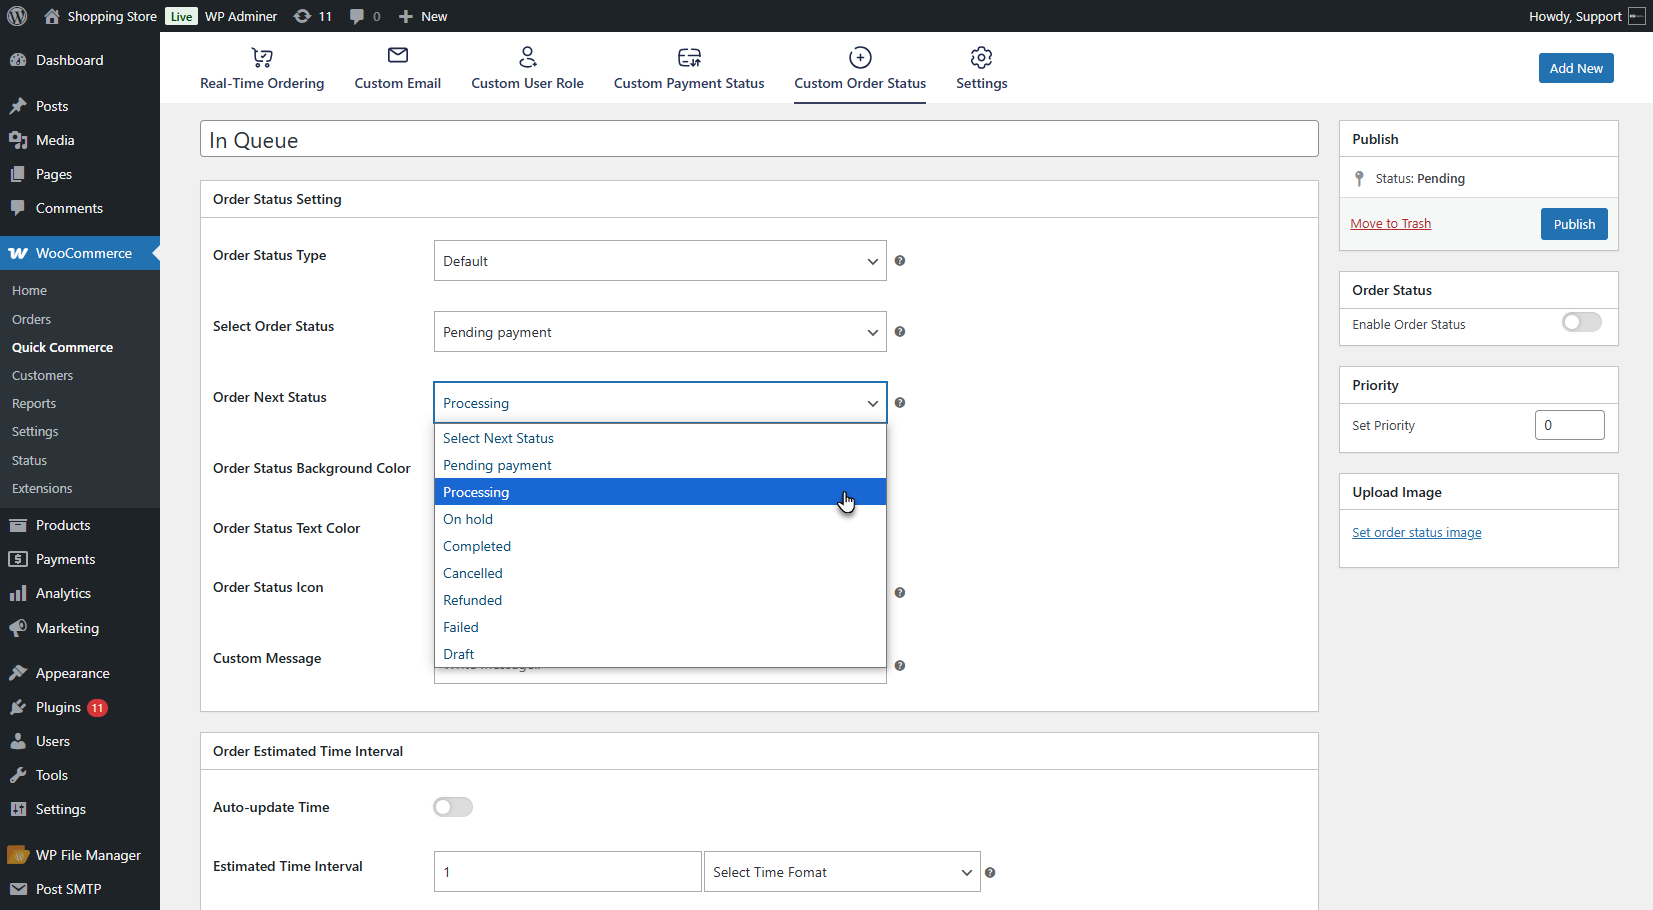
- Select the Order Next Status.
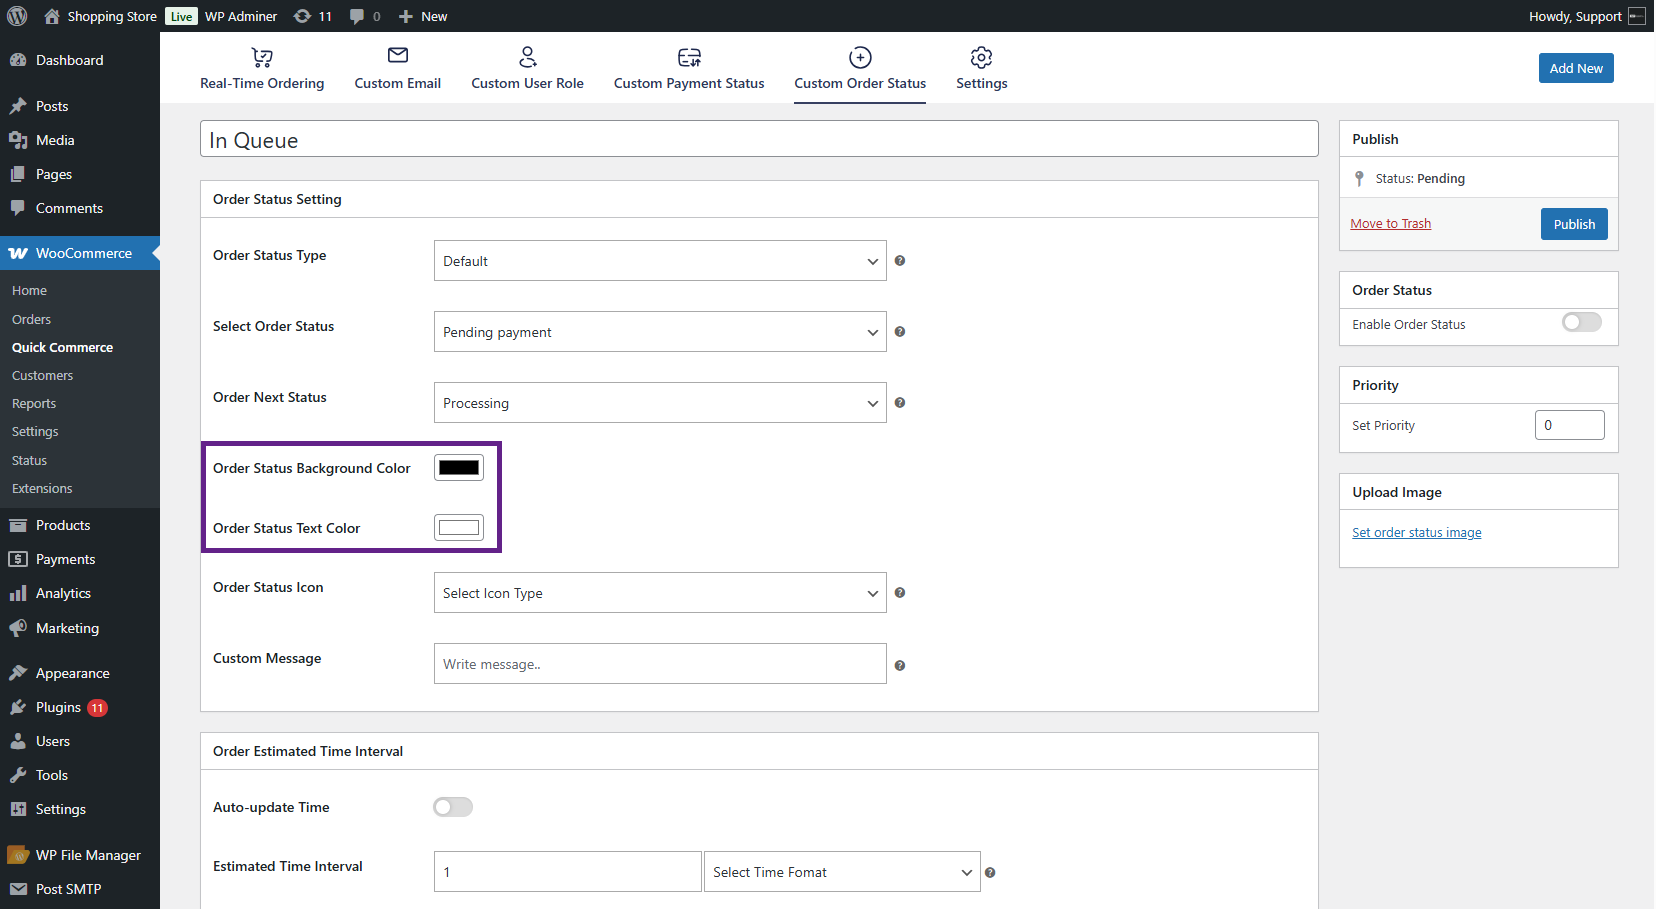
- Choose the Order Status Background Color using the color picker and set the Order Status Text Color.
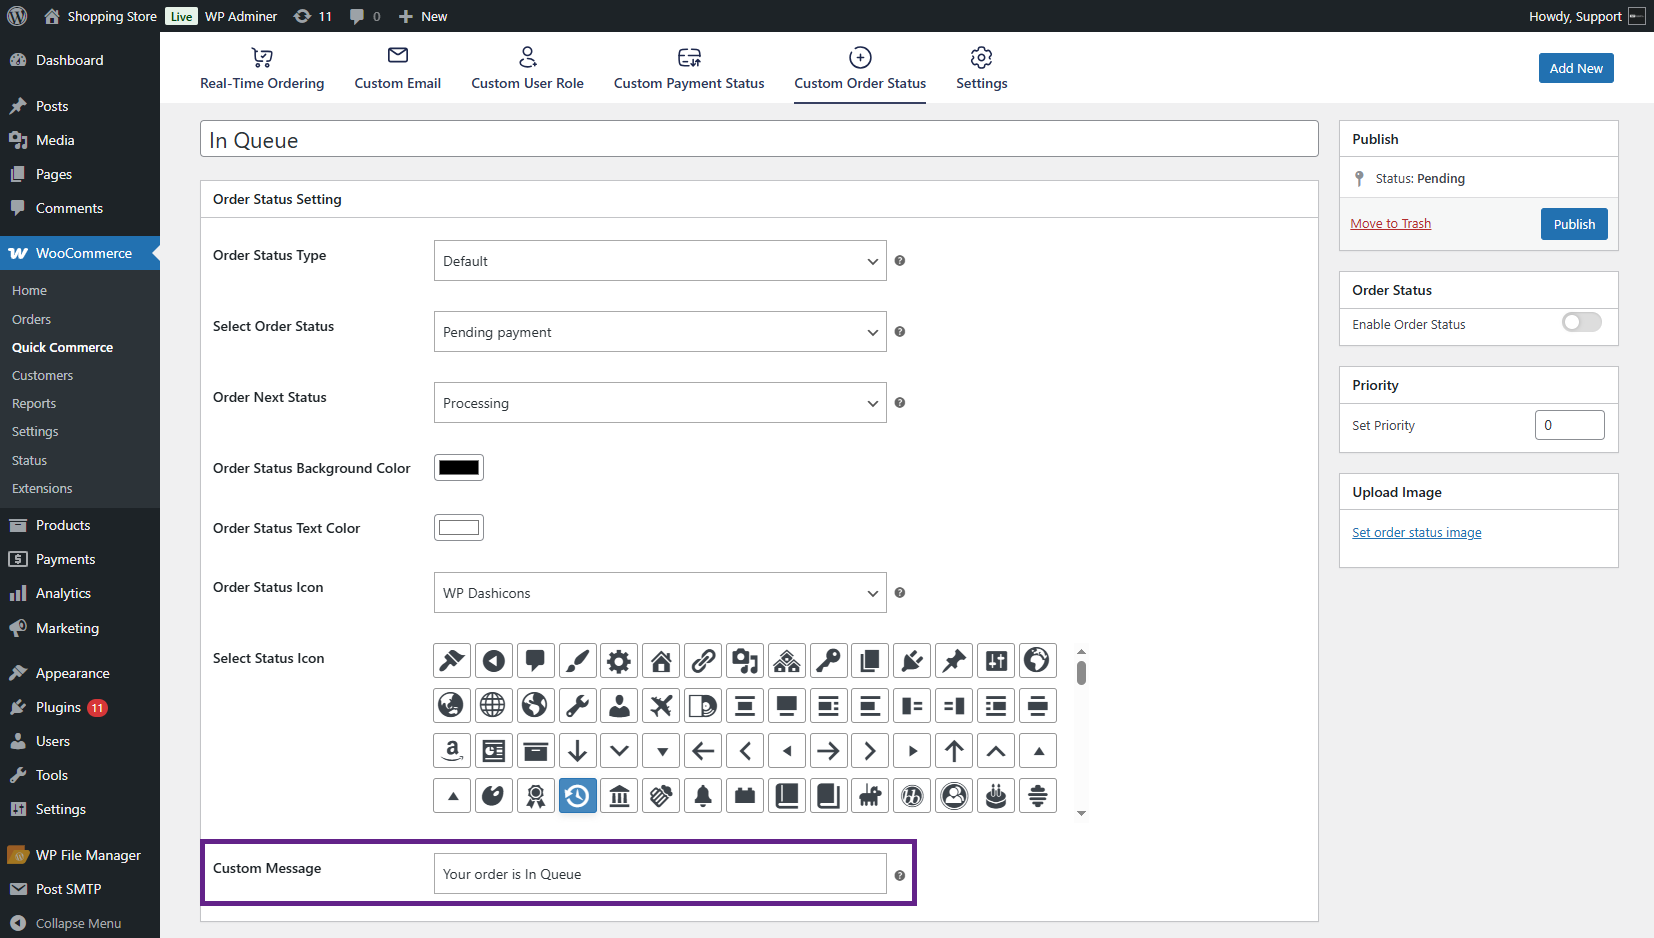
- Select an Order Status Icon from the dropdown list. Two options are available: WP DashIcons or Custom. The admin can choose from the provided WP DashIcons or upload a custom icon.
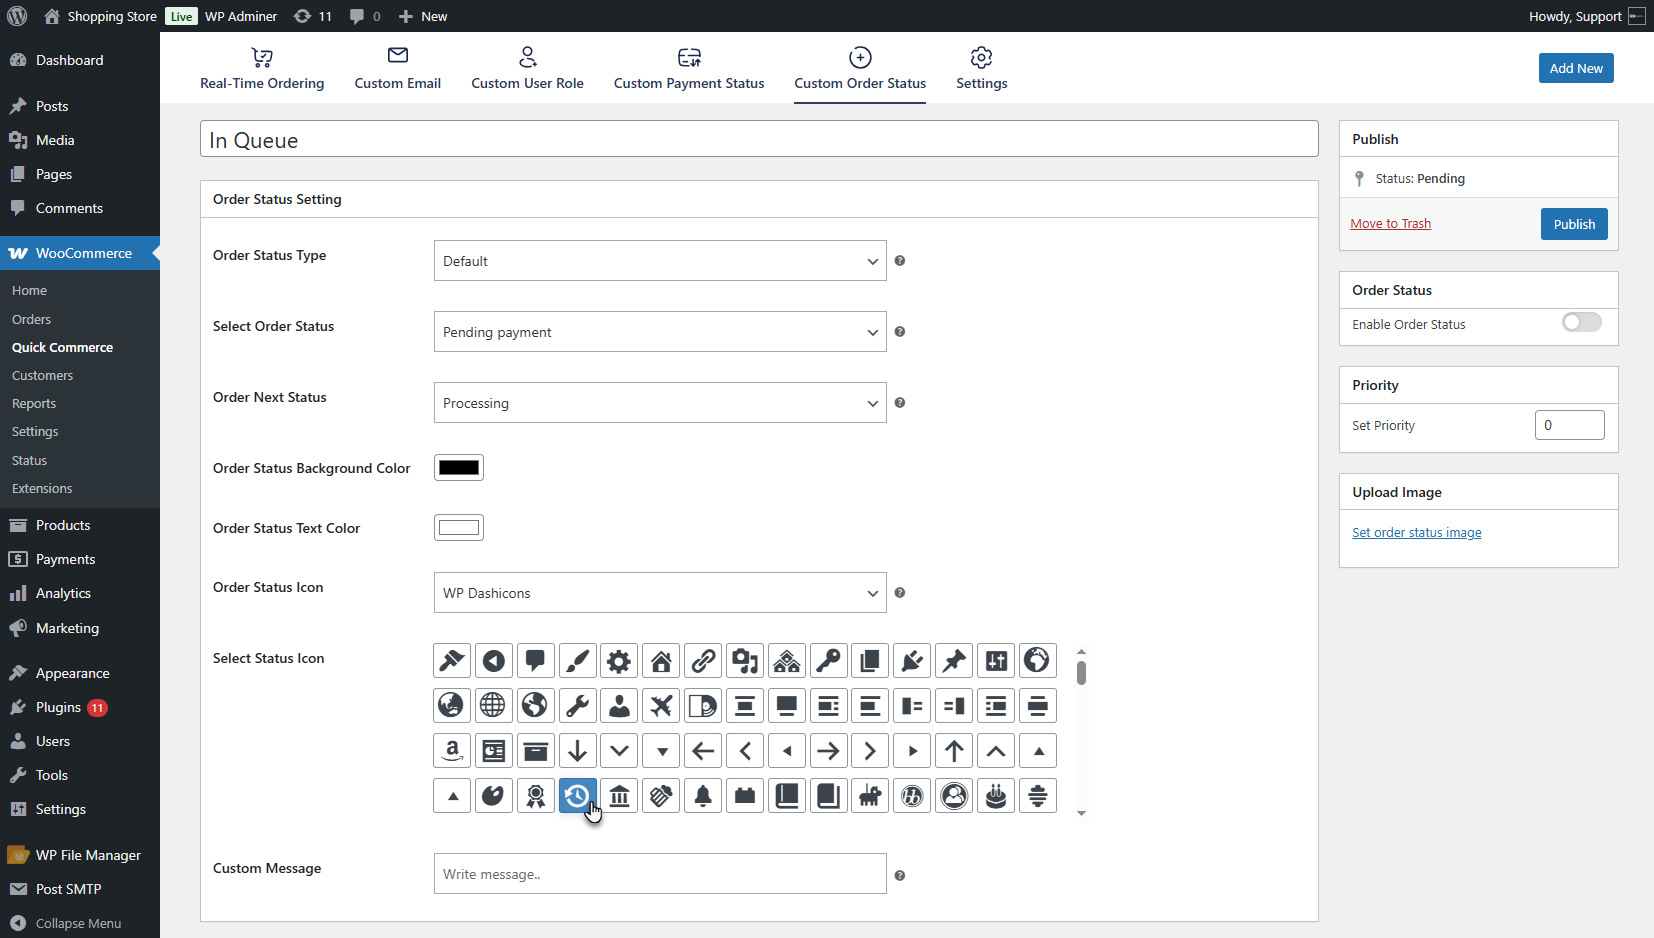
- Enter a Custom Message to be displayed for this order status.
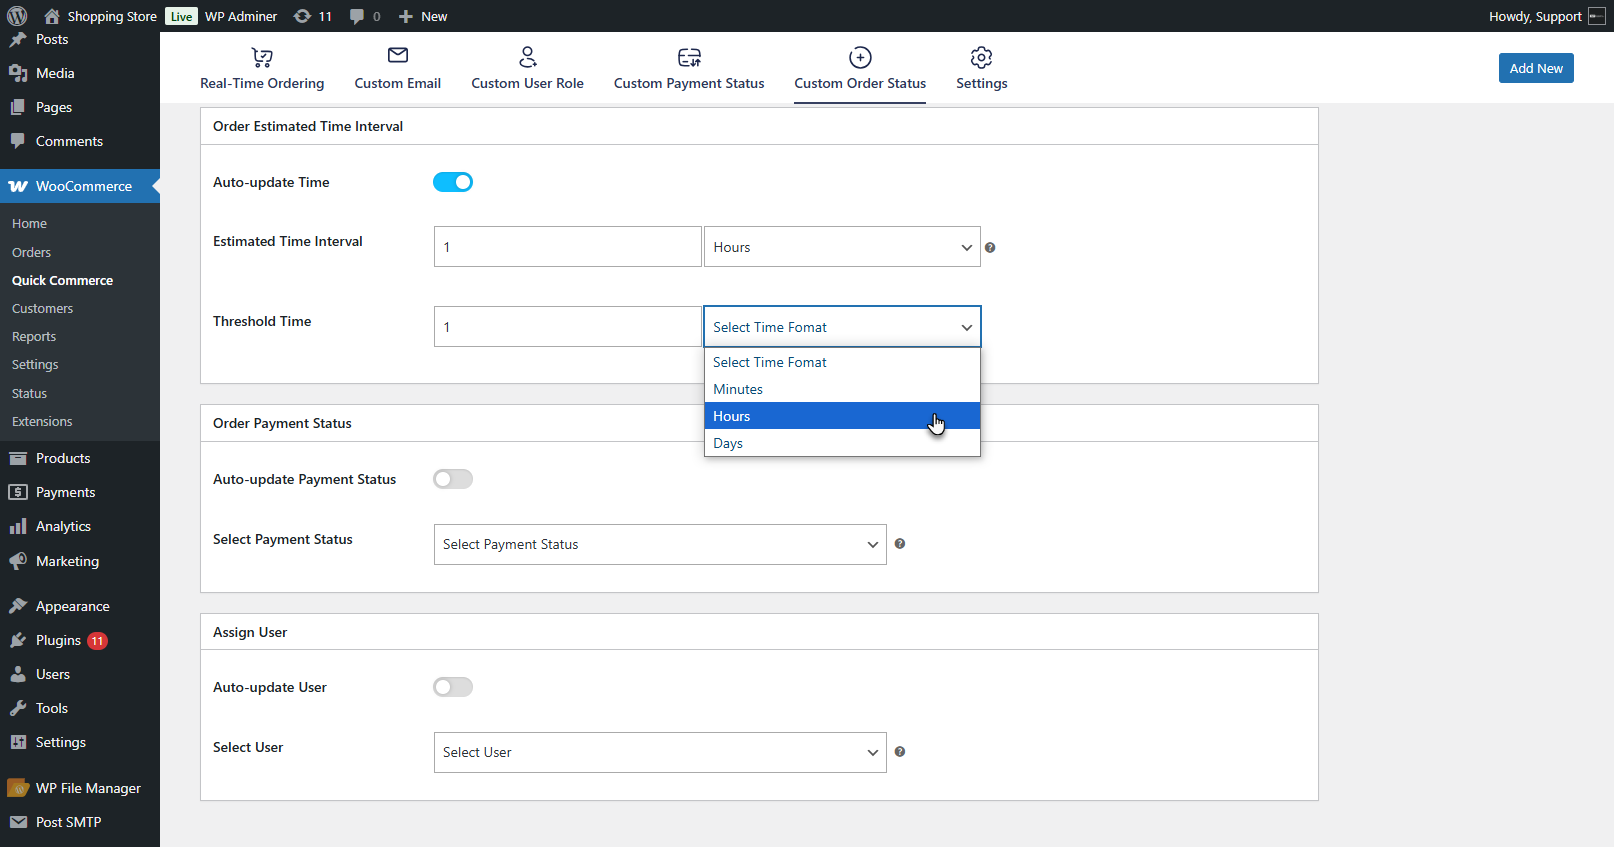
- In the Order Estimated Time Interval metabox, enable Auto Update Time to have the status automatically update.
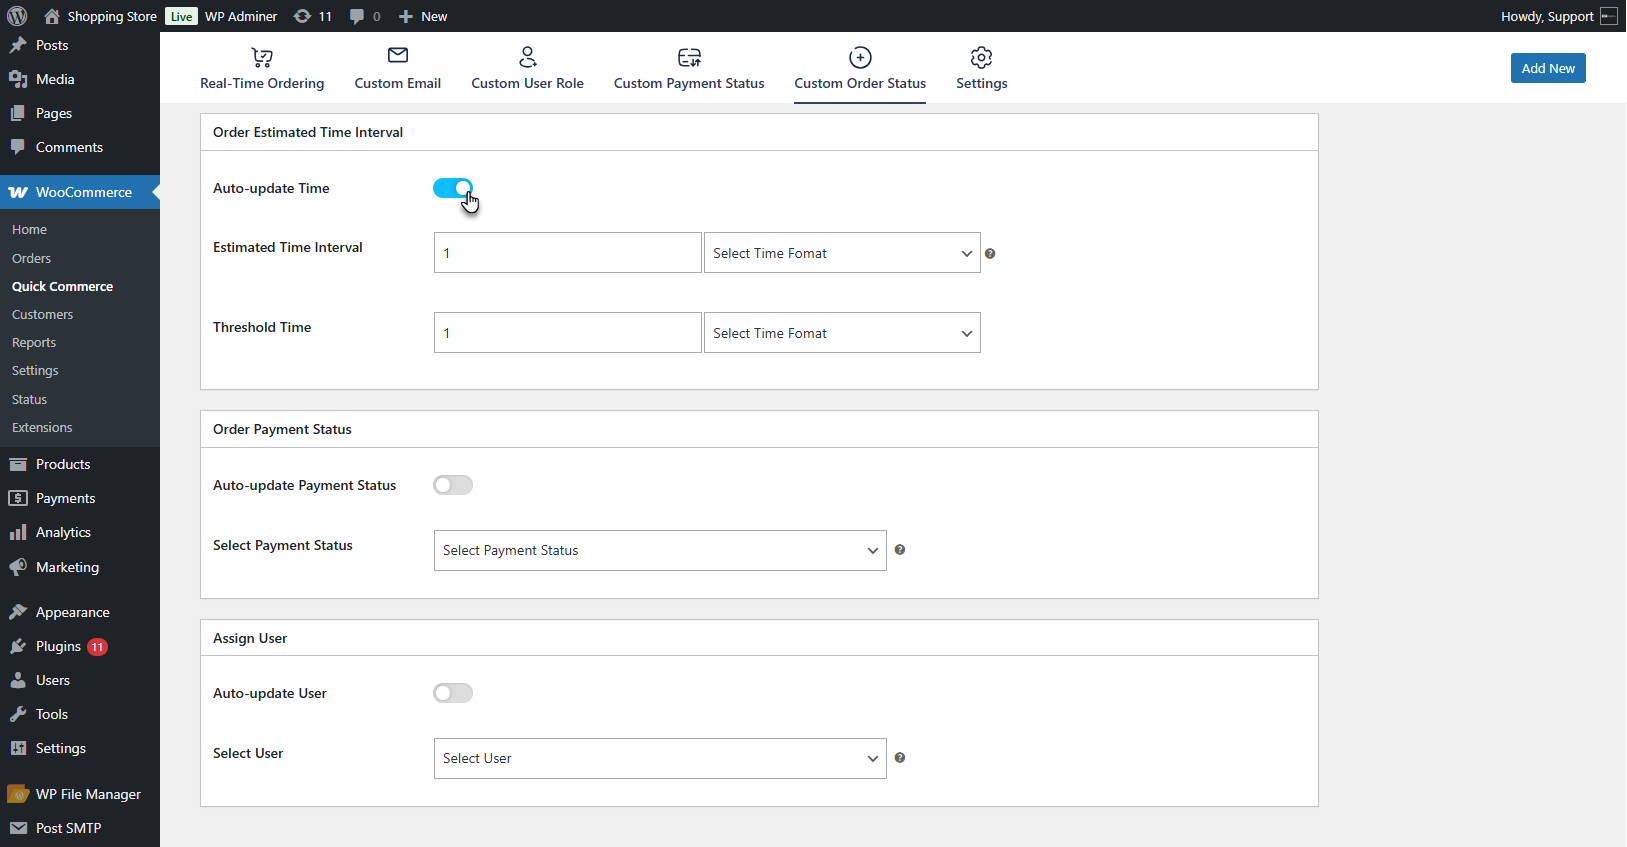
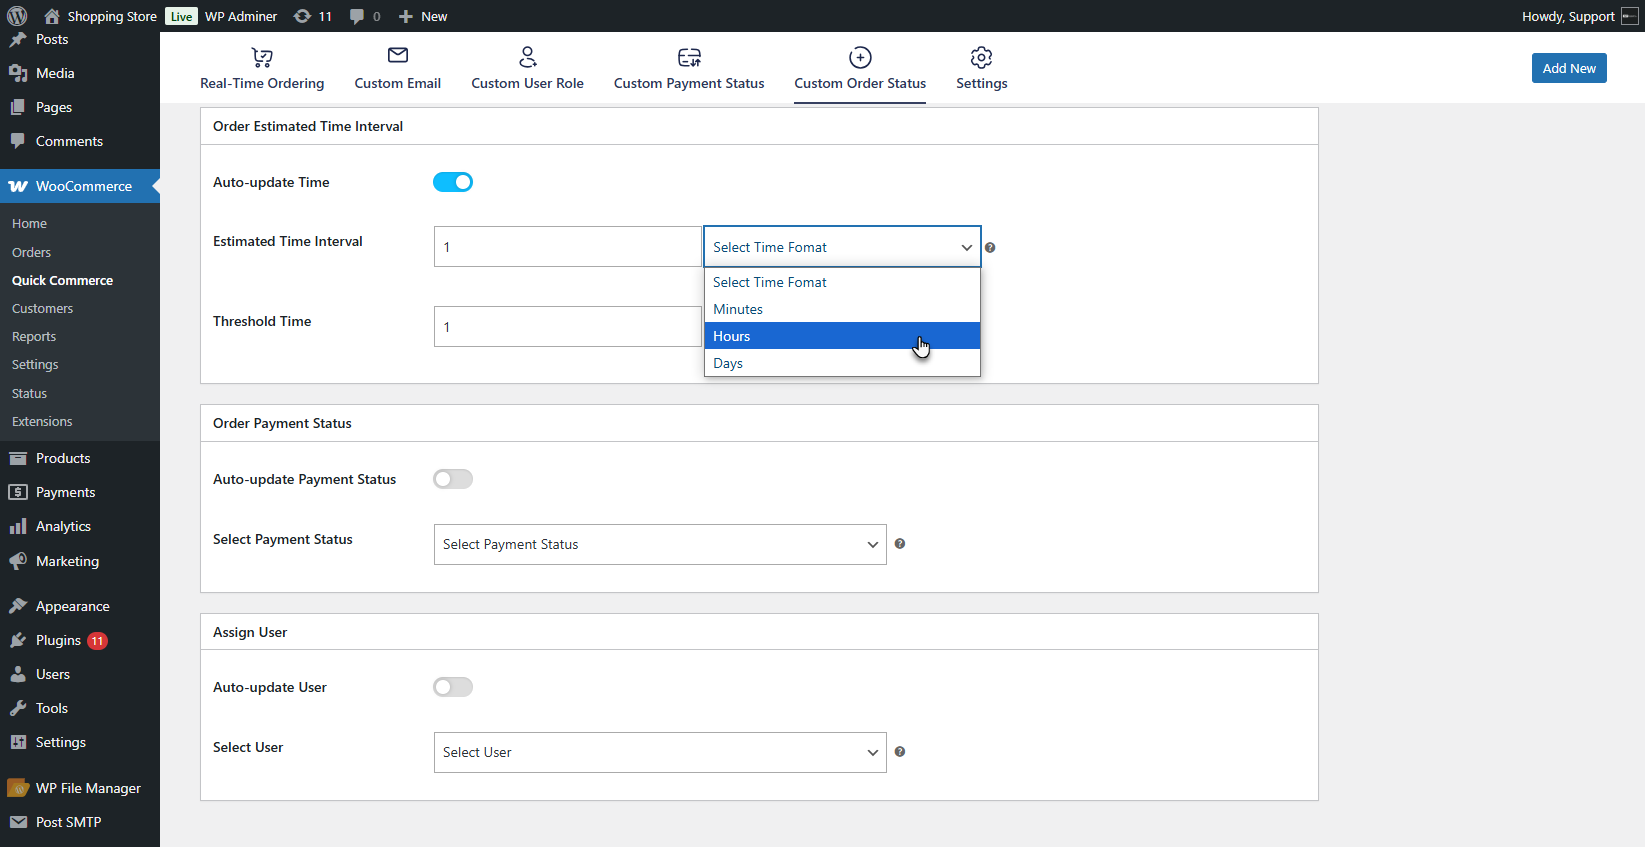
- Set the Estimated Time Interval (Minutes/Hours/Days) after which the order will be updated.
- Define the Threshold Time, if needed.
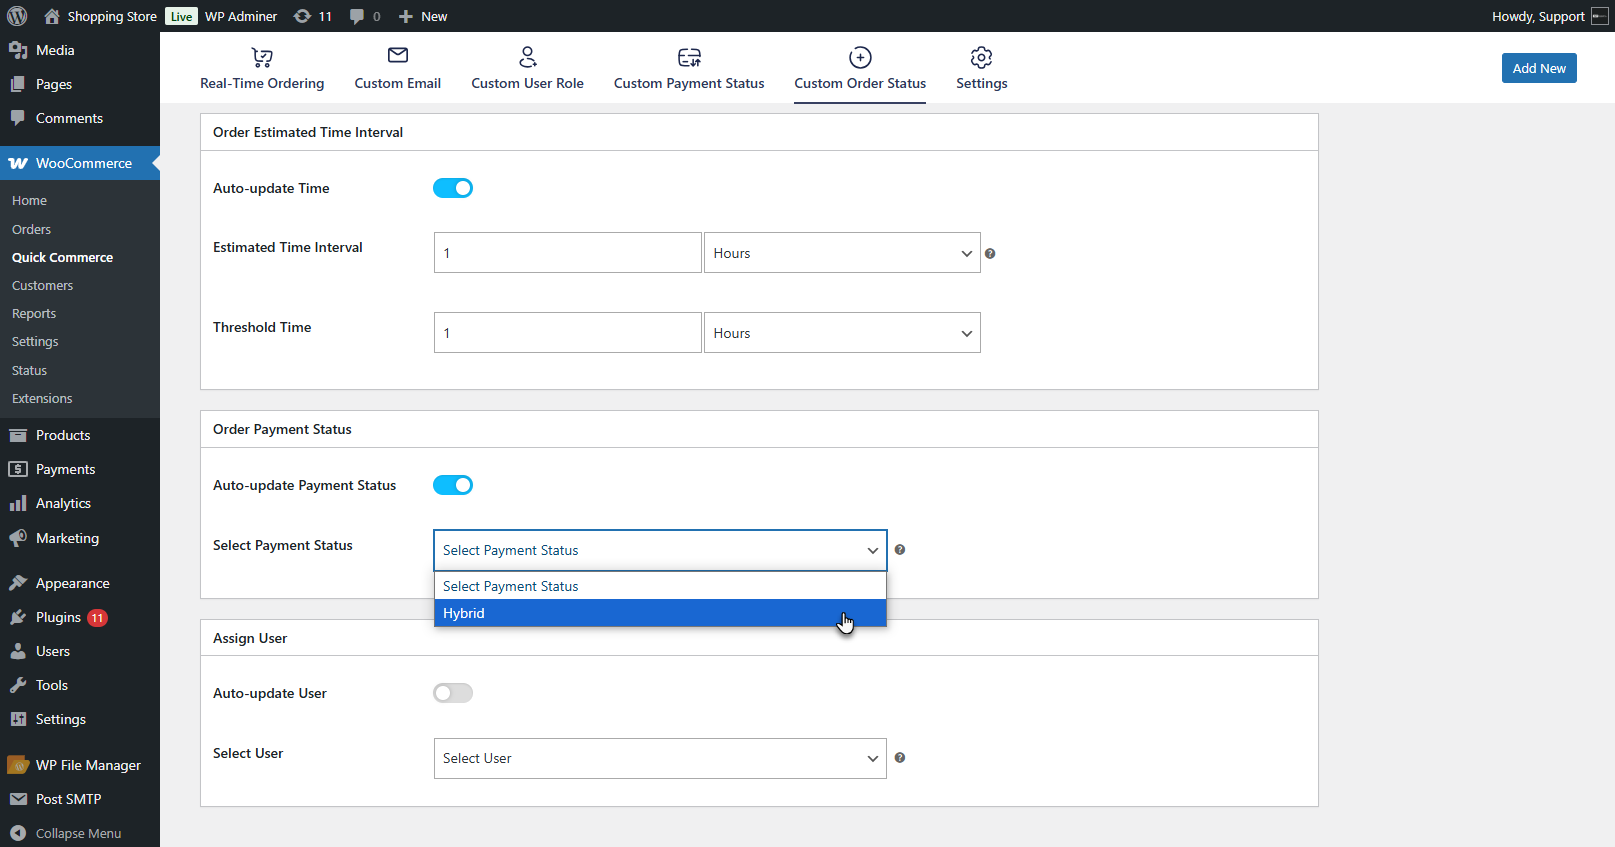
- In the Order Payment Status metabox, enable the Auto Update Payment Status option.

- Select the Payment Status, which should be automatically assigned when this order status is applied.
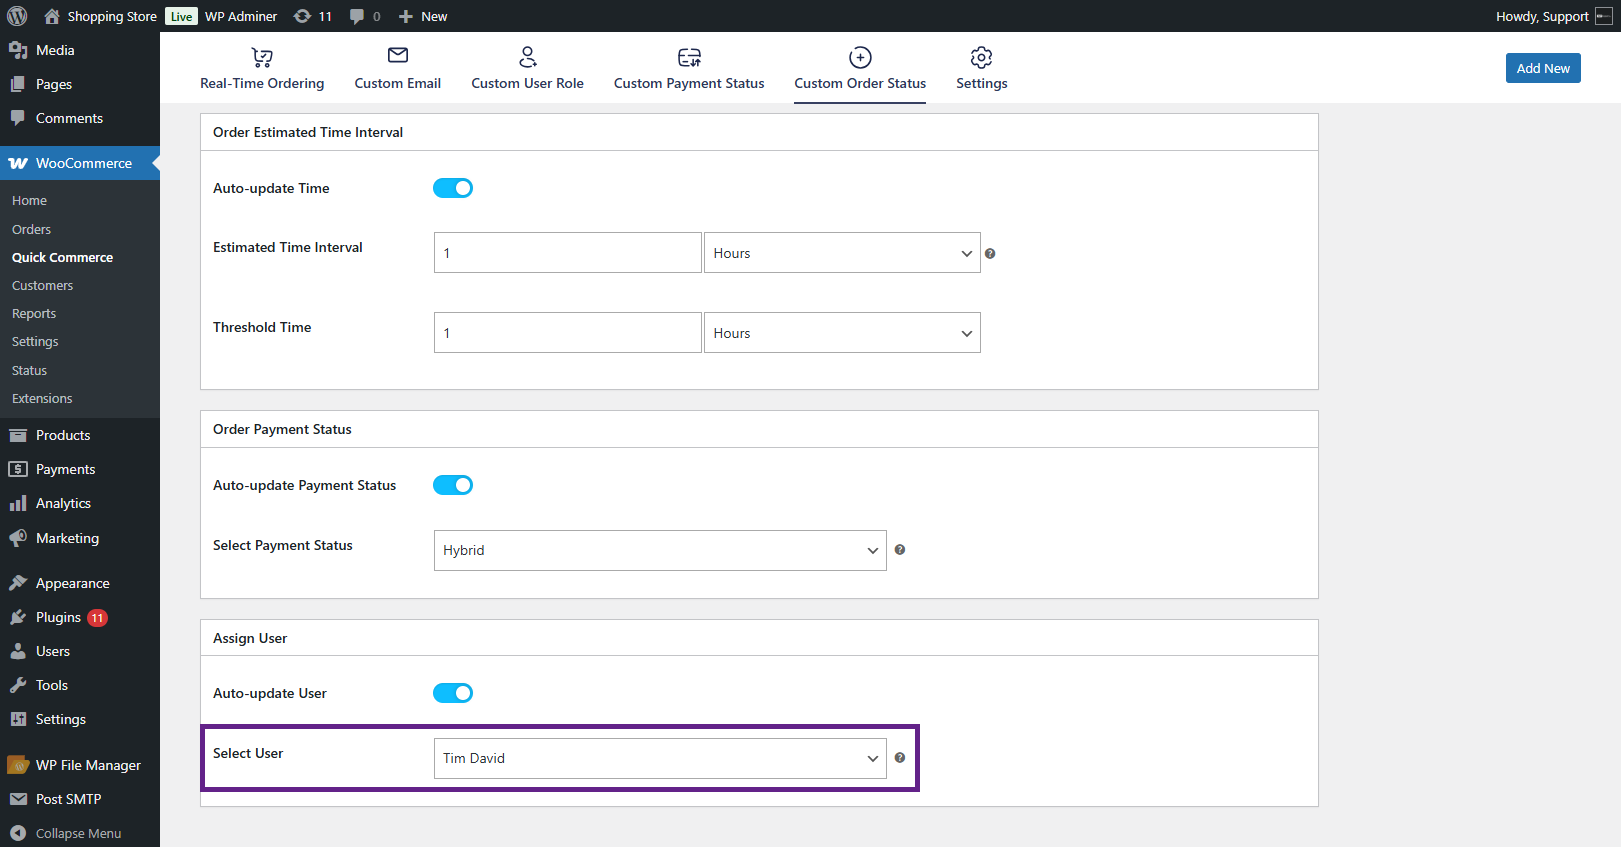
- In the Assign User meta box, enable the Auto Update User toggle to assign a user automatically.
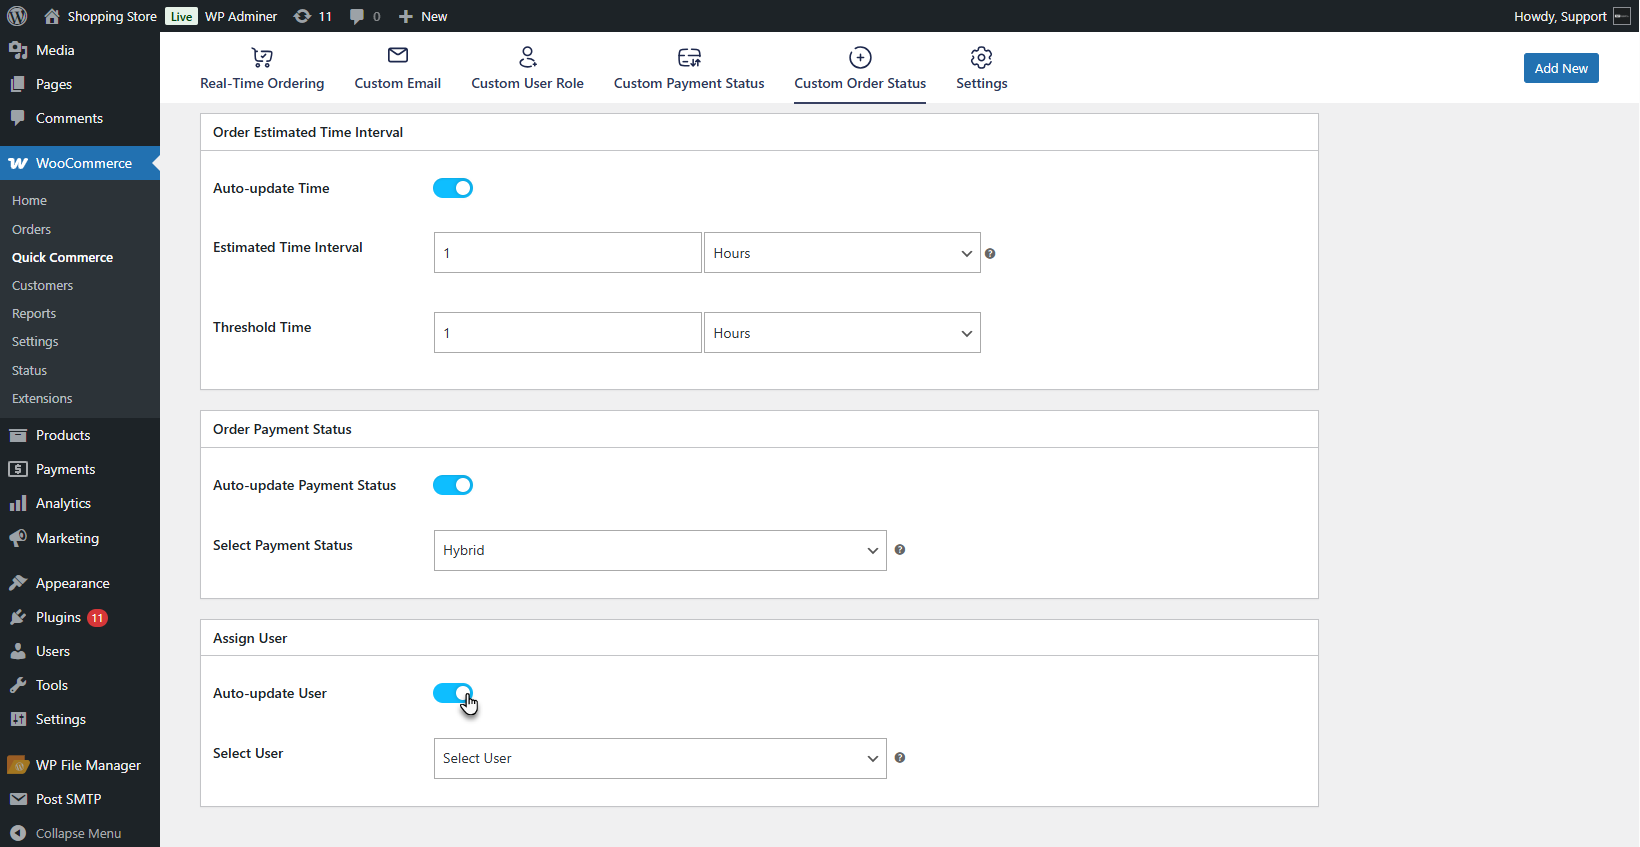
- Select the User from the dropdown who will be assigned to this order status.
- Enable the Enable Order Status option on the right sidebar to activate the status upon publishing.
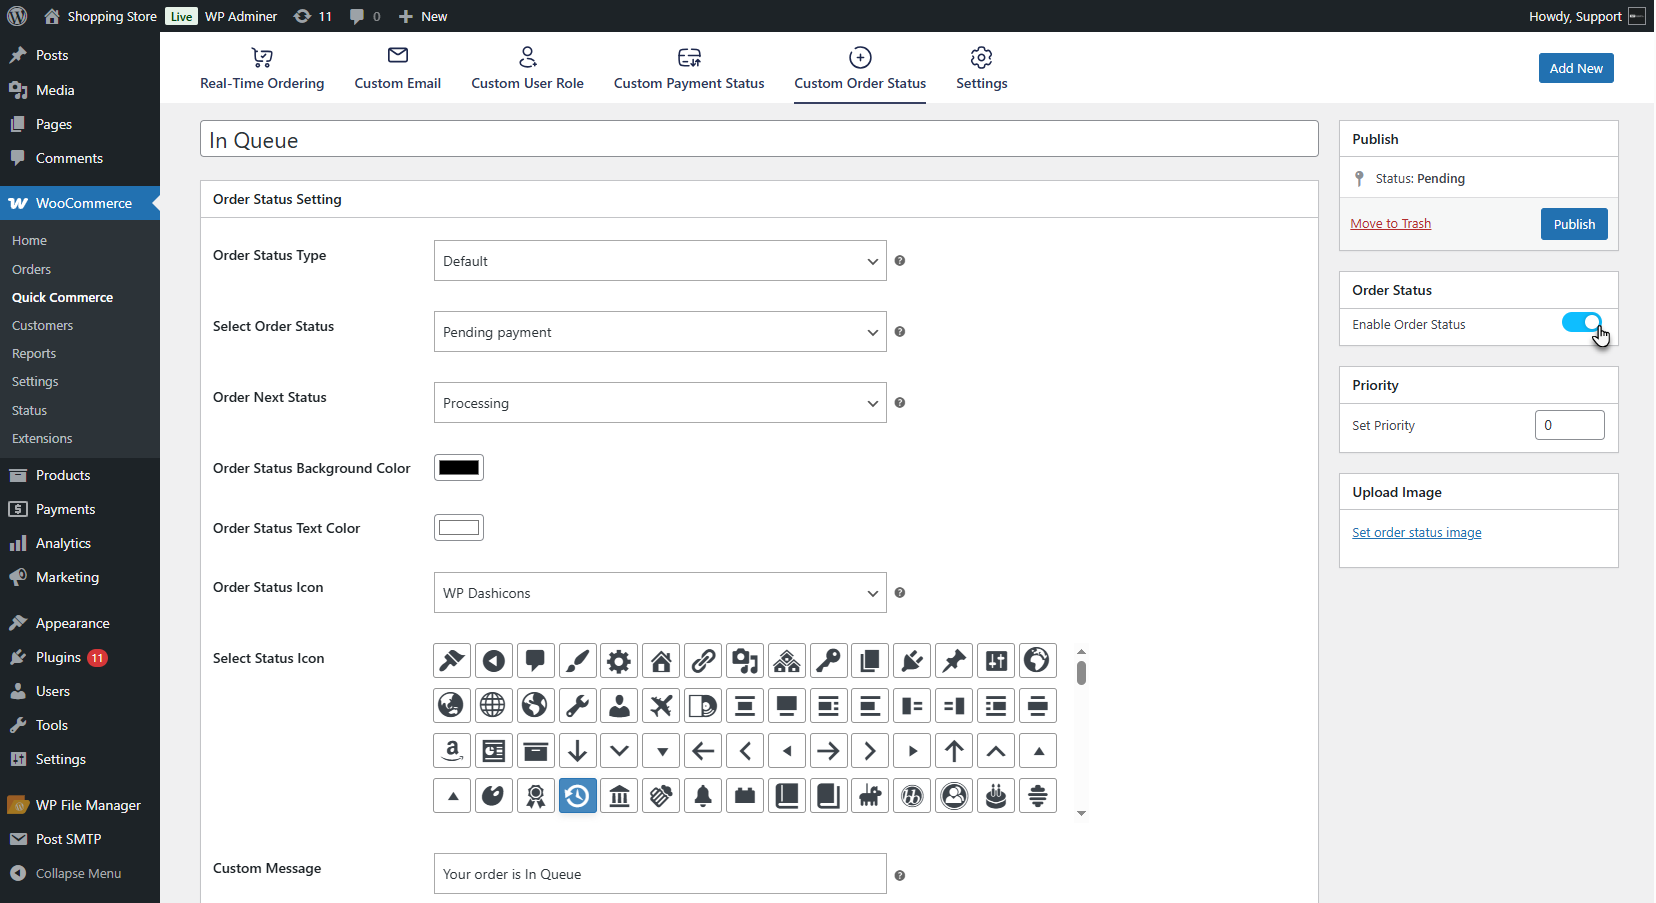
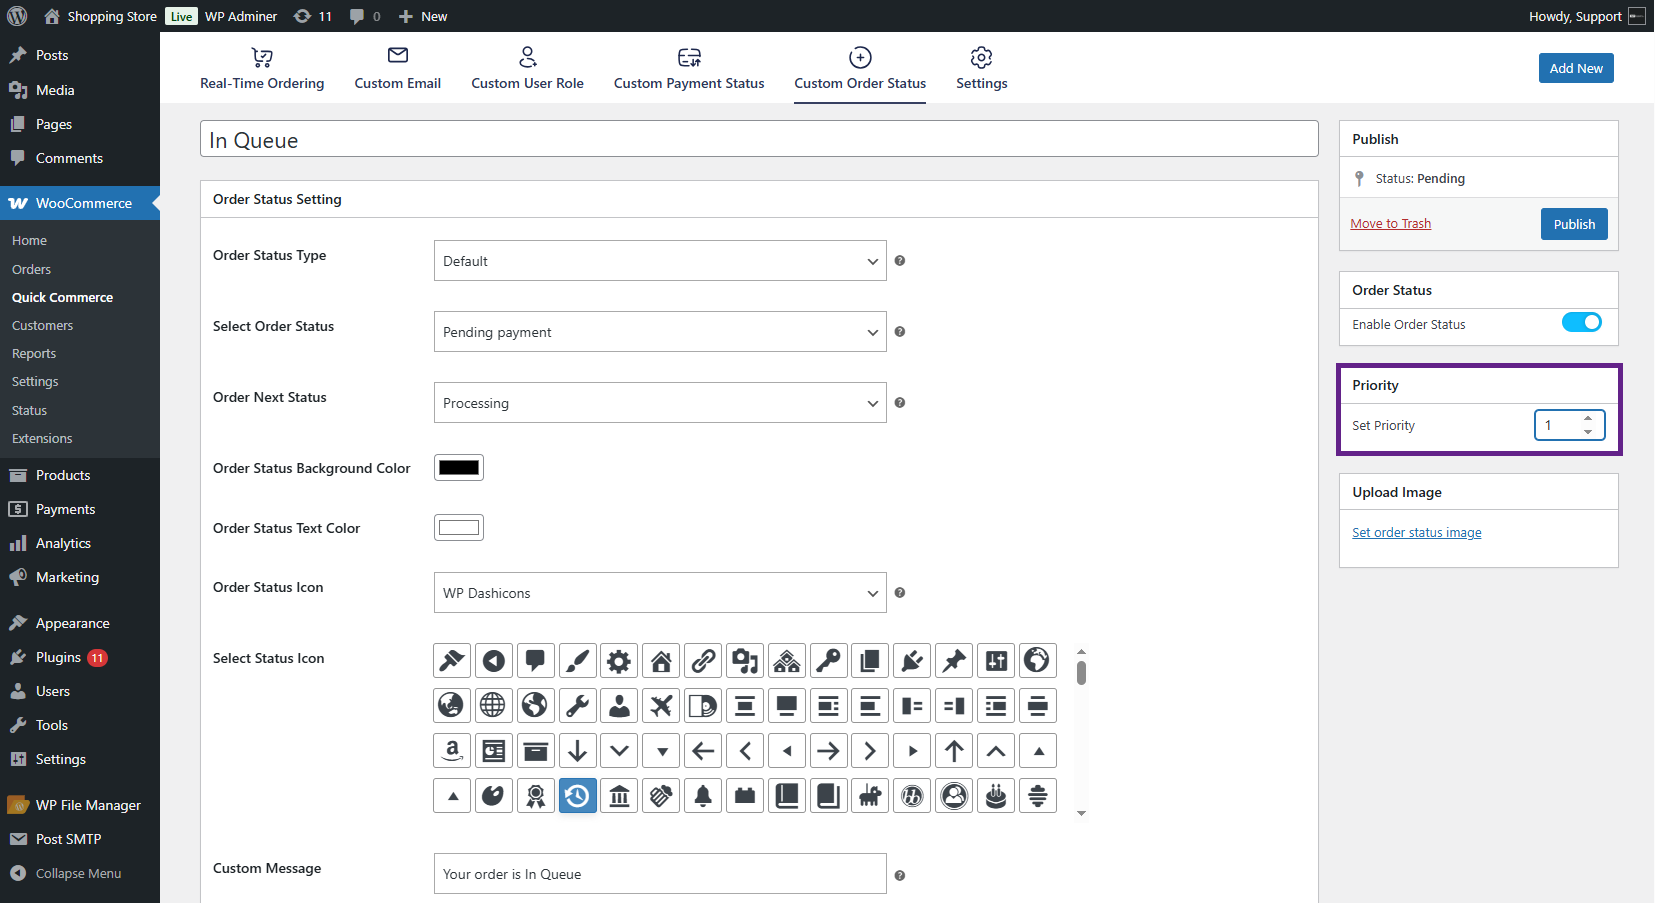
- Set the Priority value to define the order of appearance for this status. A value of 0 or 1 indicates the highest priority.
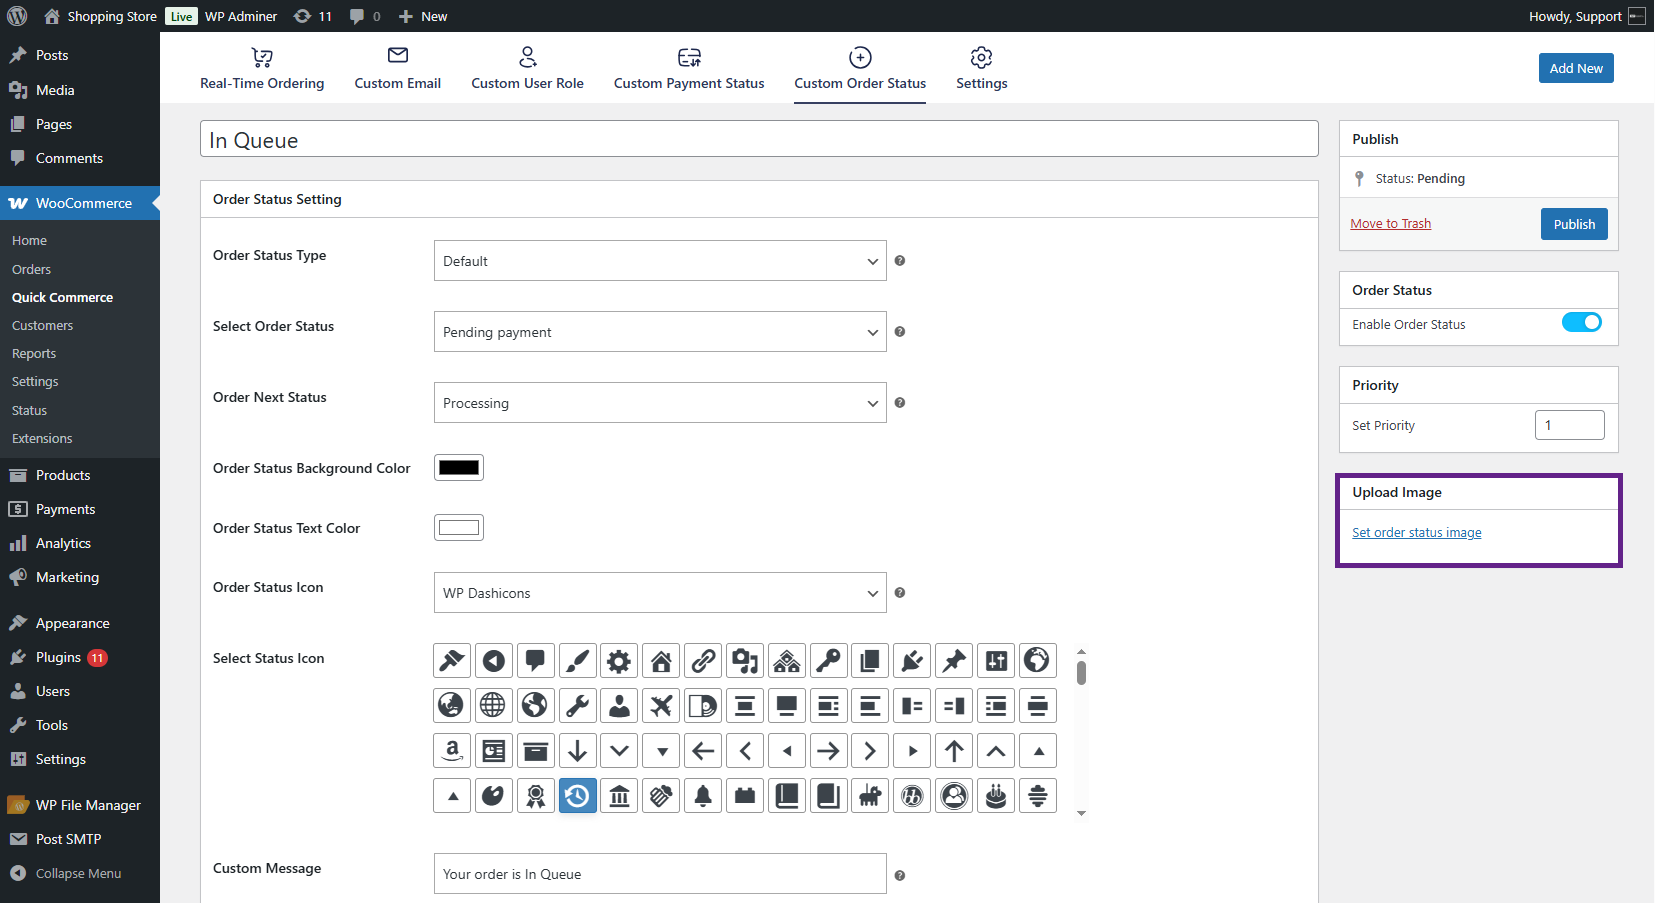
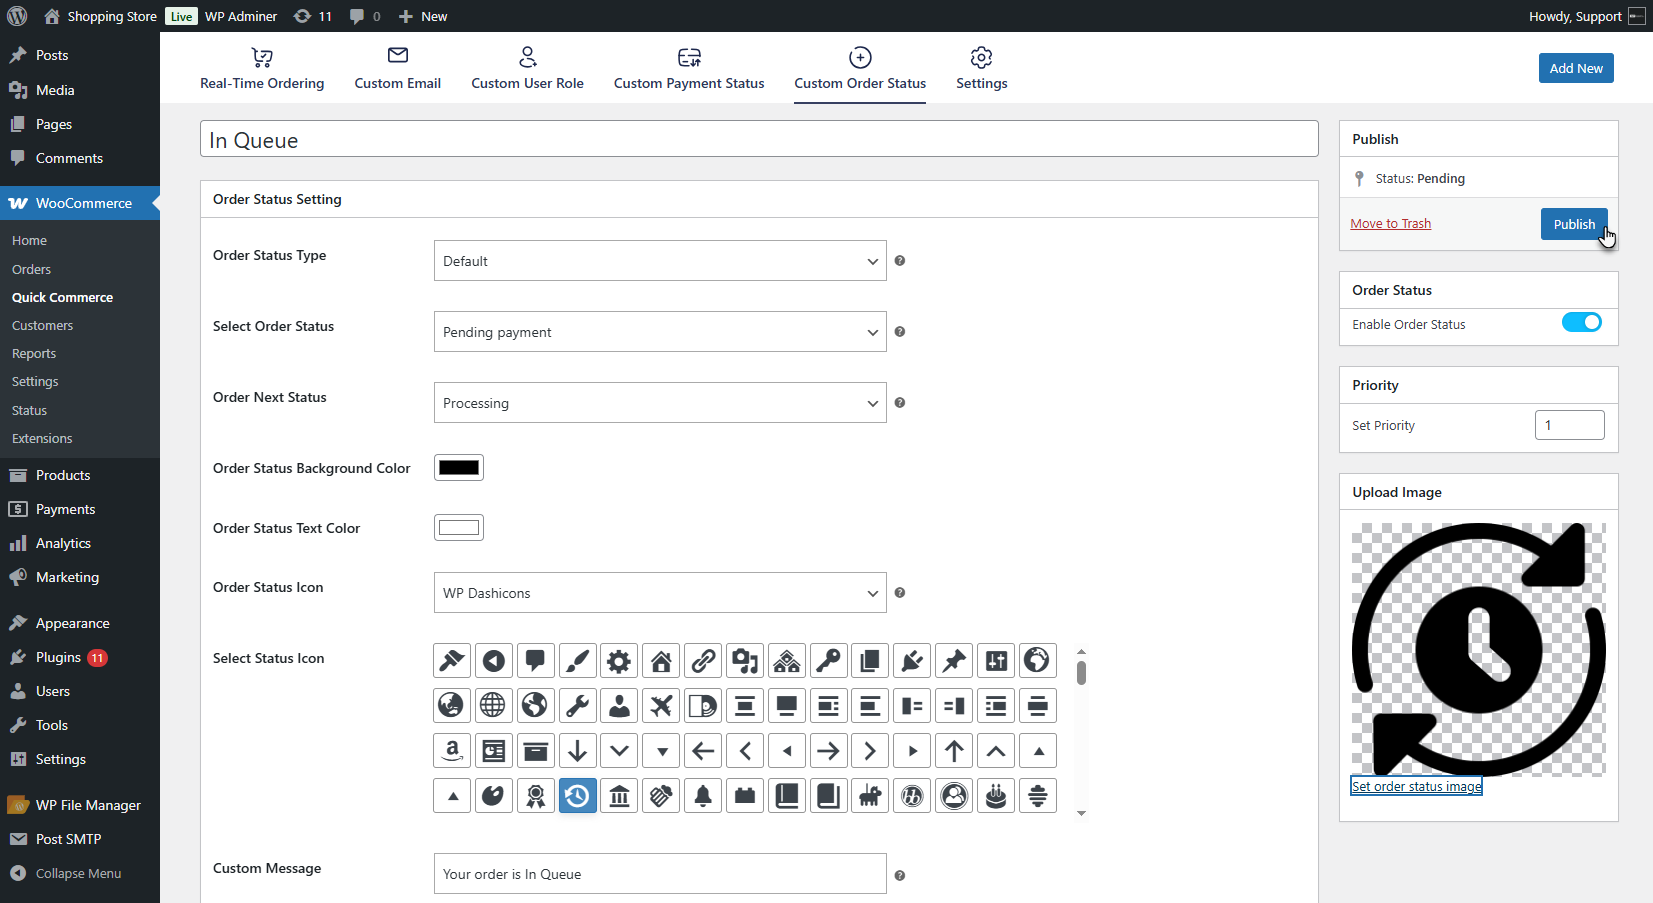
- The admin can upload an image for the order status using the Set Order Status Image option.
- Once all the fields are filled, click the Publish button to create and activate the custom order status.
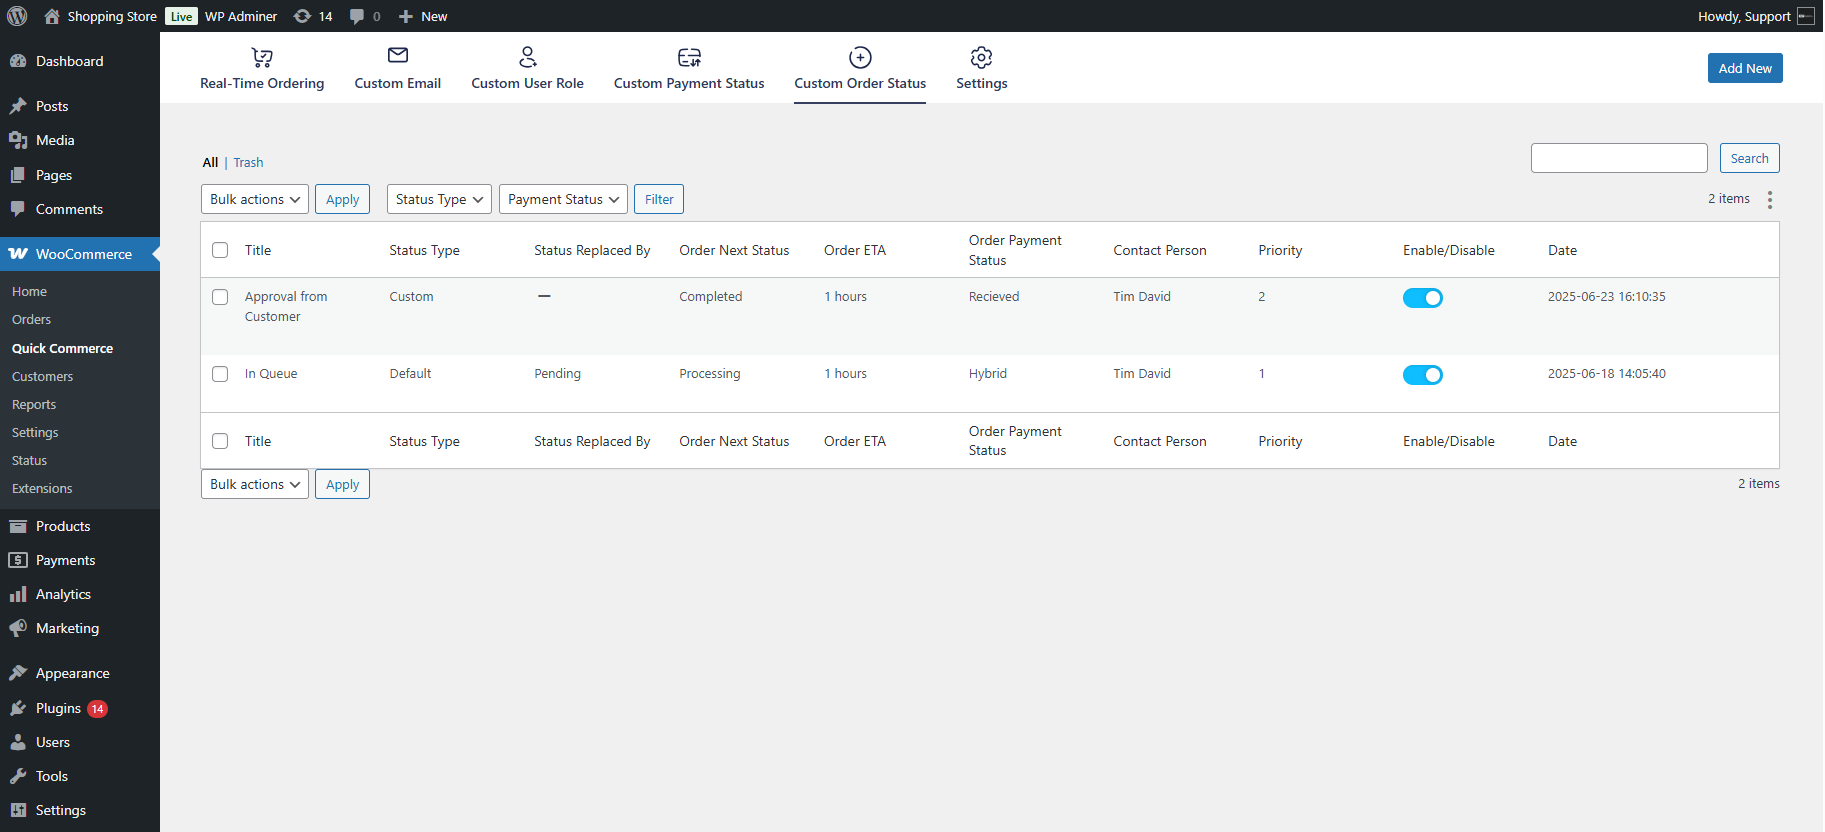
- A Custom type Order Status is added with the same settings as elaborated.
- The order status will be created and listed on the Custom Order Status List page. Each status in the list will display the following columns: Title, Status Type, Status Replaced By, Next Order Status, Order ETA, Order Payment Status, Contact Person, Priority, Enable/Disable, and Date.
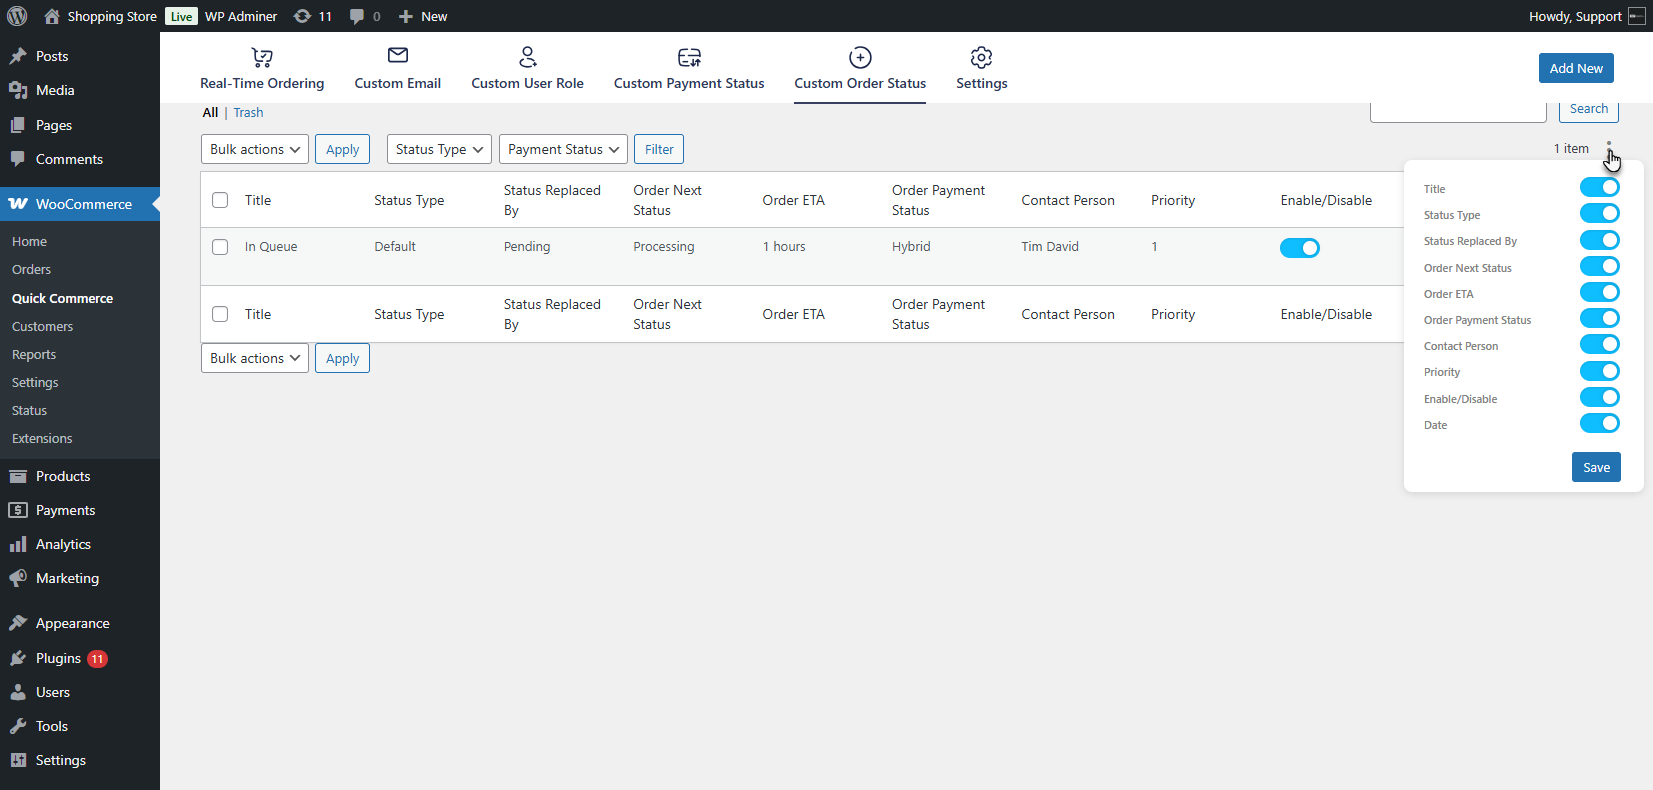
- The admin can show/hide the columns as per requirement using the option available on the Custom Order Status List page.
Real Time Ordering
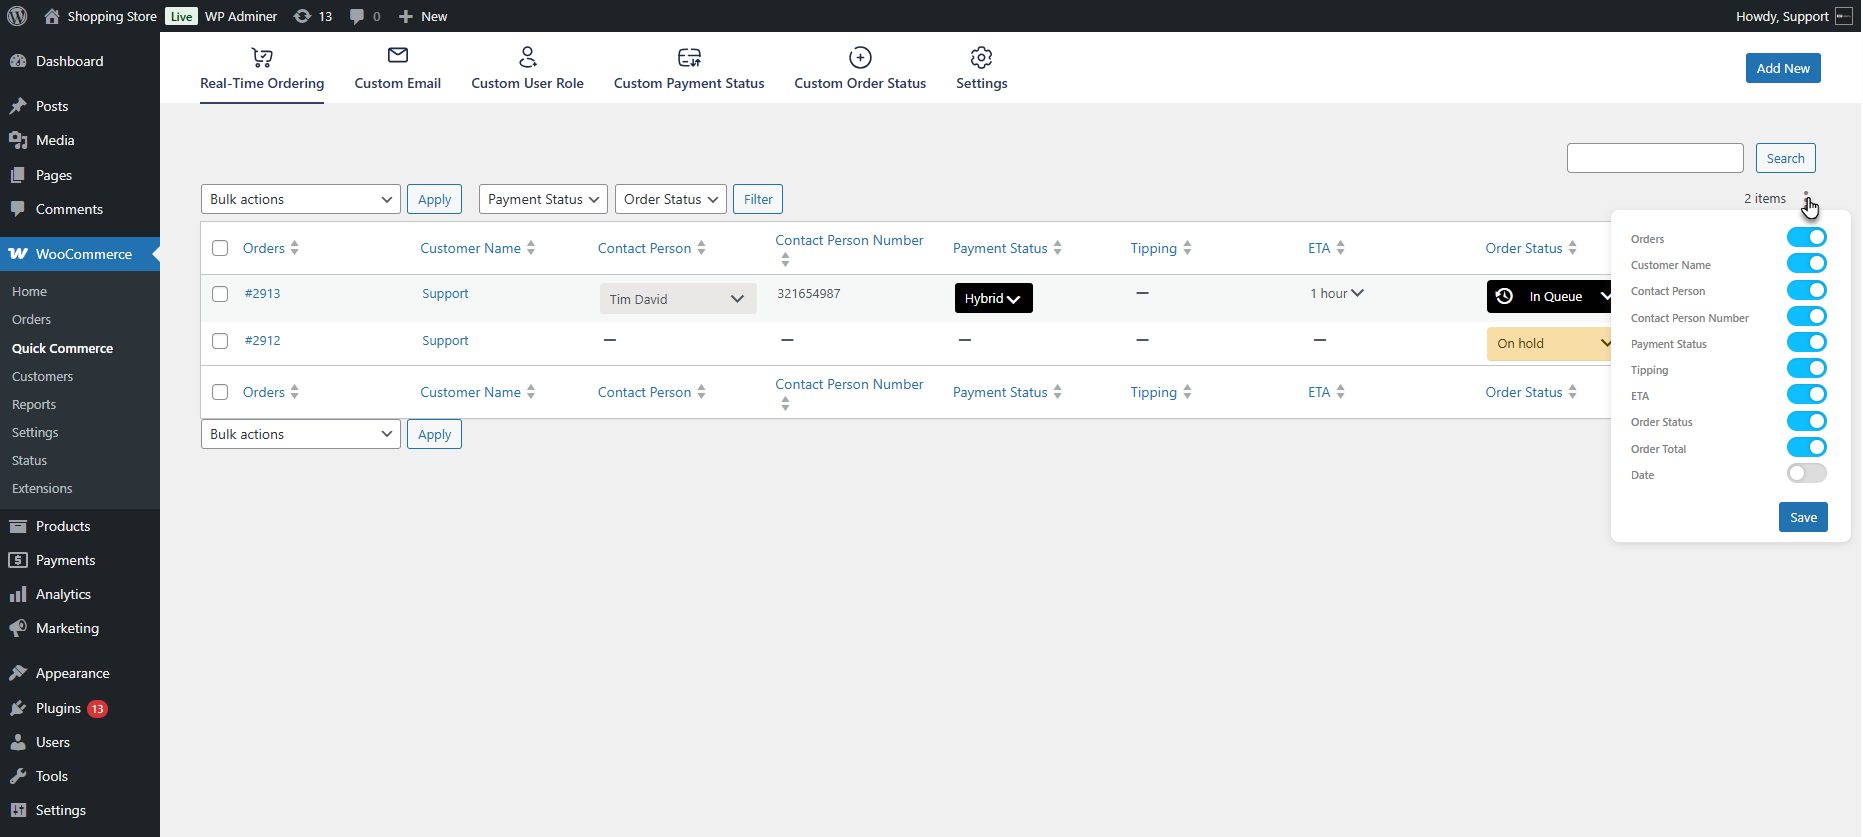
↑ Back to top- Real-time Ordering displays live order data with columns for Order ID, Customer Name, Payment Status, ETA, and Contact Person information.
- To view the Real-Time Ordering status, go to the WordPress Admin Dashboard > WooCommerce > Quick Commerce > Real-Time Ordering.
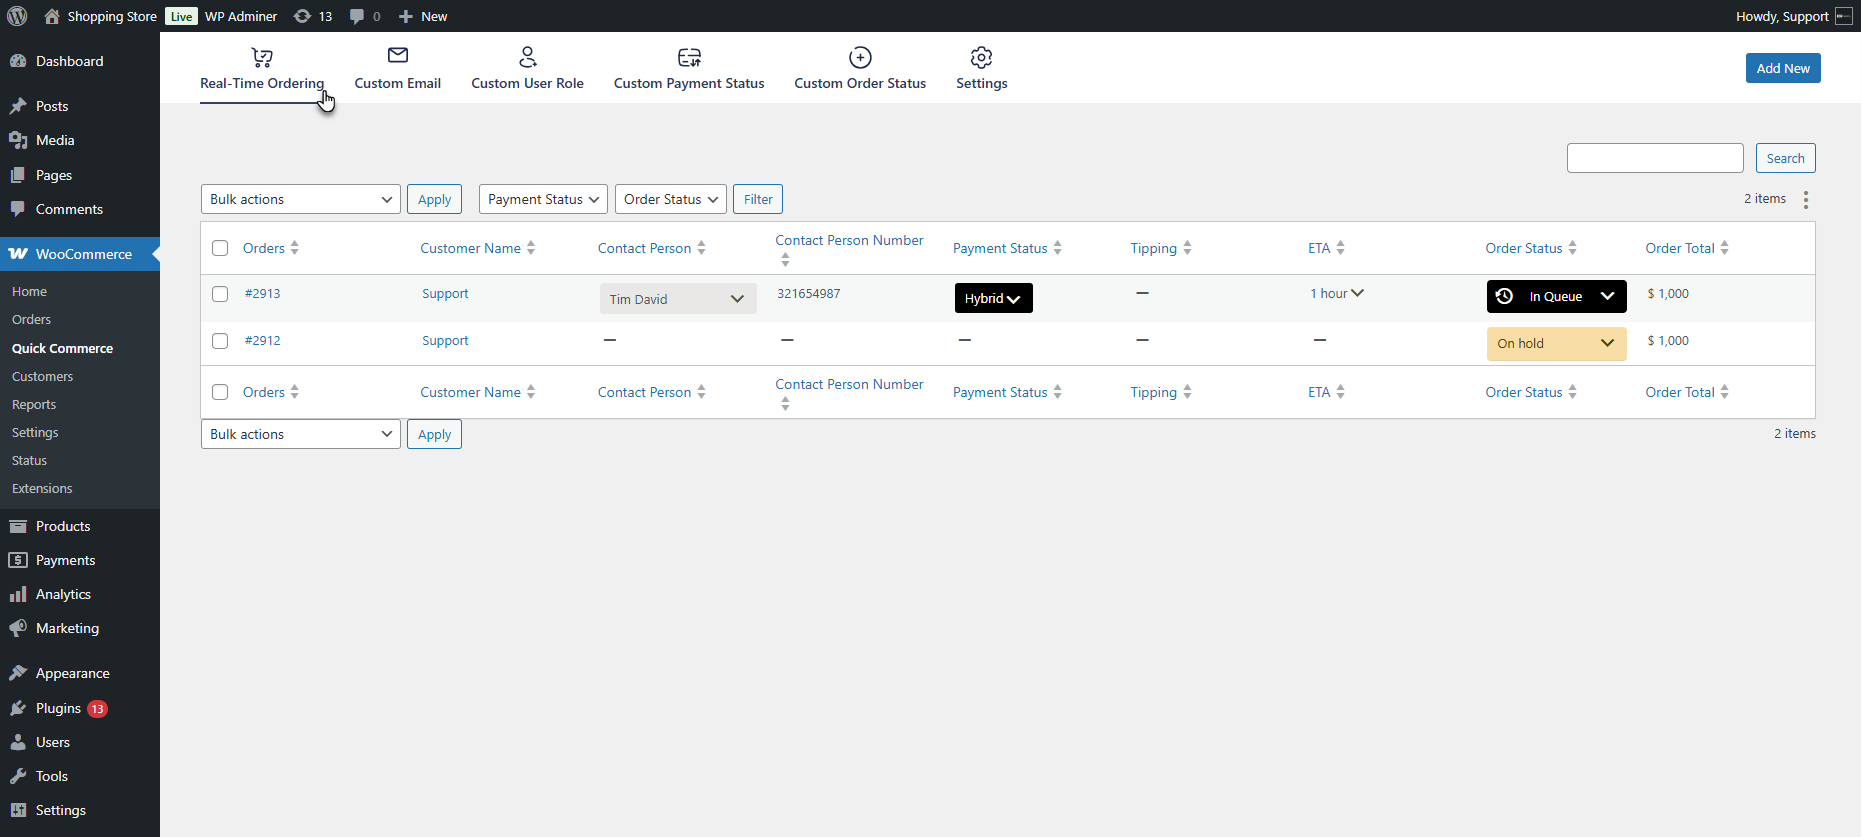
- When a customer places an order, it will be displayed live on this page with the following columns and features:
- Orders: Displays the unique Order ID for each placed order.
- Customer Name: Shows the name of the customer who placed the order.
- Contact Person: The person responsible for delivering or handling the order can be assigned manually or automatically via custom order status.
- Contact Person Number: Displays the phone number of the assigned contact person.
- Payment Status: Indicates the payment status based on the method used; it can be set manually or via custom order status settings.
- Tipping: Shows any tip amount entered by the customer for the order.
- ETA: Estimated Time of Arrival for the order. It can be set manually or automatically, and a threshold time is defined in the custom order status.
- Order Status: Displays the current order status (custom or default); it can be updated manually or driven by automation rules.
- Order Total: Shows the total value of the customer’s order.

Note: When the admin hovers over an order and clicks it, they will be redirected to the respective WooCommerce Order Details Page for that specific order.
- The admin can show/hide the columns as per requirement using the option available on the Real Time Ordering page.
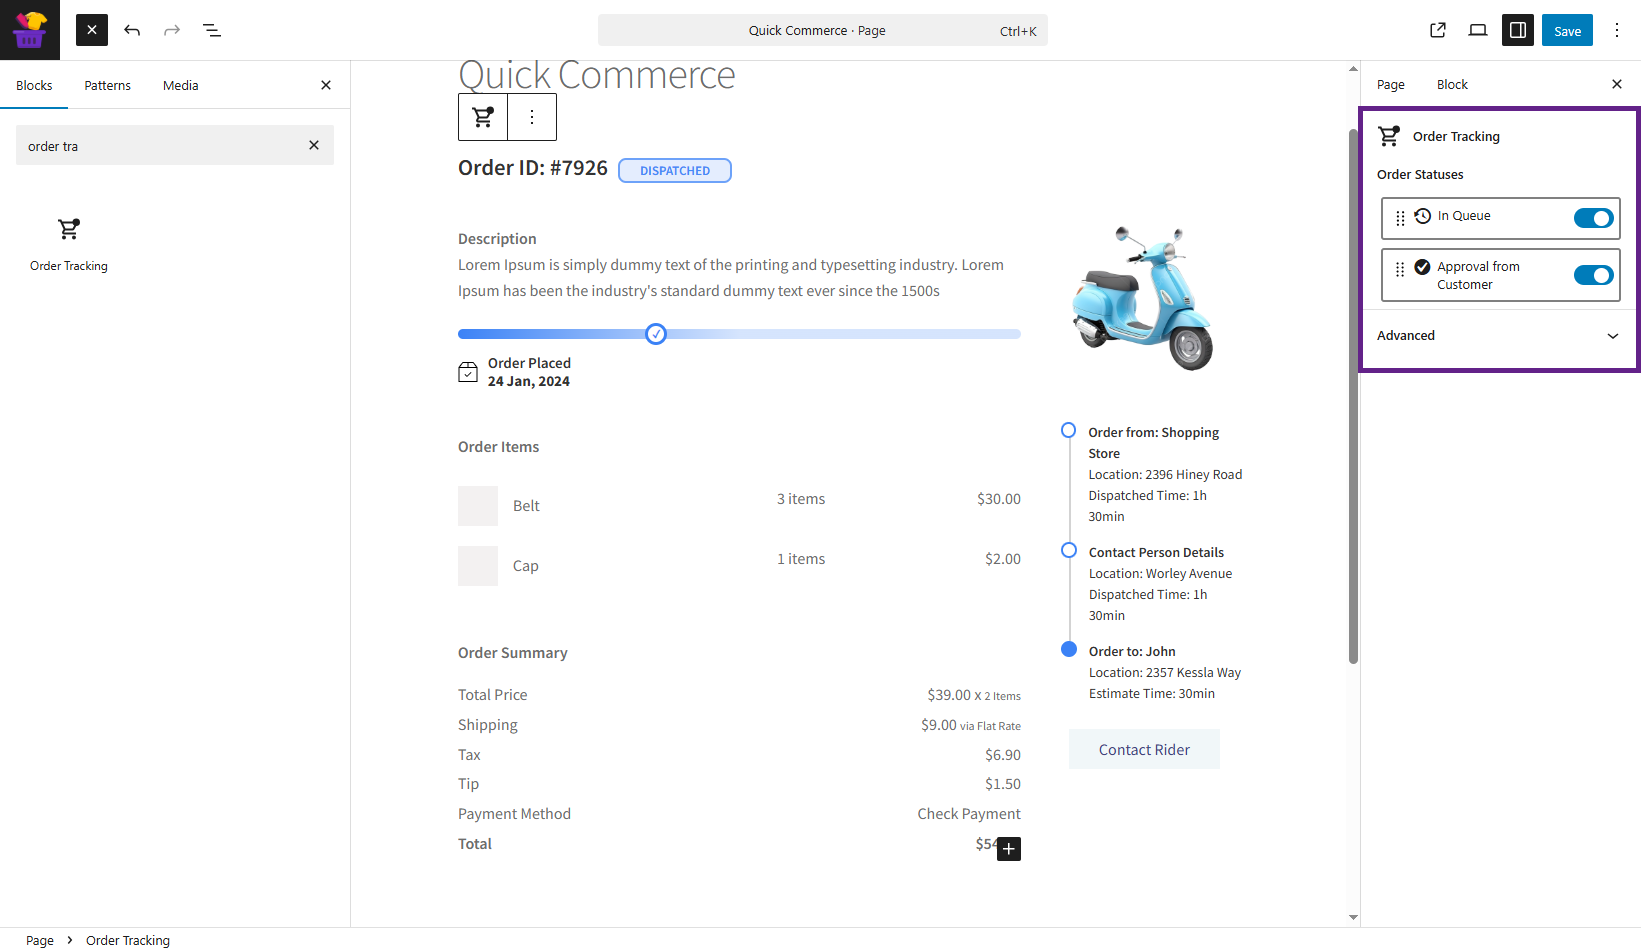
Real Time Ordering – Block
↑ Back to top- The admin can use the Order Tracking block to display Order Tracking for the customer on any page.
- Navigate to WordPress Admin Dashboard > Pages > Add New / Edit Page.
- Click the + button inside the editor, search for Order Tracking, and select the Order Tracking block.
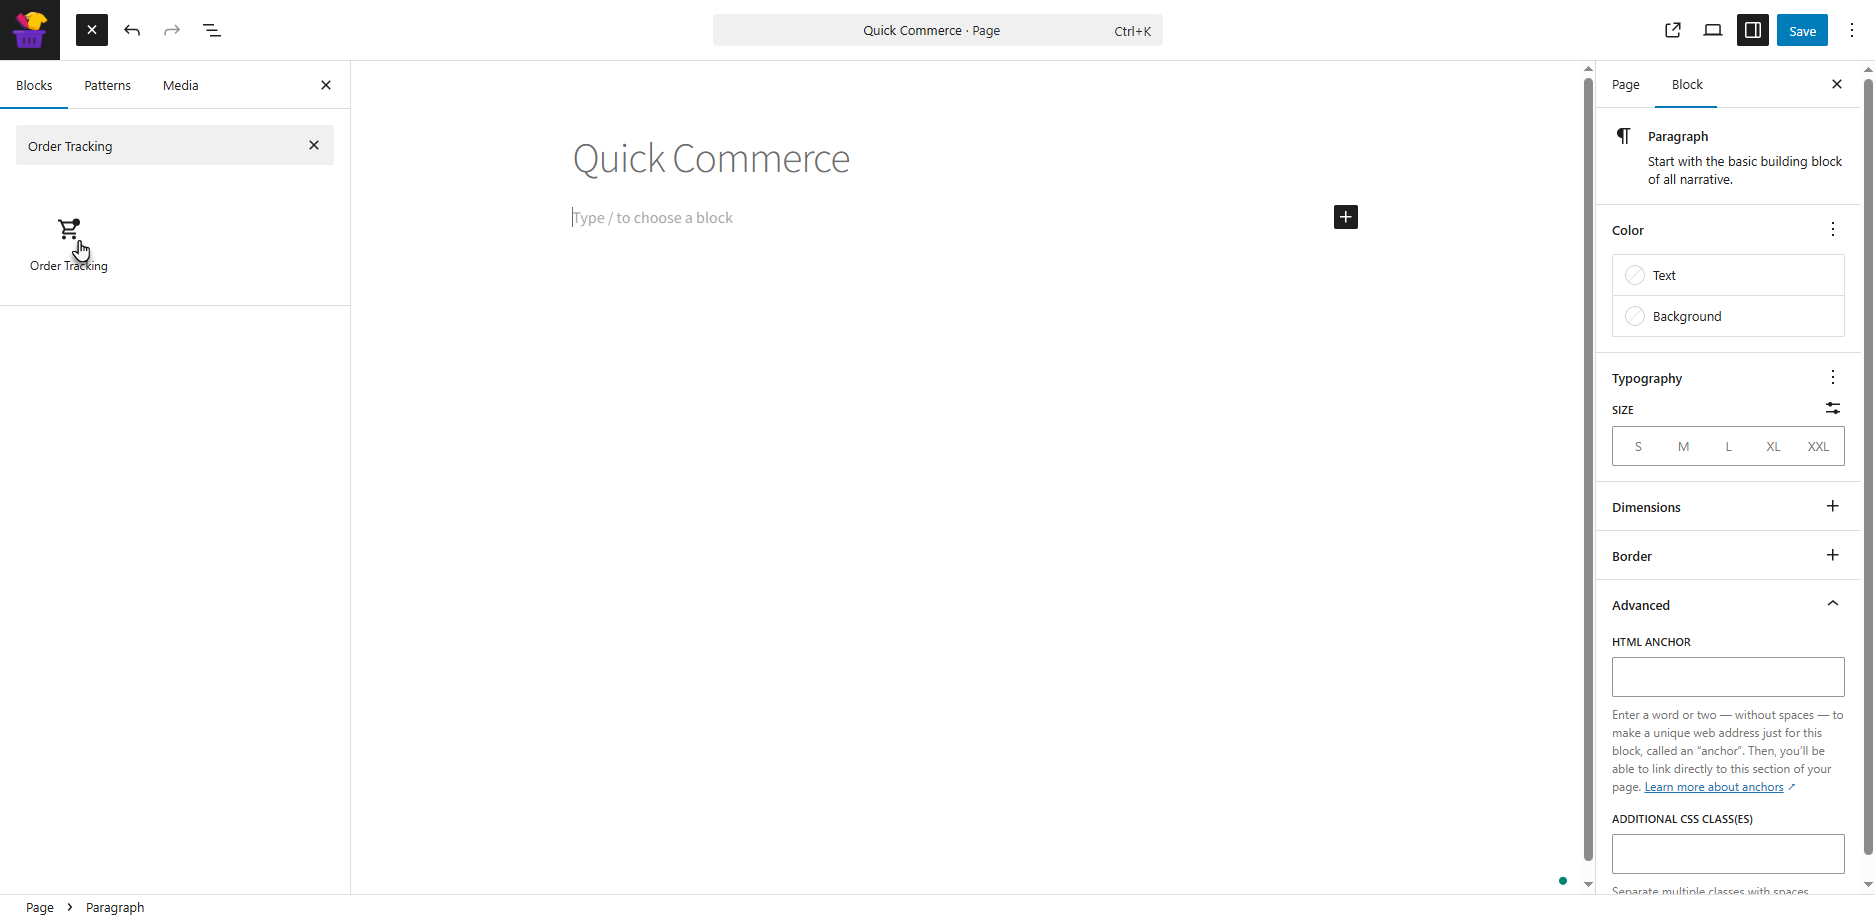
- The block will be added to the page.
- This block is adjustable and can be adjusted according to the admin’s requirements. Once you’ve done so, publish or save the page.

Front End Impact
- Log in to your account.
- Place an order. A Track Your Order button will appear on the Thank You page. Click on this button to be redirected to the Order Tracking Page set by the administrator.
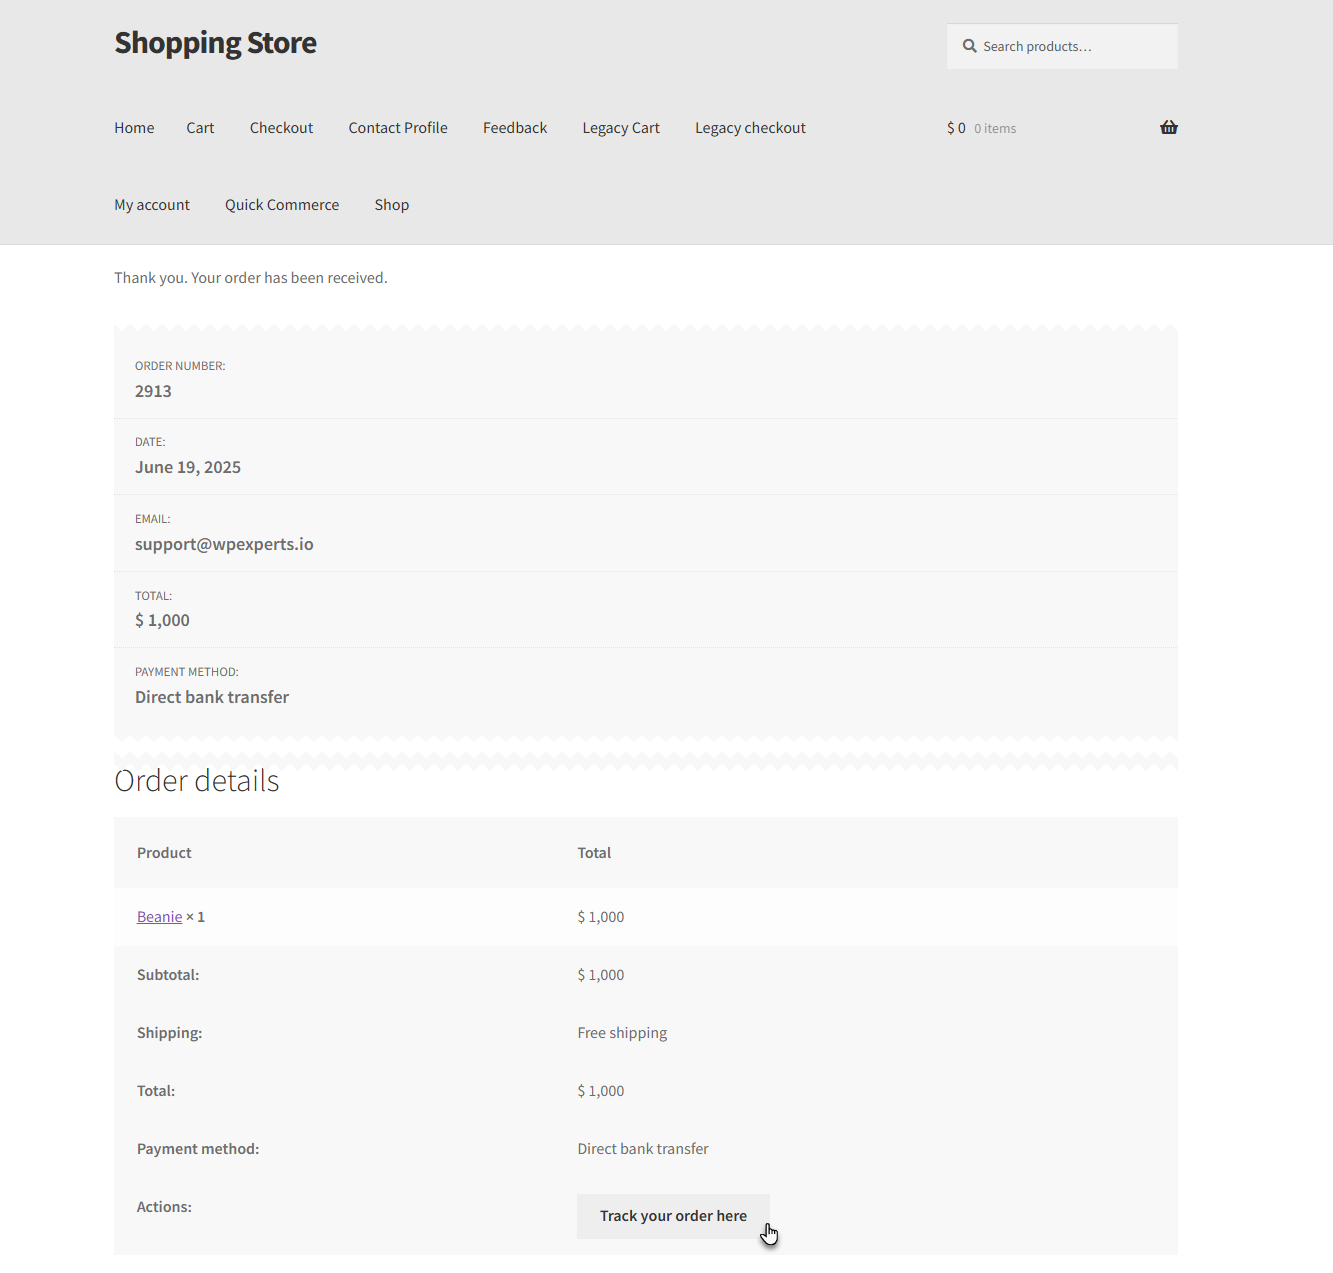
PLEASE NOTE: Customers can also track their orders by navigating to My Account Page > Orders > Track My Order.
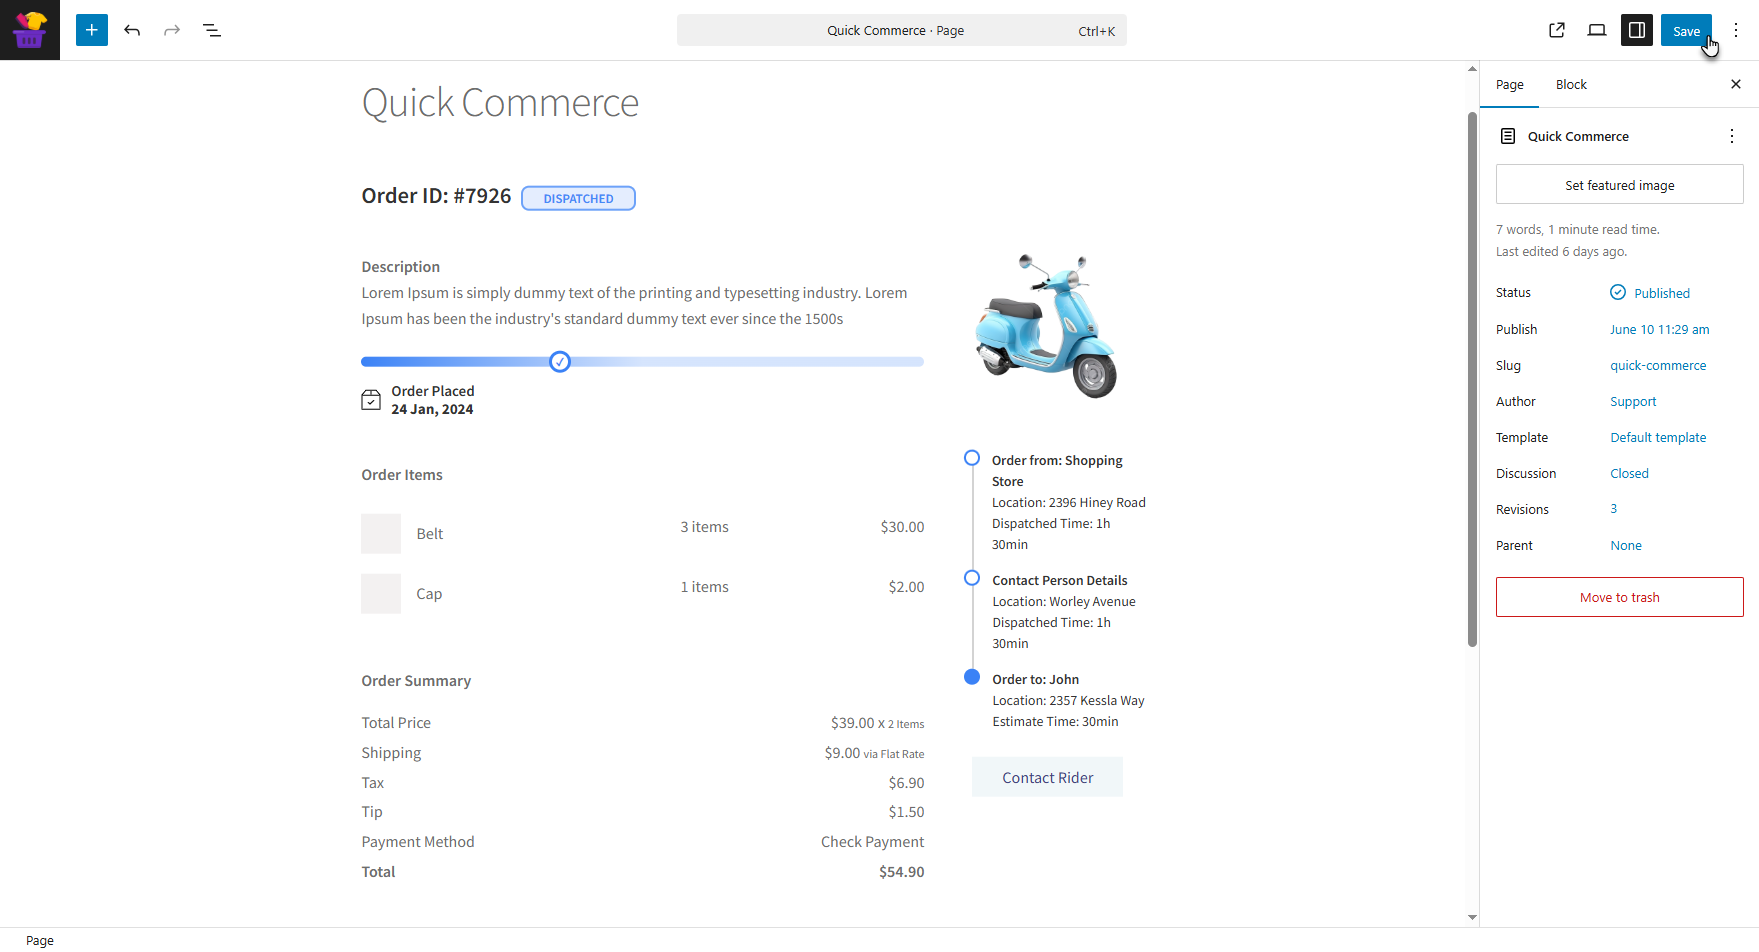
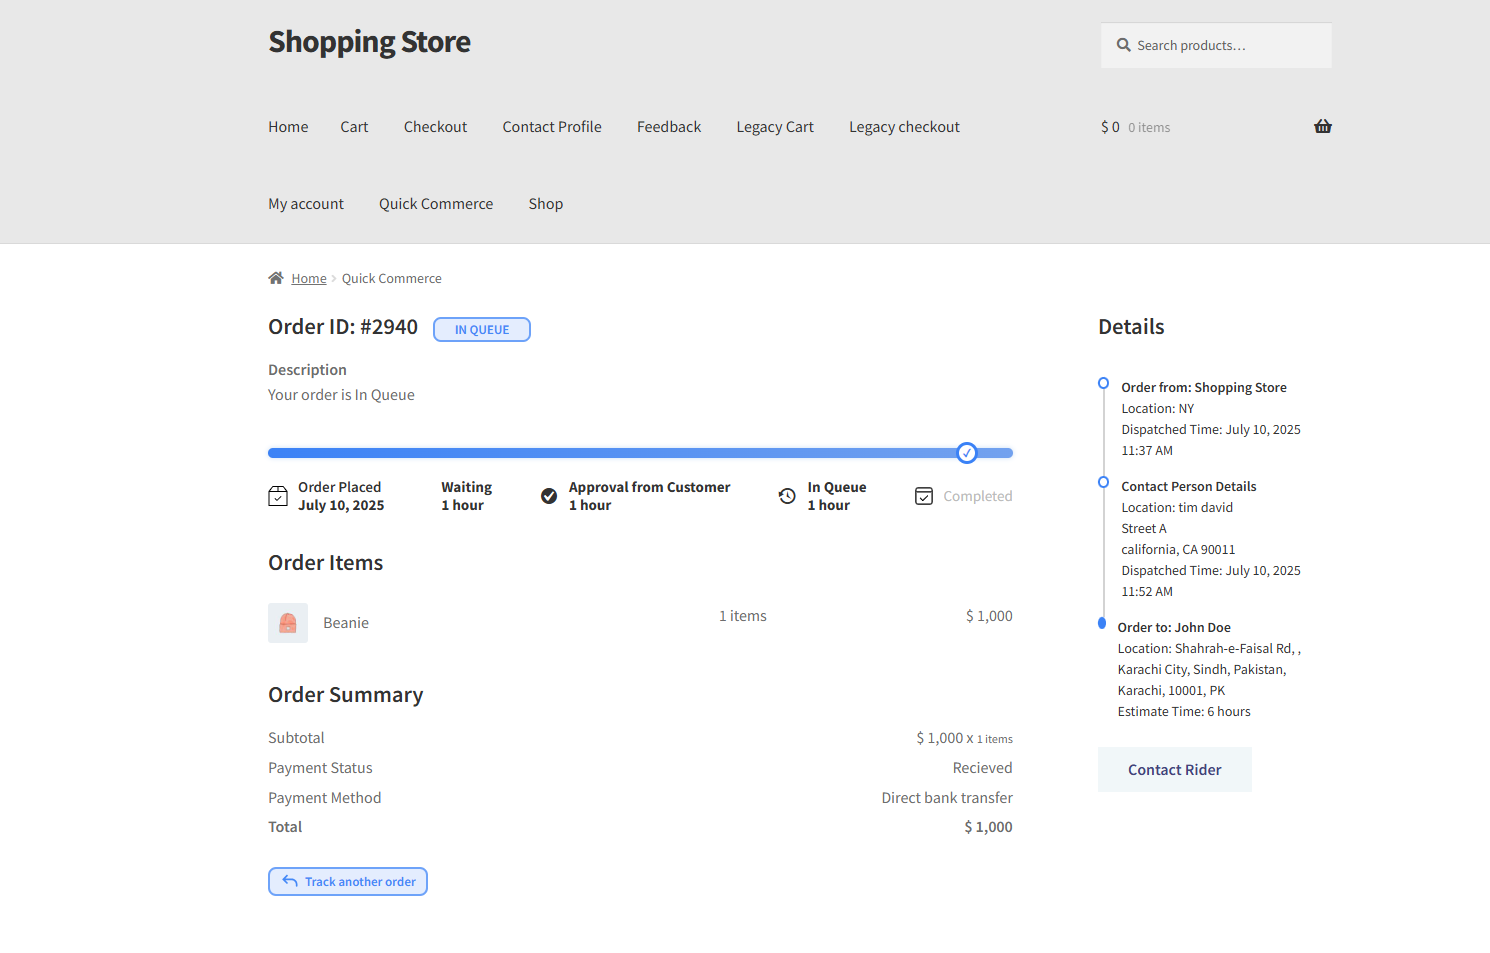
- The Order Tracking Page contains the full order details, including the assigned contact person and rider information.
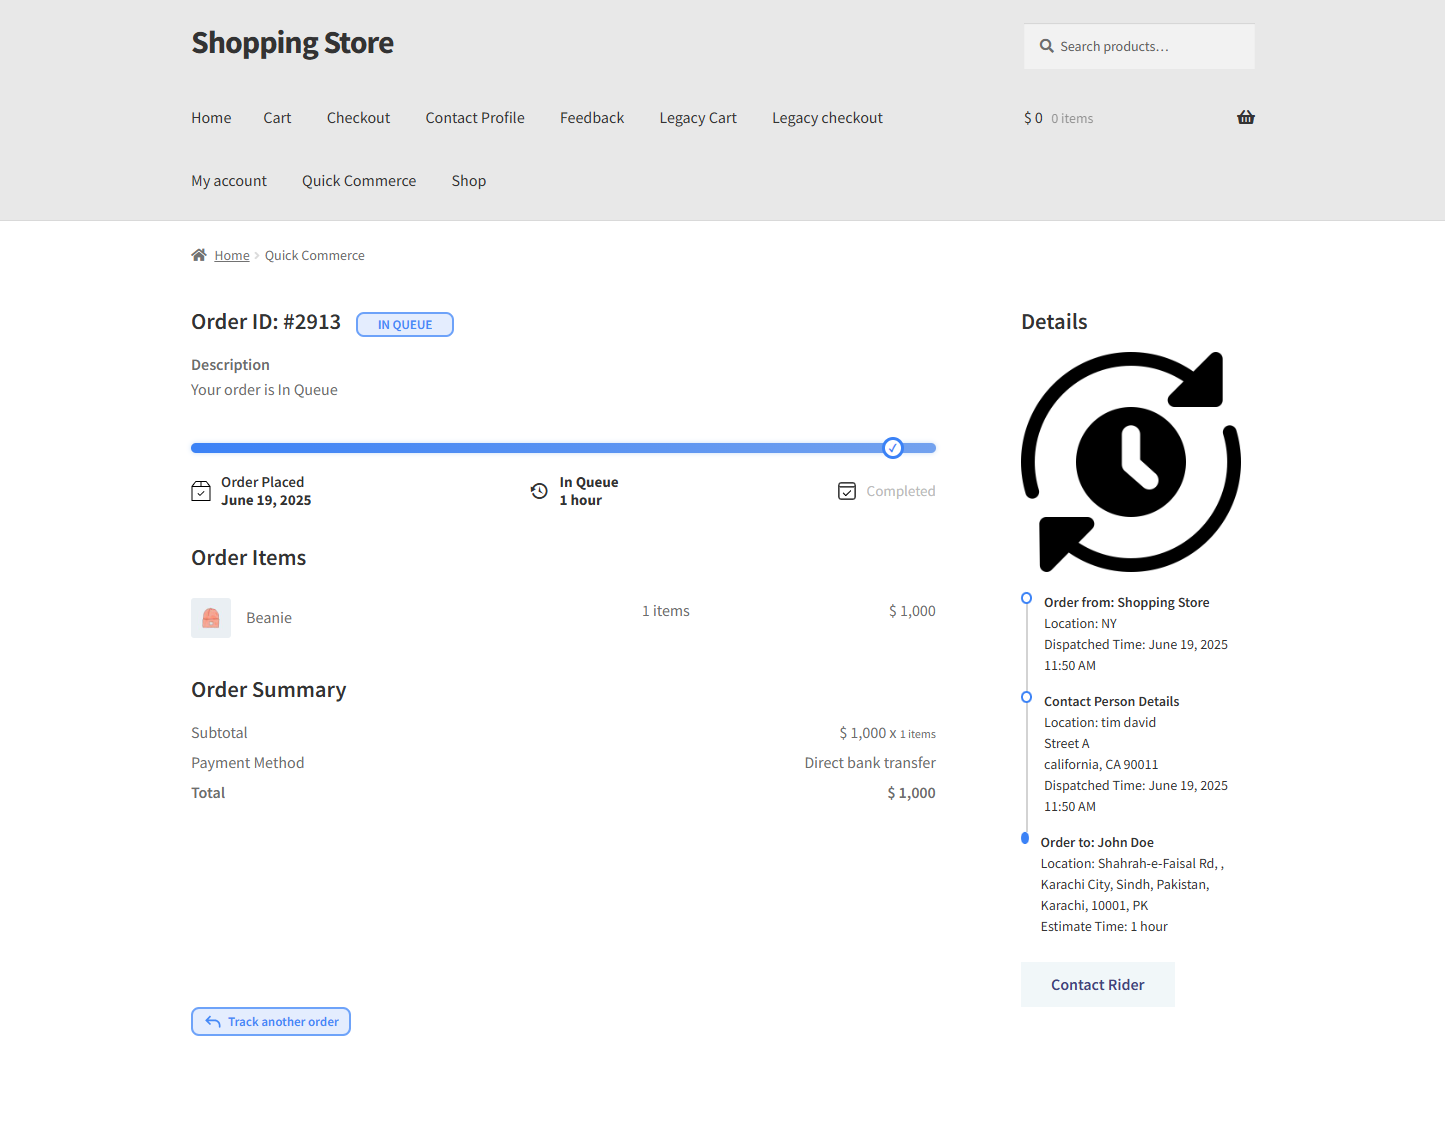
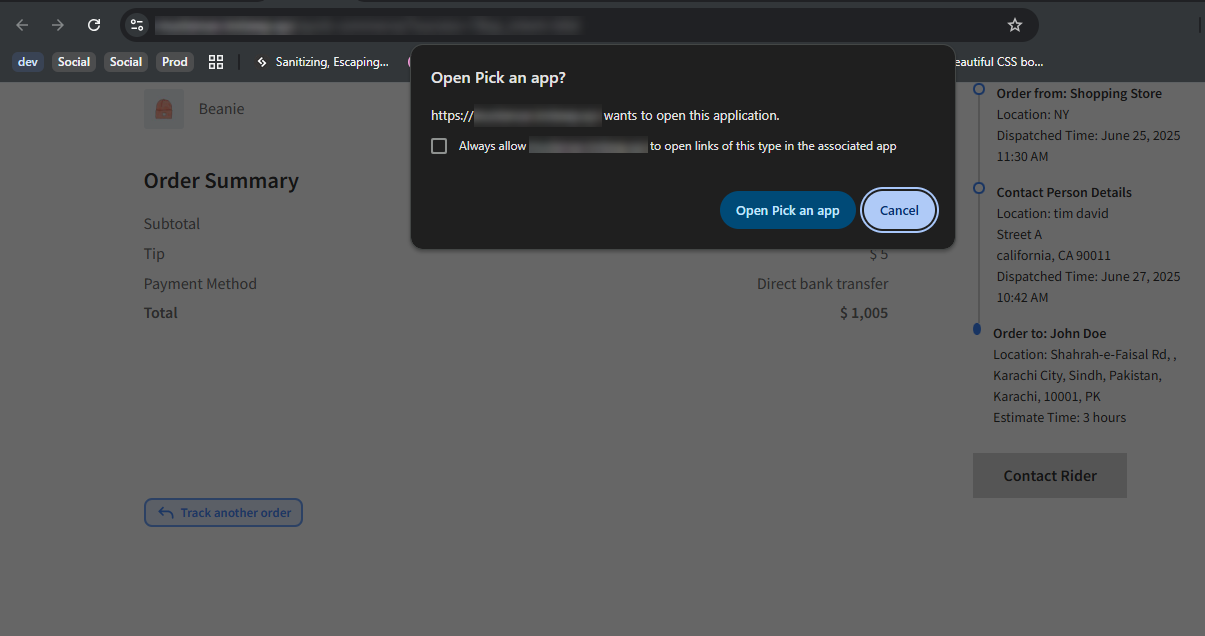
- The customer can contact the rider by using the Contact Rider button.
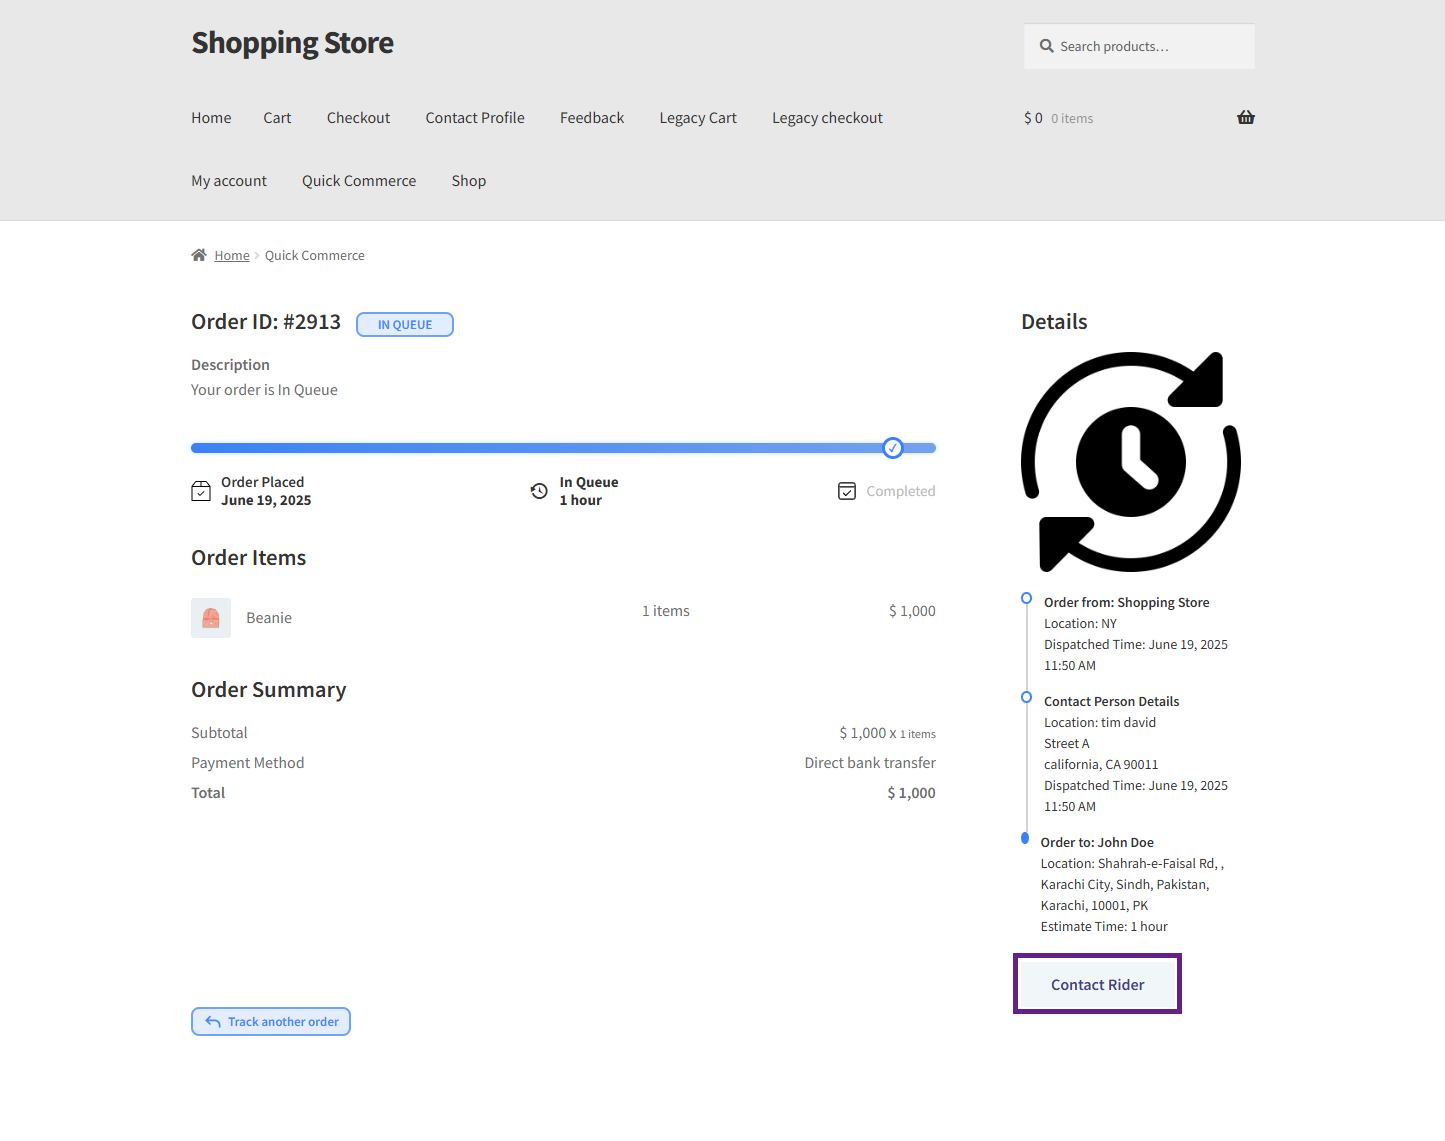
- The user will be redirected to the available Contact Rider Application page.
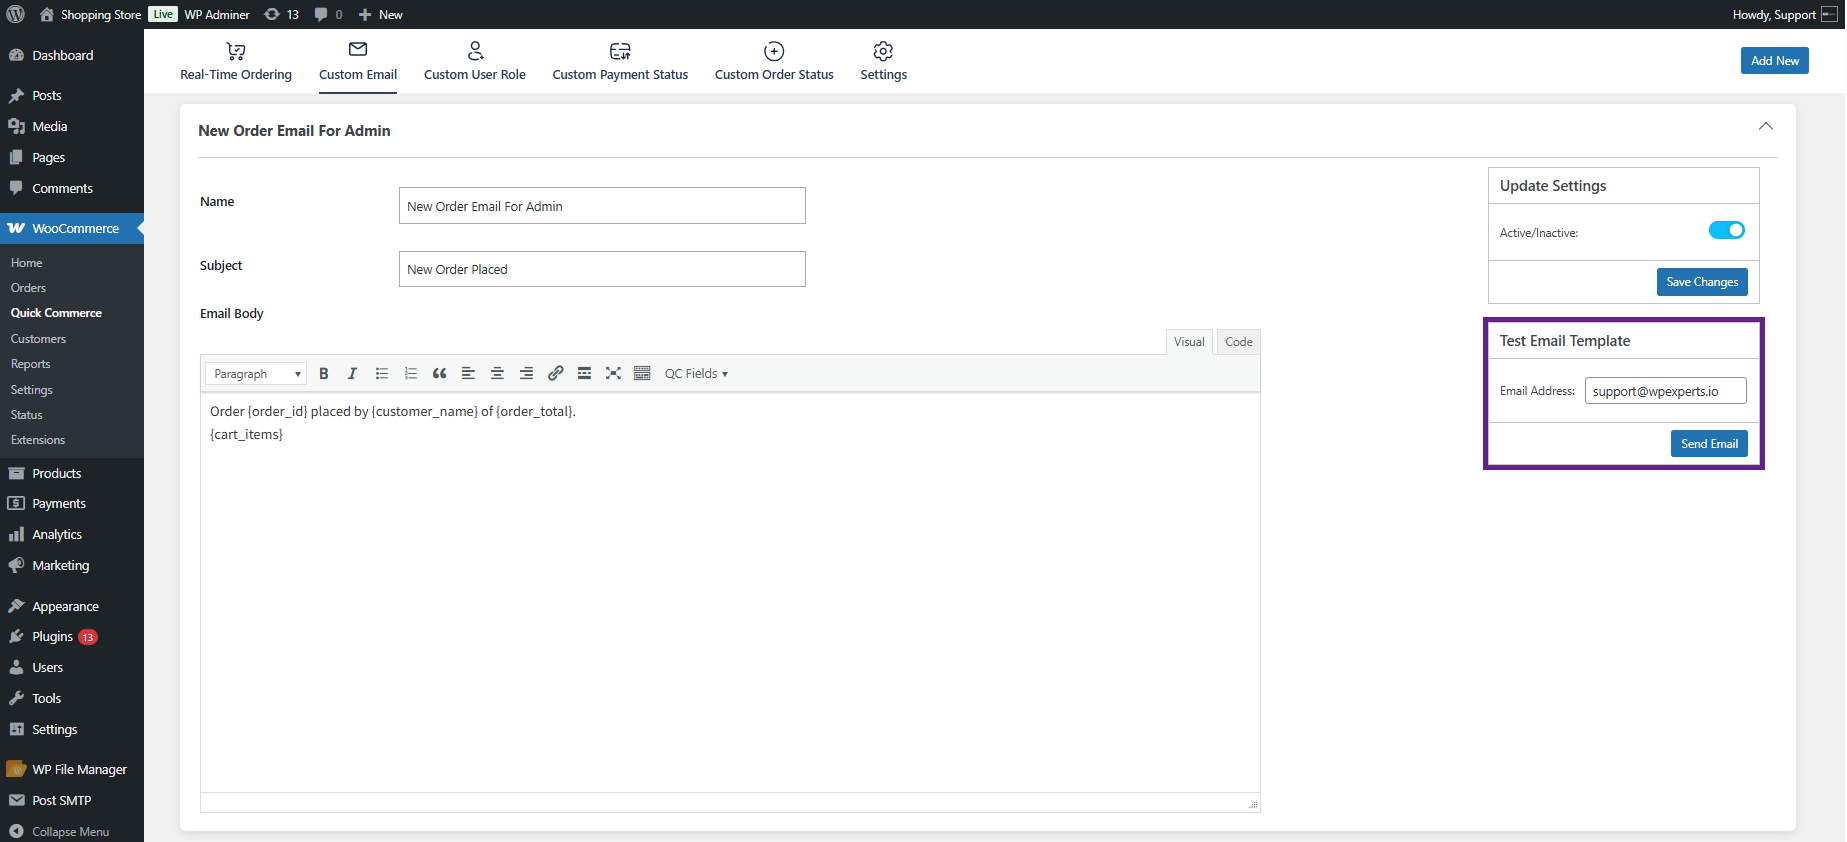
Custom Emails
↑ Back to top- This feature provides predefined and customizable email templates for the admin, customer, and contact person with Quick Commerce tags.
- Go to WordPress Admin Dashboard > WooCommerce > Quick Commerce > Custom Email.
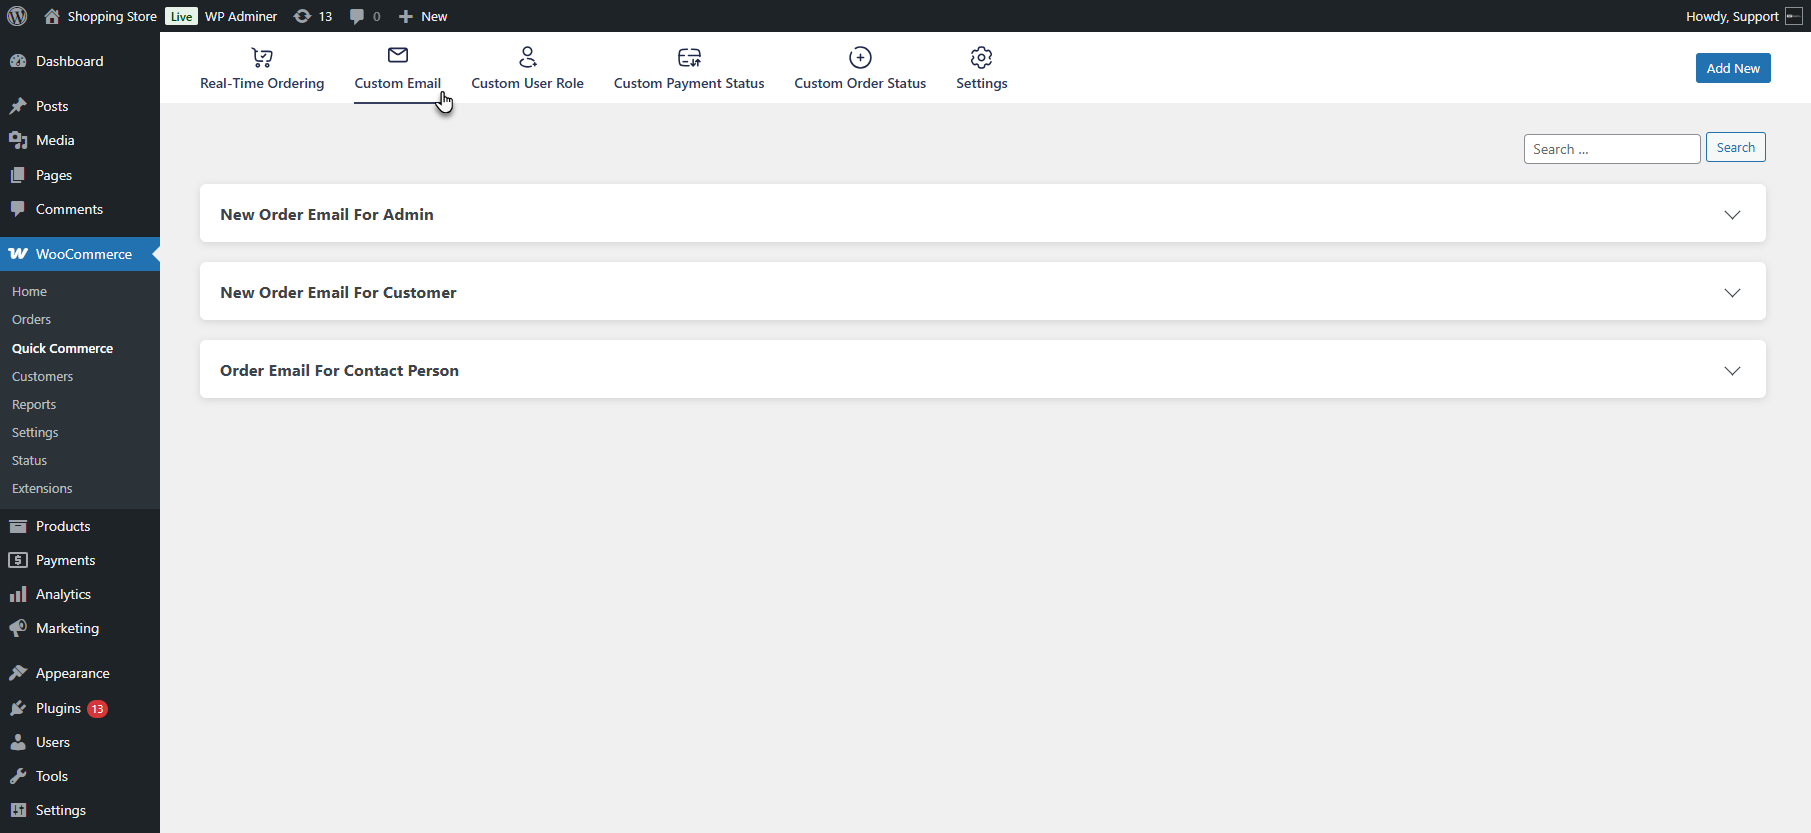
- Three default email templates are available:
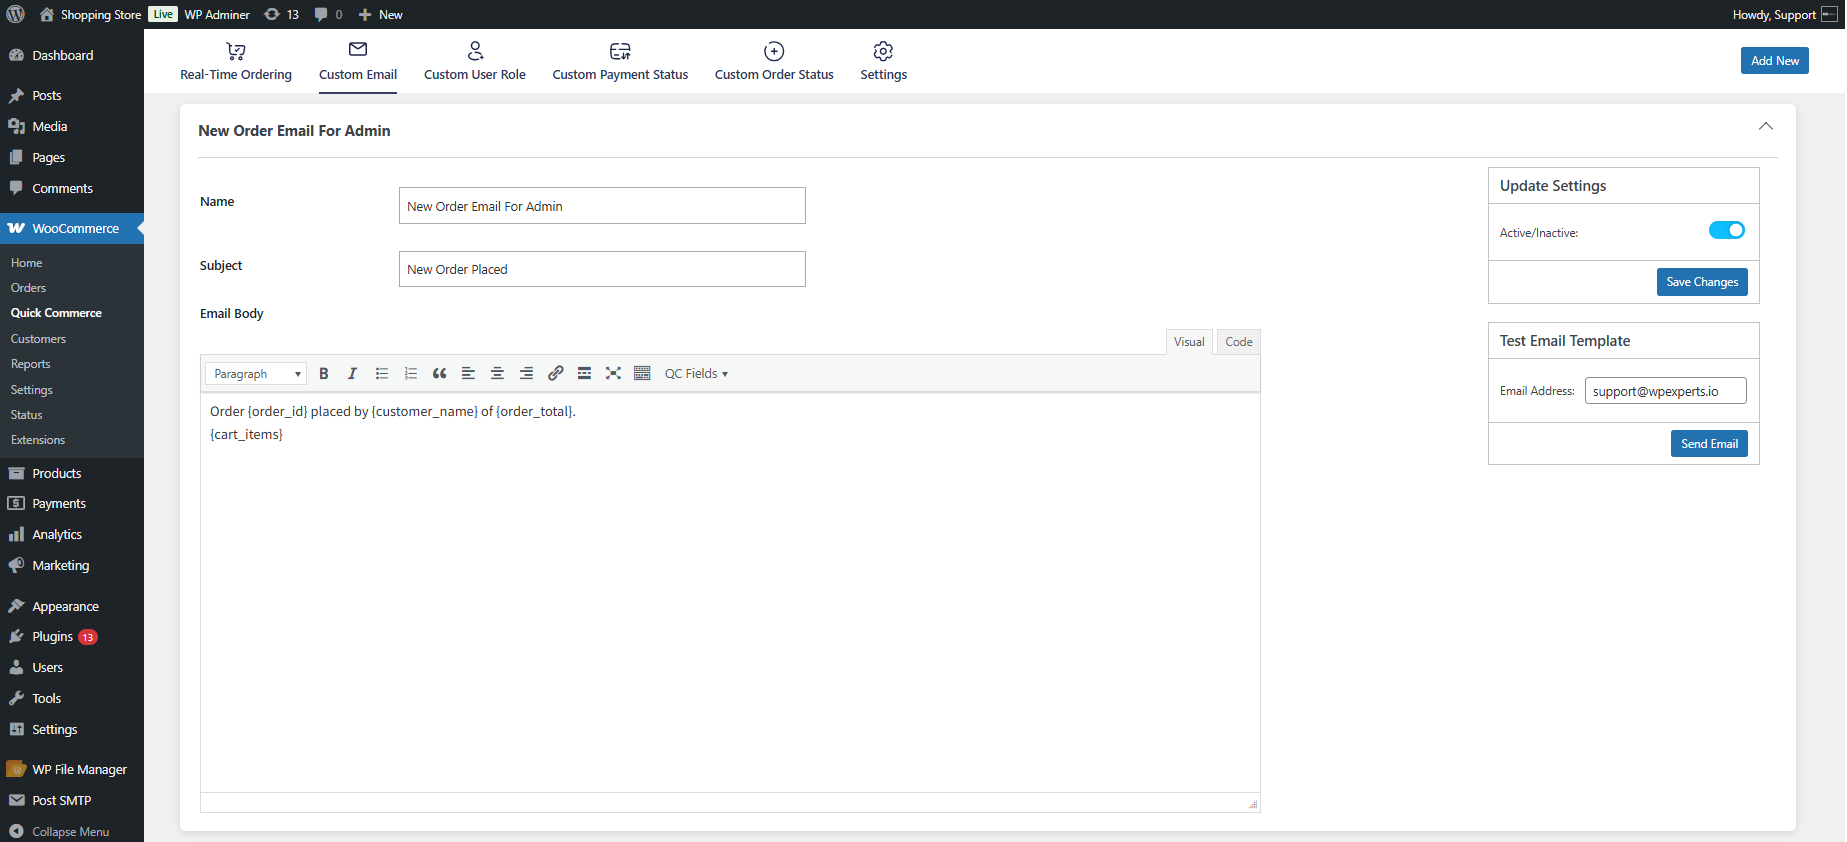
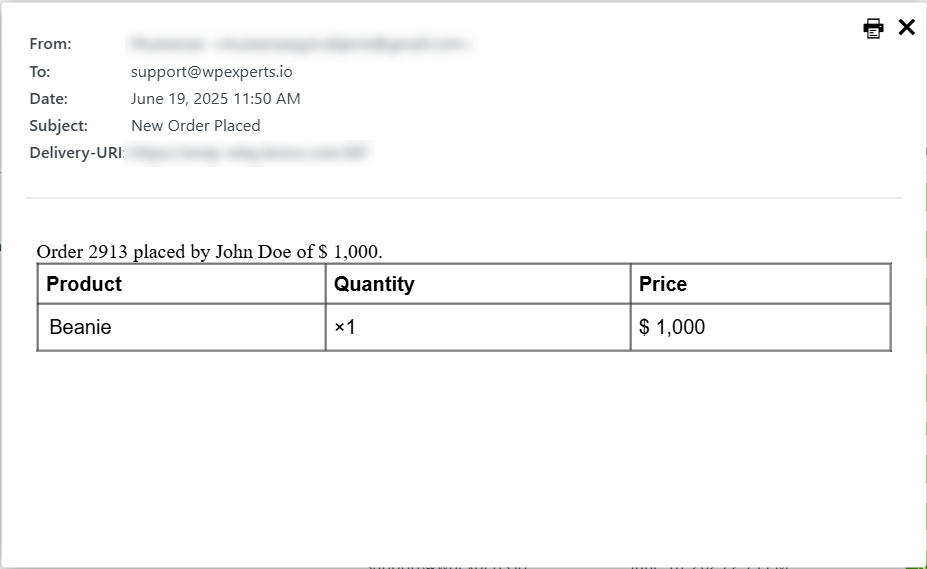
- New Order Email for Admin: Sends a notification to the admin when a new order is placed.
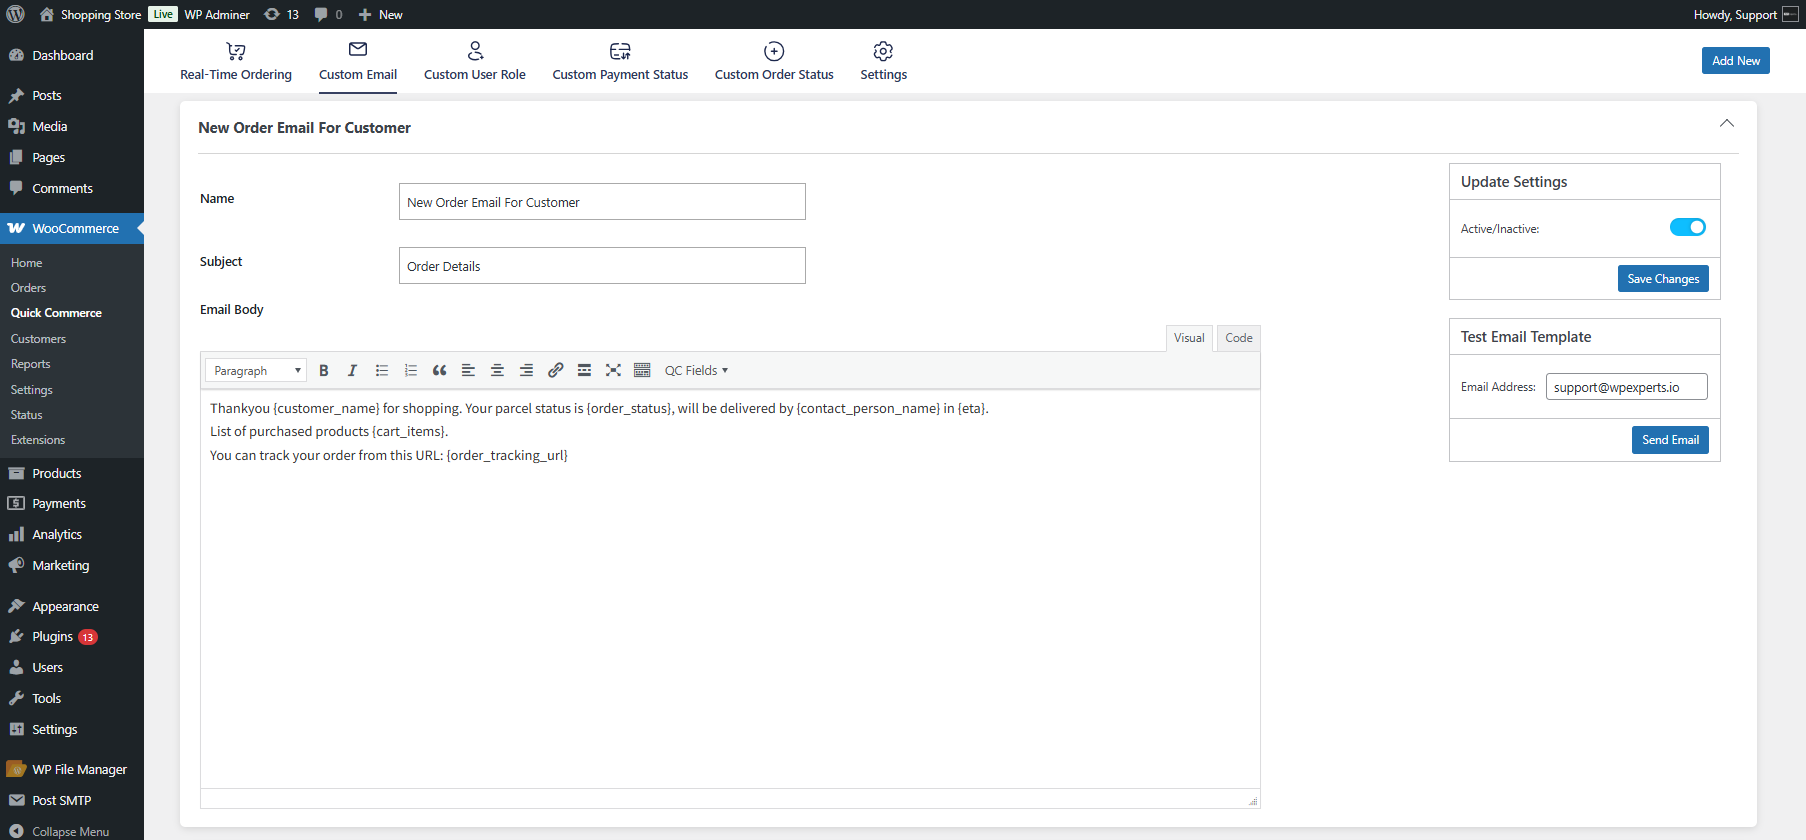
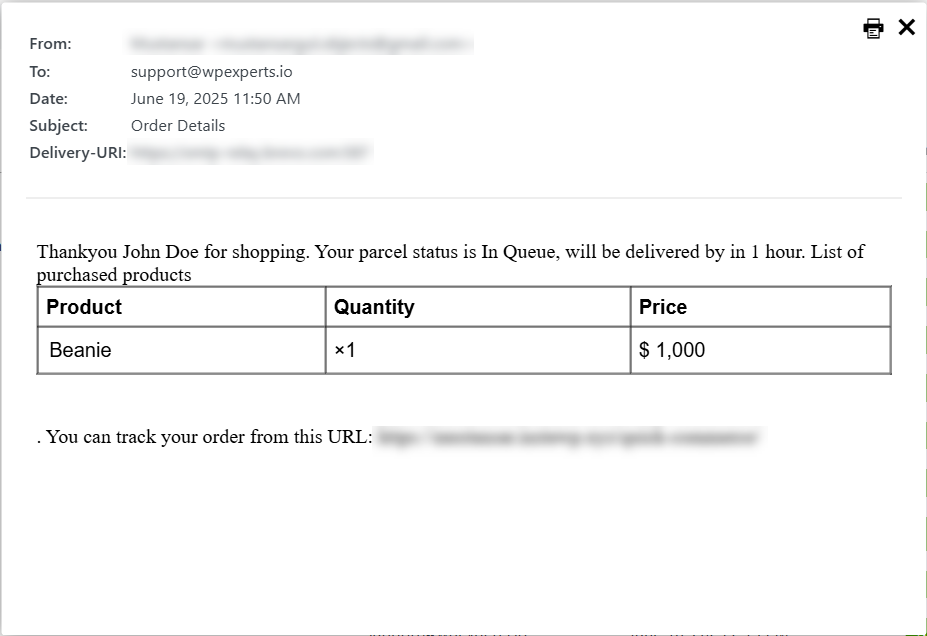
- New Order Email for Customer: Sends the customer a confirmation email with order details.
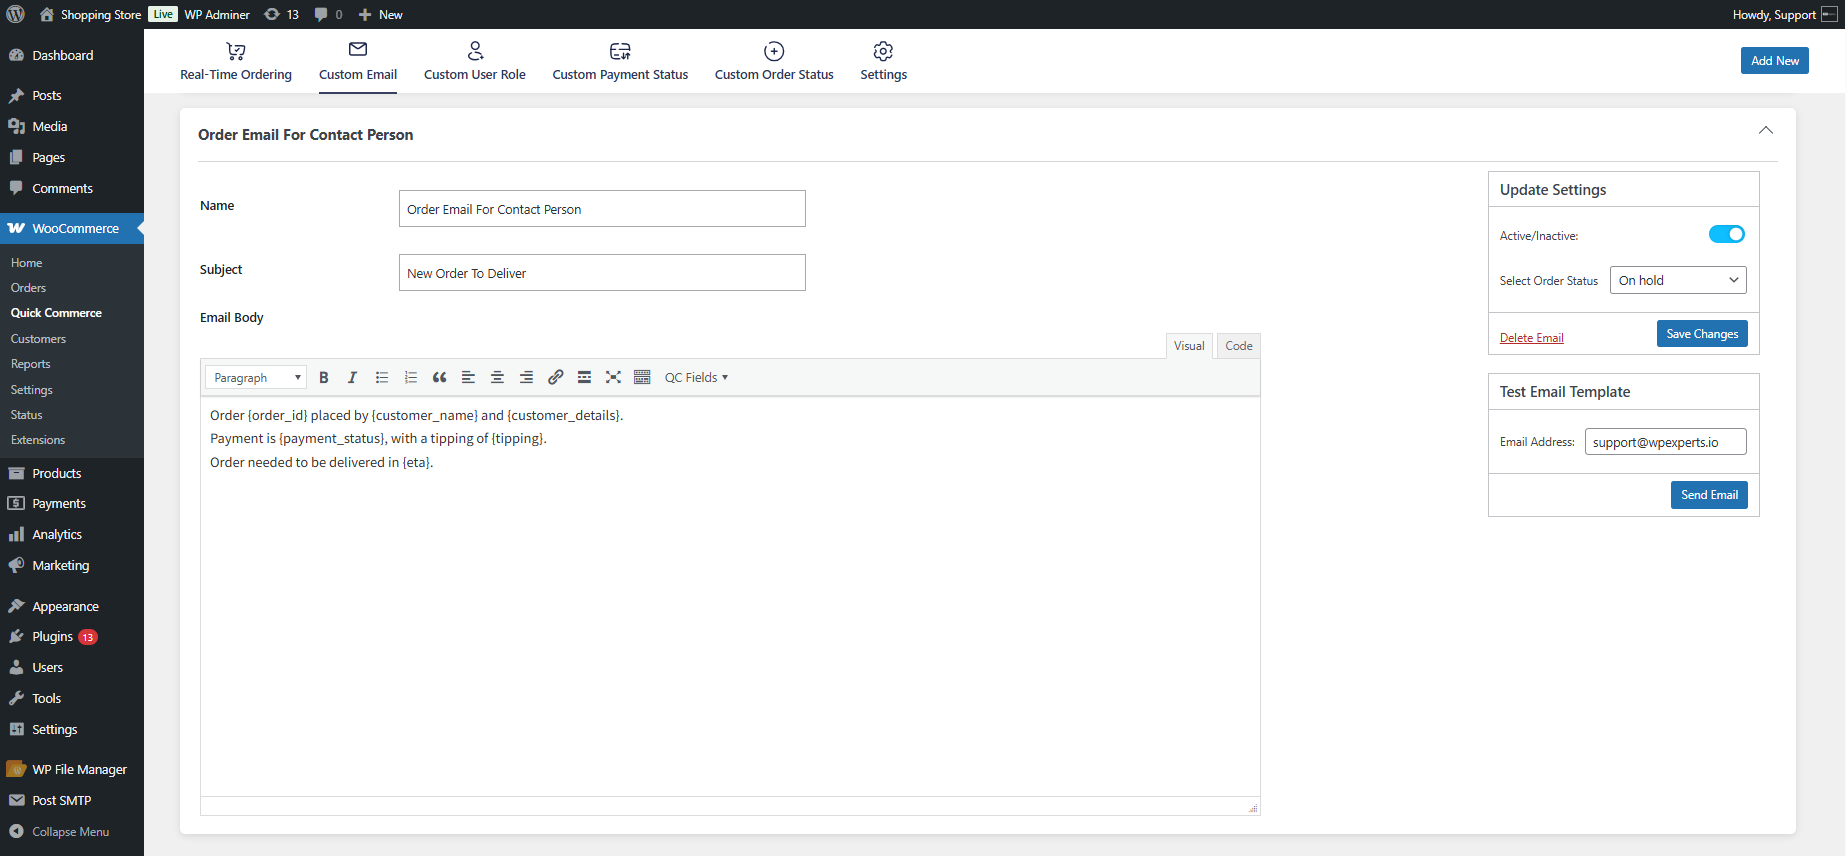
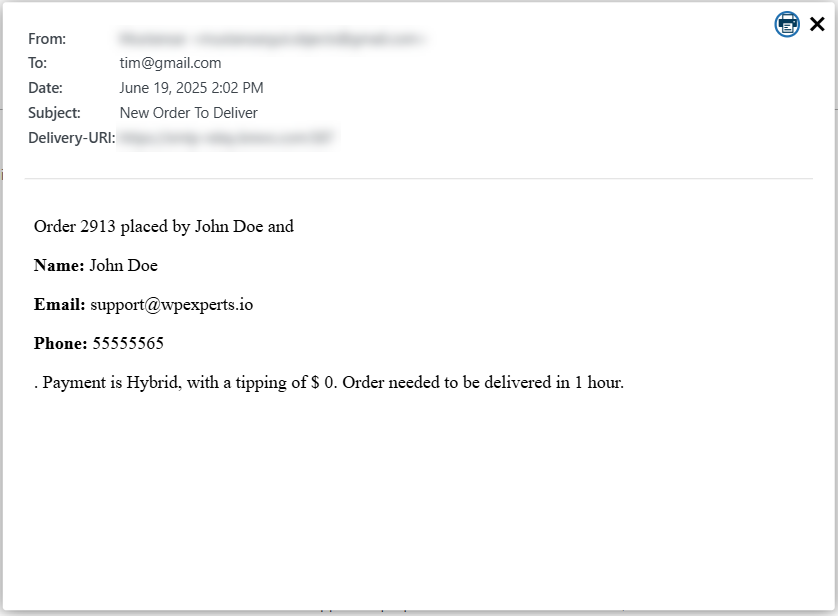
- Order Email for Contact Person: Based on the selected order status, this email sends the order information to the assigned contact person.
- Click on any email template to expand it. The admin can change the name and subject of the email.

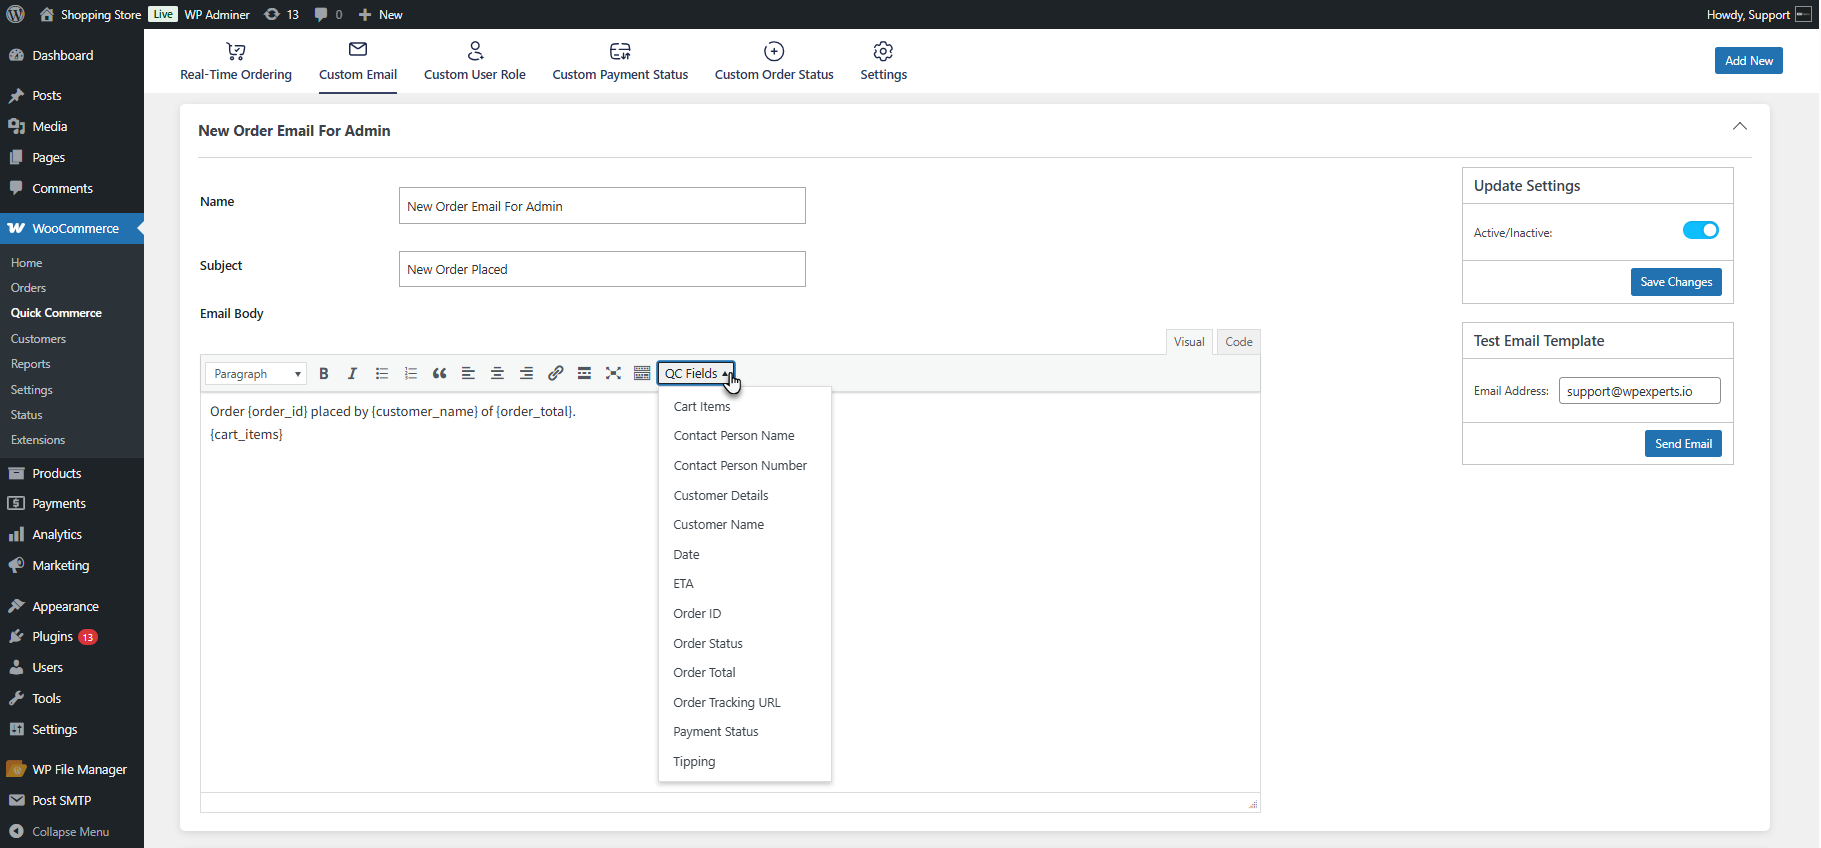
- The body of the email can be customized using Quick Commerce tags. Available Quick Commerce tags include:
- Order ID – A unique identifier is assigned to each order.
- Customer Name – Name of the customer who placed the order.
- Contact Person Name – The assigned contact person handles the order.
- Contact Person Number – Phone number of the assigned contact person.
- Payment Status – Indicates the current payment status of the order (e.g., Paid, Pending).
- Tipping – The customer gives the tip amount to the contact person.
- ETA – Estimated time for the order to be delivered to the customer.
- Cart Items – List of products included in the customer’s order.
- Order Status – Current progress stage of the order (e.g., Processing, Completed).
- Order Total – Total amount charged for the order.
- QCommerce URL – links to the order tracking page
- Date – Date when the order was placed.
- Customer Details – Contact information and customer address.
- The admin can enable or disable each email using the Update Settings option.

- The admin can send a test email to preview the format.
- For the Order Email to the Contact Person, the admin must select the specific order status upon which the email will be triggered and sent to the contact person.

- If needed, the admin can add more email templates by clicking the Add New button.

Front End Impact
- New Order Email for Admin
- New Order Email for Customer
- Order Email for the Contact Person
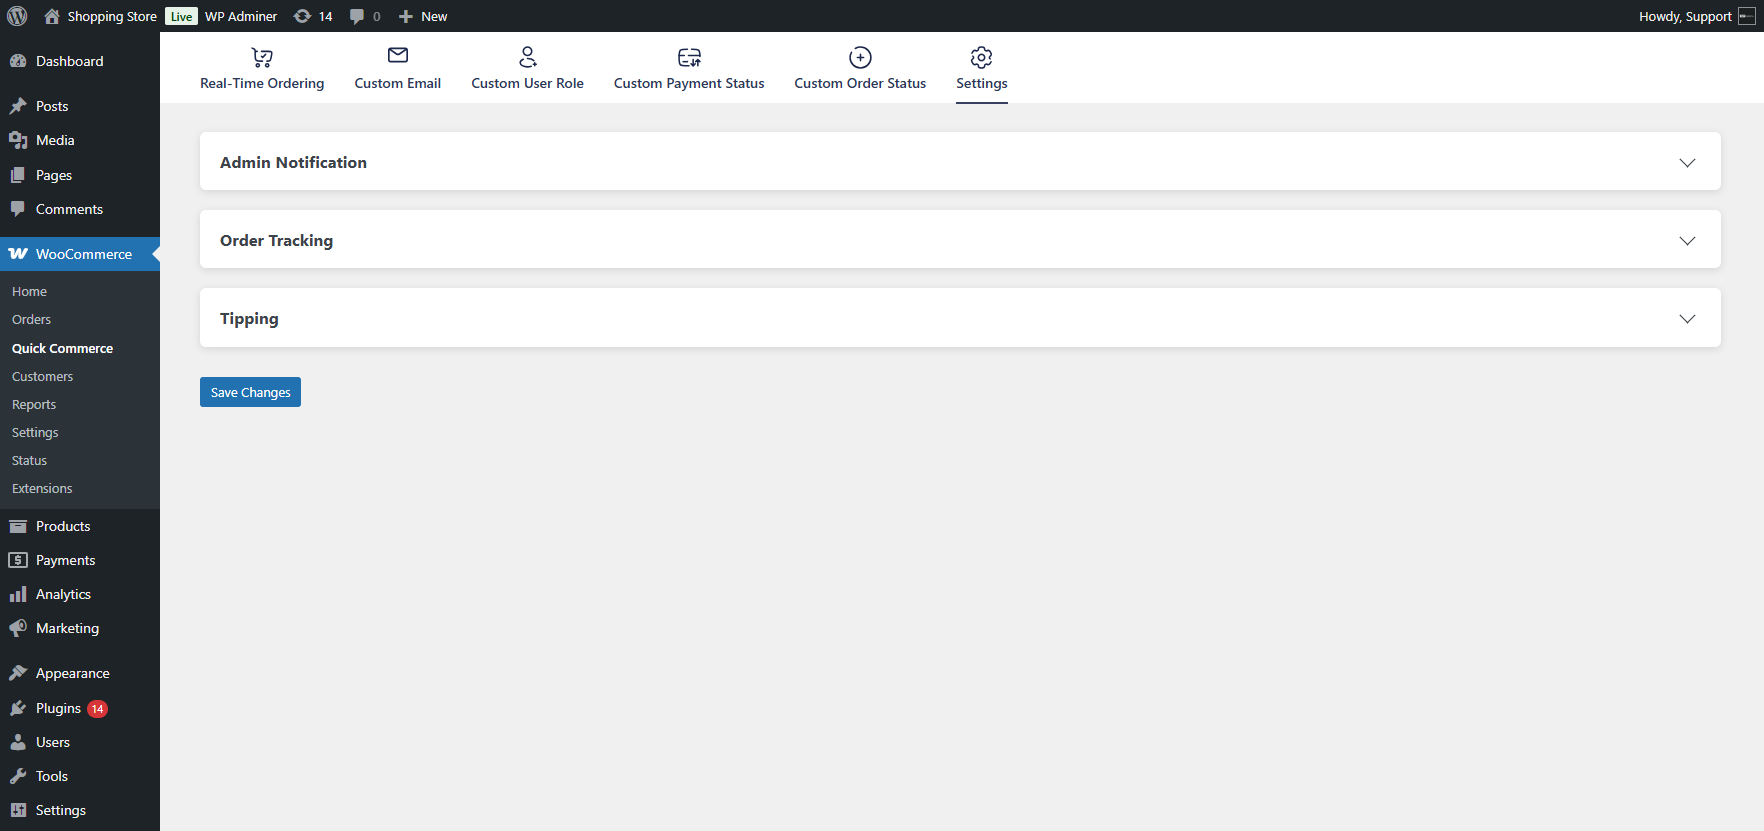
Settings
↑ Back to top- Go to WordPress Admin Dashboard > WooCommerce > Quick Commerce > Custom Email.
- There are three settings metaboxes:
- Admin Notification
- Order Tracking
- Tipping
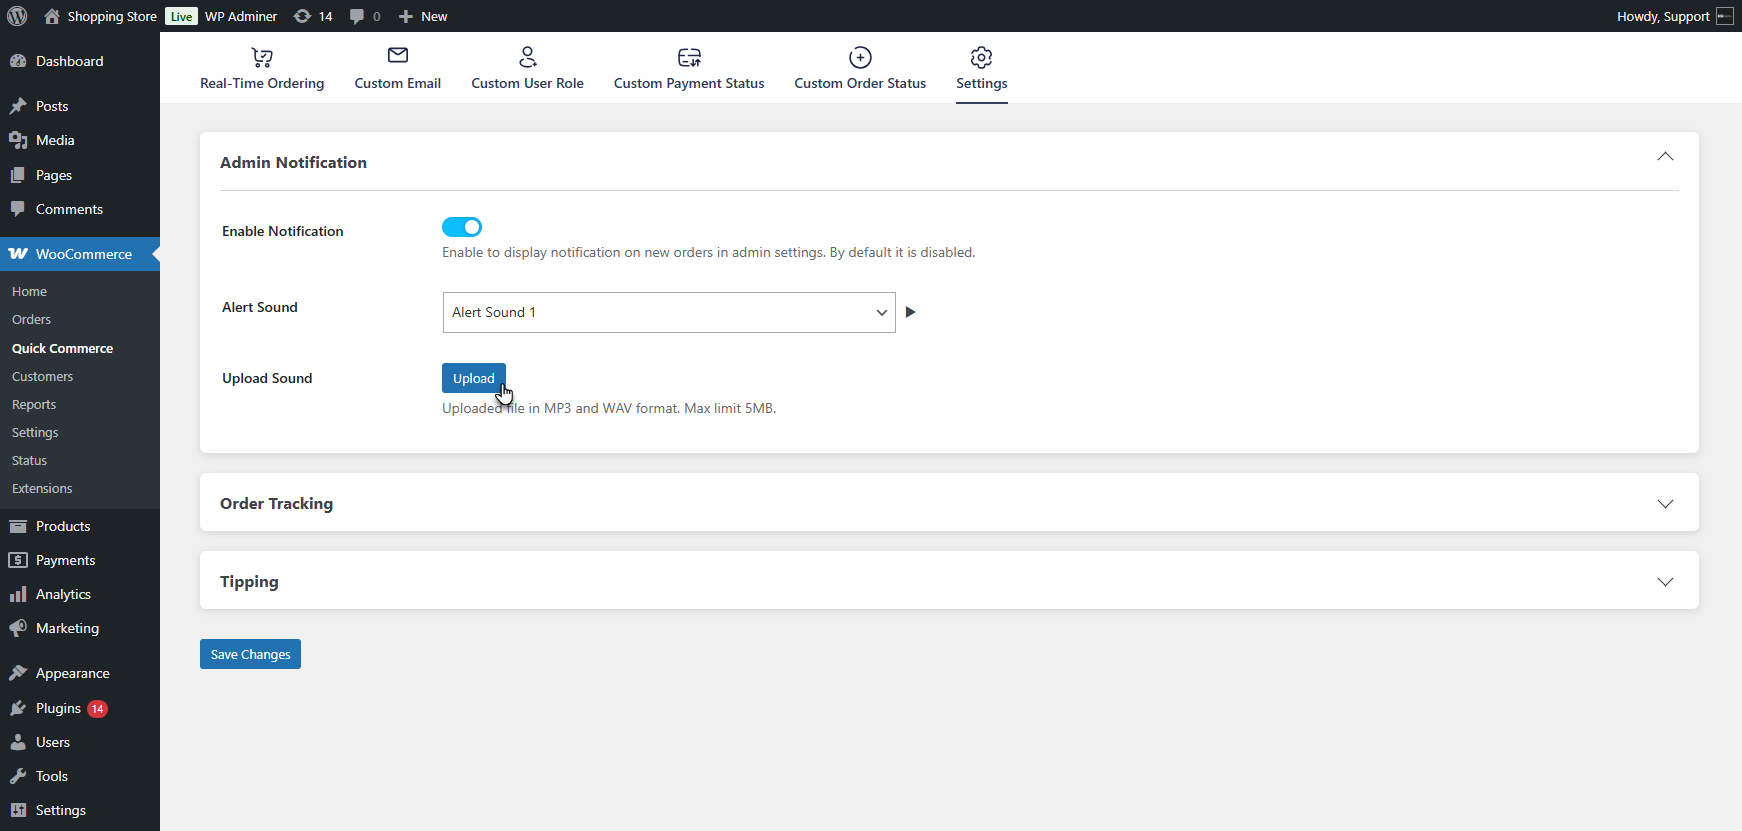
Admin Notification
↑ Back to top- Click on the Admin Notification box to expand the settings. Enable the notification option to notify the admin when a new order is placed.
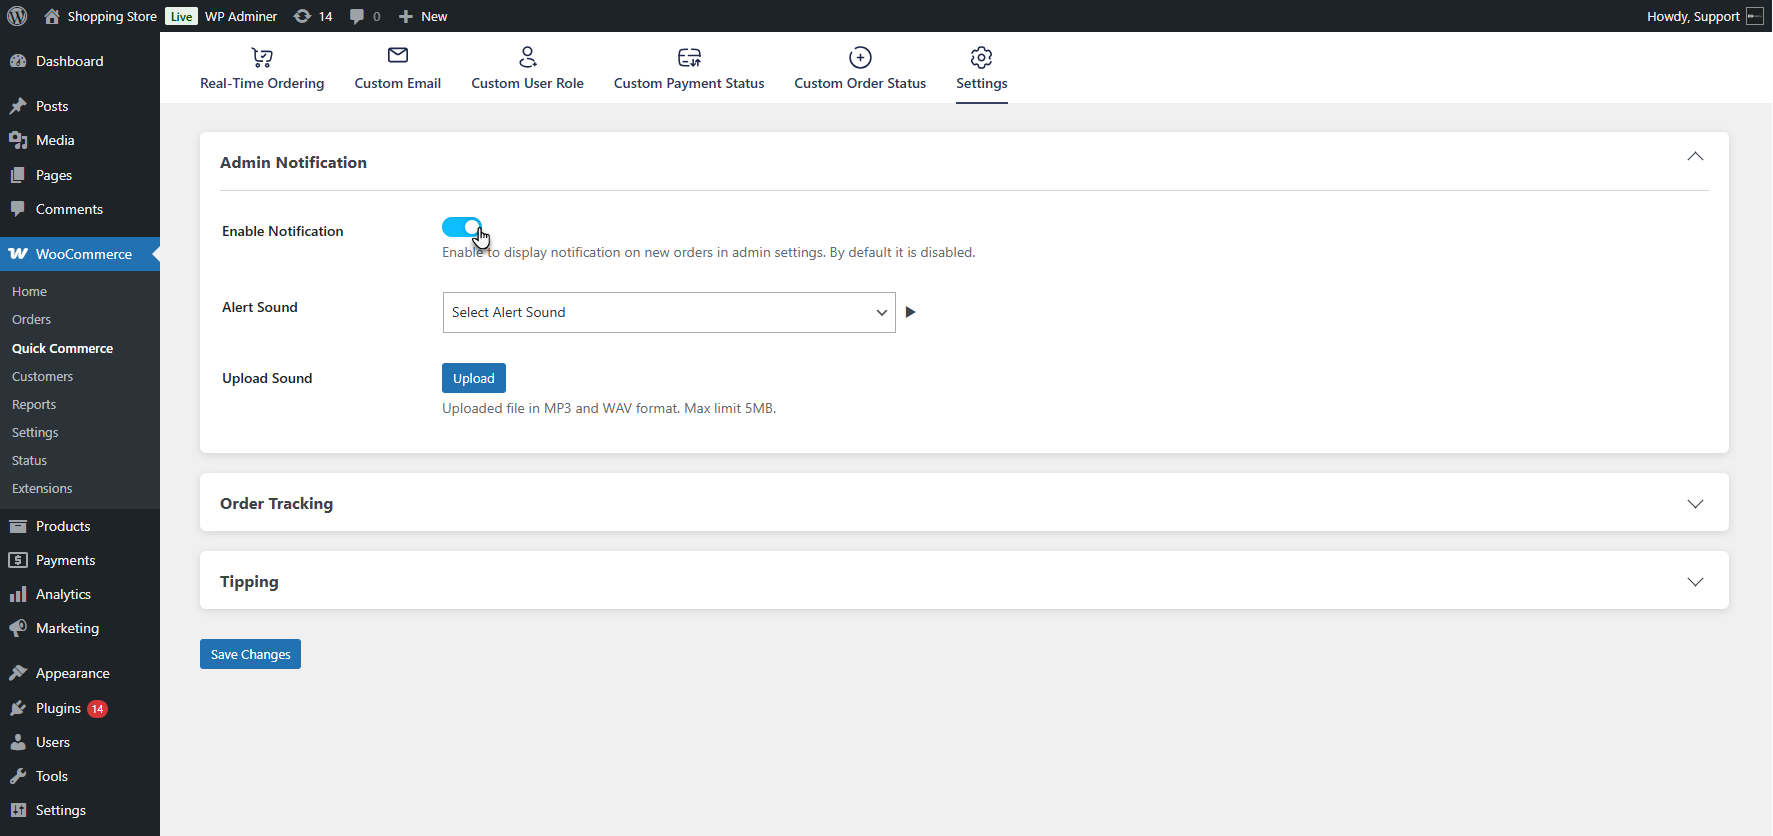
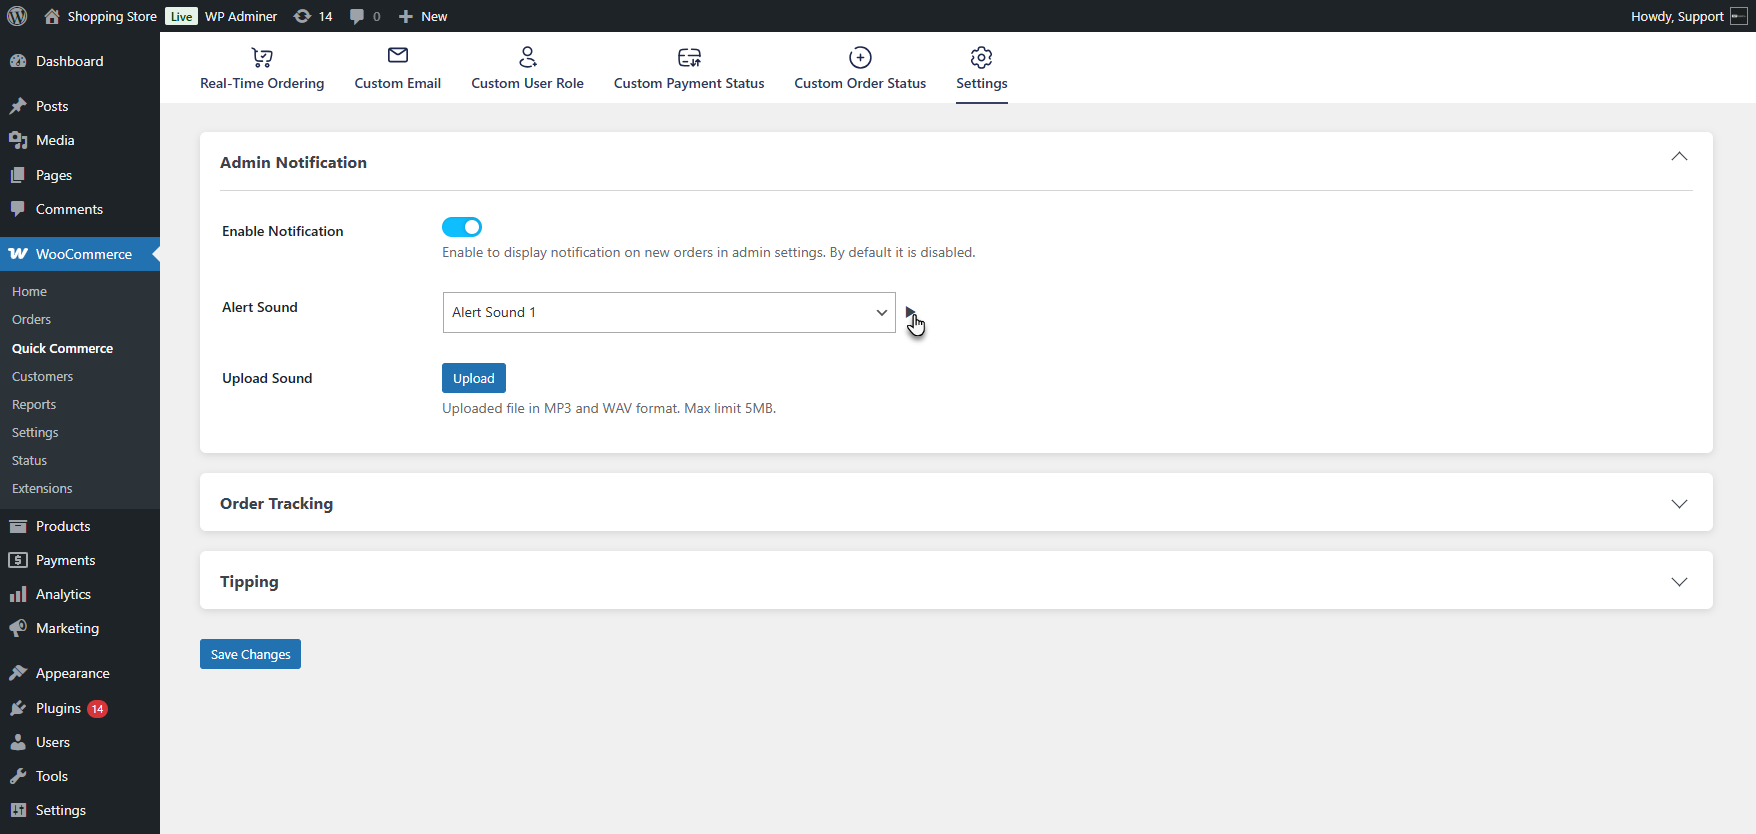
- Select an alert sound using the Alert Sound dropdown.
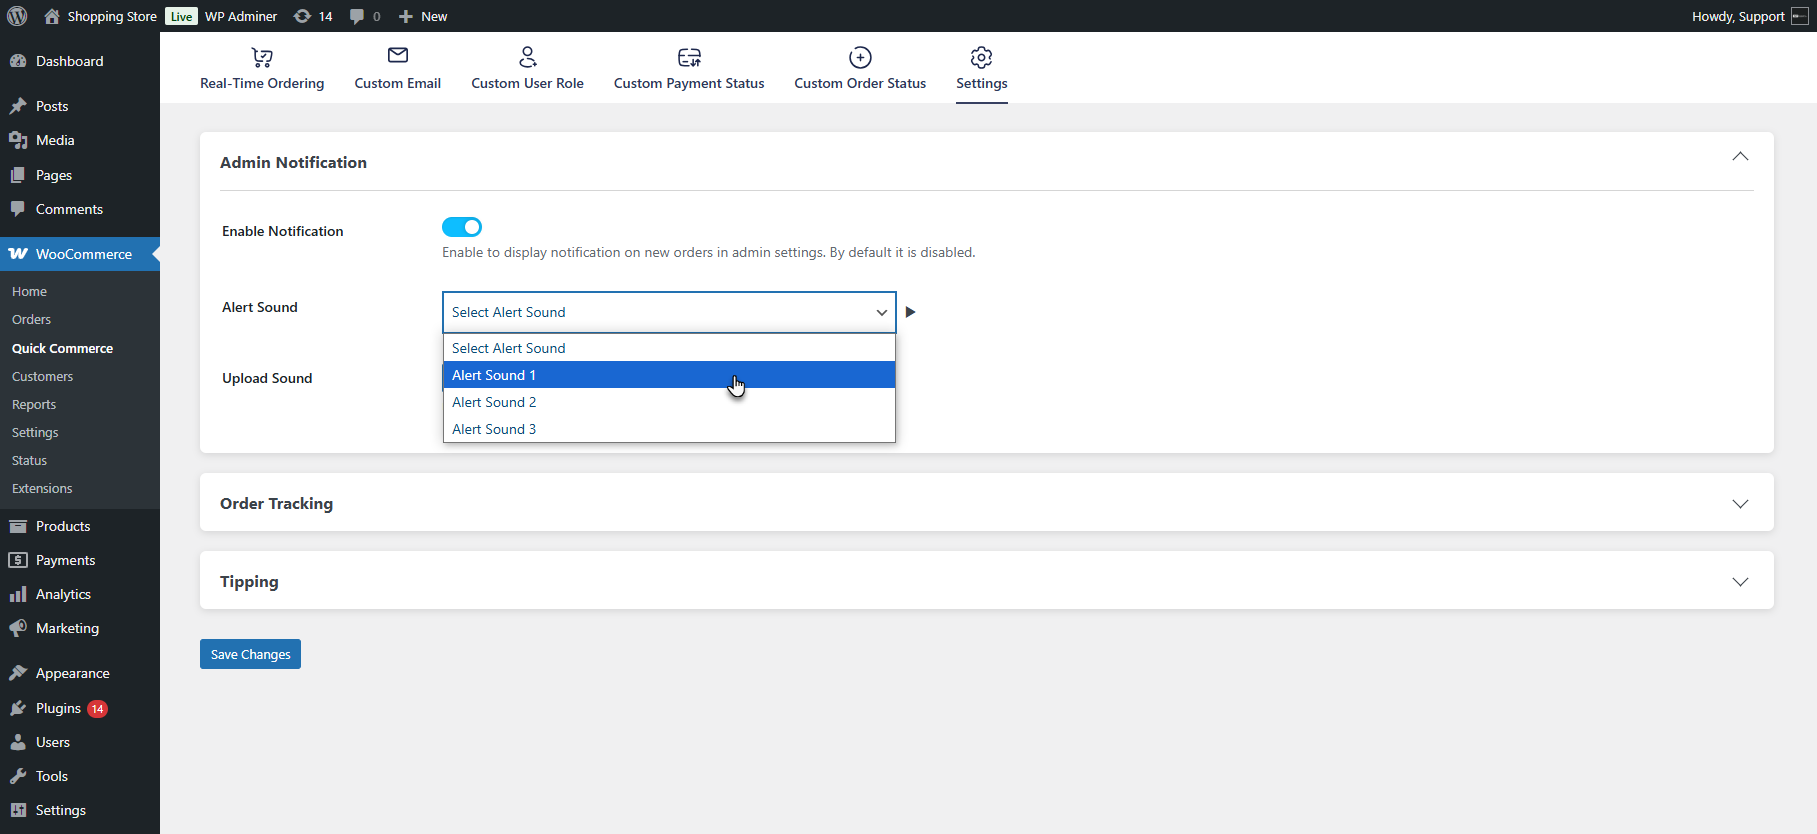
- Use the Play button to preview the selected sound.
- The admin can also upload a custom alert sound from their local system using the Upload Sound option.
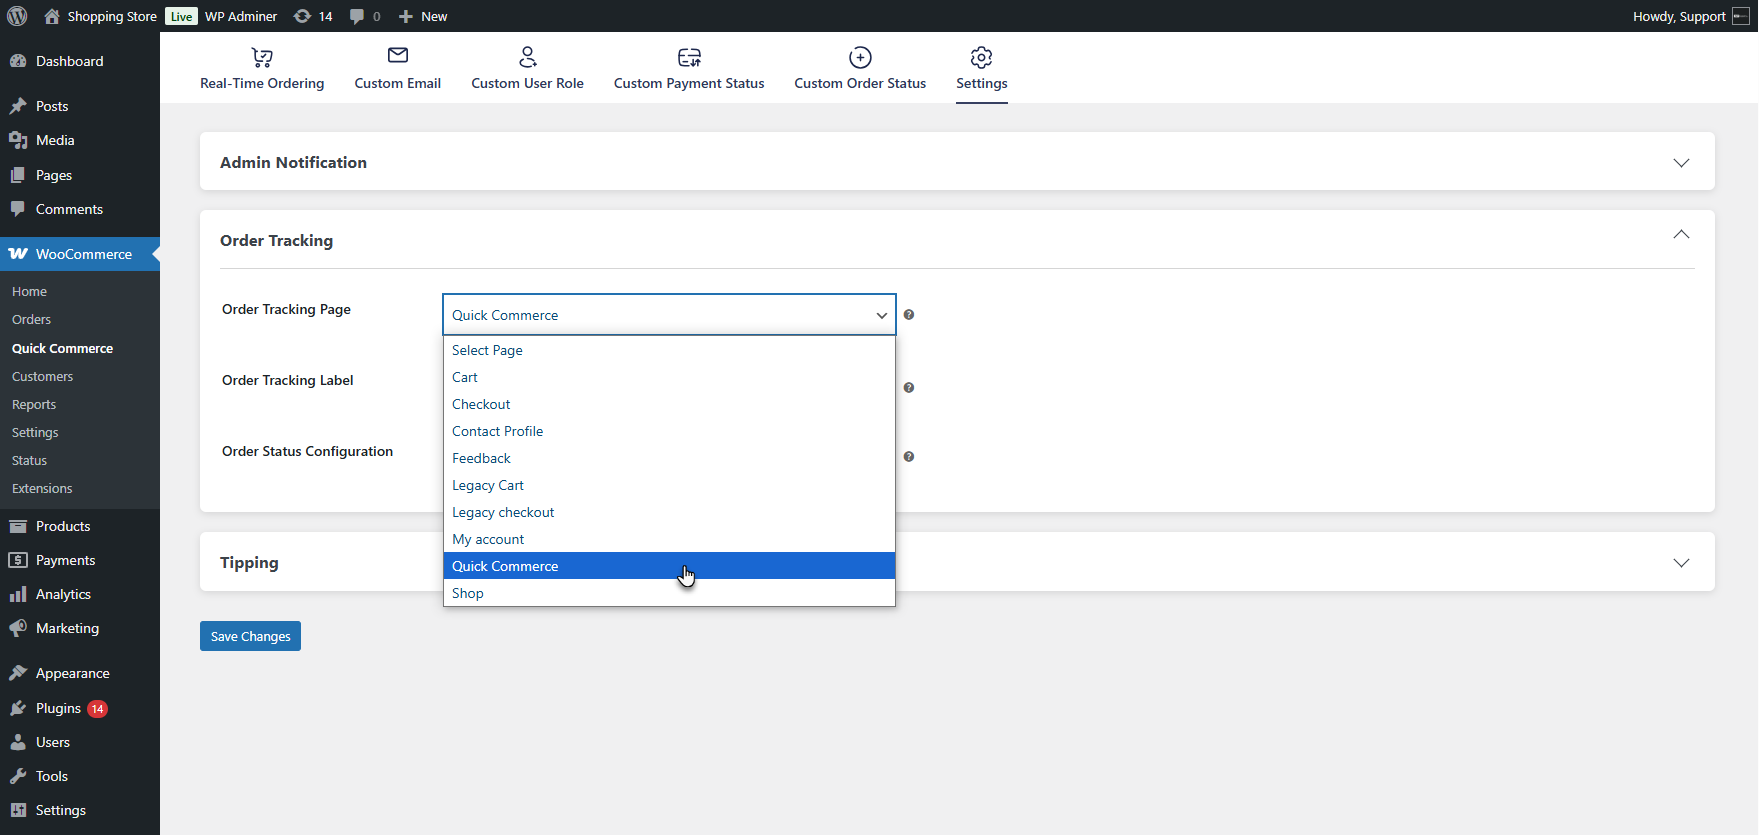
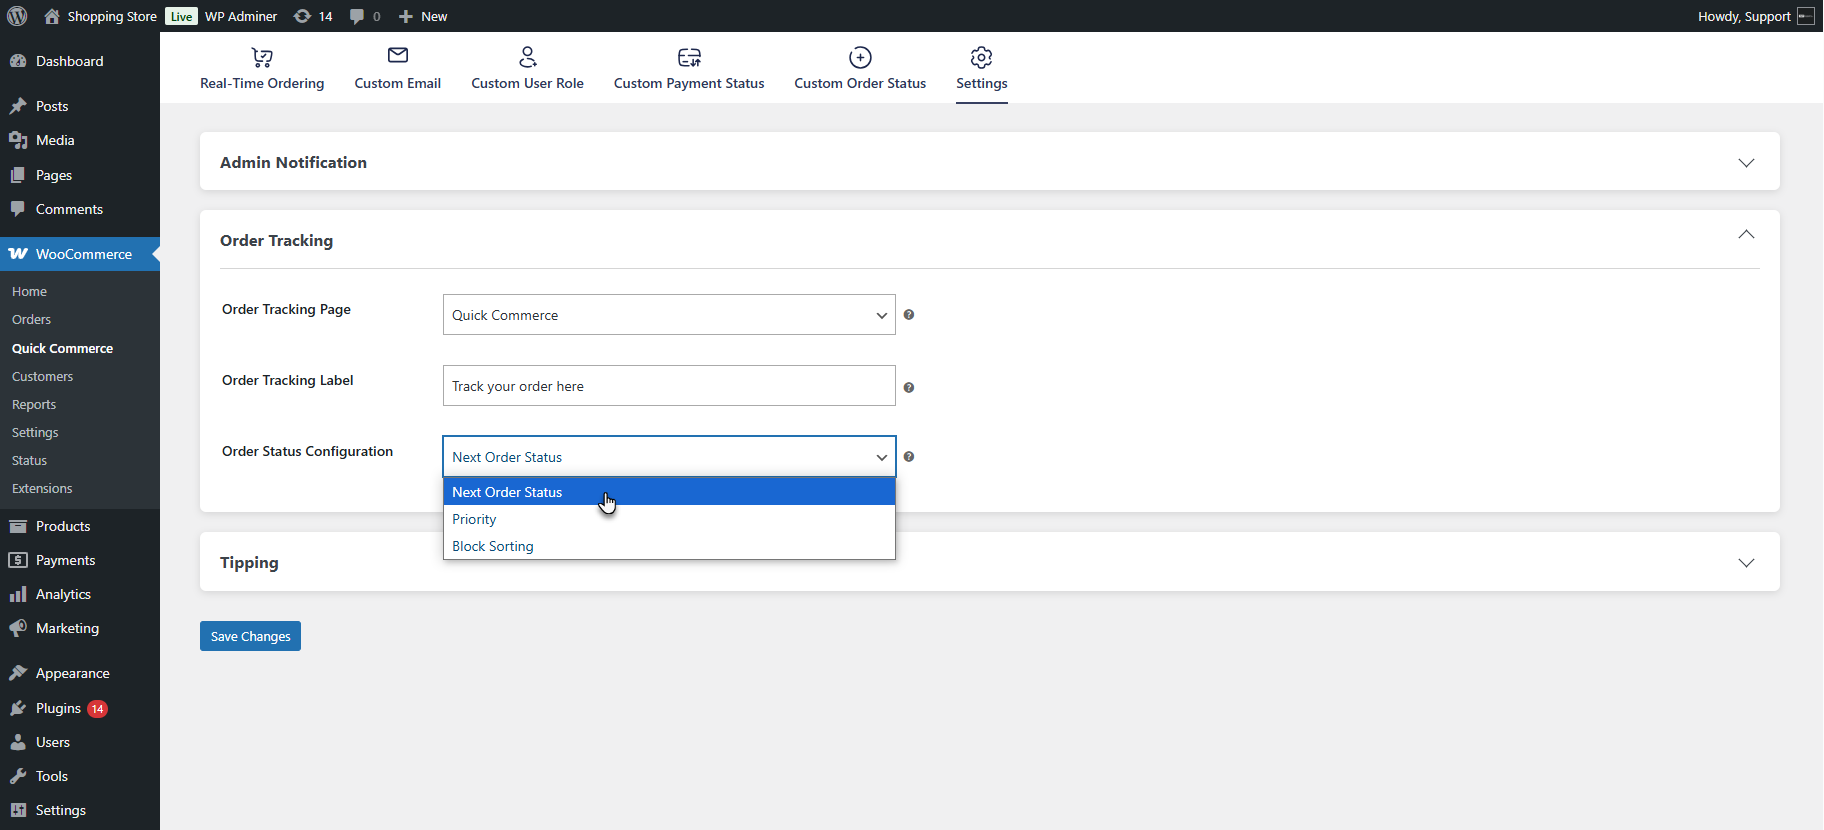
Order Tracking
↑ Back to top- In the Order Tracking metabox, select the Order Tracking Page from the dropdown list. An order tracking block will be added to the page. When the user clicks on the Track my order on the thank you page, it will redirect to the page selected here.
- Update the Order Tracking Button Label to customize the text shown on the button on the Thank you page.
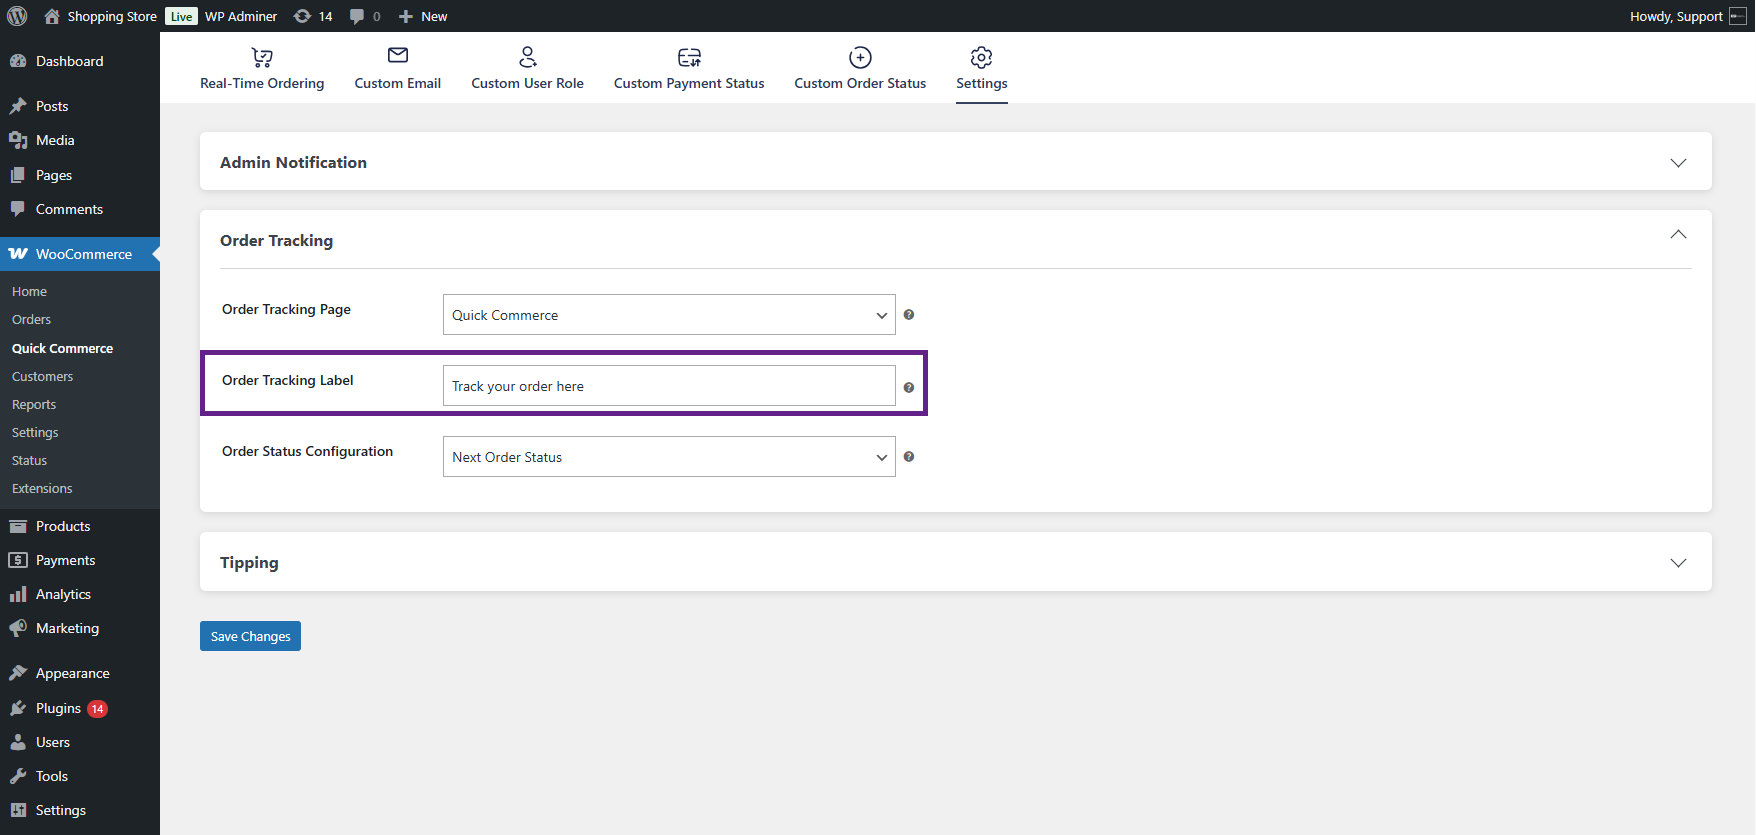
- Select the Order Configuration option from the available three choices:
- Next Order Status – the order status will change according to the next status set in Custom Order Status.
- Priority – the status will follow the priority level defined in Custom Order Status.
- Block Sorting: The status will proceed based on the sorting order configured by the admin in the Order Tracking block.
- For Block Sorting: When the admin places the Order Tracking block on a page, they can arrange the sequence of order statuses as desired.
Tipping Settings
↑ Back to top- Enable the tipping feature by toggling on the Enable Tipping option. This will add a tipping field on both the Cart and Checkout pages, allowing customers to leave a tip.
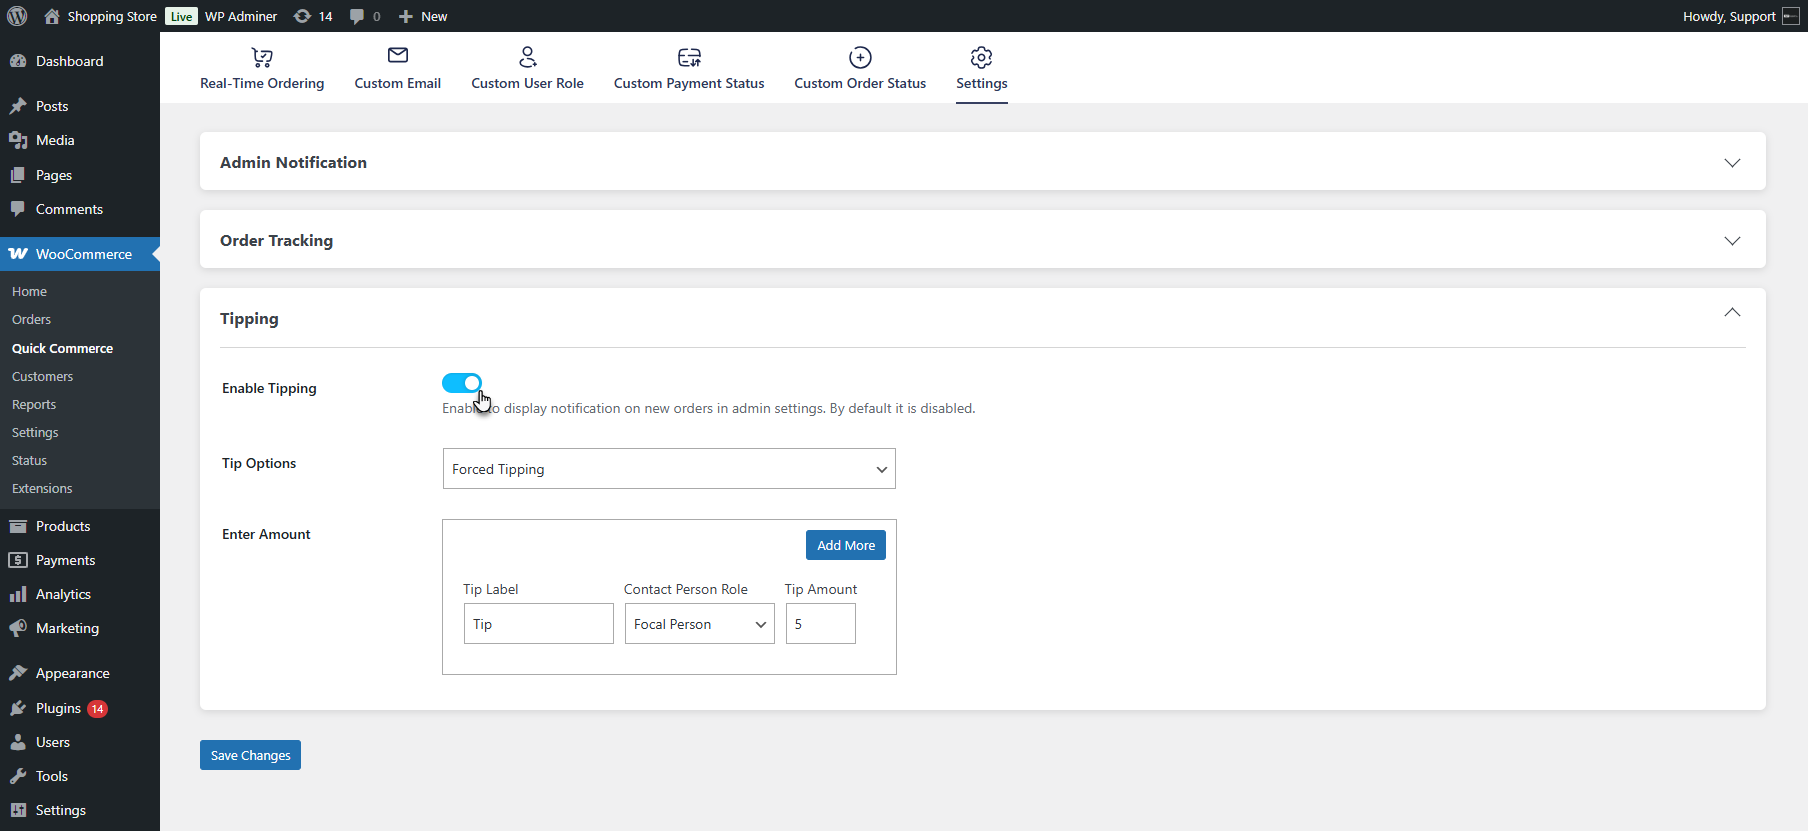
- Choose the Tip Type from the dropdown – options include Forced or Optional tipping.
- Forced Tipping: Tipping is mandatory, and a fixed amount is automatically added to the order during checkout.
- Optional Tipping: Customers can add a tip based on their preference during checkout.
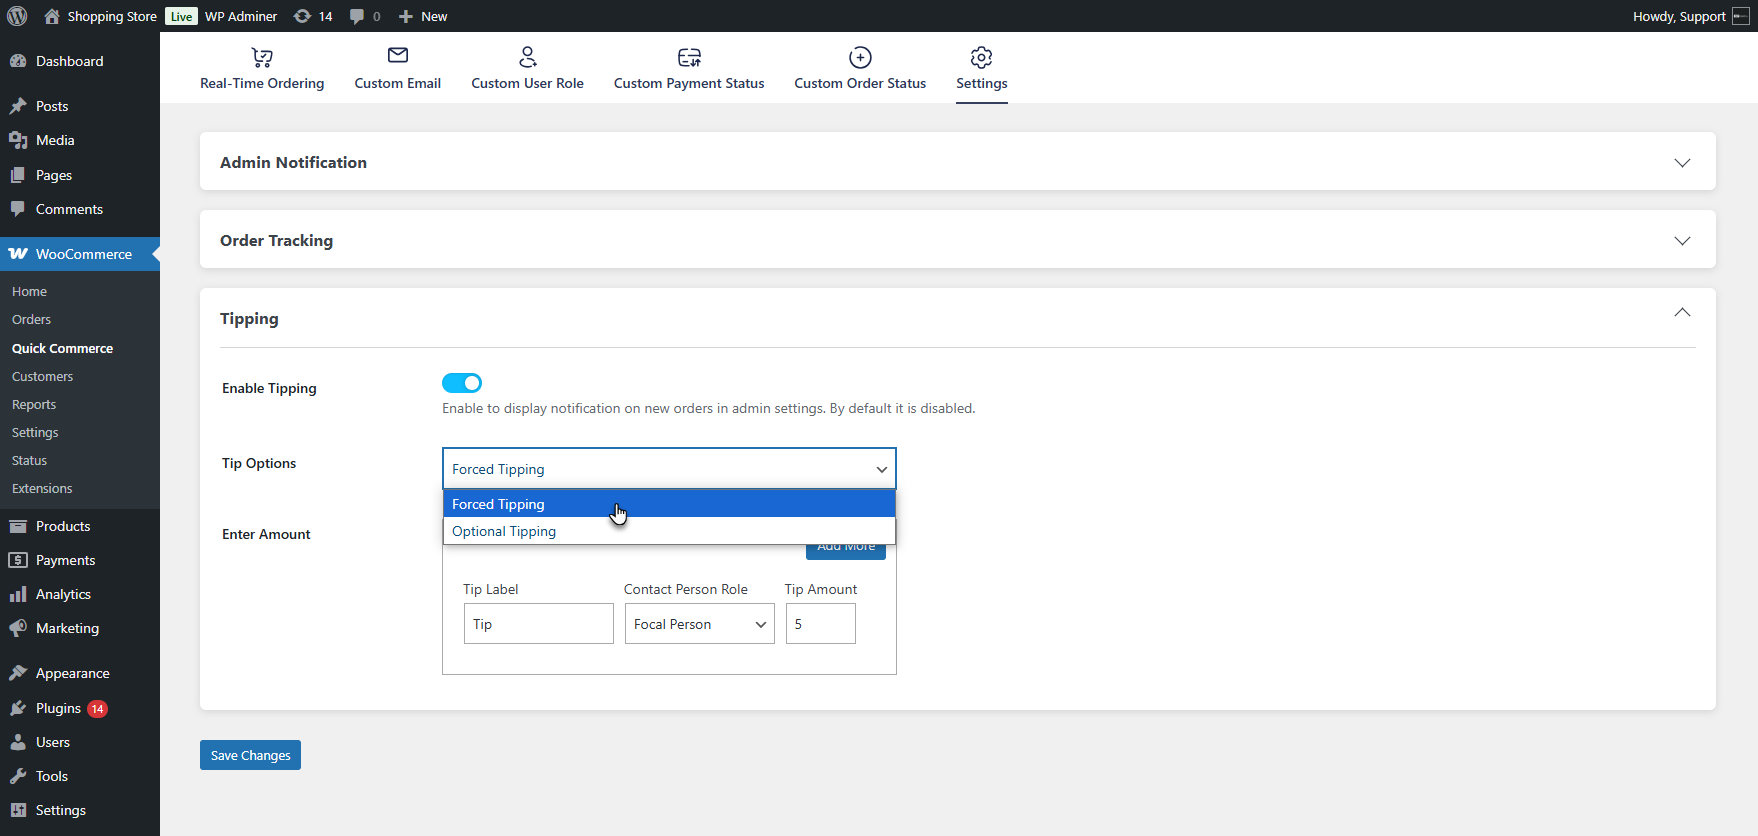
- When Forced Tipping is selected, add a label to be displayed during the tipping process, select the contact person role for receiving the tip, and set the tip amount.
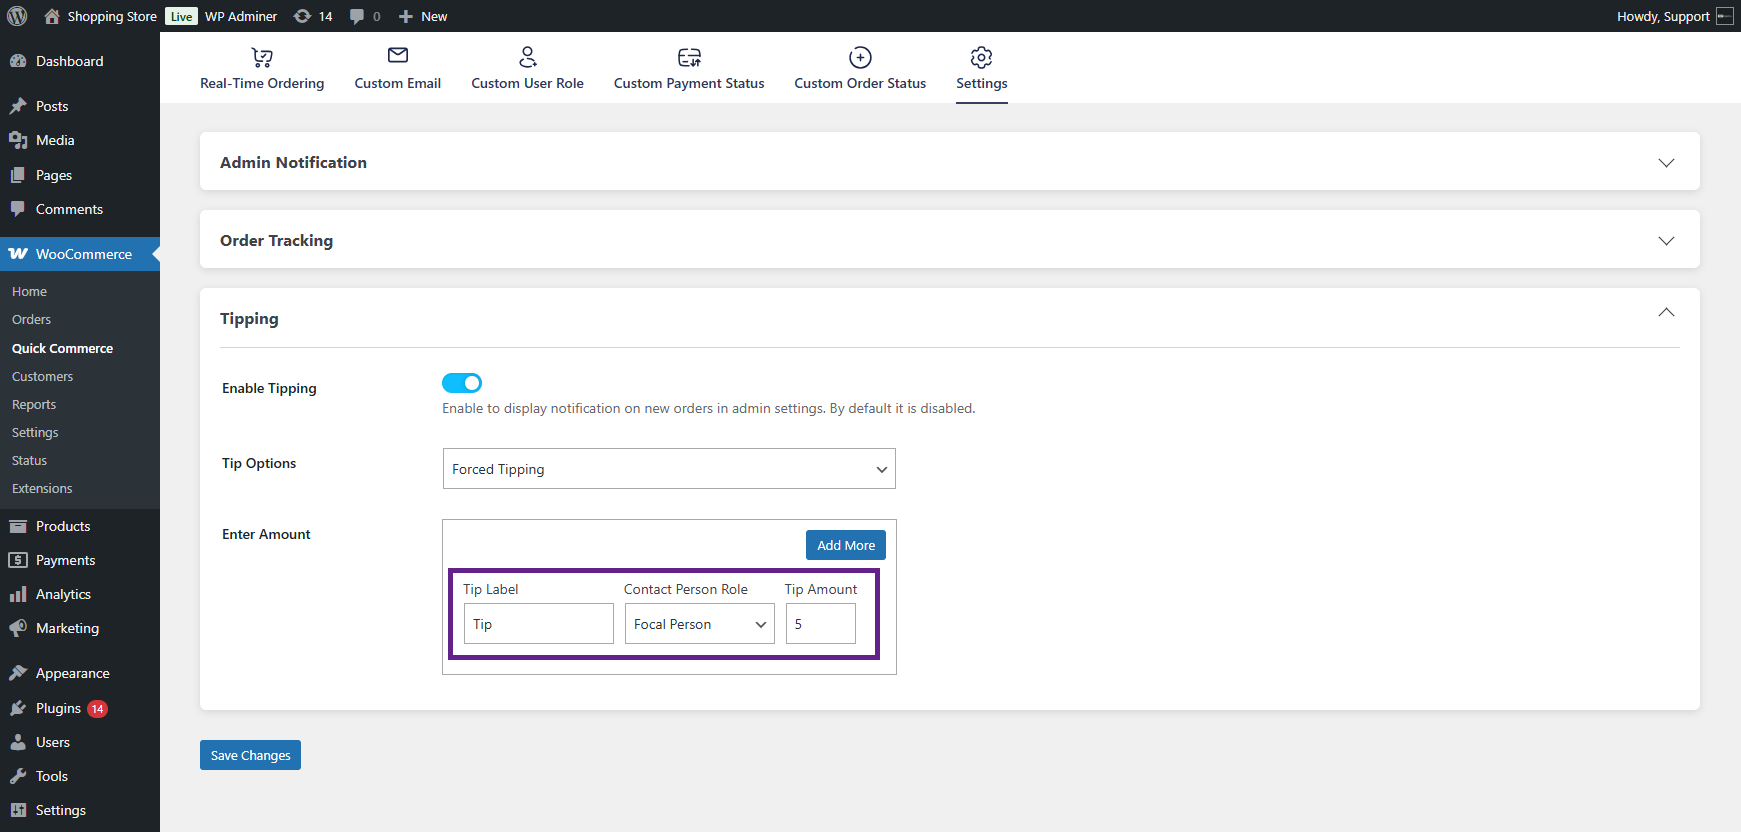
- You can also add multiple Tipping Levels if needed.

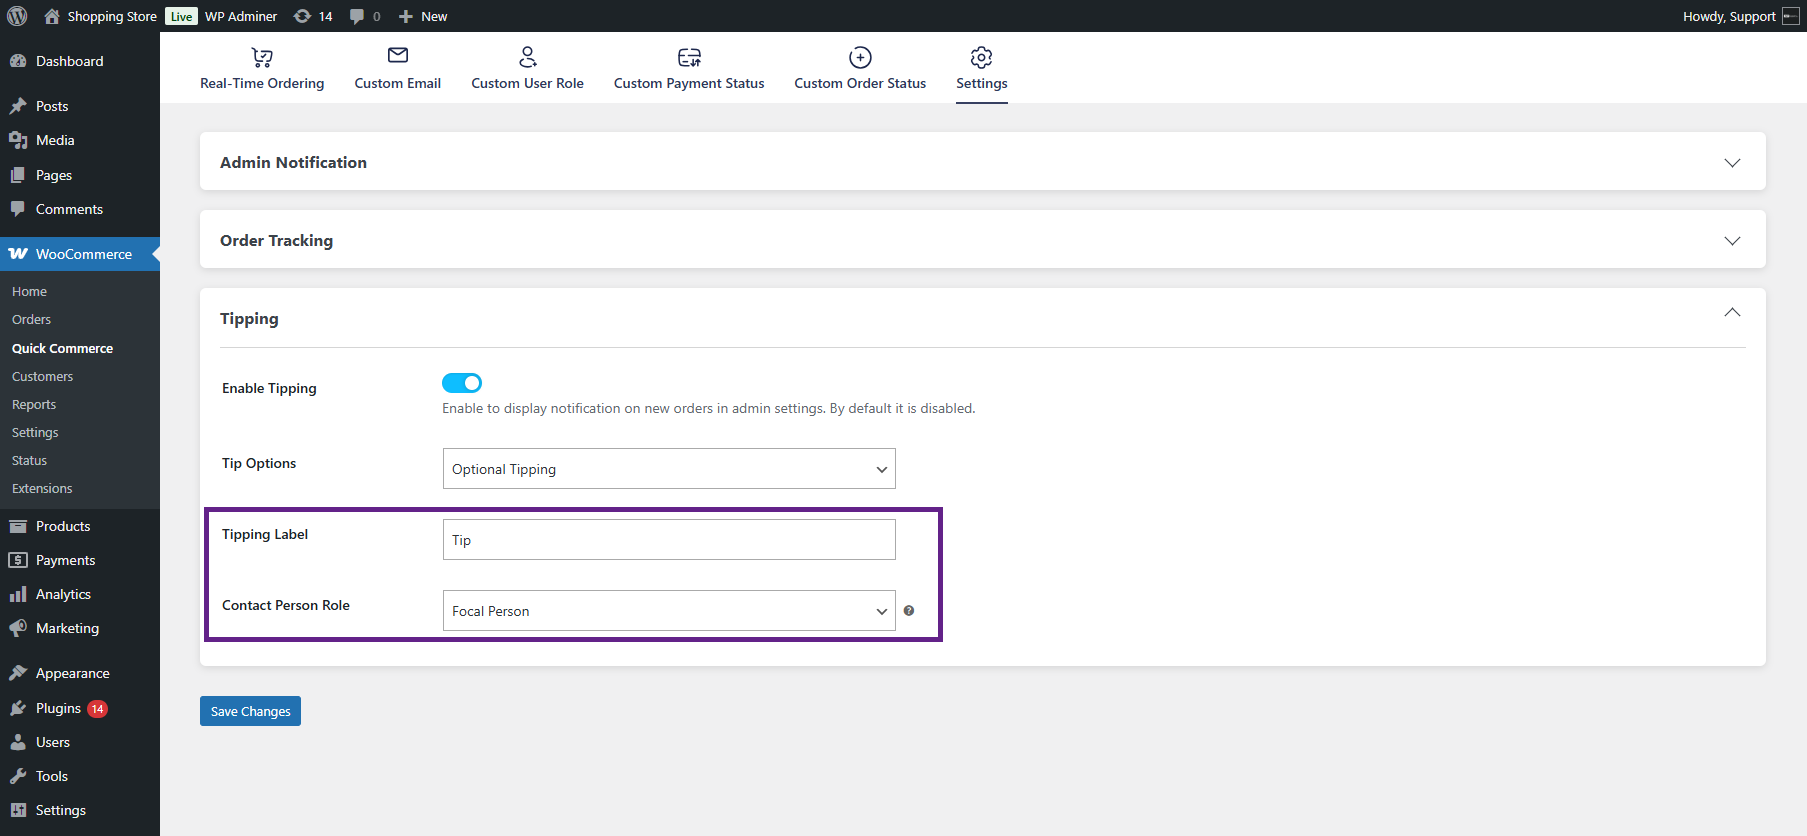
- When Optional Tipping is selected, add a Tipping Label and simply choose the Contact Person Role to whom the optional tip will be assigned.
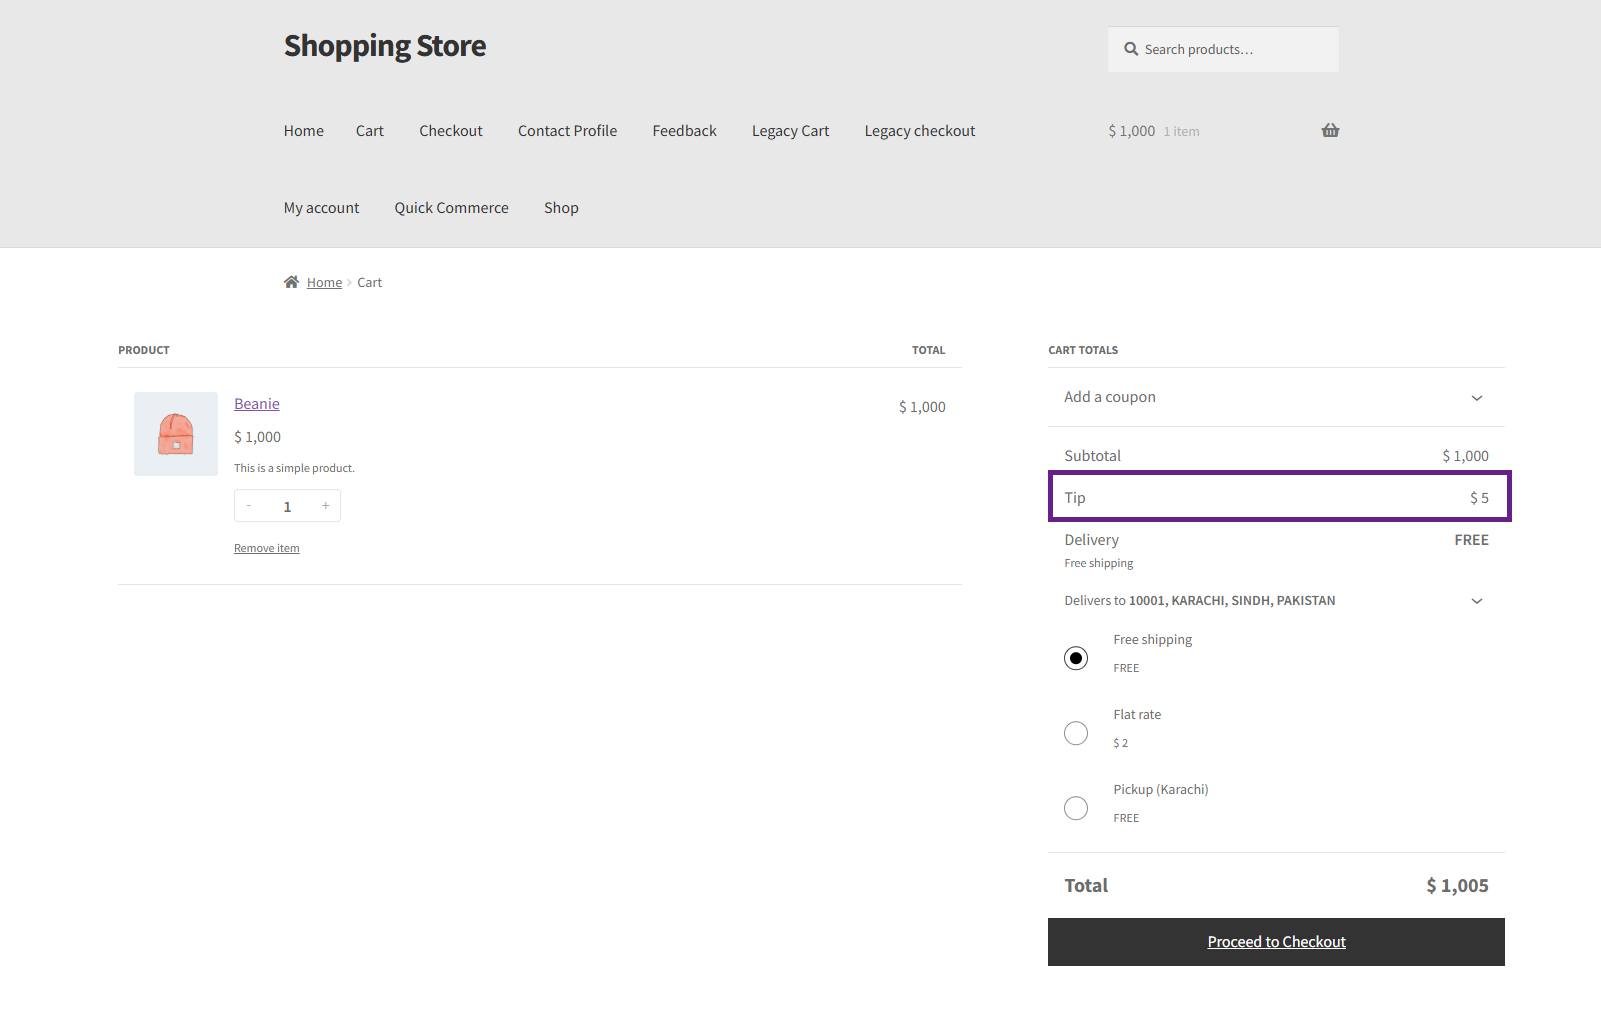
- The tipping option will appear on the Cart and Checkout page. This is forced typing, in which the user has to pay the defined tip.
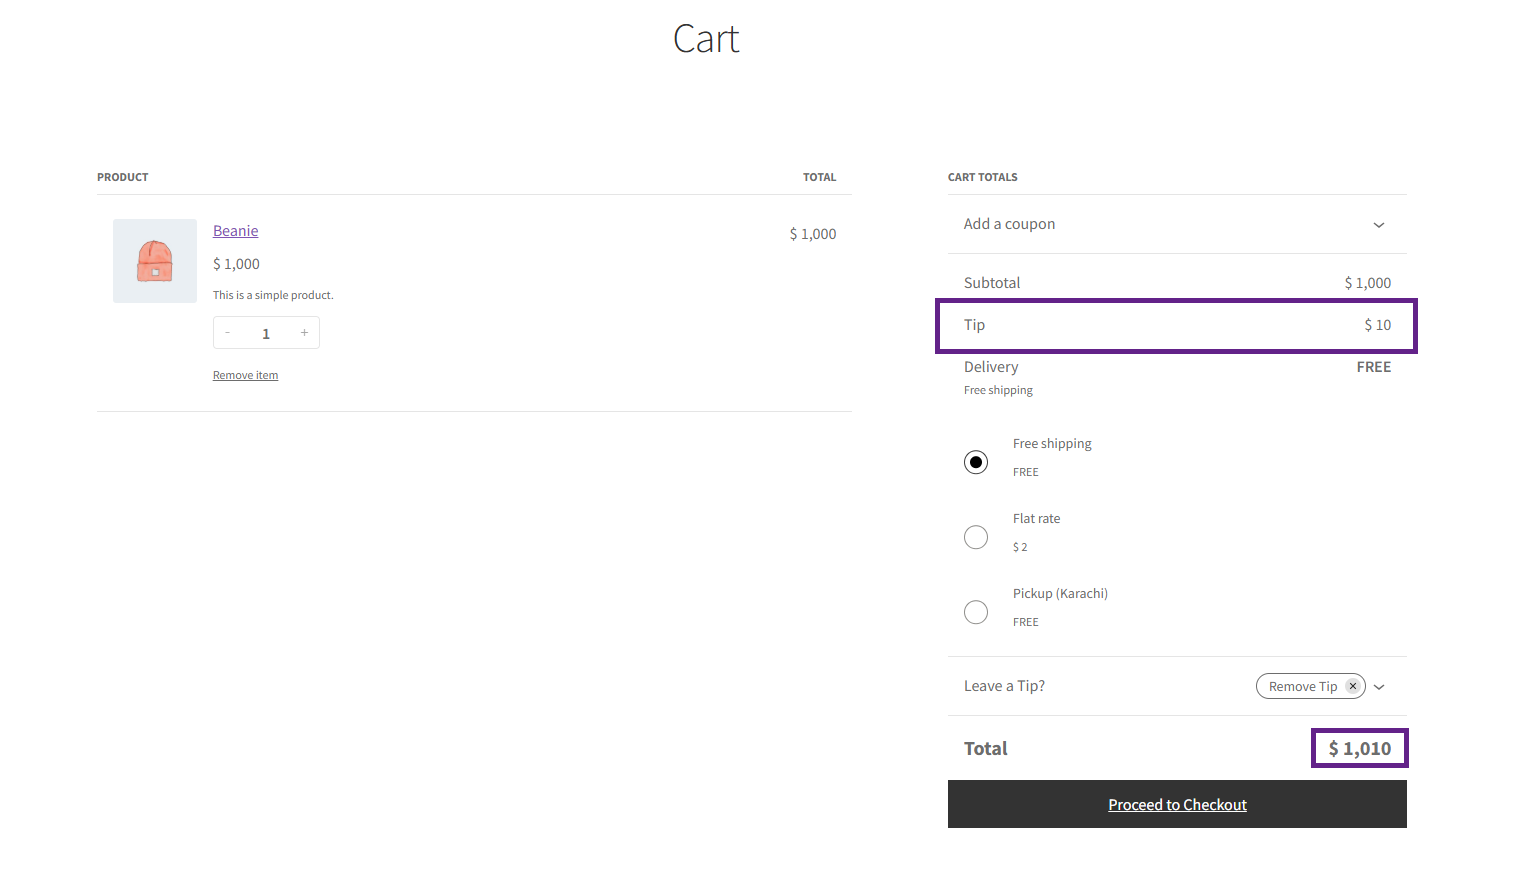
- This is the optional tipping, which allows users to add a tip. Add a tip in the Leave a Tip field and click on Apply.
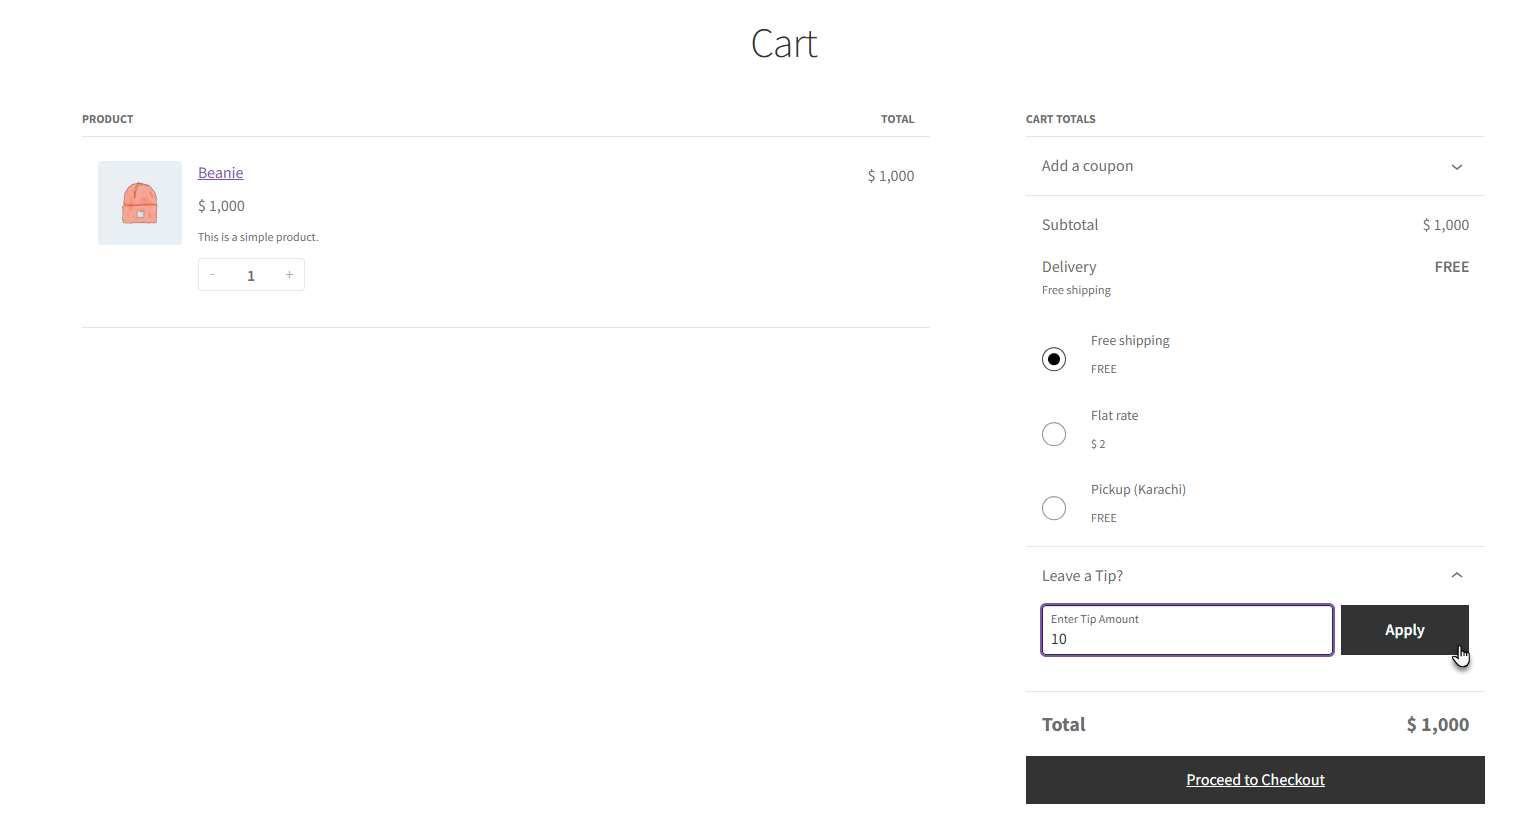
- The Tip will be added to the Cart Total and Checkout Page. The user can remove the Tip using the Remove Tip.
Feedback
↑ Back to top- The admin can use the Feedback block to enable customers to provide feedback to the Contact Profile upon completing an order on any page.
- Navigate to WooCommerce > Pages > Add New Page / Edit Page.
- Click on the “+” block inserter, search for Feedback Form, and click on it to add the block.
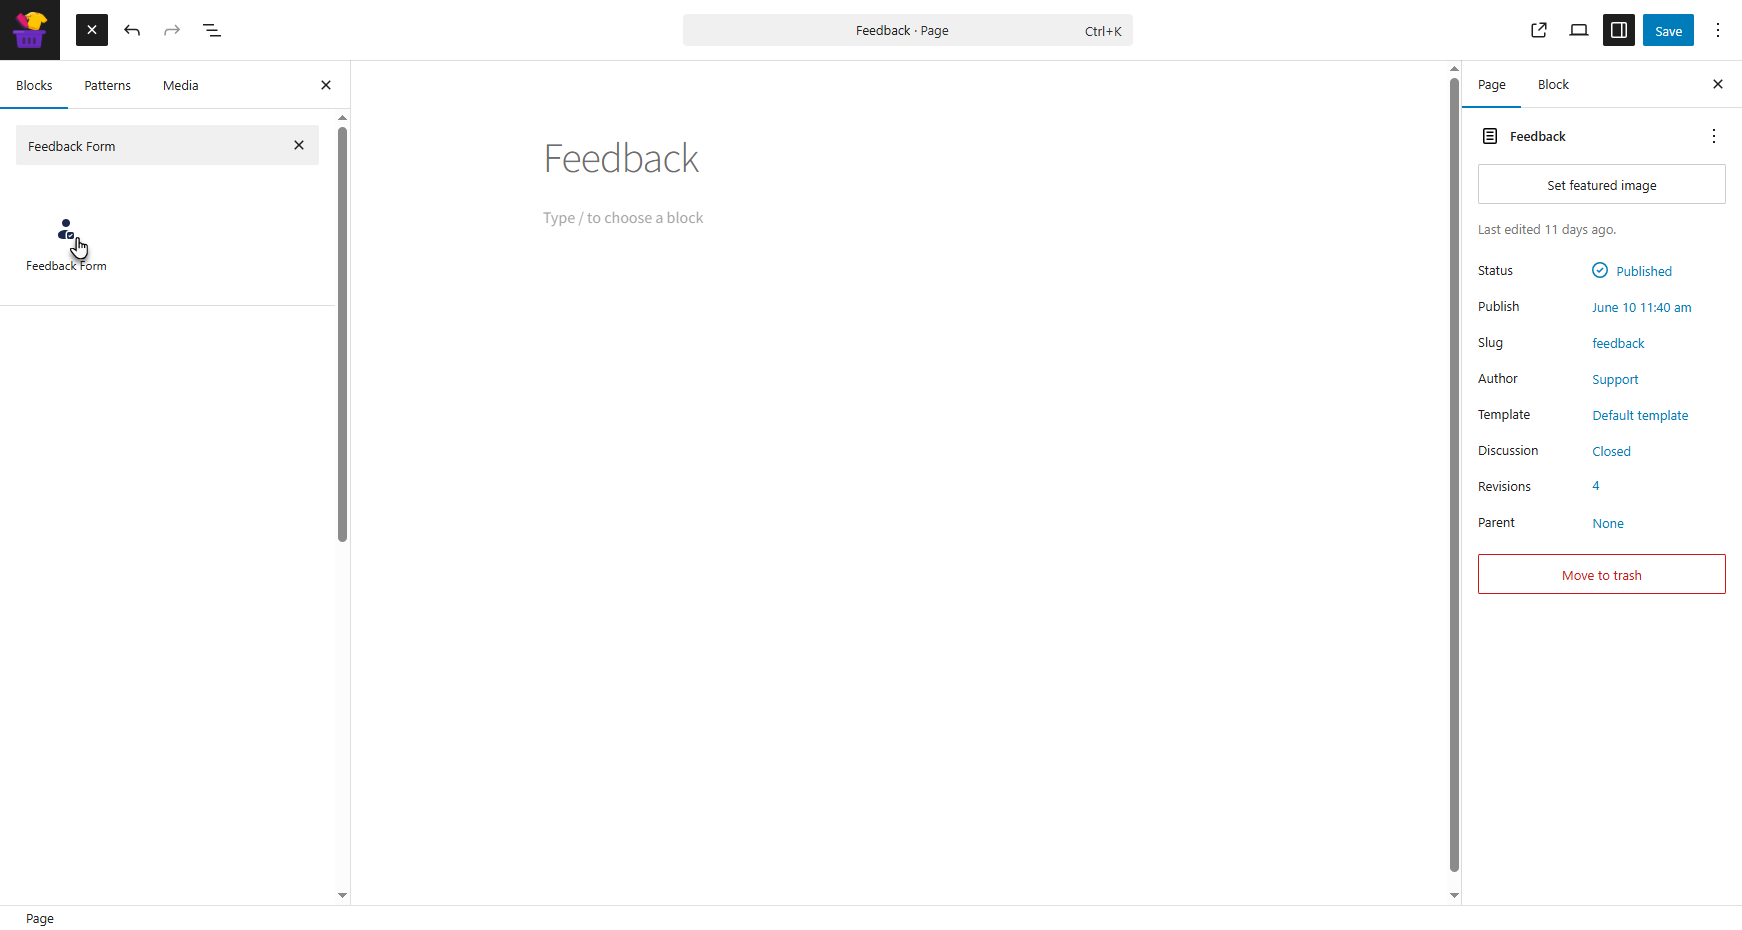
- The Feedback block will be added to the page. The admin can select the contact person for whom the feedback form will be active.
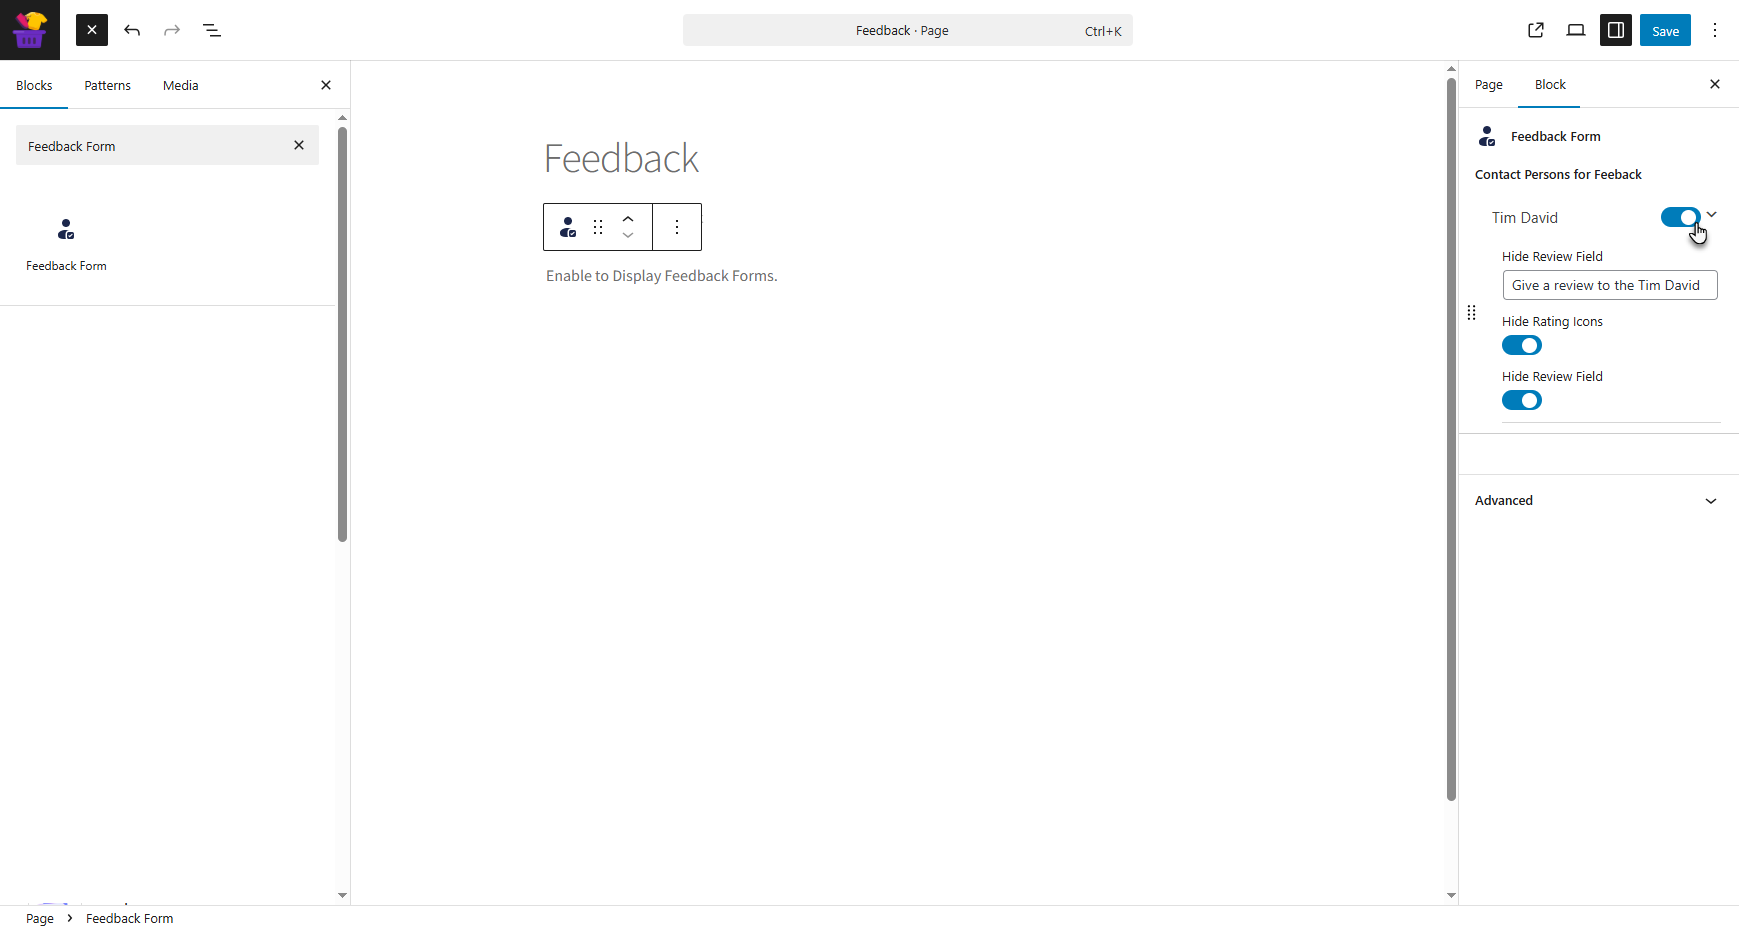
- Once enabled, a feedback template containing icons and a review field will appear.
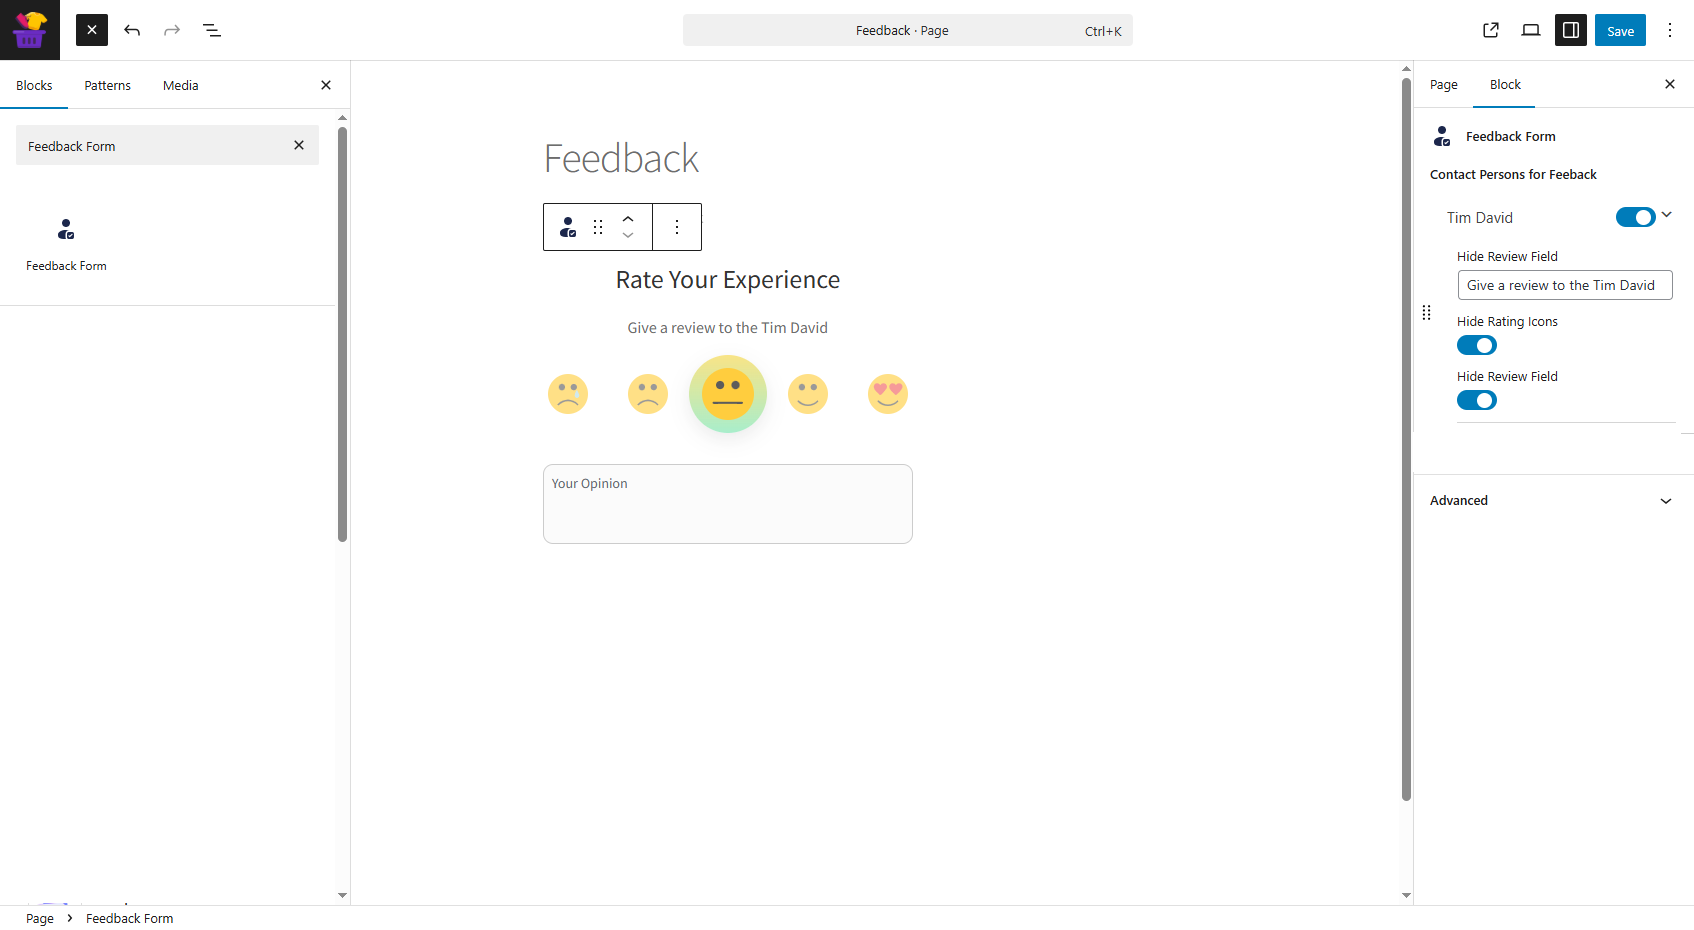
- The admin can hide the icons or the review field based on requirements.
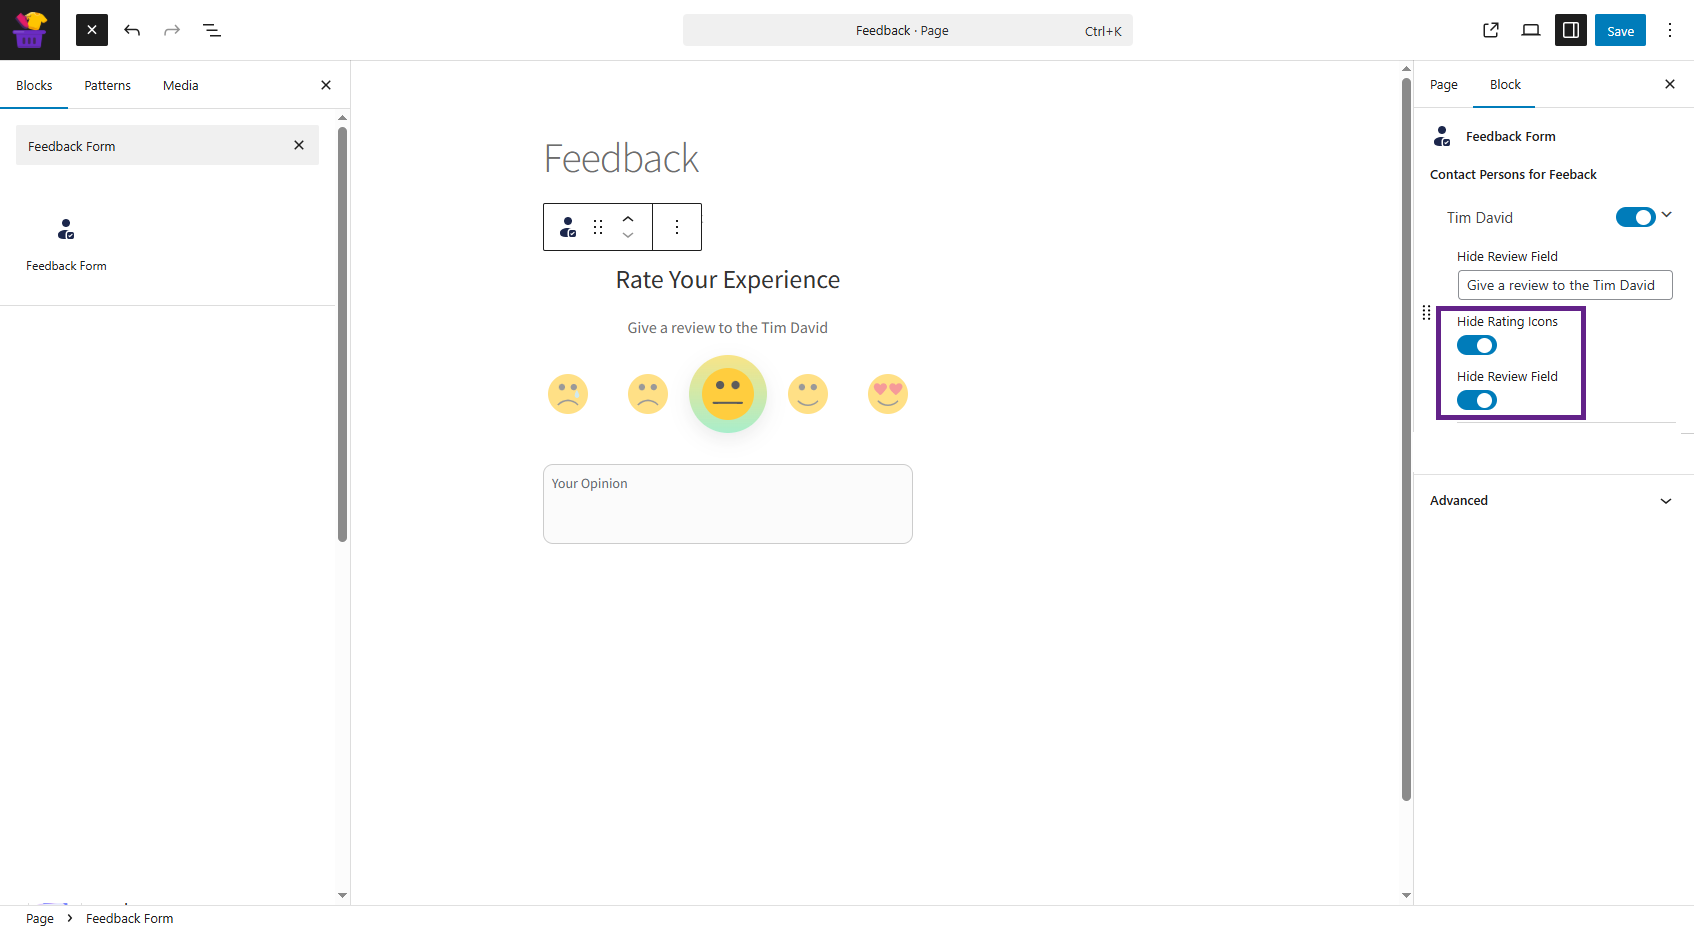
- Click Save or Update the page to apply the changes.

Front End Impact
↑ Back to top- Log in to your account.
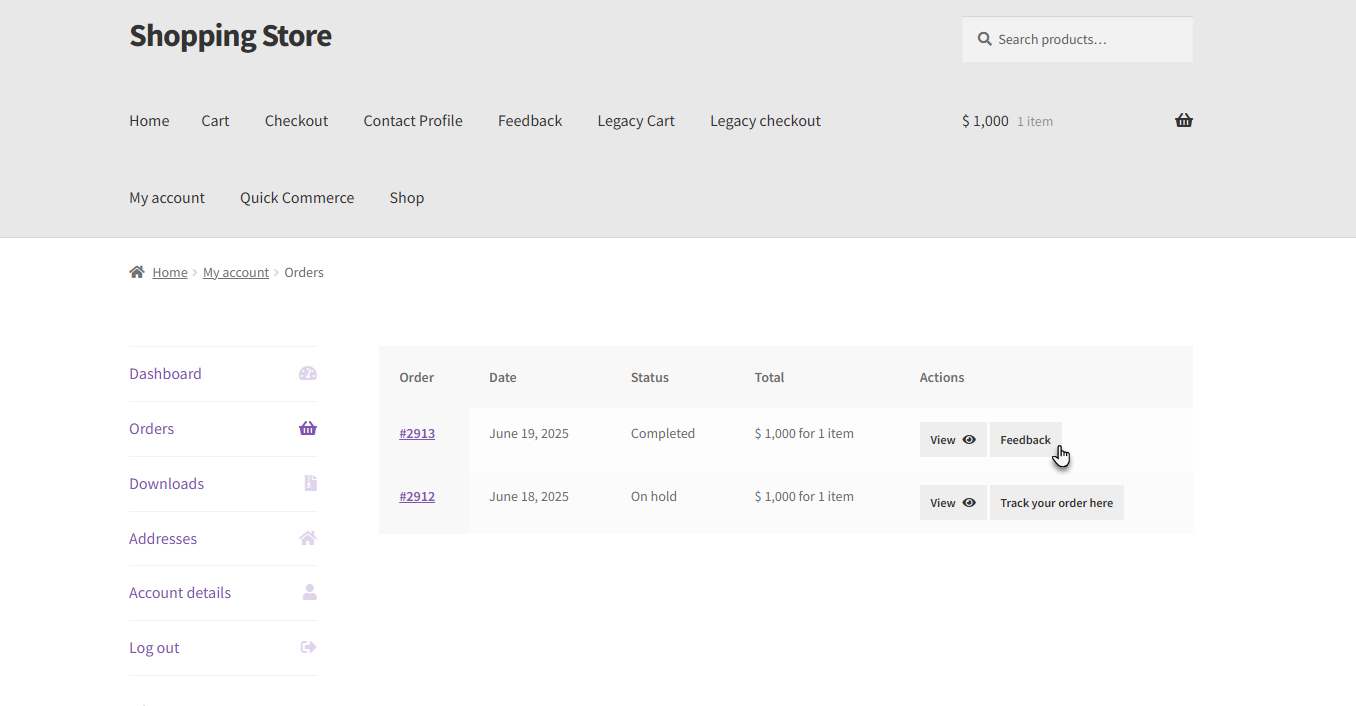
- Go to the My Account page and click on Orders.
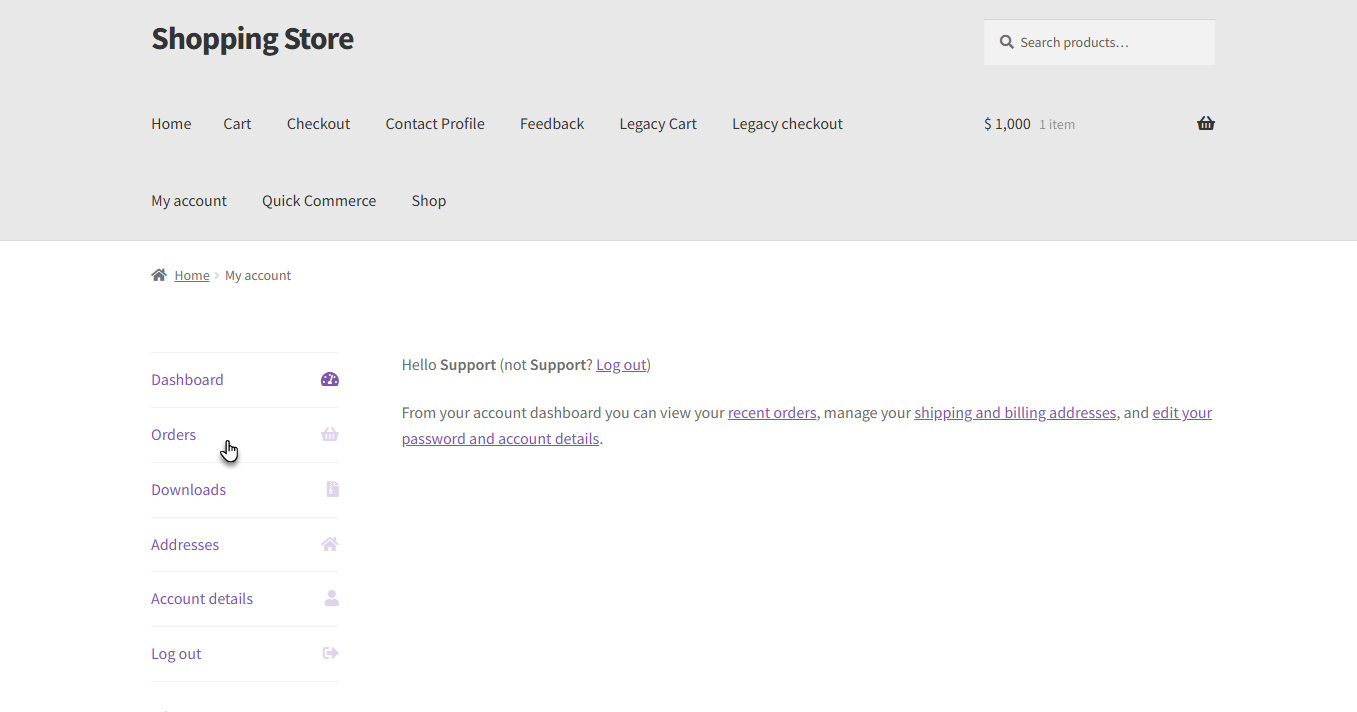
- A Feedback button will appear once the admin or contact person marks the order as completed. Click on the Feedback button.
- The Feedback form will appear. Select an icon to indicate your satisfaction level, add a review for the contact person, and click on the Submit Now button. Your feedback will be submitted.
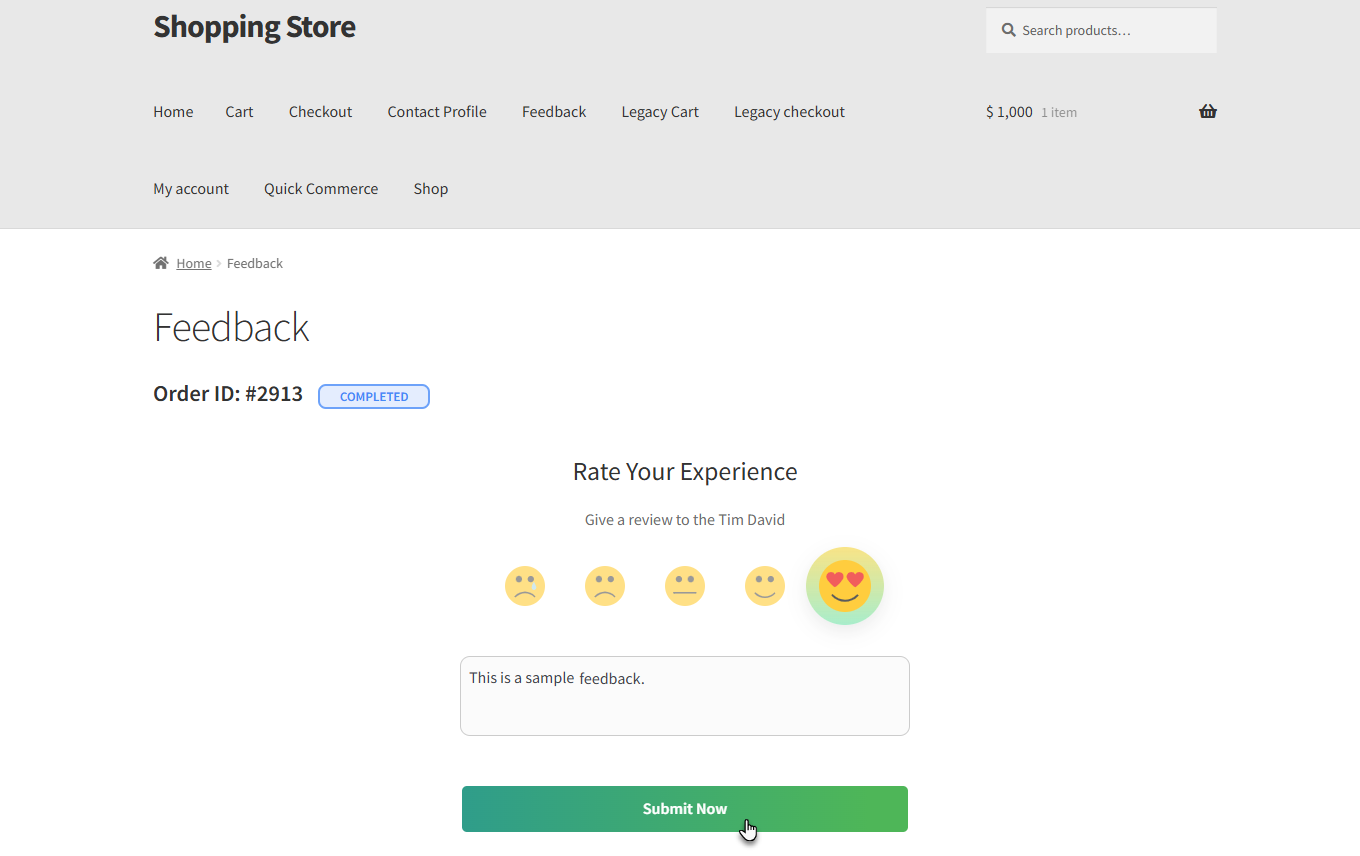
Note: The contact person can view this feedback in their contact profile.
Contact Profile
↑ Back to top- The Contact Profile block allows the contact person to manage their account, including viewing tips earnings, customer reviews, order history, and updating profile details.
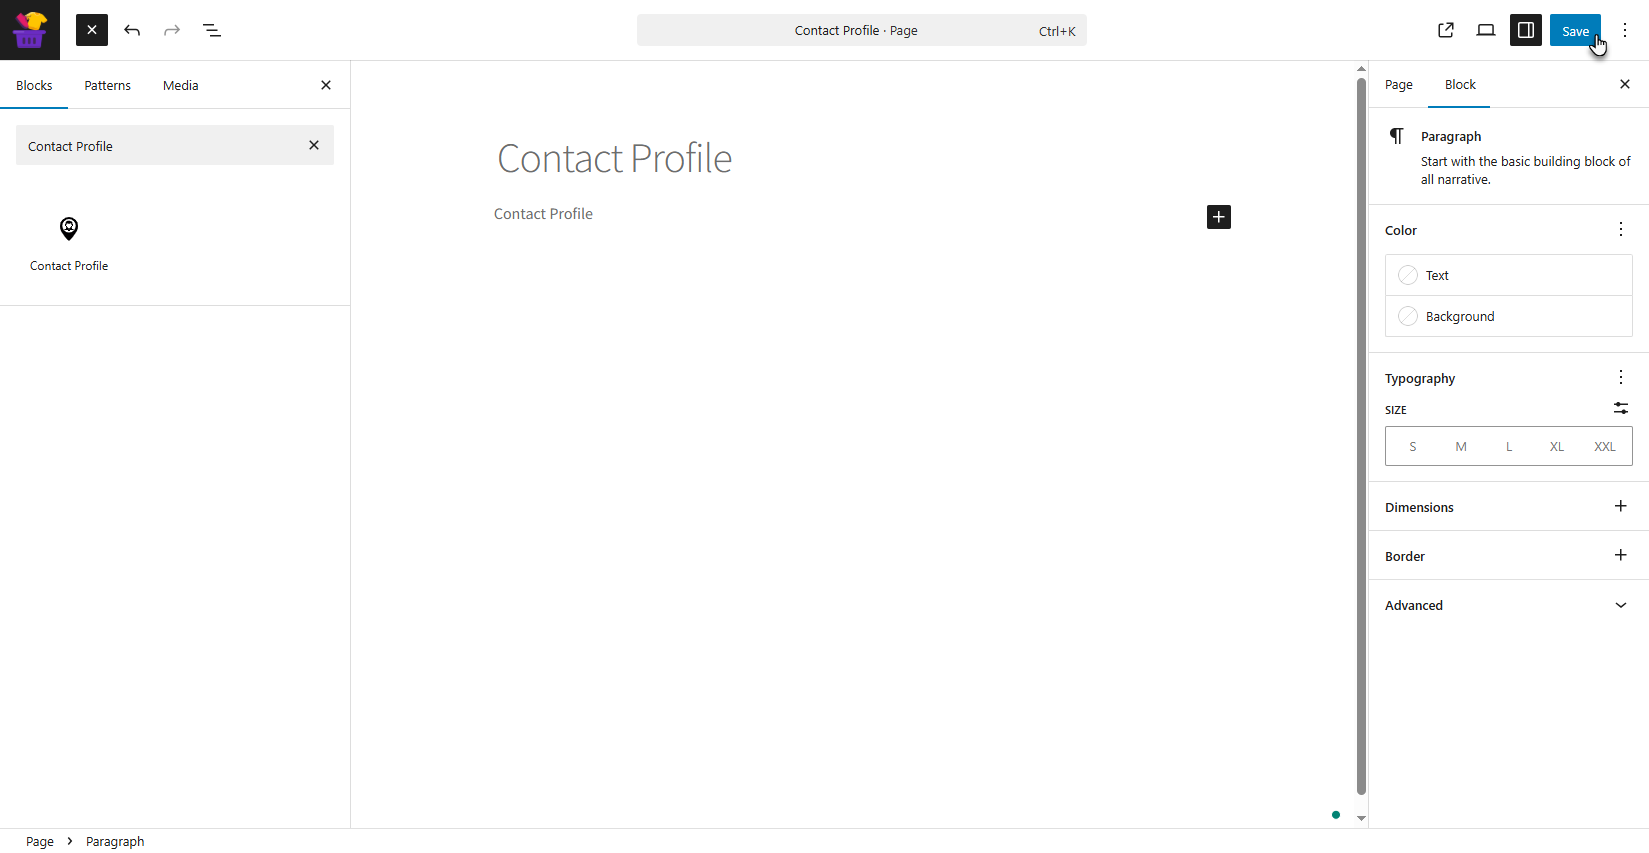
- Navigate to WooCommerce > Pages > Add New Page / Edit Page.
- Click on the “+” block inserter, search for Feedback Form, and click on it to add the block.

- The Contact Profile will be added to the page. Click on the Save button to apply changes.
Front End Impact
↑ Back to top- Log in to your account.
- Go to the Contact Profile page. The Contact profile details will appear.
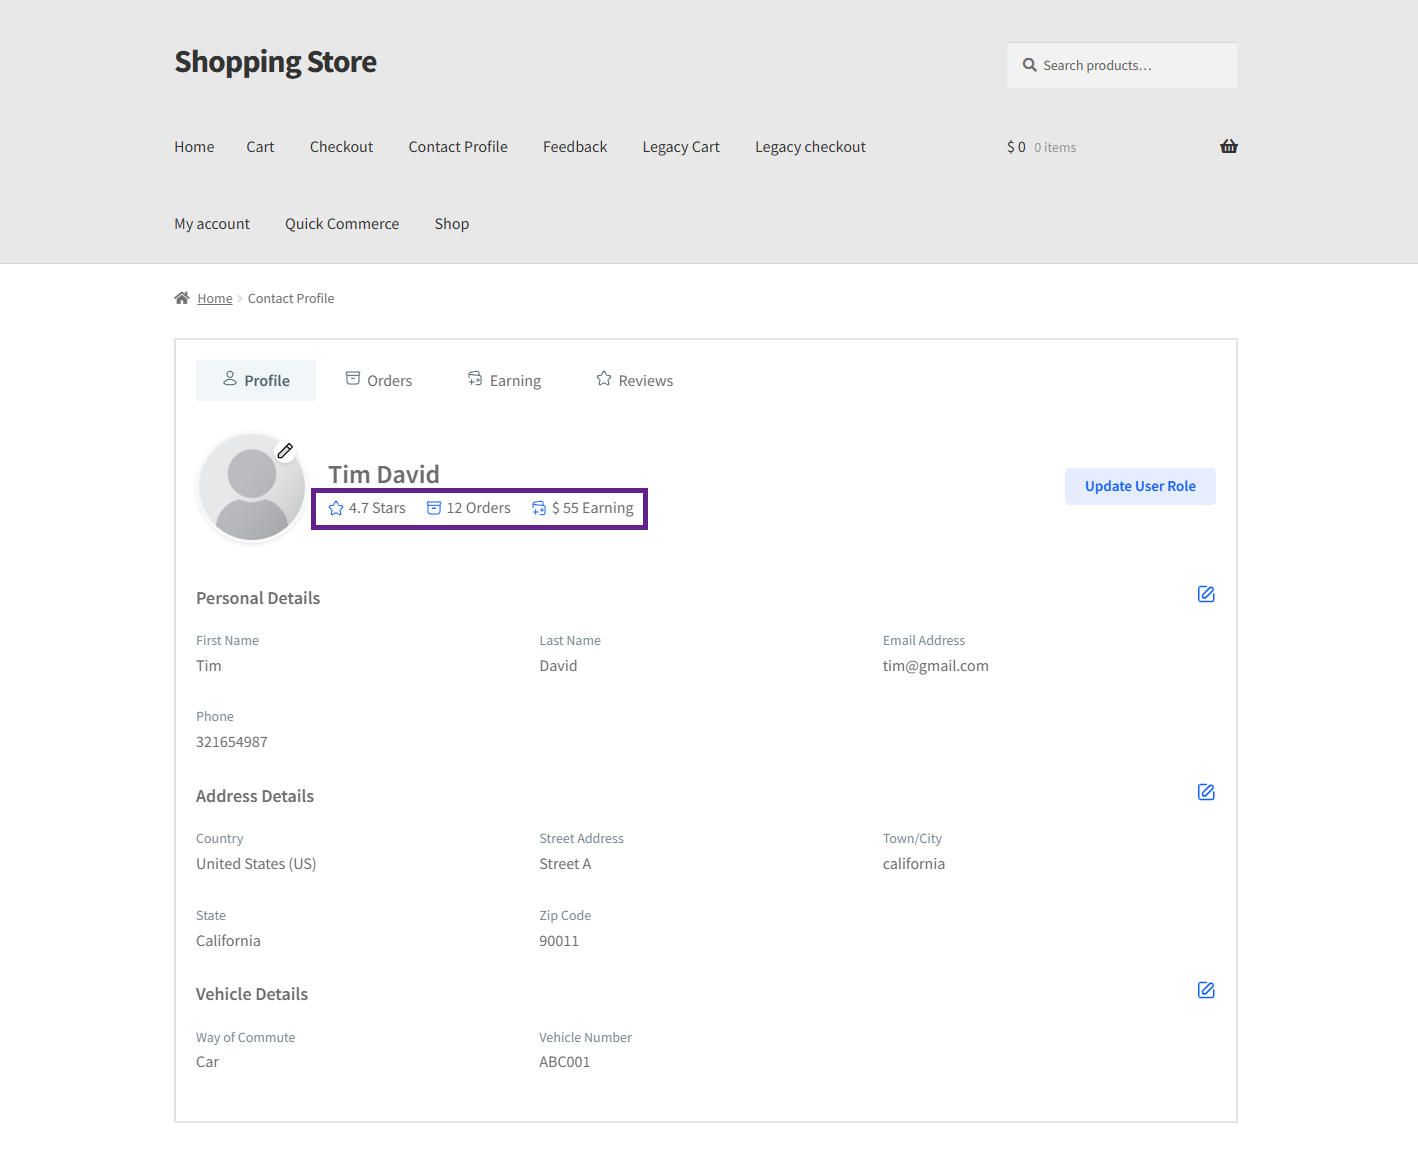
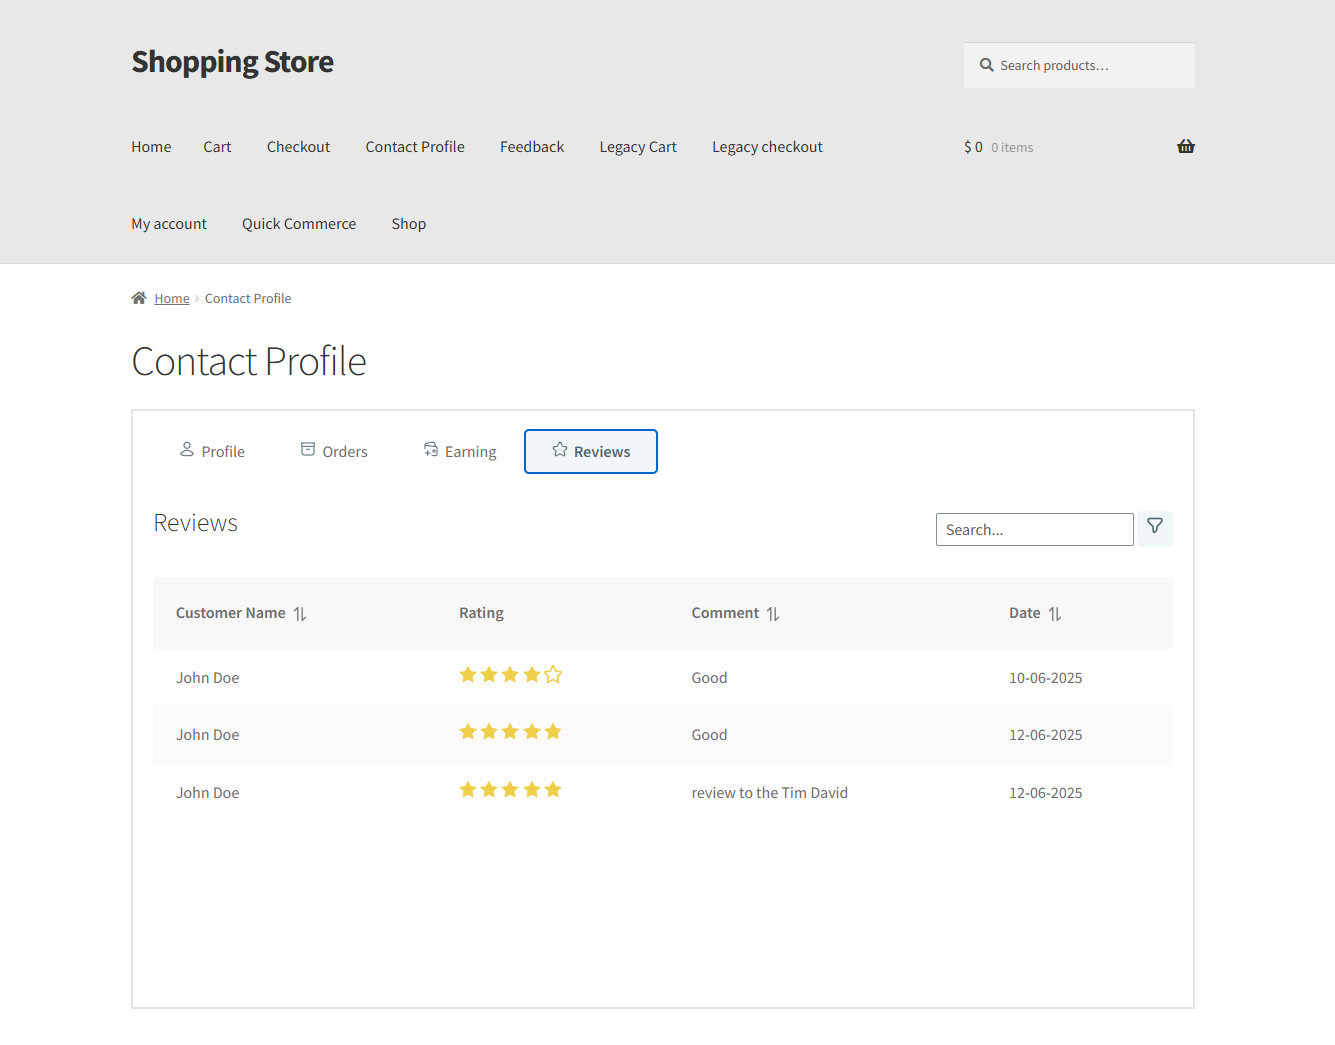
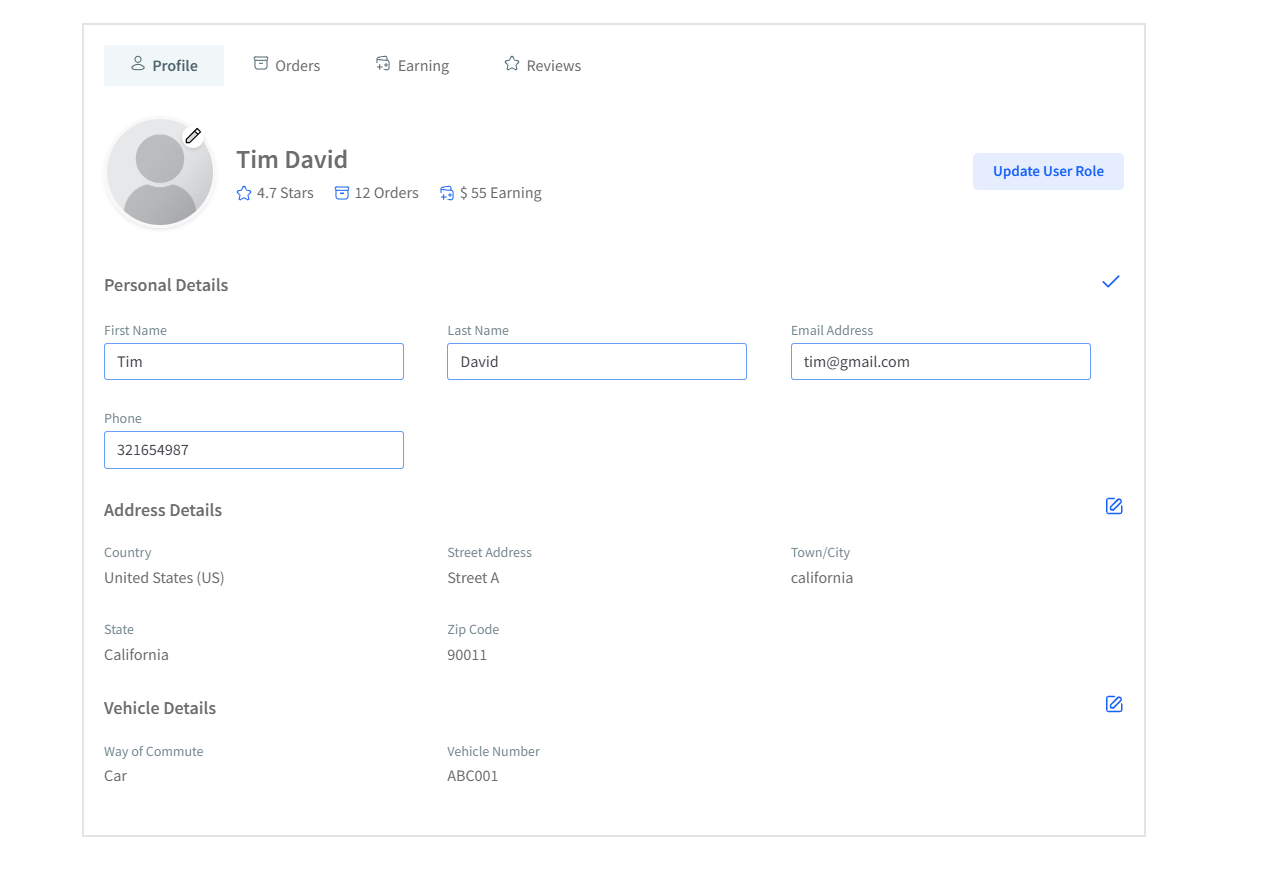
- The Contact Profile has four tabs: Profile, Orders, Earnings, and Reviews.
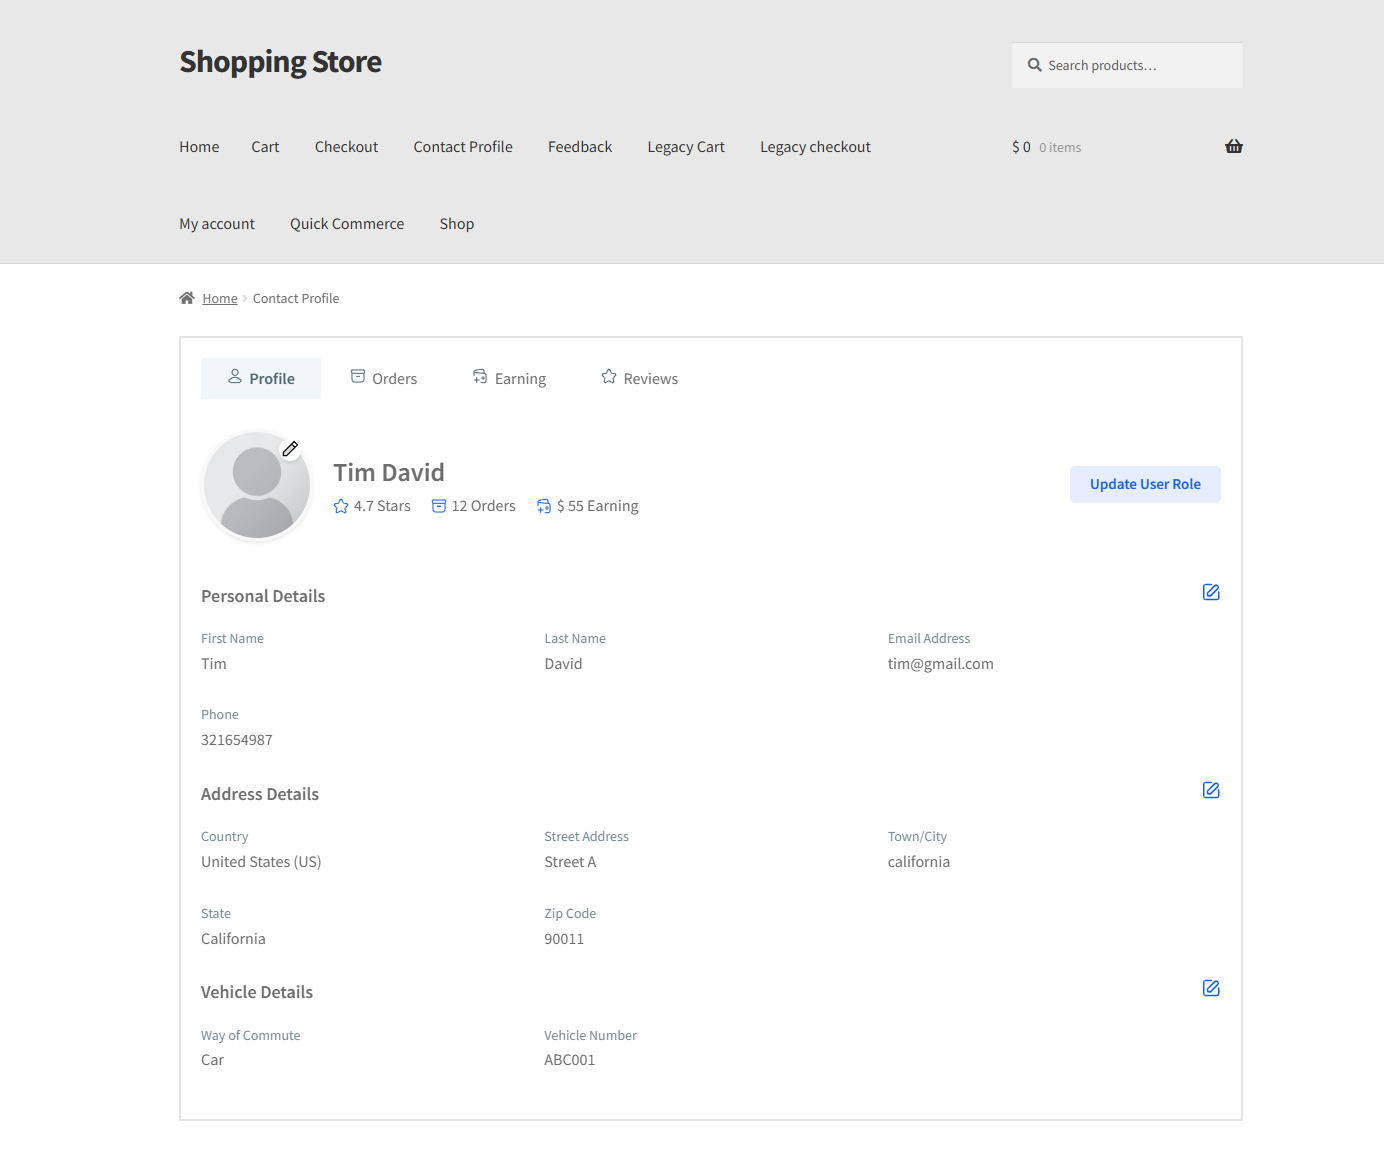
- In the Profile tab, the contact person can edit their details.
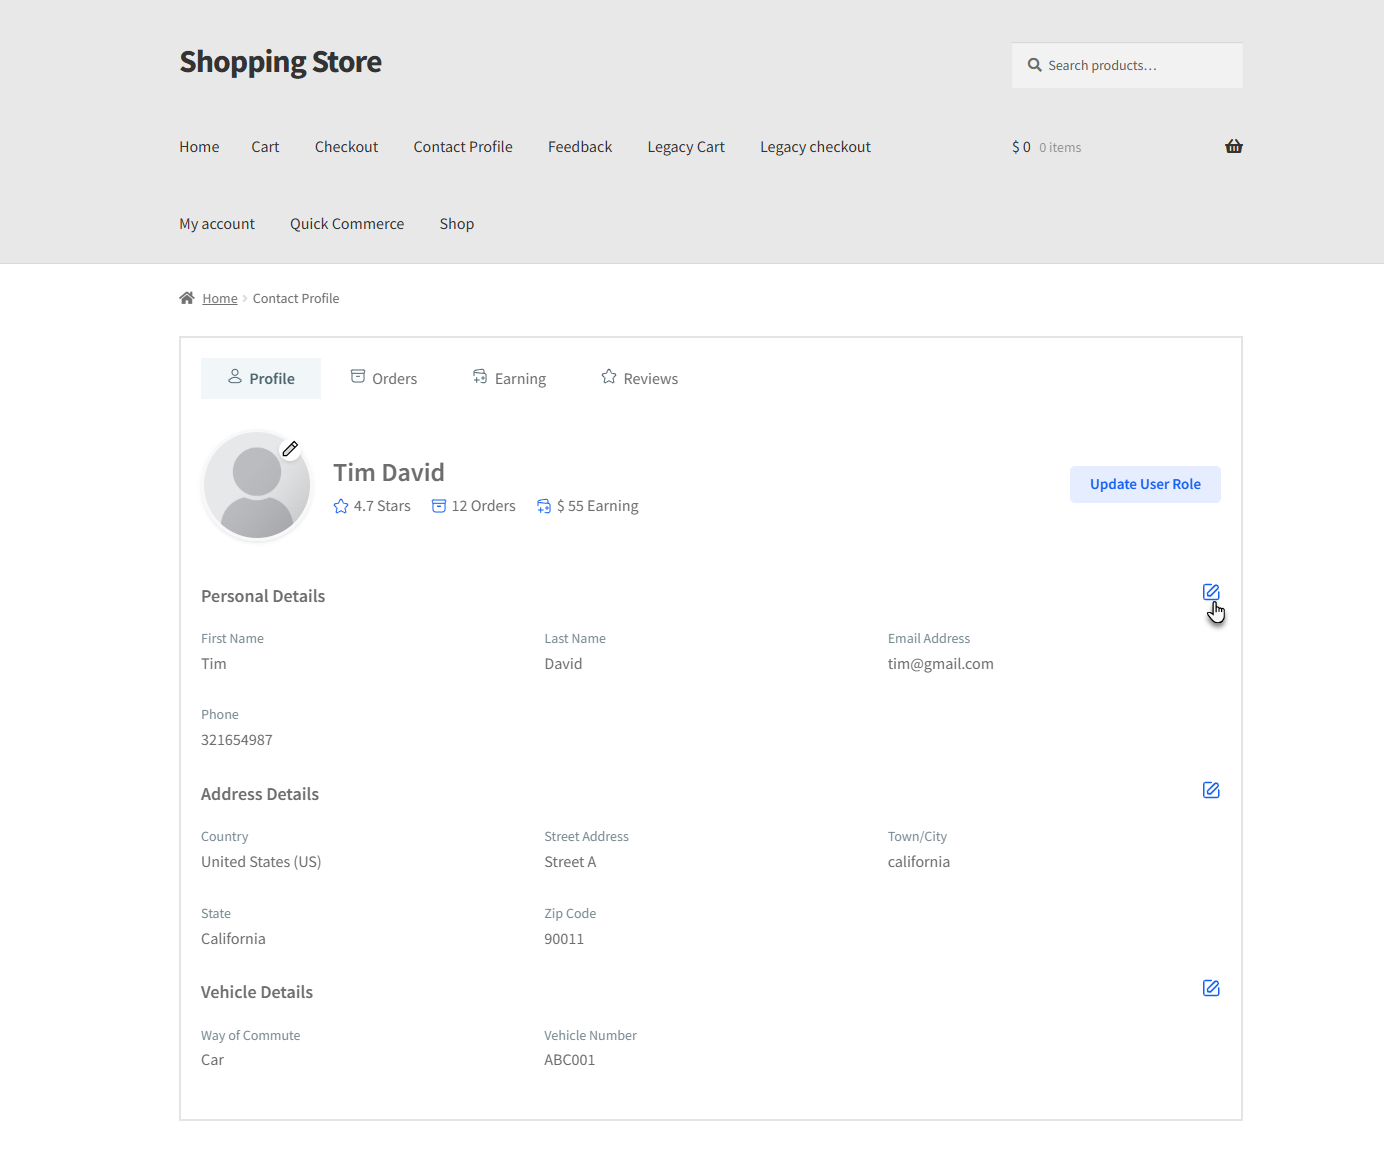
- The fields will become editable, and the contact person can update the information. Similarly, the Contact person can update the address details and Vehicle details.
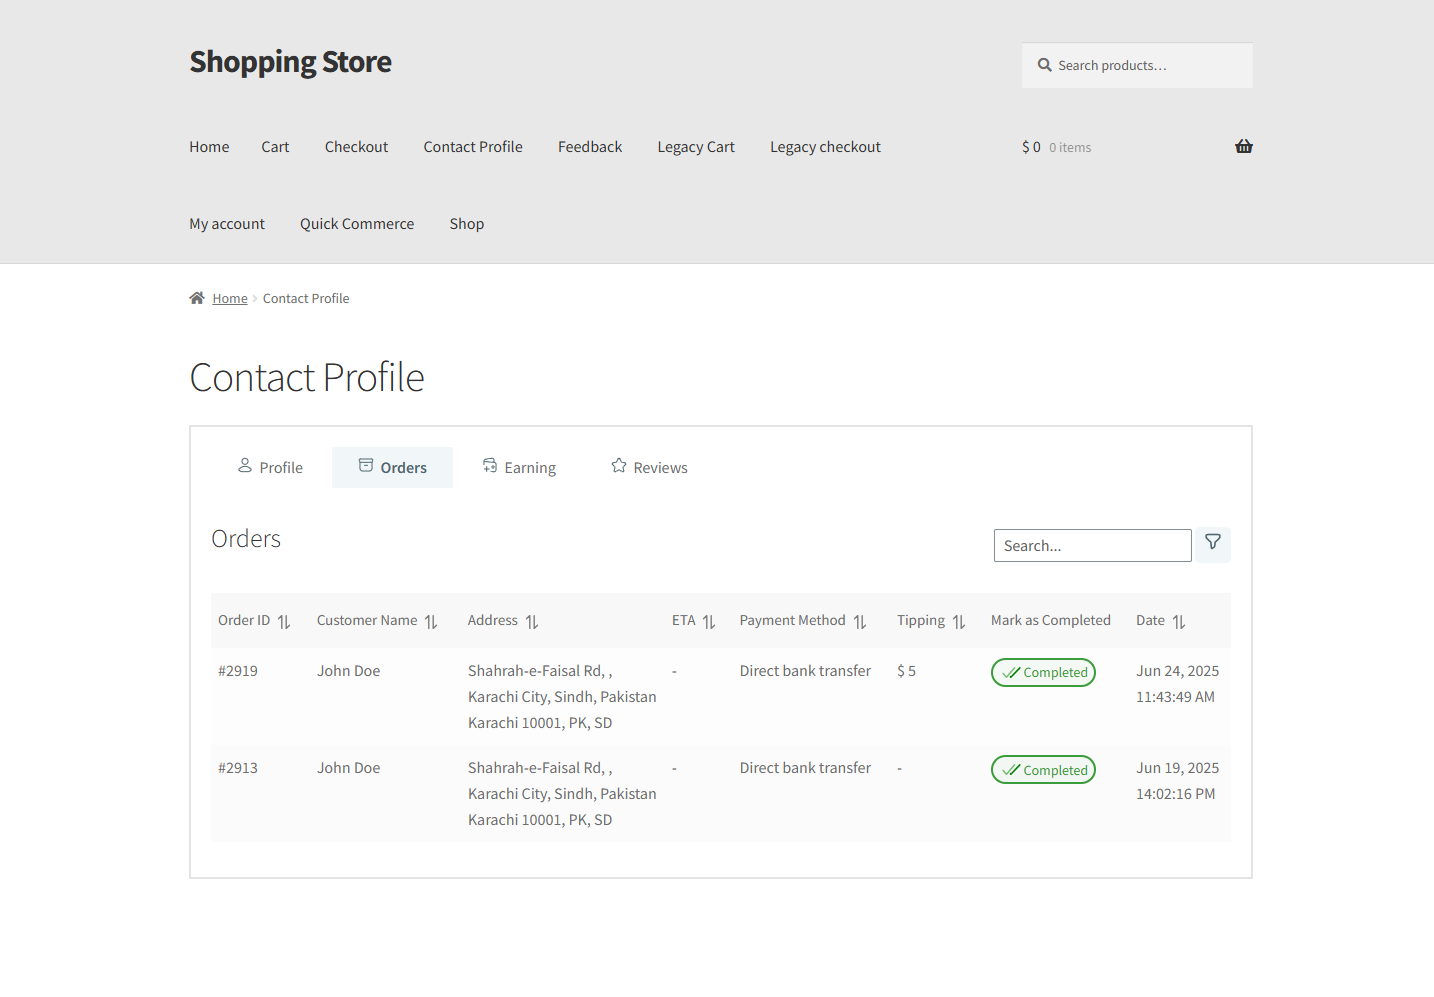
- In the Orders tab, they can view the complete list and details of orders assigned to them.
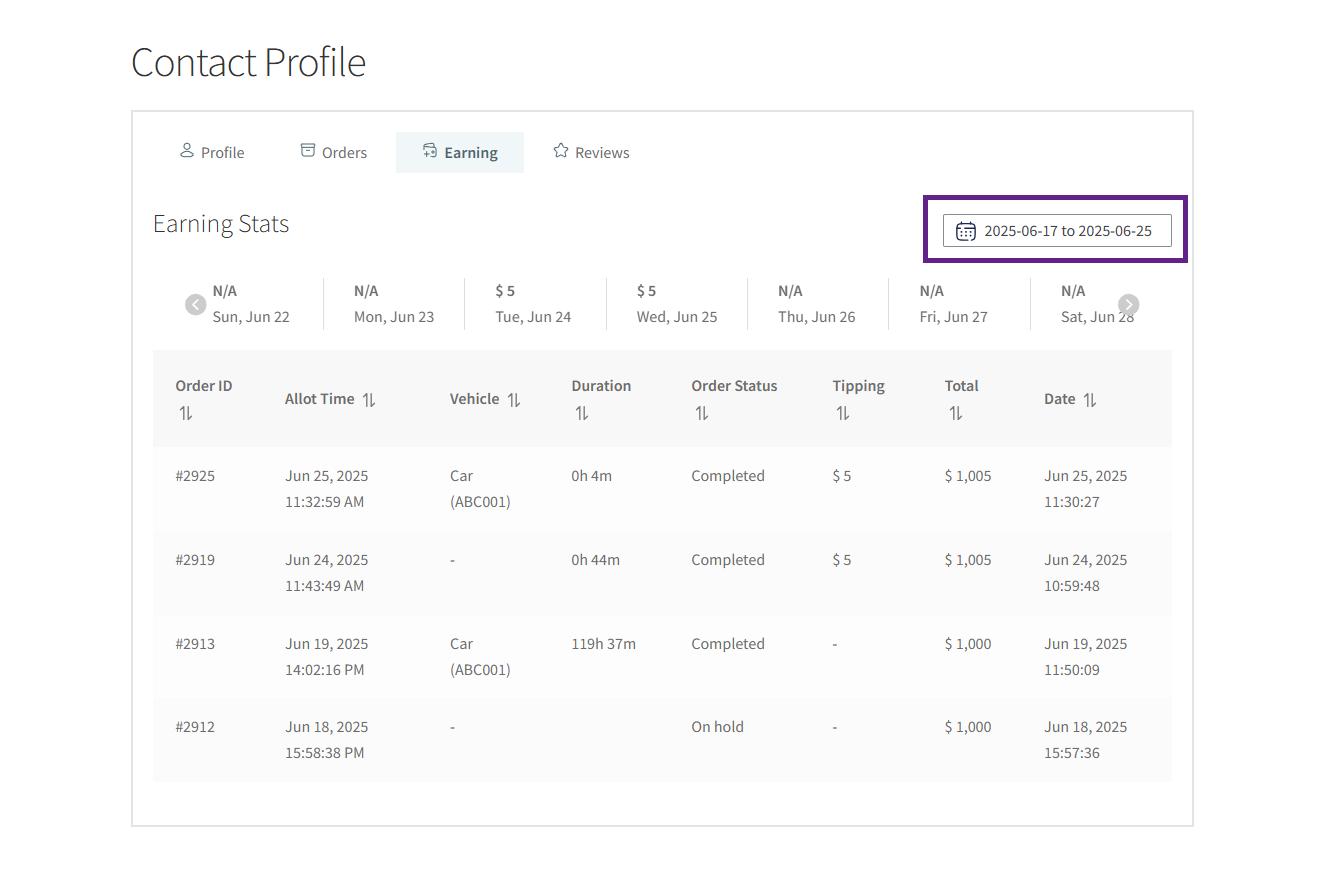
- The Earnings tab shows the contact person’s total earnings, which are based on the tips received from completed orders.
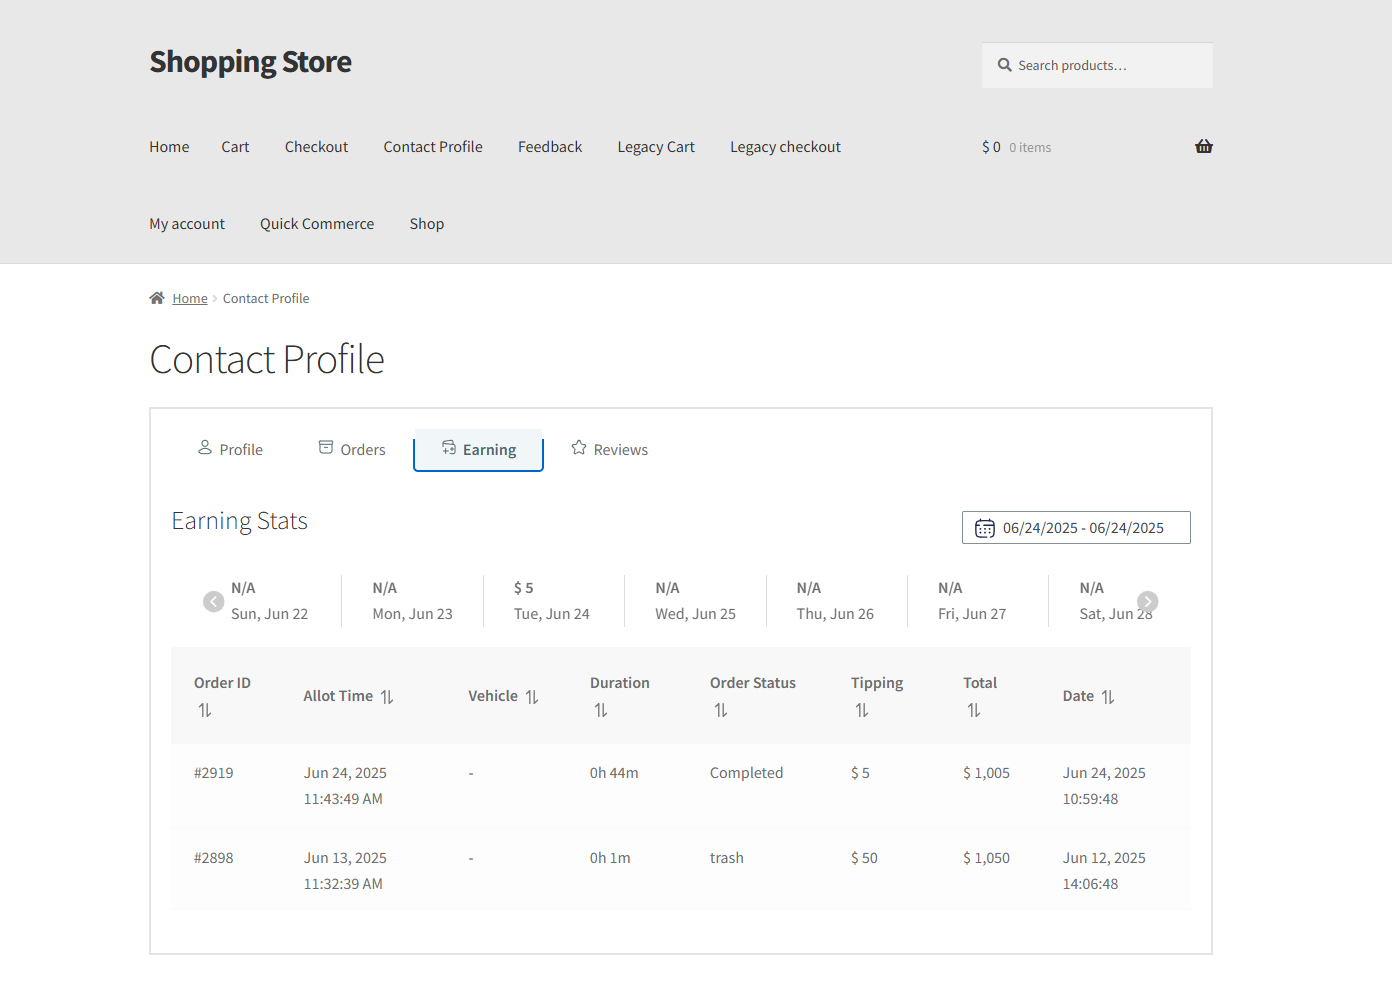
- The Earnings data can be filtered using the date range filter.
- In the Reviews tab, they can view customer ratings and feedback shared through the feedback form.