Installation
↑ Back to topTo start using a product from WooCommerce.com, you can use the “Add to store” functionality on the order confirmation page or the My subscriptions section in your account.
- Navigate to My subscriptions.
- Find the Add to store button next to the product you’re planning to install.
- Follow the instructions on the screen, and the product will be automatically added to your store.
Alternative options and more information at:
Managing WooCommerce.com subscriptions.

Setup and Configuration
↑ Back to topIn the Sale Timer Builder, you can create unique timers with different styles for various events and dates.
You can assign the created timers to specific categories, tags, or individual product cards, or exclude certain products where the timer shouldn’t appear.
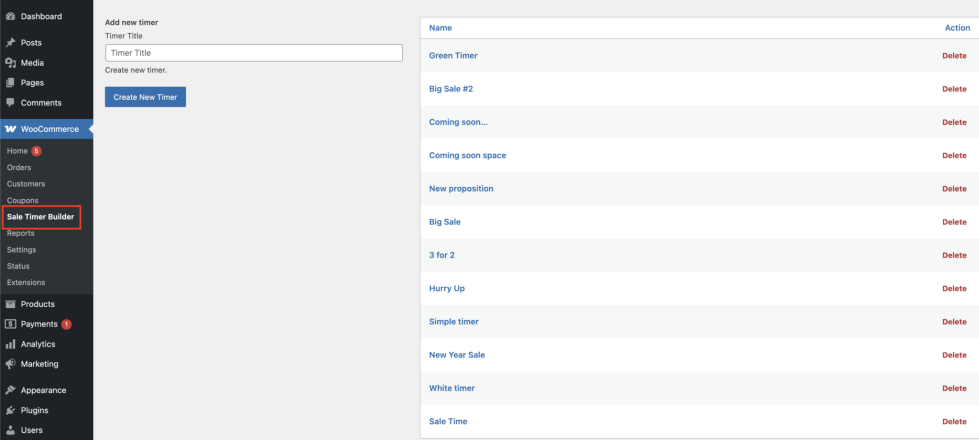
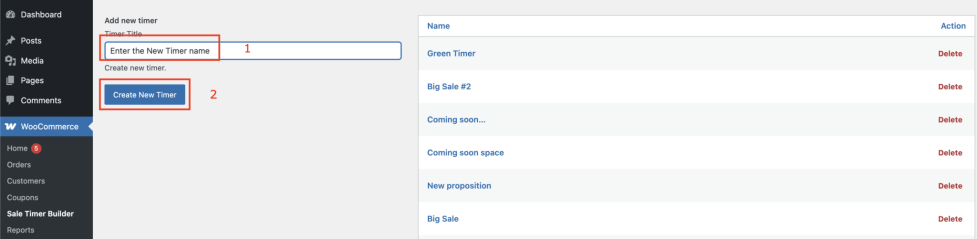
At the beginning, you need to:
- Enter the name of your new timer in the input field.
- Click the “Create New Timer” button.
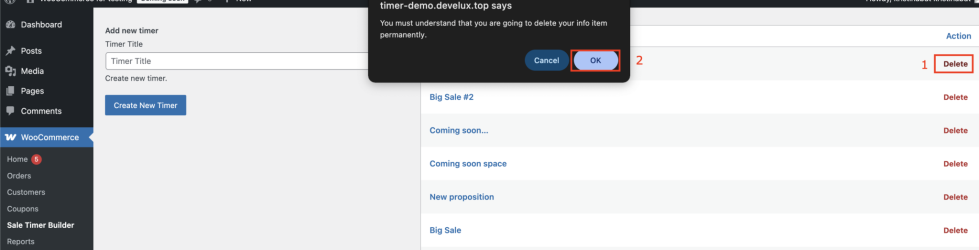
If you need to delete the timer, click the ‘Delete’ button and confirm the removal in the pop-up.
Timer Settings
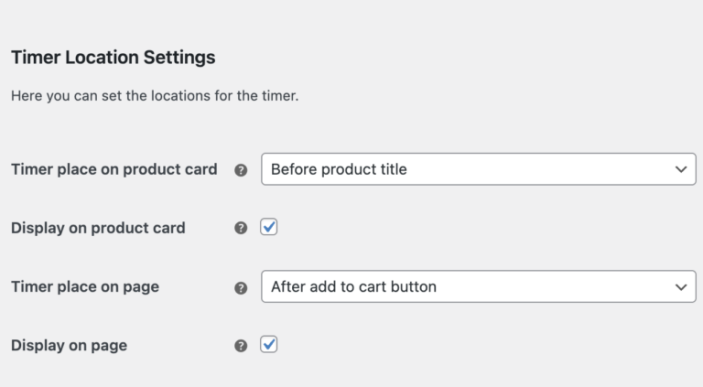
↑ Back to topHere you can set the titles for the timer and the locations on the product card/ page.
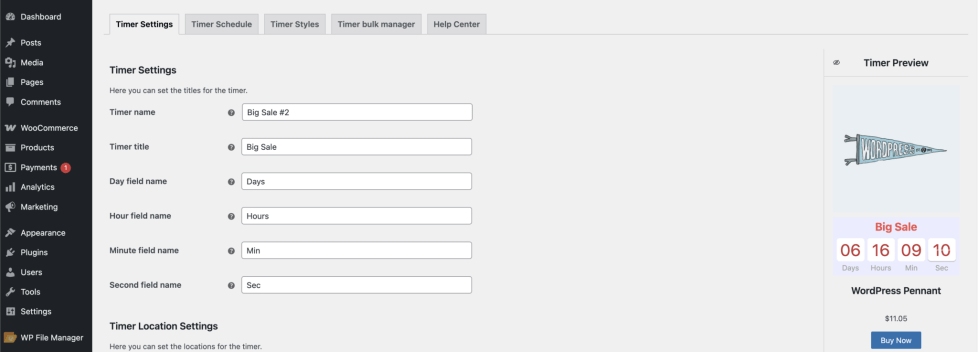
Timer name – allows you to name the timer so you can easily identify it later in the list.
Timer title – sets the timer topic and helps you organize timers by event or purpose.
Day field name – allows you to choose how the word ‘day’ will appear on the timer.
Hour field name – allows you to choose how the word ‘hour’ will appear on the timer.
Minute field name – allows you to choose how the word ‘minute’ will appear on the timer.
Second field name – allows you to choose how the word ‘second’ will appear on the timer.
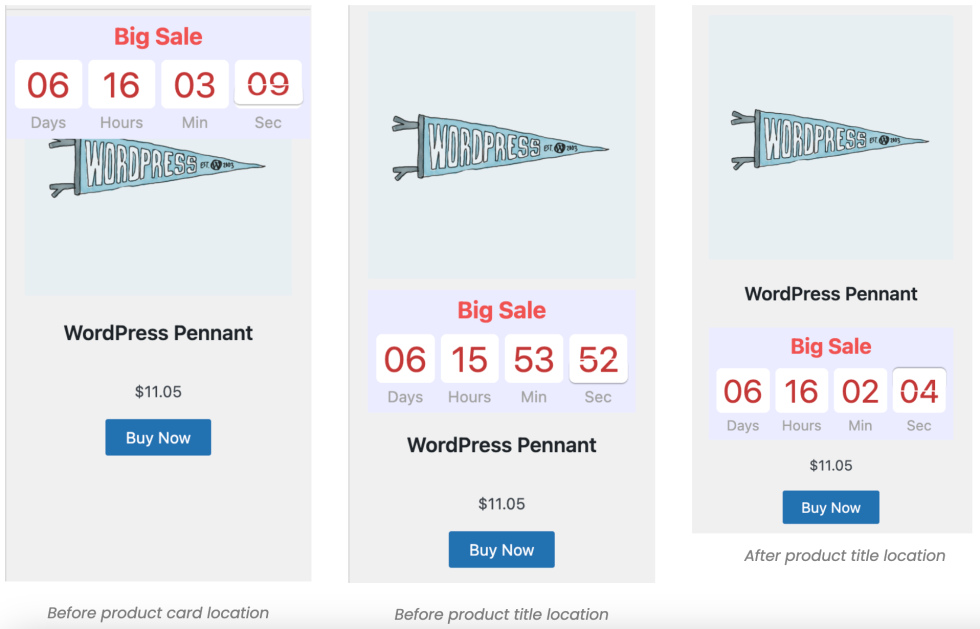
Timer place on product card – allows to locate the timer in different places on the product card
- Before product card – in this location timer will be displayed at the top of the product card
- Before product title – in this location timer will be displayed before the product card
- After product title – in this location timer will be displayed after the product card
Display on product card – allows turning off/ turning on the timer on the product card
Timer place on product page – allows to locate the timer in different places on the product page
- Before add to cart button – in this location timer will be displayed before the ‘Add to cart’ button
- After product thumbnail – in this location timer will be displayed after the thumbnail
- After add to cart button – in this location timer will be displayed after the ‘Add to cart’ button
Display on product page – allows to turn off/ turn on the timer on the product page

Important!
If the product has no price, the Before Add to Cart button and After Add to Cart button locations will not be shown.

Important!
If the product has a specific gallery or slider, After product thumbnail location will not be shown.
Timer Schedule
↑ Back to topIn the Timer Scheduler tab, you can set the date in the timer for a scheduled event.
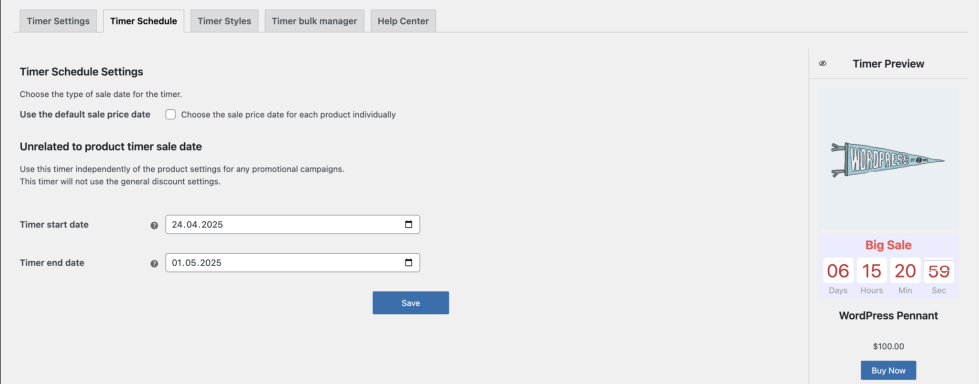
If you plan to use the Timer Bulk Manager, make sure to use the default sale price date and leave the Choose the sale price date for each product individually option unchecked.
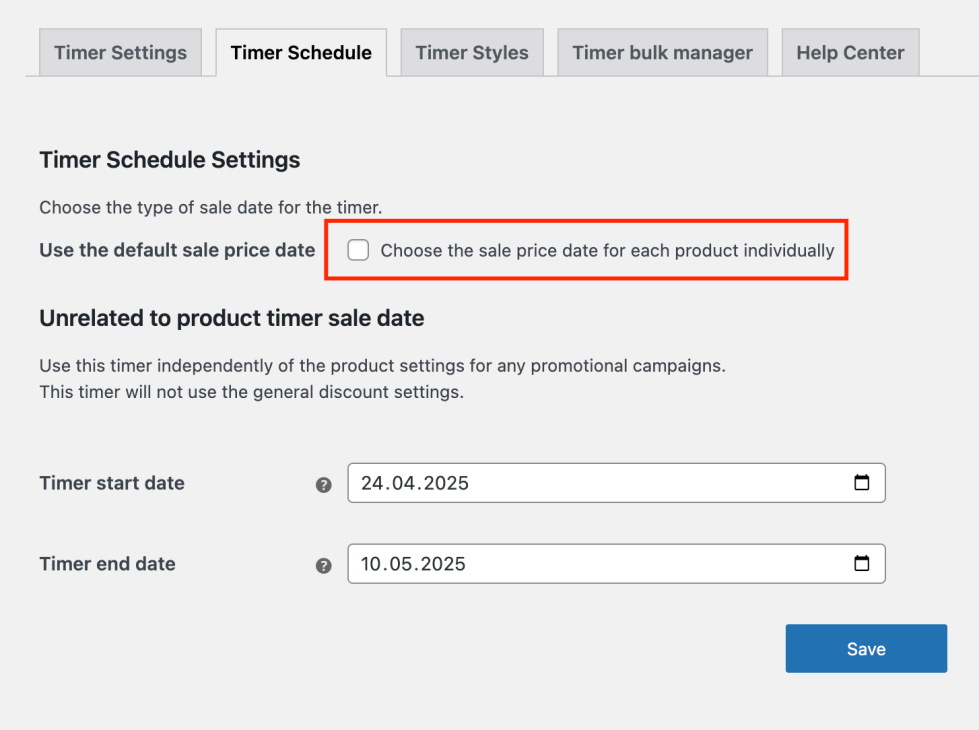
Timer start date – defines the date when the event begins.
Timer end date – defines the date when the event ends.
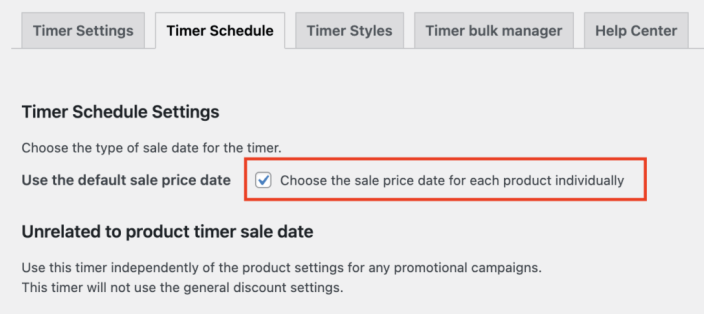
If you want to use a sale date for a specific product, check the Choose the sale price date for each product individually option and set the schedule in the meta box.
‘Timer Scheduler’ page with individually price date settings
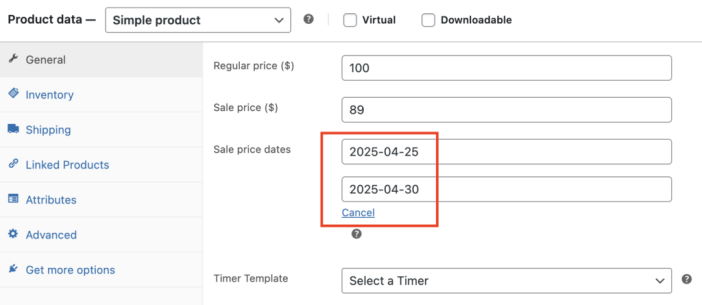
Single product page settings -> Meta box schedule settings
Timer Style
↑ Back to topIn this tab, you can set different colors, fonts, and sizes for the timer.
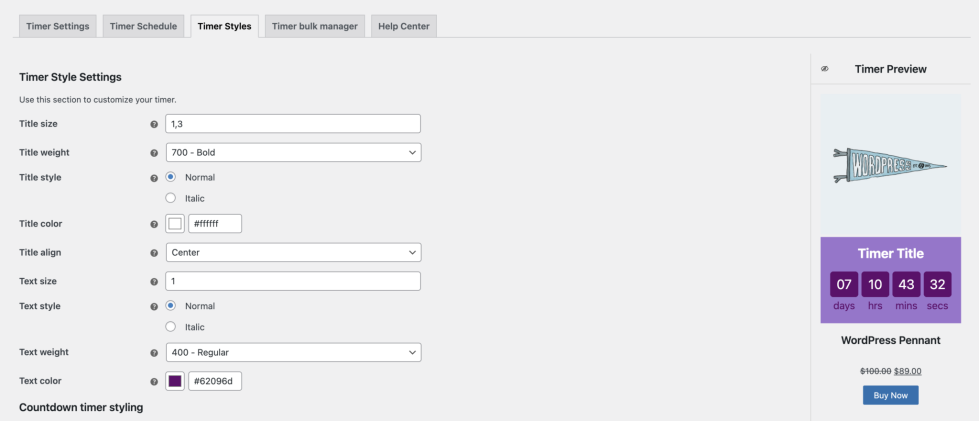
Title size – sets the title size
Title weight – sets the weight of the title (light, medium, bold)
Title style – sets the style for the title (normal, italic)
Title color – sets the color of the title
Title align – sets the alignment for the title (start, center, end)
Text size – sets the size for the text (days, hours, minutes, seconds)
Text style – sets the style for the text (normal, italic)
Text weight – sets the weight for the text (light, medium, bold)
Text color – sets the color for the text
Use animation for timer – enables smooth transitions when the timer updates its countdown values
Numbers size – sets the number size in the boxes
Numbers style – sets the number style in the boxes (normal, italic)
Numbers weight – sets the number weight in the boxes (light, medium, bold)
Numbers color – sets the number color in the boxes
Rounding – sets the roundness of the number box corners
Number box width – sets the width for the number boxes
Number box height – sets the height for the number boxes
Space between boxes – sets space between the number boxes
Top outer space – sets the space between the title and number boxes
Background color – sets the background color of the number boxes
Bottom inner space – sets the space between the text and the wrapper
Horizontal inner space – sets the space inside the left and right sides of the numbers container
Main width – sets the width of the container that holds the timer boxes
Main top offset – sets the vertical location of the number boxes
Background color – sets the wrapper background color
Background opacity – sets the transparency level of the background color
Timer background image – allows uploading an image for the timer
Repeat background – allows to choose if the background image should repeat to fill the space or appear just once
Background position – allows to choose how the background image fits inside the space
- Cover – fills the area and may crop the image
- Contain – shows the whole image, but might leave the empty space
- Revert – uses the default setting
Image placement – allows to choose where the image appears inside the background (at the top, bottom, left, right, center)
Inner space – sets the inner space in the general wrapper
Width (for product page only – sets the timer width on the product page
Top offset – sets the space between the timer wrapper and the element above
Bottom outer space – sets the space between the timer wrapper and the element below
Rounding – sets the roundness of the general wrapper
Frame size – sets the outline width of the general wrapper
Frame style – sets the outline style of the general wrapper
Frame color – sets the outline color
Timer bulk manager
↑ Back to topThe Timer bulk manager allows you efficiently manage timer assignments across many products in one place. Using this tool, you can:
- Apply a selected timer to a group of products by category or tag
- Assign timers to specific products using the Include Product option
- Exclude certain products from a timer using the Exclude Product option
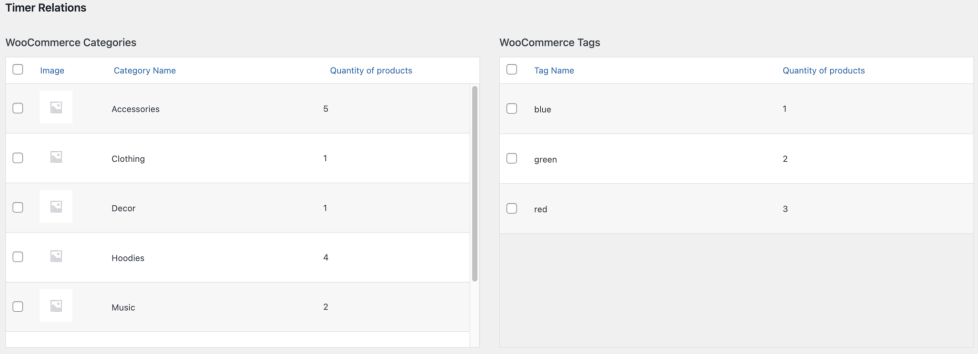
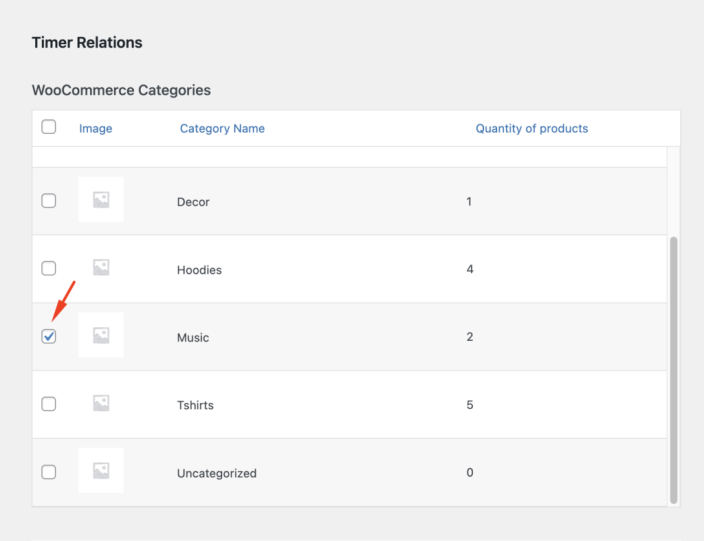
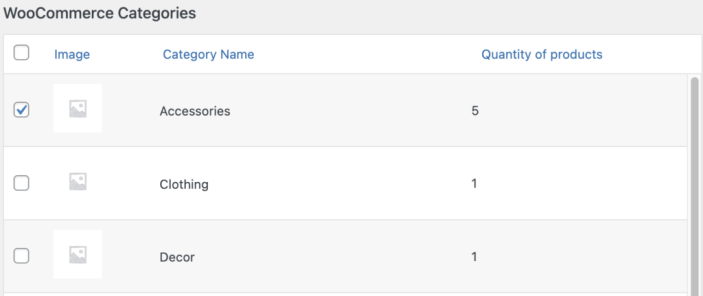
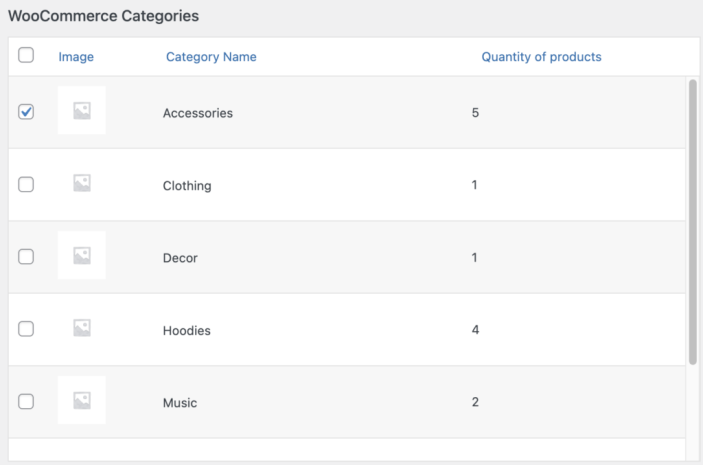
WooCommerce Categories – the timer will be displayed on all categories’ products.
Timer bulk manager settings by category
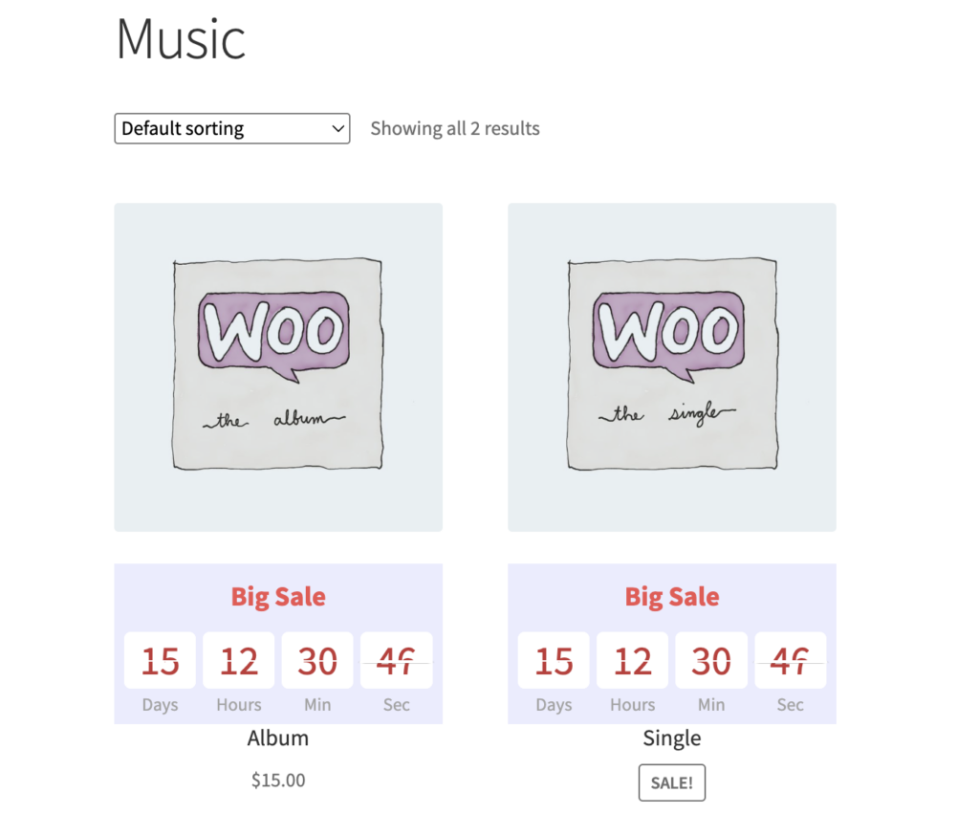
Page with products sorted by category
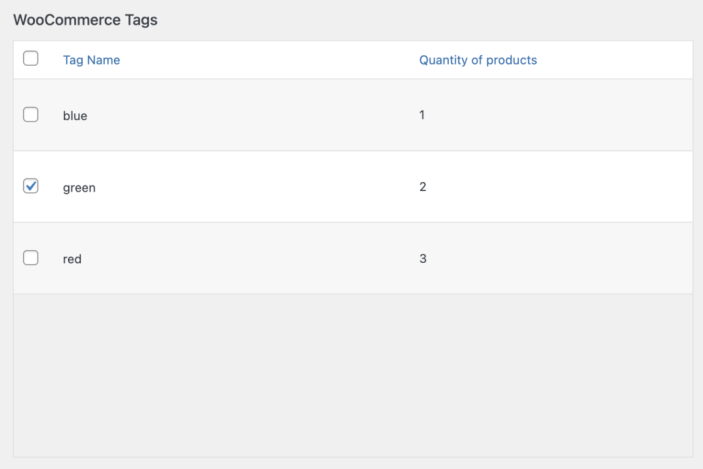
WooCommerce Tags – the timer will be displayed on all products with this tag.
Timer bulk manager settings by tag
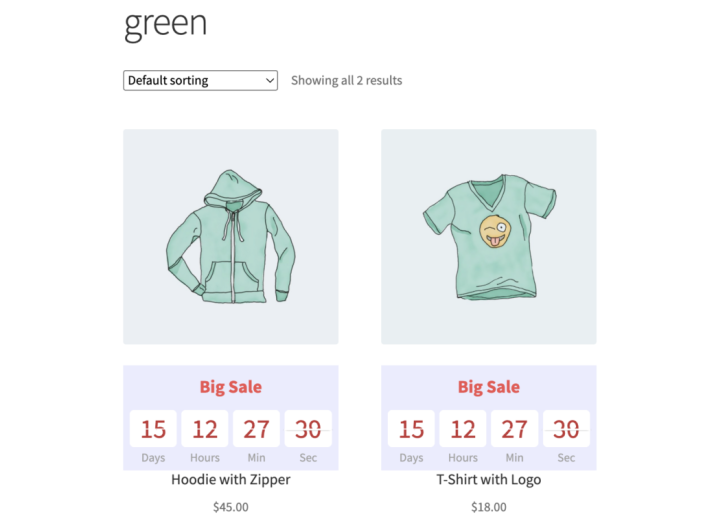
Shop page with products grouped by tag
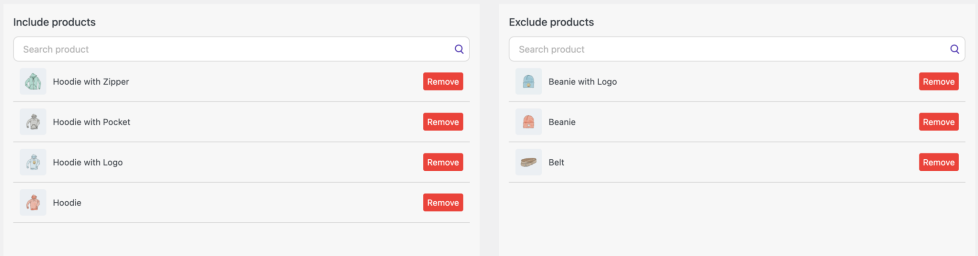
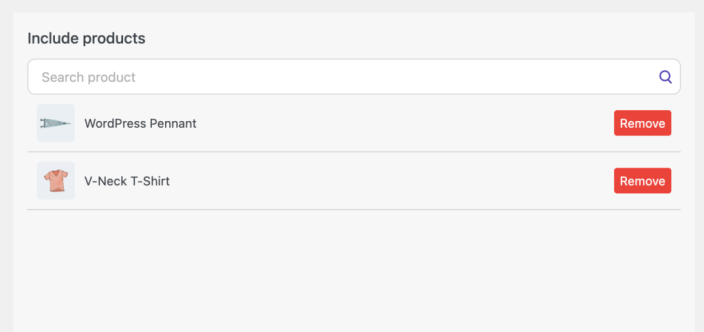
Include products – assign the timer to a specific product.
Timer bulk manager settings by including products
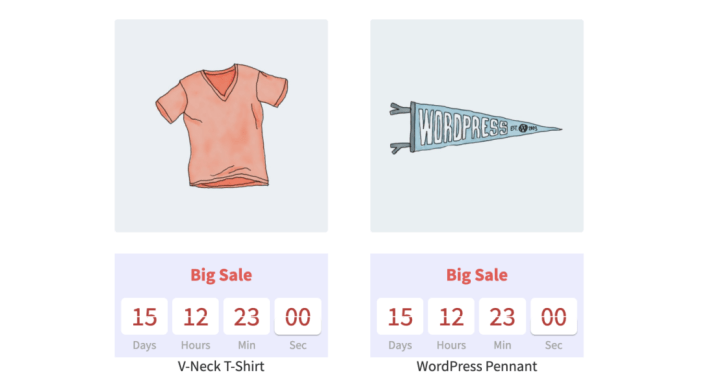
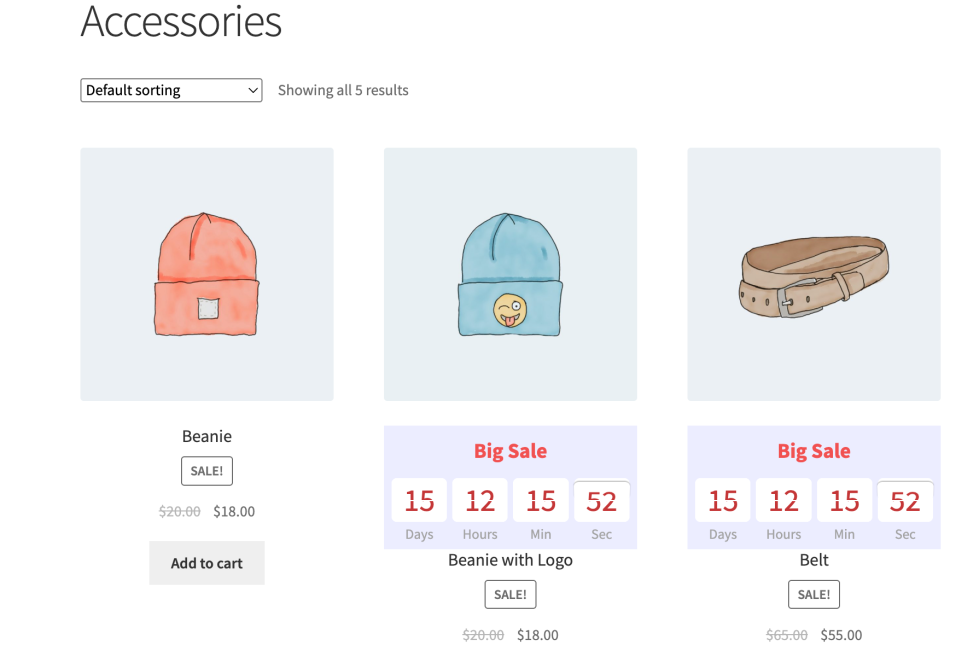
Shop page
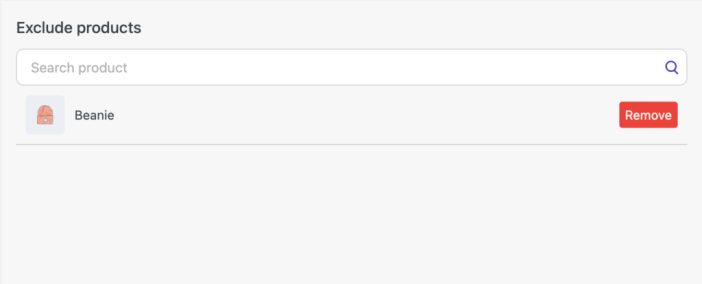
Exclude products – remove the timer from required products (the element will not be displayed on these products).
Timer bulk manager settings by excluding products
Product meta box
↑ Back to topIn the meta box, you can assign the timer for the product and the schedule for it as well.
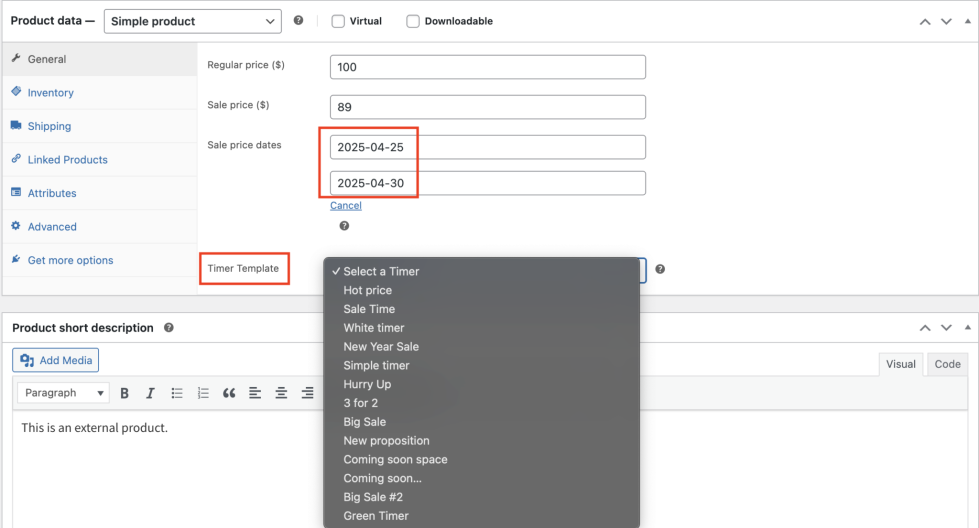
If you have assigned a specific timer to a group of products, but one of the products needs a different timer, go to the meta box of that product, select the desired template, set the date, and update the changes.
The selected timer template will then be applied to the product.
Important!
If you assign timers from both the library and the meta box to the same product, the timer from the meta box will take precedence.
Assign timers from the library
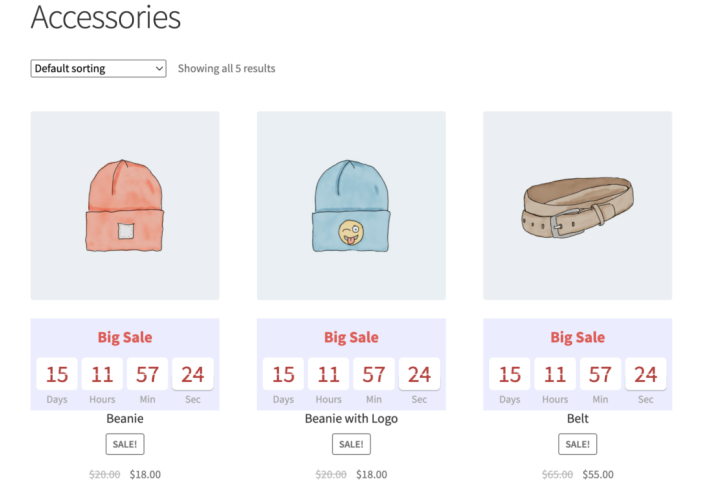
Shop page with timers from library
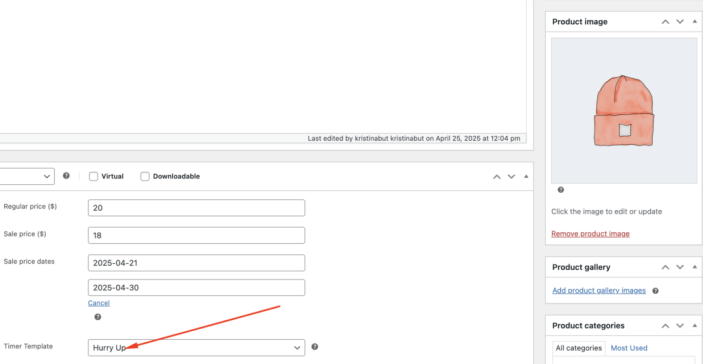
Assign timers from the meta box
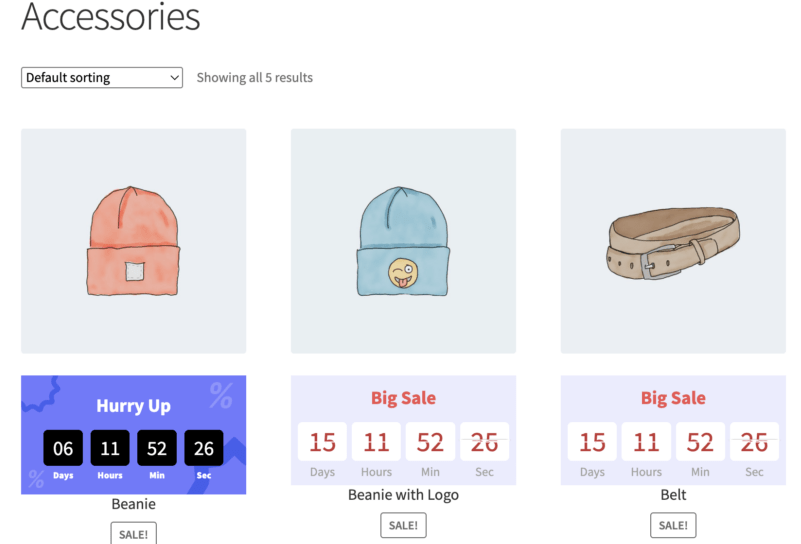
Shop page with timers from both the library and the meta box
Getting started
↑ Back to top- Go to: WooCommerce > Sale Timer Builder > Create a new timer or use a ready-made timers .
- Select a scheduler option.
- Customize the timer.
- Use bulk manager to place a timer on products
- Save changes.
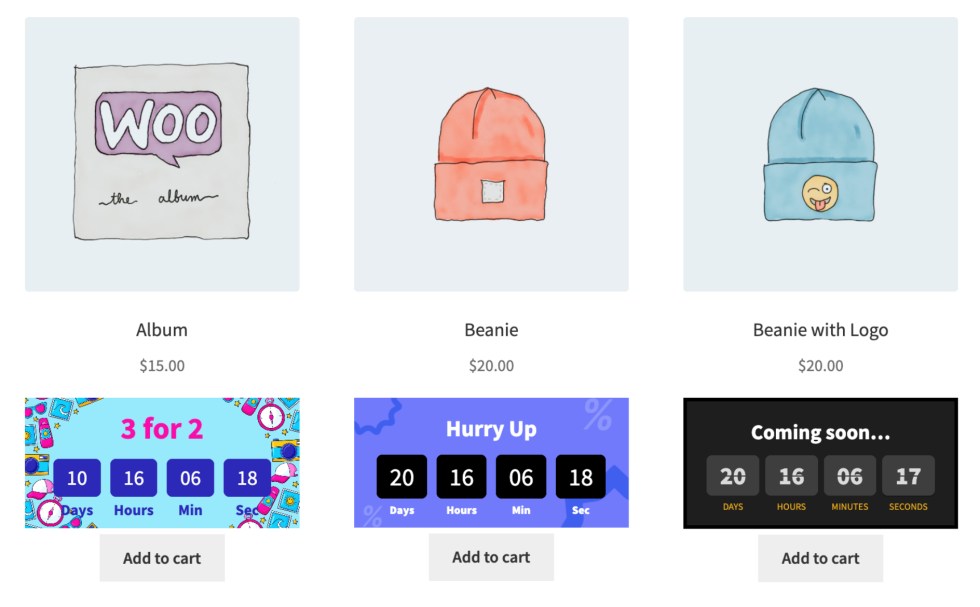
Usage
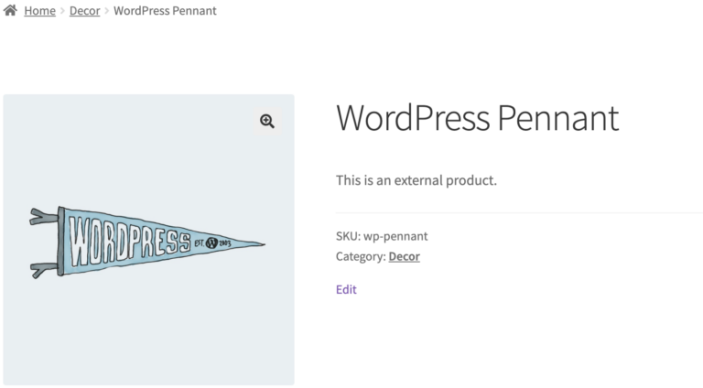
↑ Back to topWhat customers see on the front end.
Troubleshooting
↑ Back to topIf the timer does not appear in the location you selected, we recommend that you select a different location for the timer.
This can sometimes happen if the theme does not use the appropriate hooks.
FAQs
↑ Back to top
Is it possible to style the appearance of the Countdown Timer?
Yes, you can style the appearance of the timer to match your website style.
We provide a wide range of tools for styling color, size, etc.
Does the timer show when the discount on a product ends?
Yes, the timer can use the end date of the discount for the product that you set in the admin panel.
You can also use an end date for the tamer that will not be tied to the discount for the product.
You may configure this in the schedule section.
Can I set a timer for different products?
Yes, we have developed a bulk manager that allows you to set a timer for many different products, you can also use categories and tags.