Sync and manage products, prices, and orders across multiple WooCommerce stores with centralized control and customizable automation settings.
Installation
↑ Back to topTo start using a product from WooCommerce.com, you can use the “Add to store” functionality on the order confirmation page or the My subscriptions section in your account.
- Navigate to My subscriptions.
- Find the Add to store button next to the product you’re planning to install.
- Follow the instructions on the screen, and the product will be automatically added to your store.
Alternative options and more information at:
Managing WooCommerce.com subscriptions.

Configuration
↑ Back to topAfter installation and activation, go to WooCommerce > Store and Product Sync. You will find the following configuration sections:
Add New Store
↑ Back to topYou can add and manage multiple destination stores that sync with your source store.
- Go to WooCommerce > Store and Product Sync.
- Click Add New Store to begin setup.
- Title: Add a title to identify the store.
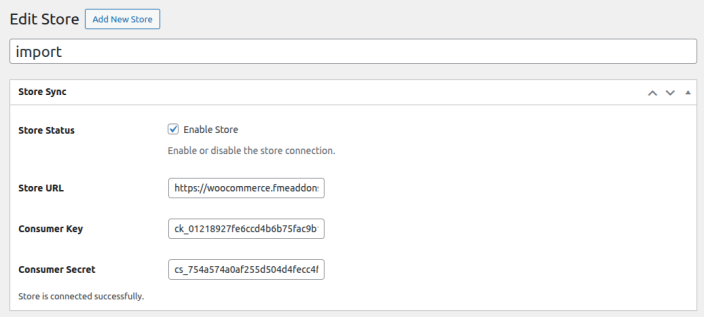
Store Sync:
- Store Status: Enable or disable the store connection.
- Store URL: Enter the destination WooCommerce store URL.
- Consumer Key: Input the API Consumer Key from the destination store.
- Consumer Secret: Input the API Consumer Secret from the destination store.
How to get Consumer Key & Consumer Secret:
- In the destination store backend, go to WooCommerce > Settings > Advanced.
- Open the REST API tab.
- Create a new key by entering the Description, selecting a User, and setting the Permission to Read/Write.
- Copy the generated Consumer Key and Consumer Secret, then paste them into the source store.
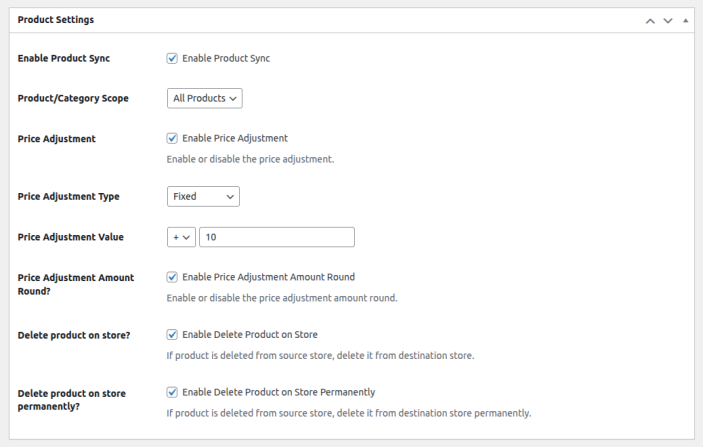
Product Settings
↑ Back to topThese settings control how products are synced from the source to the destination store.
- Enable Product Sync: Enable or disable product synchronization.
- Product/Category Scope:
- All Products
- Specific Products or Categories
- Include / Exclude: Choose to include or exclude selected products or categories.
- Select Products / Categories: Manually select products or categories to sync.
- Price Adjustment: Toggle to enable or disable price modification during sync.
- Price Adjustment Type:
- Fixed (e.g., +$10)
- Percentage (e.g., +10%)
- Price Adjustment Value: Define the amount or percentage to increase or decrease.
- Price Adjustment Amount Round?: Enable to round the adjusted amount.
- Delete Product on Store?: If enabled, products deleted from the source store will be deleted from the destination store.
- Delete Product on Store Permanently?: If enabled, the deleted product will be permanently removed from the destination store.
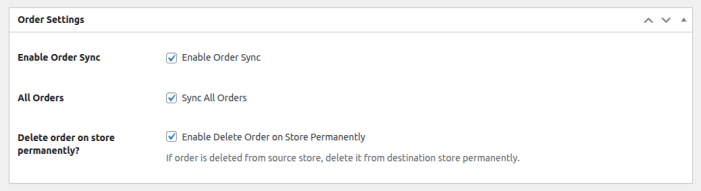
Order Settings
↑ Back to topControl how orders are synced between stores.
- Enable Order Sync: Toggle to enable or disable order synchronization.
- All Orders: Enable to sync all orders to the source store.
- Delete Order on Store Permanently?: If enabled, deleting an order from the source store will delete it permanently from the destination store.
Advanced Settings
↑ Back to topGo to WooCommerce > Settings > Store and Products Sync to configure global settings.
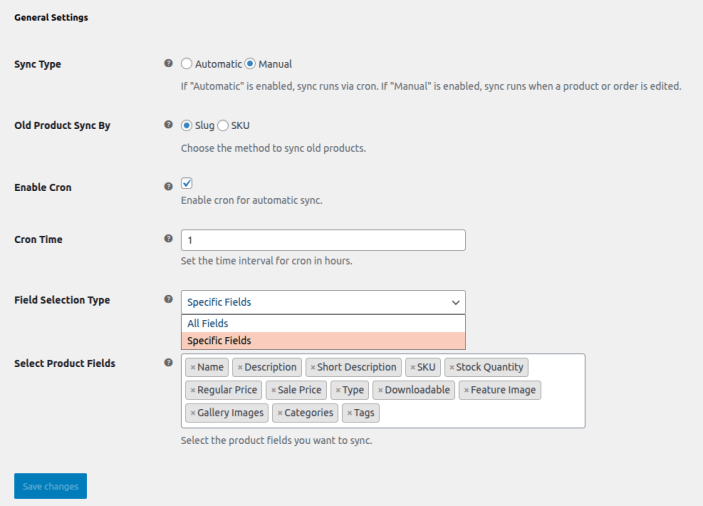
General Settings
↑ Back to top- Sync Type:
- Automatic: Sync runs via cron jobs.
- Manual: Sync is triggered when editing a product or order.
- Old Product Sync By:
- Slug: Match products using slugs.
- SKU: Match products using SKU.
- Enable Cron: Enable automatic syncing through scheduled cron tasks.
- Cron Time: Set the sync interval (in hours).
- Field Selection Type : Choose whether to sync all fields or only specific fields.
- Select Product Fields: Select the exact product fields (e.g., title, price, stock) you want to include in the synchronization.