Store Modes Manager for WooCommerce gives you complete control over your store’s availability. It allows you to easily set working days, schedule vacations, and plan maintenance periods, ensuring your store operates smoothly and is available to customers at the right times.
Installation
↑ Back to topTo start using a product from WooCommerce.com, you can use the “Add to store” functionality on the order confirmation page or the My subscriptions section in your account.
- Navigate to My subscriptions.
- Find the Add to store button next to the product you’re planning to install.
- Follow the instructions on the screen, and the product will be automatically added to your store.
Alternative options and more information at:
Managing WooCommerce.com subscriptions.

Setup and Configuration
↑ Back to topAfter installation of Store Modes Manager extension, Go to WooCommerce → Settings → Store Modes to configure settings. You will find 4 tabs having different configuration options. Each tab is described below.
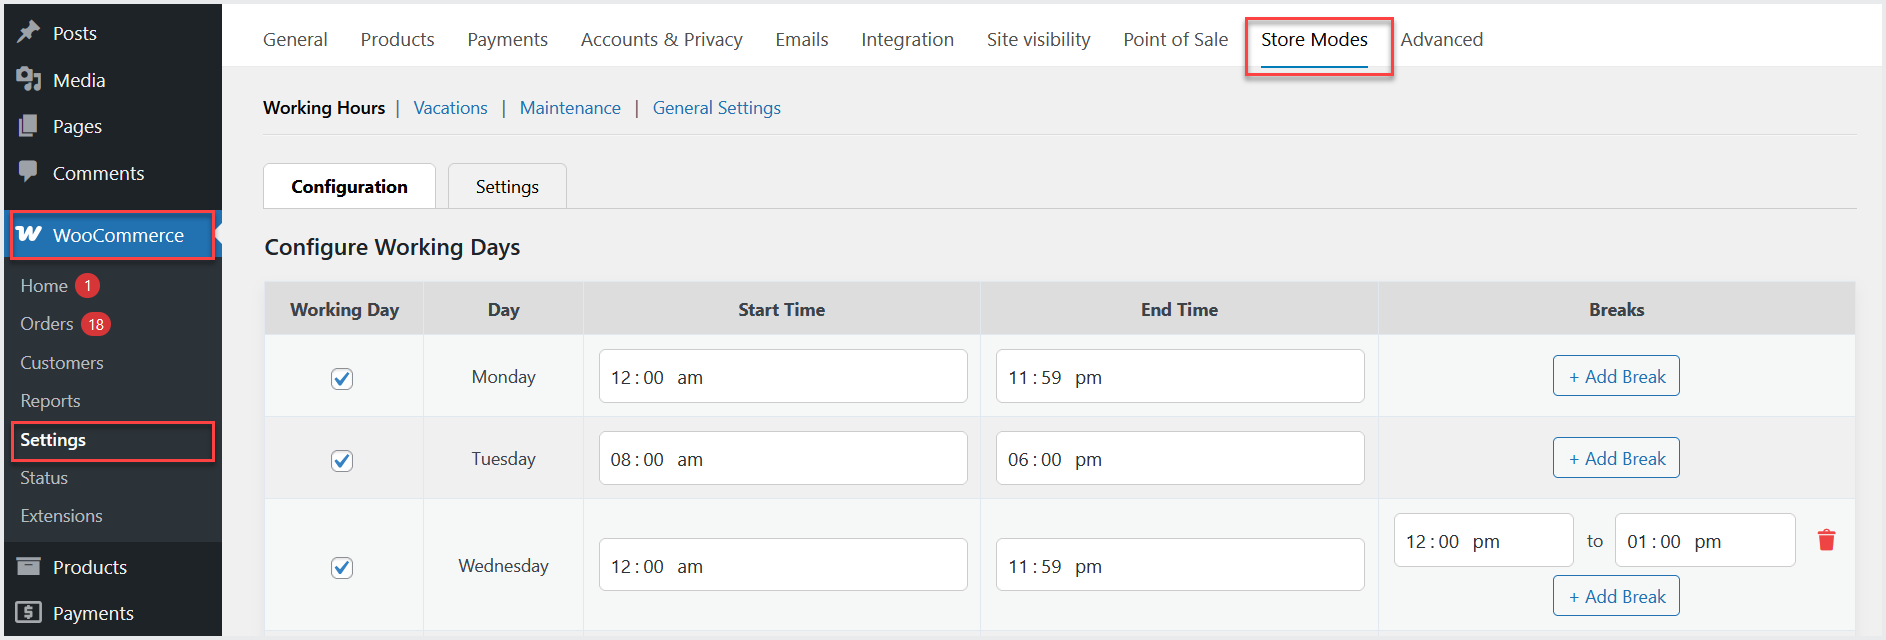
Working Hours
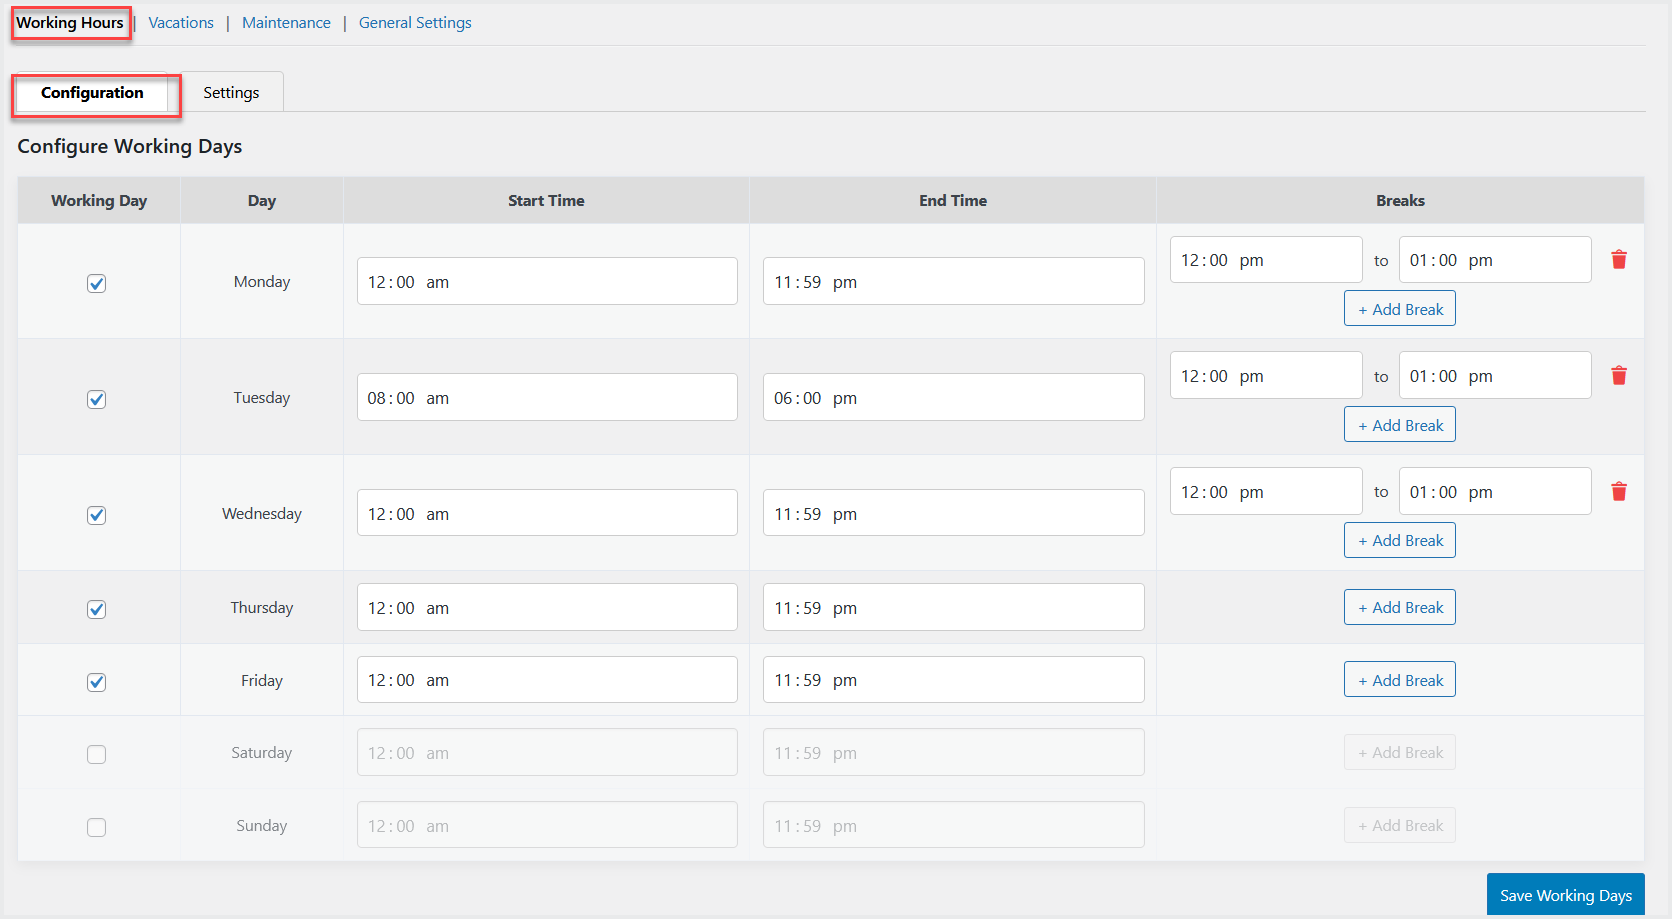
↑ Back to topIn the Working Hours>Configurations tab, you can enable working based on week days and set the working hours and add the single or multiple breaks for the enabled working day.
Move to the “Settings” tab, here you can enable header and footer for your store to display customized messages to your customers during break and weekends.
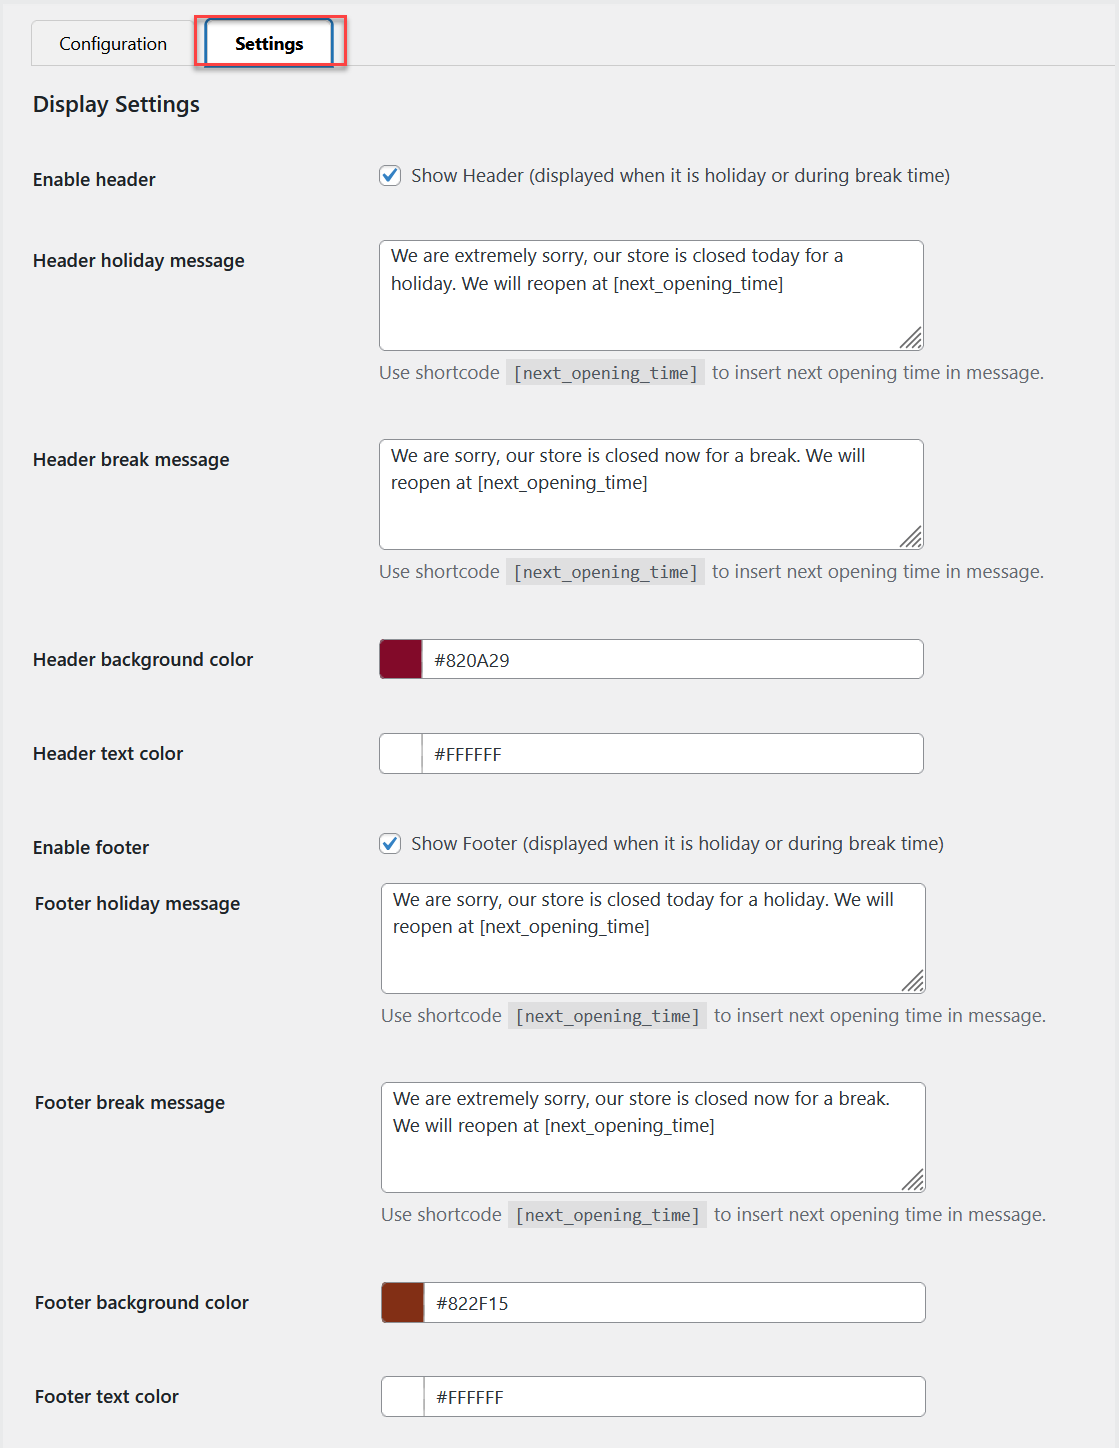
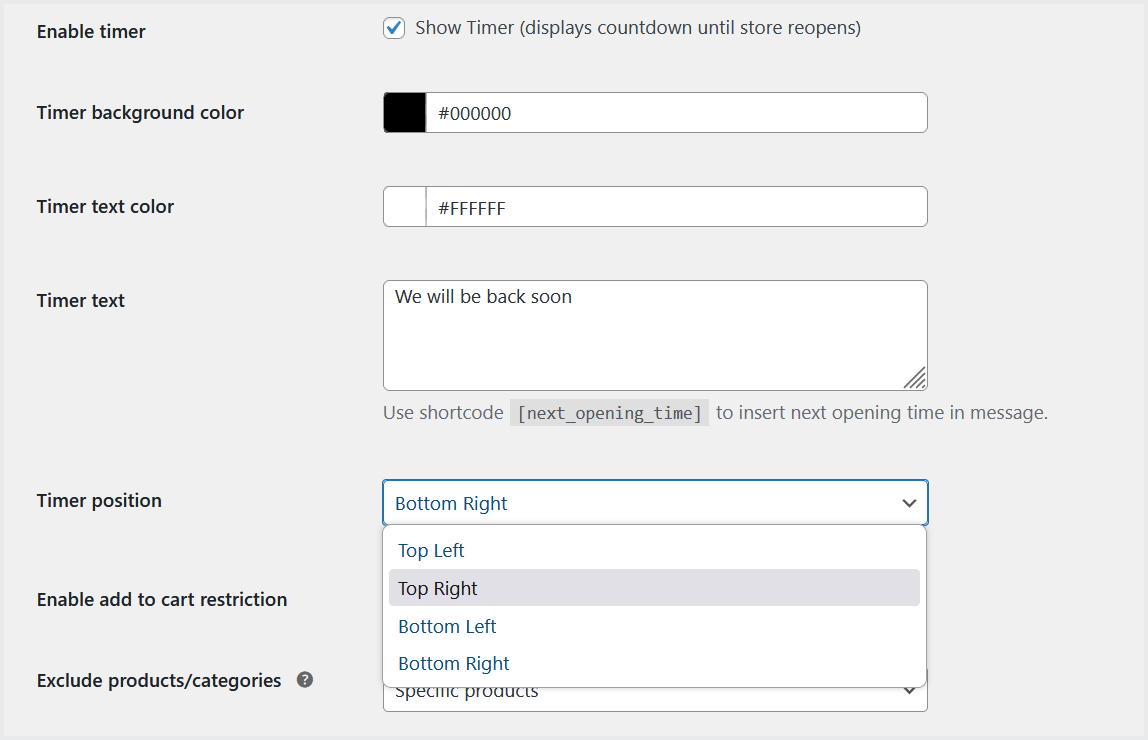
You can also enable a timer to display the store’s remaining time for reopening to your customers.
Enable cart restrictions option to disable add to cart button during non-working hours. However, you can also exclude specific products or categories from this restriction.
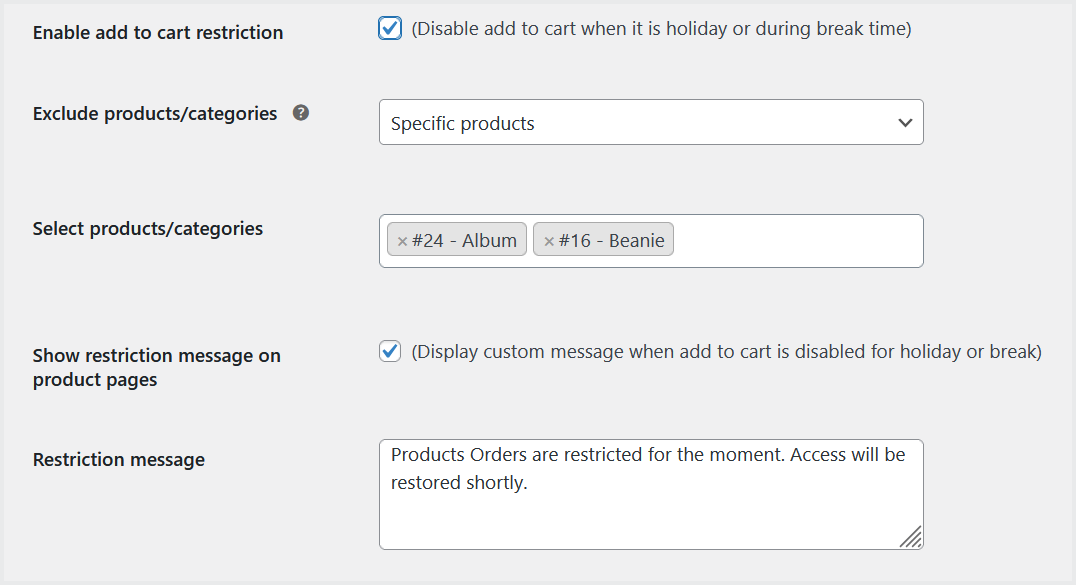
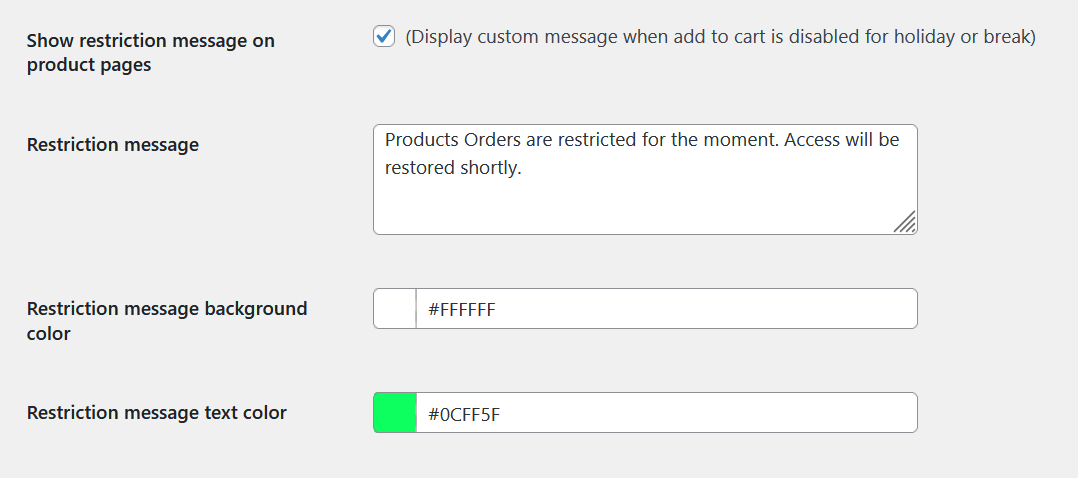
You can also display customized messages on product pages for restricted products.
Tips & Best Practices
Always save changes after editing.
- Use [next_opening_time] shortcode to make messages dynamic.
- Keep breaks clear and concise to avoid confusion.
- Combine header, footer, and timer for professional display and improved customer experience.
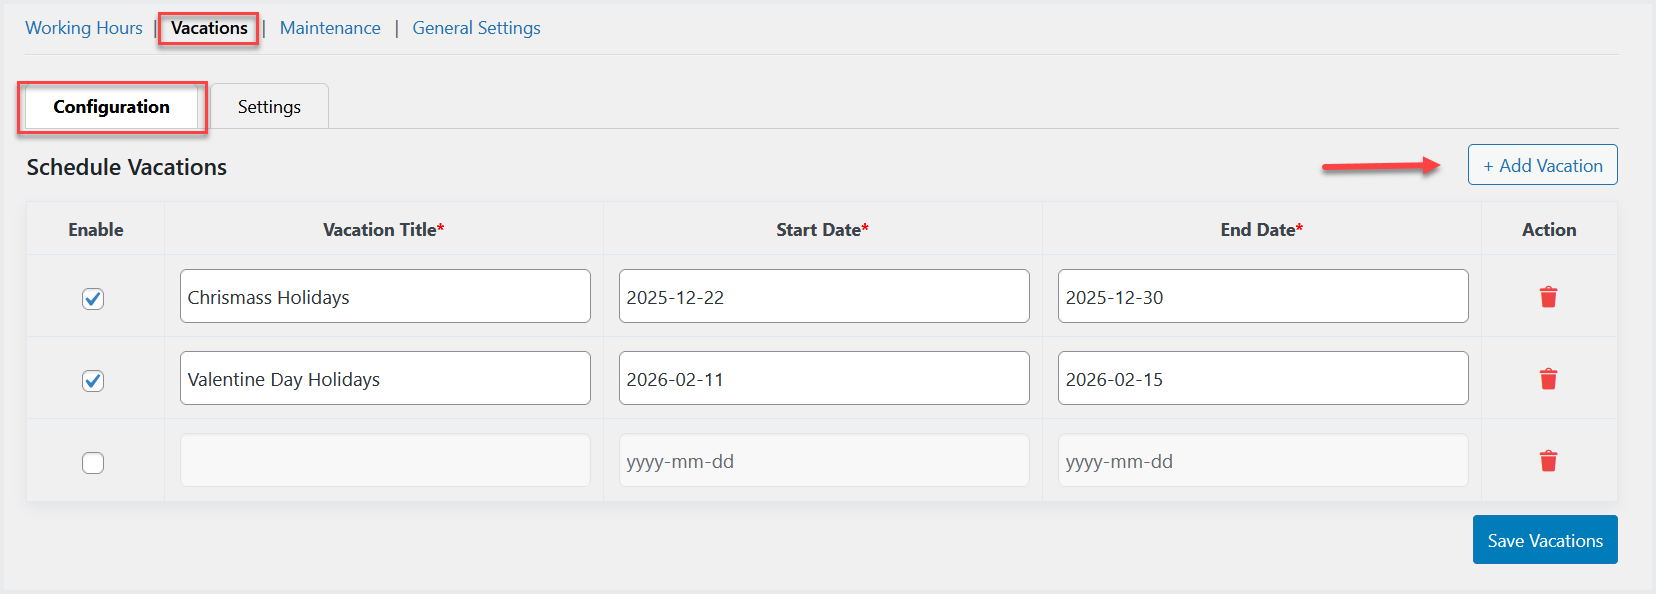
Vacations:
↑ Back to topClick the “Vacation” tab and visit the “Configuration” tab to add single or multiple vacations based on start and ending dates.
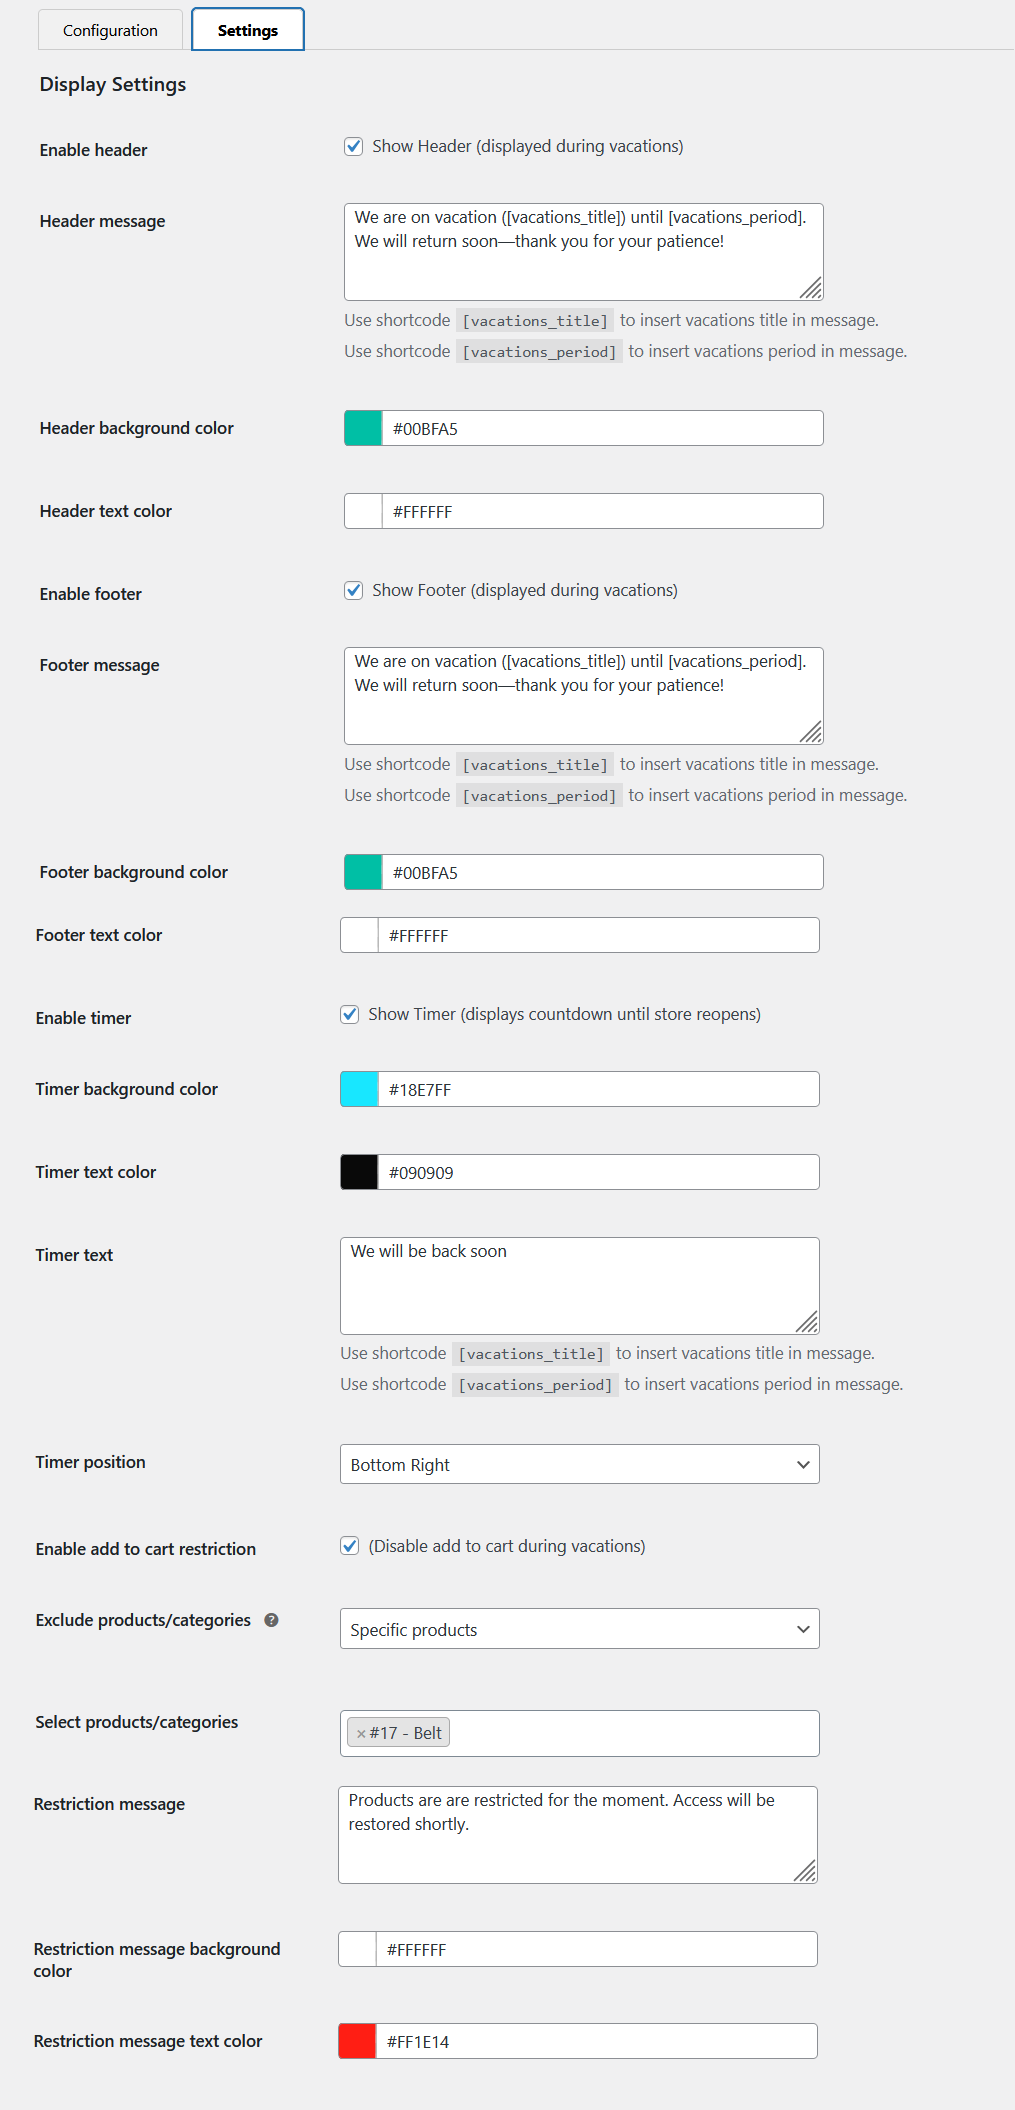
Move to the “Settings” tab, here you can do the same settings for vacation mode as we have described above for the working mode such as header and footer messages, countdown timer, and cart restrictions.
Maintenance
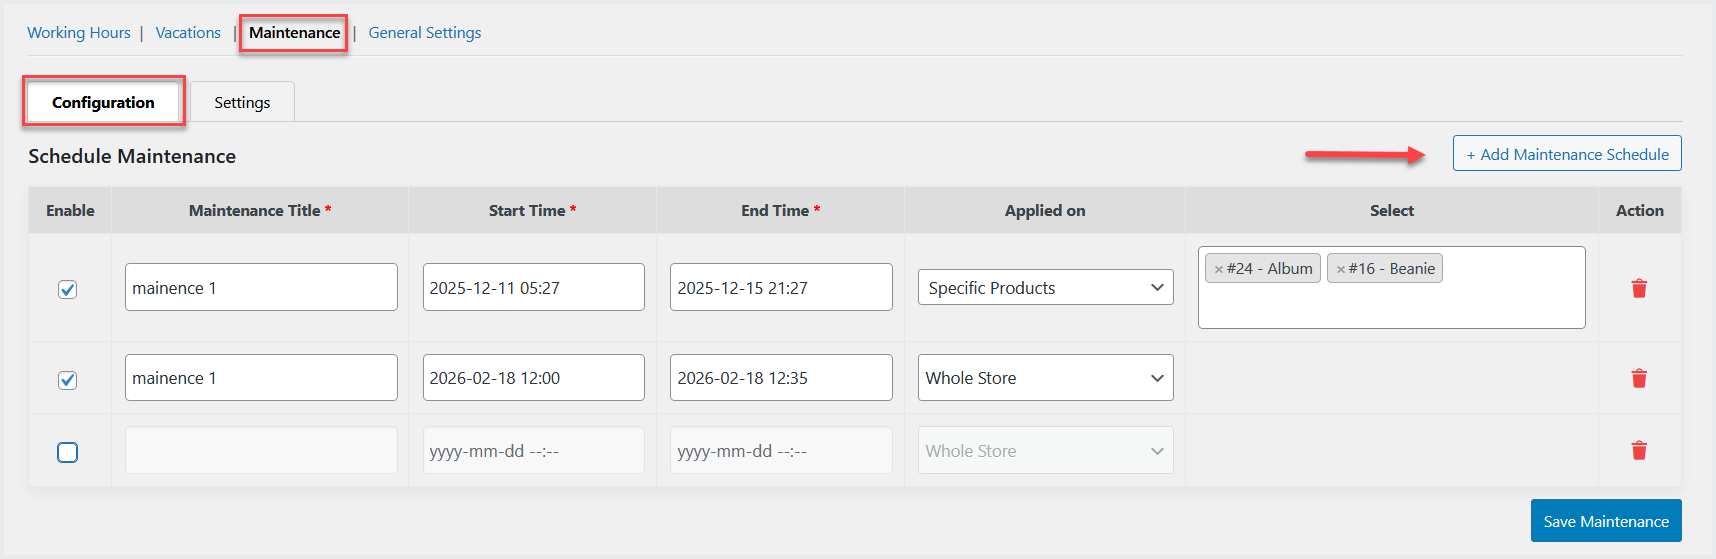
↑ Back to topGo to Maintenance>Configuration to enable single or multiple maintenance modes based on your requirements.
You can specify dates with time for this mode and also apply them on specific products, categories, CMS pages, or the whole store.
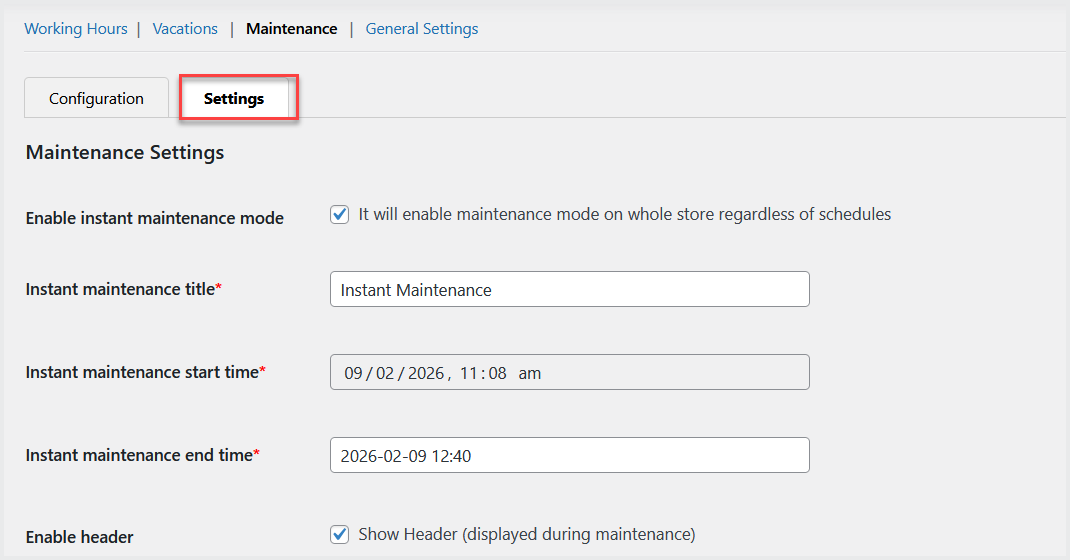
Now click the “Settings” tab, here you can enable instant maintenance mode for the whole store which will be effective right away and you can set its ending date.
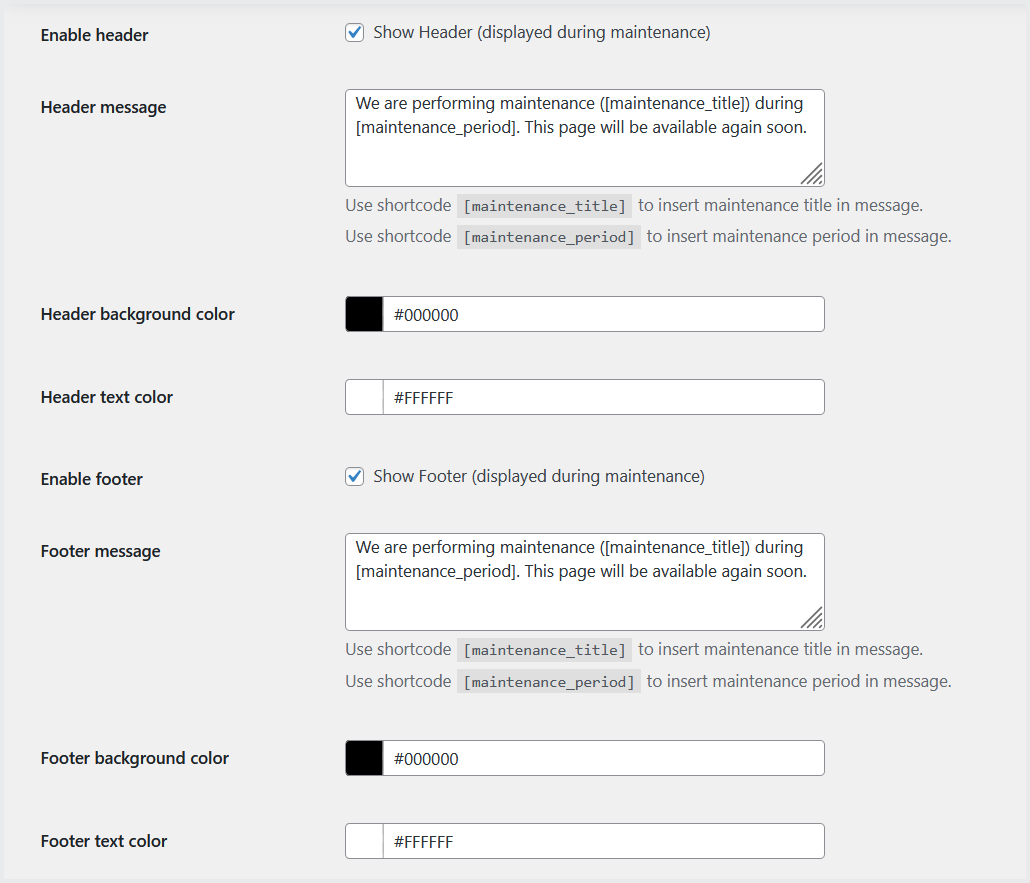
You can enable/disable header and footer to display customized messages during maintenance mode.
Display countdown time to display remaining time for store’s reopening and set its position on the page accordingly.
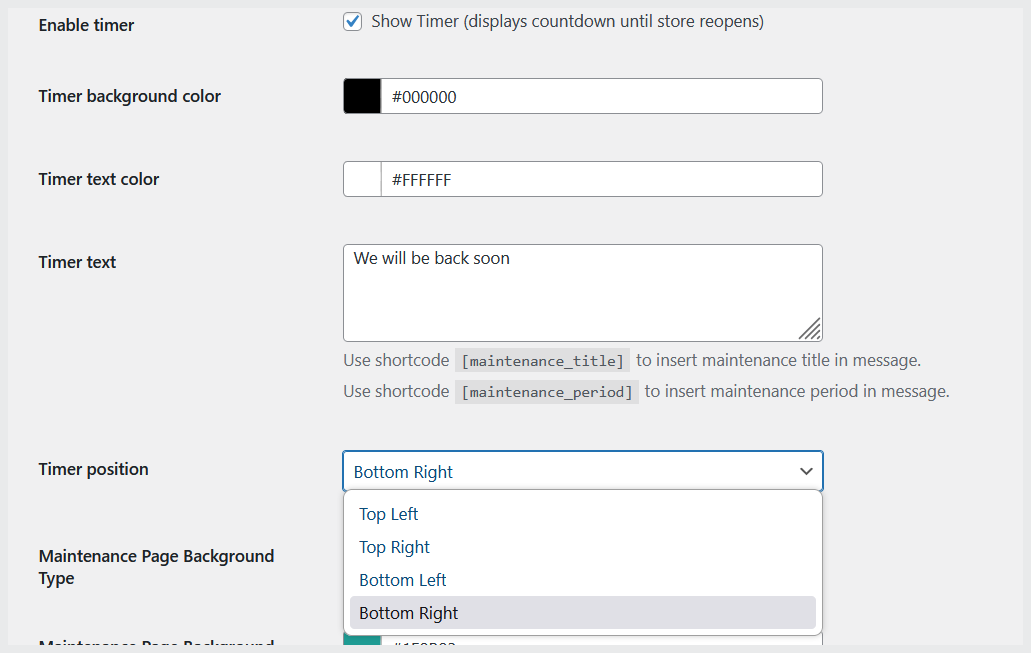
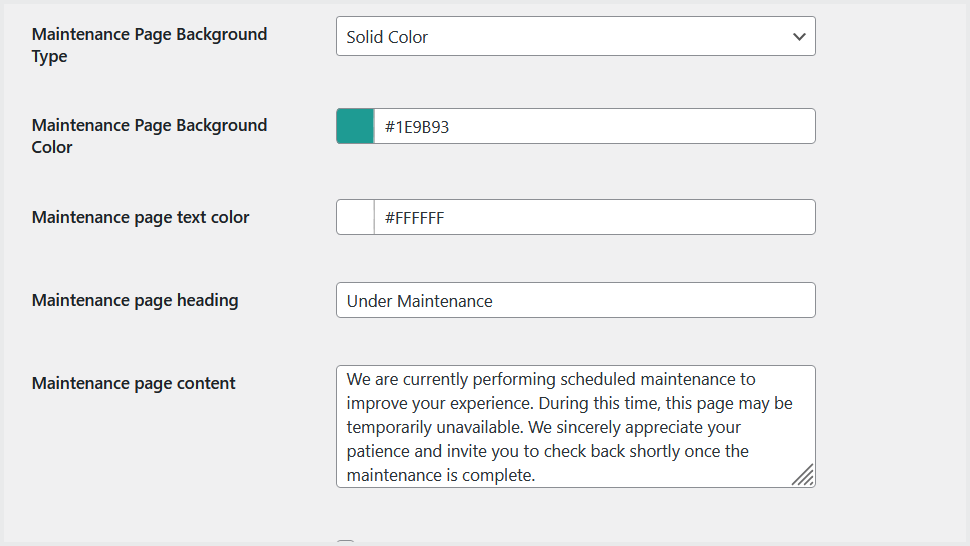
Set maintenance mode page such as title, content, colors and more.
Option to upload logo and image for this page.
General Settings:
↑ Back to topGo to the “General Settings” tab to set the priority between these modes. You can drag and drop the modes to set the priority.
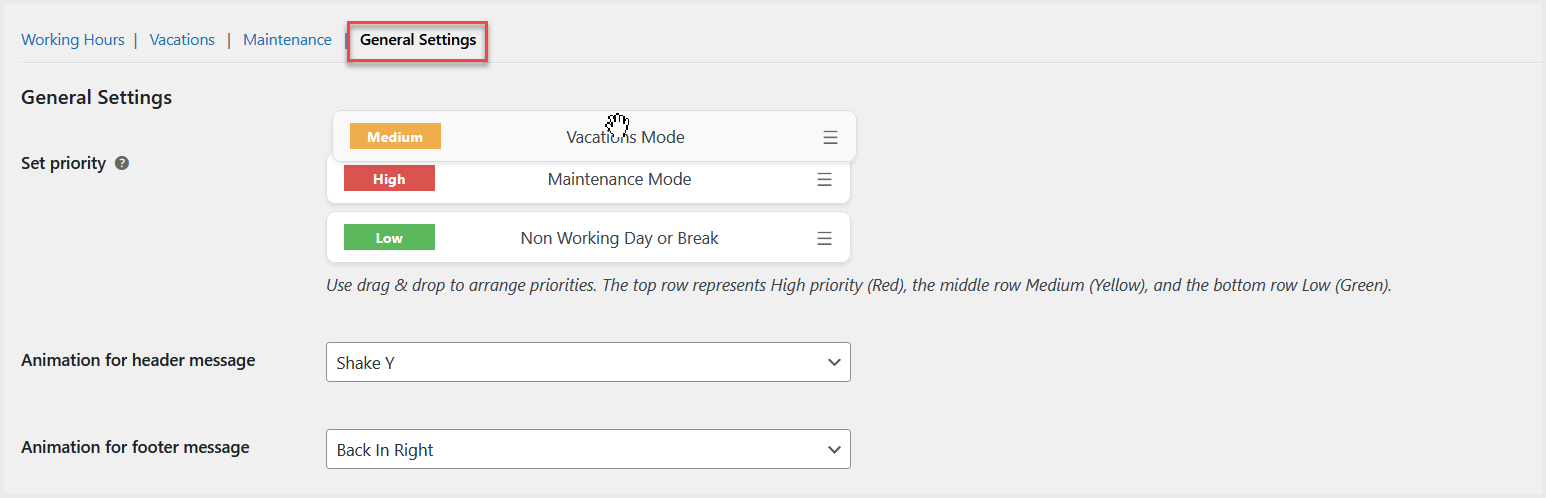
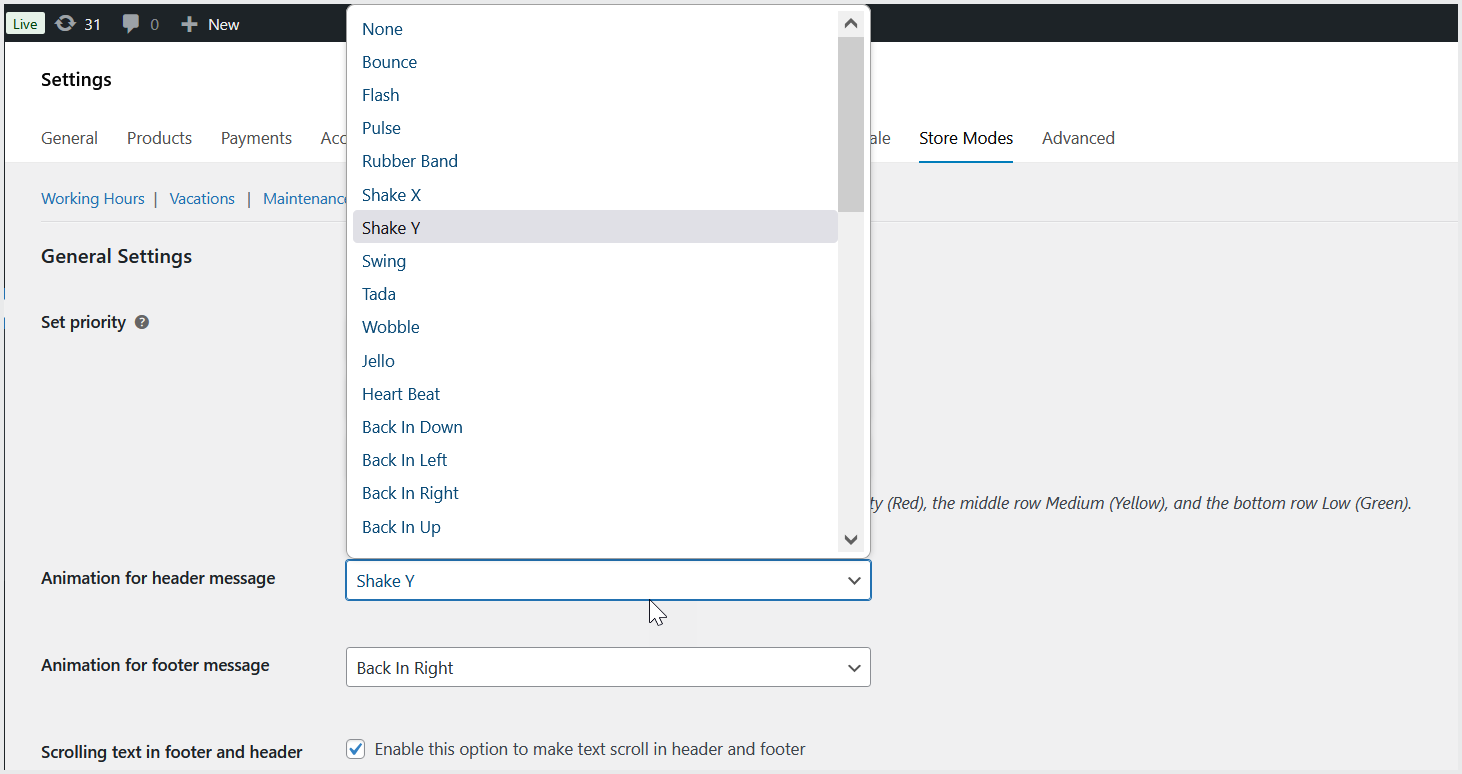
Option to select animation style for header and footer messages and enable scroll option to scroll the text of header and footer messages.