Overview
↑ Back to topThe Universal Address Autocomplete extension connects your store to one of several address autocomplete providers, letting you easily provide address validation to customers all over the world.
Available Providers
↑ Back to topCurrently, Universal Address Autocomplete supports the following providers:
- Loqate
- Google Places
- Fetchify
- PostcodeSoftware
- Canada Post
- Smarty
- Ideal Postcodes
- PostGrid
Don’t see the provider you want listed? Please reach out with a feature request. We are actively adding new providers.
Installation
↑ Back to topTo start using a product from WooCommerce.com, you can use the “Add to store” functionality on the order confirmation page or the My subscriptions section in your account.
- Navigate to My subscriptions.
- Find the Add to store button next to the product you’re planning to install.
- Follow the instructions on the screen, and the product will be automatically added to your store.
Alternative options and more information at:
Managing WooCommerce.com subscriptions.

Setup and Configuration
↑ Back to top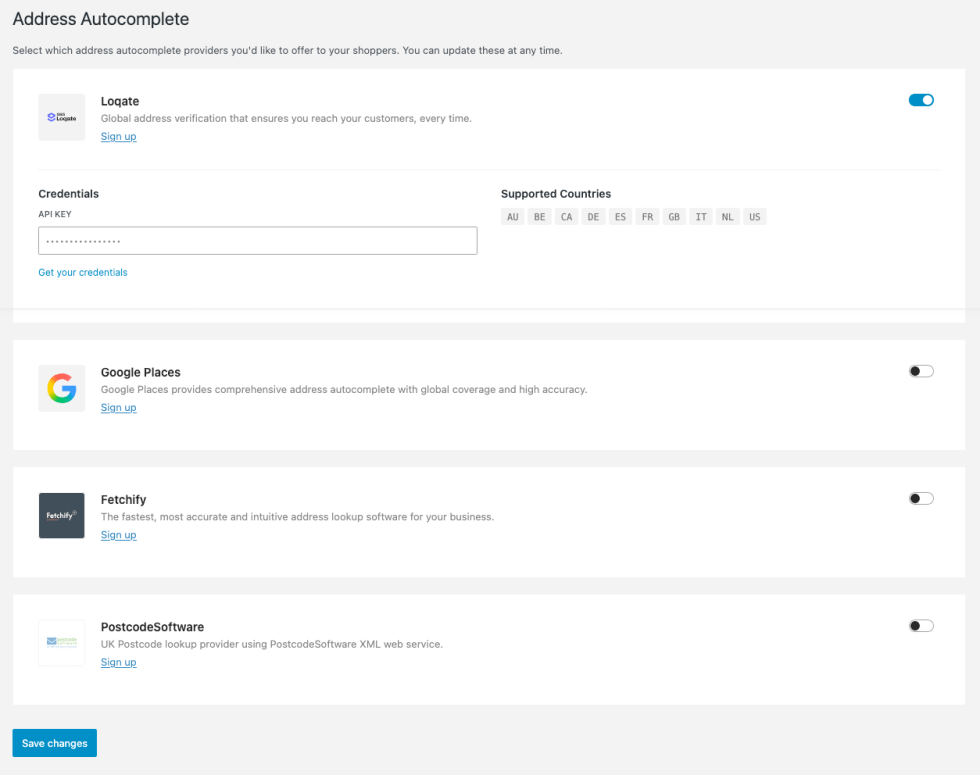
Getting started
↑ Back to topTo set up your store with Universal Address Autocomplete:
- Go to: WooCommerce > Settings > Advanced > Address Autocomplete.
- Enable one (or many) providers and enter the required credentials.
- Save changes.
- Go to: WooCommerce > Settings > General.
- Tick the checkbox for Enable predictive address search.
- Save changes.
Advanced configuration
↑ Back to topIf you enabled multiple prividers, you can set a preferred provider:
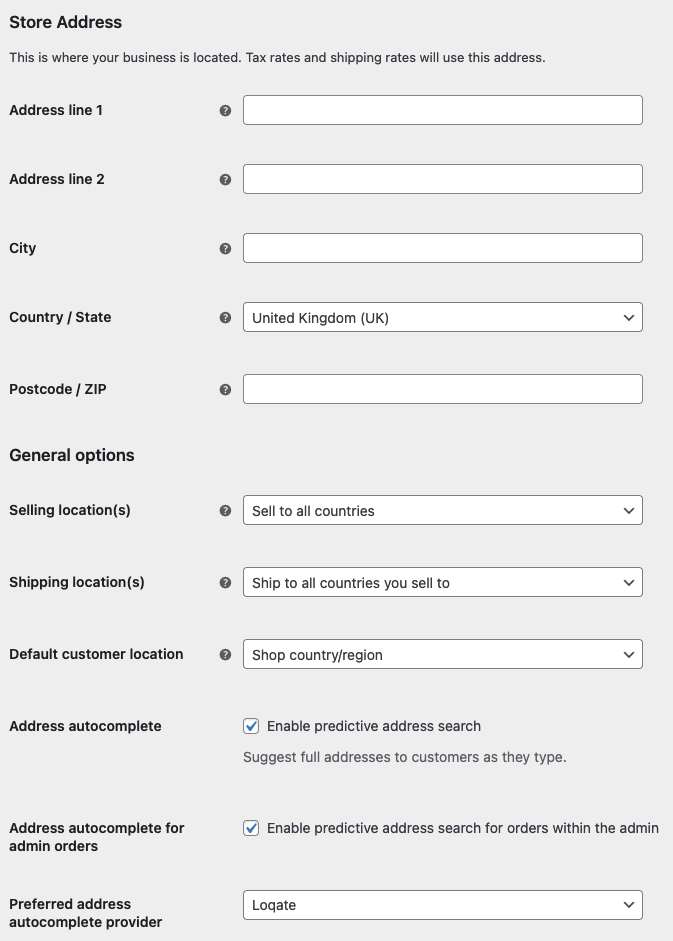
- Select your Preferred address autocomplete provider.
- Save changes.
Address autocomplete for admin orders
↑ Back to topAutocomplete for billing/shipping addresses when editing or creating an order in the WooCommerce admin can be a big time saver. For example if you take a telephone order, or you need to change a customers address.
To do this:
- Go to: WooCommerce > Settings > General
- Enable Address autocomplete for admin orders.
- Save changes.
Connecting to a service
↑ Back to topTo be able to offer address autocomplete to your customers, you’ll need an account with at least one provider:
Loqate
↑ Back to topGoogle Places
↑ Back to topFetchify
↑ Back to topPostcodeSoftware
↑ Back to topCanada Post
↑ Back to topSmarty
↑ Back to topIdeal Postcodes
↑ Back to topPostGrid
↑ Back to topDevelopers
↑ Back to topFilters
↑ Back to topuniversal_address_autocomplete_search_delayAllows adjusting the search delay after a user finishes typing before an API request is made. Defaults to 300 (milliseconds).
universal_address_autocomplete_address( array $address, array $provider_data, string $provider_id )Allows directly modifying the address returned by a provider.
universal_address_autocomplete_address_{provider-id}( array $address, array $provider_data )As above, but allows directly modifying a specific provider.