Highlight upcoming products with a “Coming Soon” badge and let customers know when they’re available to buy through Email or WhatsApp. Keep customers informed about new arrivals!
Plugin Installation
↑ Back to top- Download the .Zip file for the WooCommerce Coming Soon Products plugin from your account.
- Go to WordPress > Plugins > Add New and upload the downloaded file.
- Install and Activate the plugin to start configuration.
Configuration
↑ Back to topIn the WordPress admin panel, go to WooCommerce > Settings > Coming Soon Product and configure the settings for the plugin.
Countdown Settings
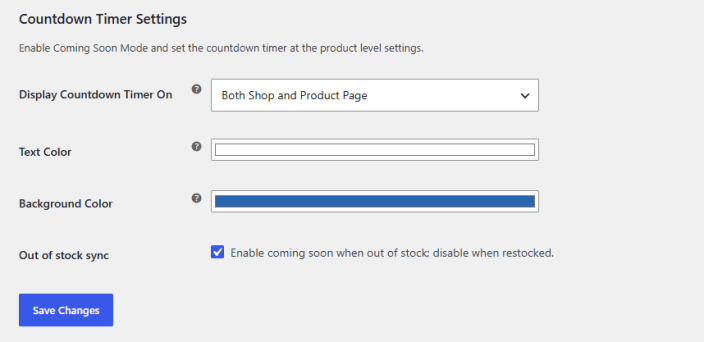
↑ Back to topConfigure the settings for the countdown timer in this tab. Go to WooCommerce > Settings > Coming Soon Product > Countdown Settings and set up the following settings:
- Display Countdown Timer On: Choose the pages where you want to display the countdown timer:
- Both Shop and Product Page
- Shop Page Only
- Product Page Only
- Text Color: Set the color for the text on the countdown timer.
- Background Color: Select the background color for the countdown timer.
- Out of Stock Sync: Enable coming soon for out-of-stock products (will be disabled once the product is back in stock)
Badge Settings
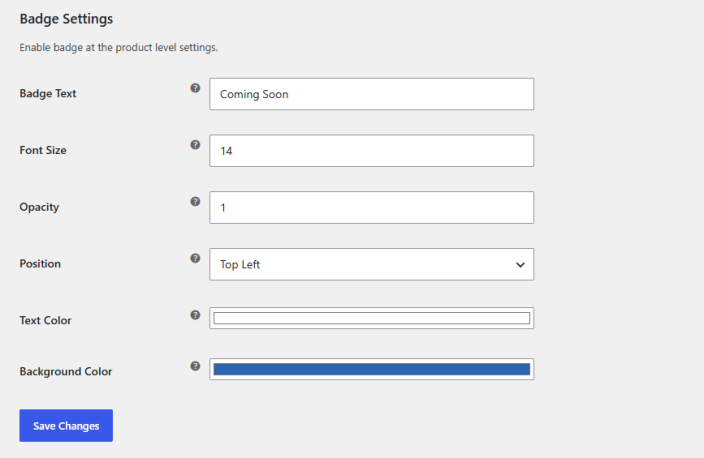
↑ Back to topCustomize the appearance of the coming soon badge in this section. To configure, go to WooCommerce > Settings > Coming Soon Product > Badge Settings:
- Badge Text: Add the text for the coming soon badge.
- Font Size: Set the size for the font of the coming soon badge.
- Opacity: Adjust the opacity of the coming soon badge.
- Position: Choose the preferred display position for the badge:
- Top Left
- Top Right
- Bottom Left
- Bottom Right
- Text Color: Select the color for the text on the badge.
- Background Color: Choose the background color for the coming soon badge.
Notify Me Form Settings
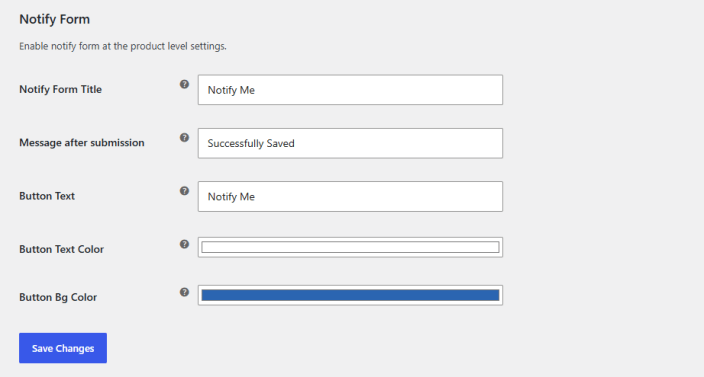
↑ Back to topConfigure the settings for the notify me form to match the theme of your store. To do so, go to WooCommerce > Settings > Coming Soon Product > Notify Me Form:
- Notify Form Title: Add a title for the Notify Me form.
- Message After Submission: Enter the message that will be displayed after the Notify Me form is submitted.
- Button Text: Add text for the form button.
- Button Text Color: Select the color for the text on the button.
- Button Background Color: Choose the background color for the button.
Email Settings
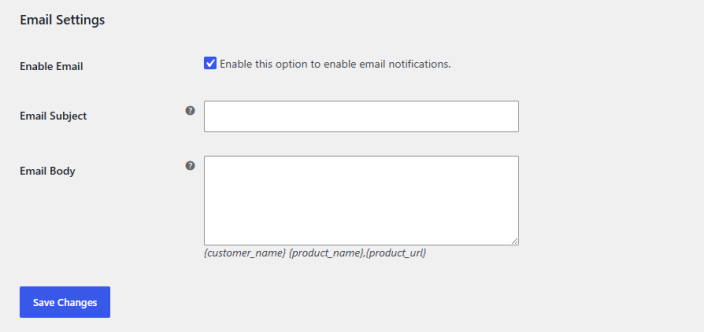
↑ Back to topSet email notifications for customers to send when a product is available. Go to WooCommerce > Settings > Coming Soon Product > Email Settings and configure the following settings:
- Enable Email: Enable email notifications upon availability of coming soon products.
- Email Subject: Add a subject for the email.
- Email Body: Add content for teh email body. Use placeholders such as {customer_name}, {product_name}, and {product_url} for customization.
WhatsApp Settings
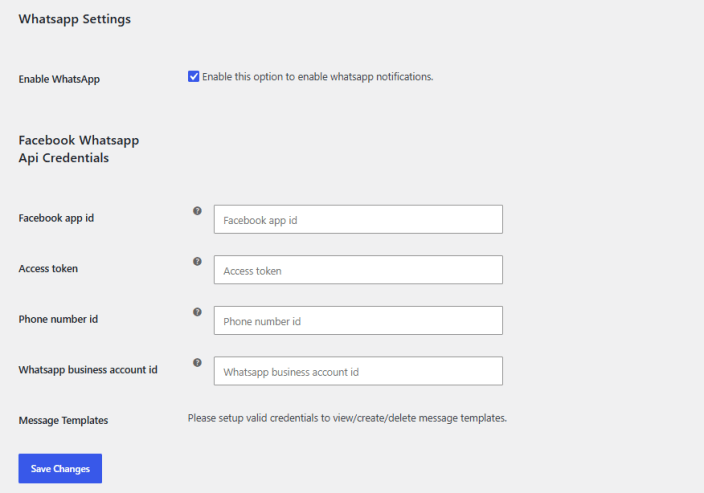
↑ Back to topSet up WhatsApp when upcoming products become available. To configure, go to WooCommerce > Settings > Coming Soon Product > WhatsApp Settings:
- Enable WhatsApp:
Facebook WhatsApp API Credentials
↑ Back to top- Facebook App ID: Enter your Facebook app ID.
- Access Token: Enter your access token.
- Phone Number ID: Enter your phone number ID.
- WhatsApp Business Account ID: Enter your WhatsApp Business Account ID.
- Message Templates: Set message templates for WhatsApp after adding the credentials.
Cron Job
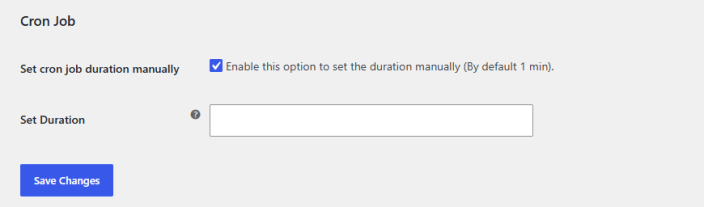
↑ Back to topSet up a cron job to automatically send notifications after a specific interval of time. Go to WooCommerce > Settings > Coming Soon Product > Cron Job and configure the following settings:
- Set Cron Job Duration Manually: Enable teh checkbox to manually set the duration for the cron job.
- Set Duration: Add the cron job duration in minutes.
Notify User Details
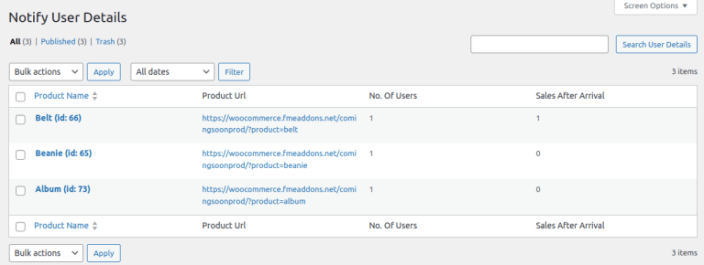
↑ Back to topCheck details of the customers who have submitted the Notify Me forms. Go to WooCommerce > Notify User Details, and here you will find the following information:
- Product names so you know which products the forms were submitted for.
- Product URLs
- Number of users who have submitted the Notify Me forms
- Number of sales after the product went live
Product Level Settings
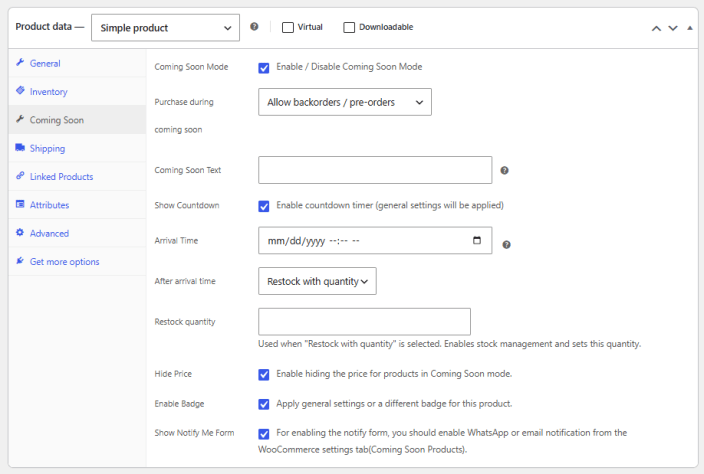
↑ Back to topConfigure the coming soon feature at the product level for more control. Go to Products > Edit Product > Product Data > Coming Soon, and here you will find the following settings:
- Coming Soon Mode: Enable or disable the coming soon mode for the product.
- Purchase during coming soon: Choose what the purchase behaviour should be during coming soon mode:
- Block Purchases (Default)
- Allow Purchases (Keep Add to Cart)
- Allow Backorders/Pre-Orders
- Coming Soon Text: Enter the text for the coming soon product.
- Show Countdown: Check the box to display a countdown timer.
- Arrival Time: Set a date and time for the arrival of the product.
- After Arrival Time: Choose what to do after the arrival time is reached:
- Do Nothing (Default)
- Mark as in Stock Only
- Restock with Quantity
- Restock Quantity: Enter the quantity of the product after restock.
- Hide Price: Hide the price for the coming soon product.
- Enable Badge: Enable the coming soon badge for the product.
- Show Notify Me Form: Check the box to display the Notify Me form for the product.