Add custom fields and extra options to your products using WooCommerce product addons. Set up flexible field types, conditional logic, and dynamic pricing to offer personalized product customization.
Installation
↑ Back to top1. Download the Product Addons and Extra Options.zip file from your WooCommerce account.
2. Go to WordPress Admin > Plugins > Add New and Upload Plugin.
3. Click on Choose File to upload the file you downloaded.
4. Install Now and Activate the extension.
Configuration
↑ Back to topAfter you have installed and activated the Product Addons and Extra Options Woo extension,Go to WooCommerce > Settings > Product Addons tab to configure the following settings.
Note: Please read the whole documentation as different types of fields have different options.
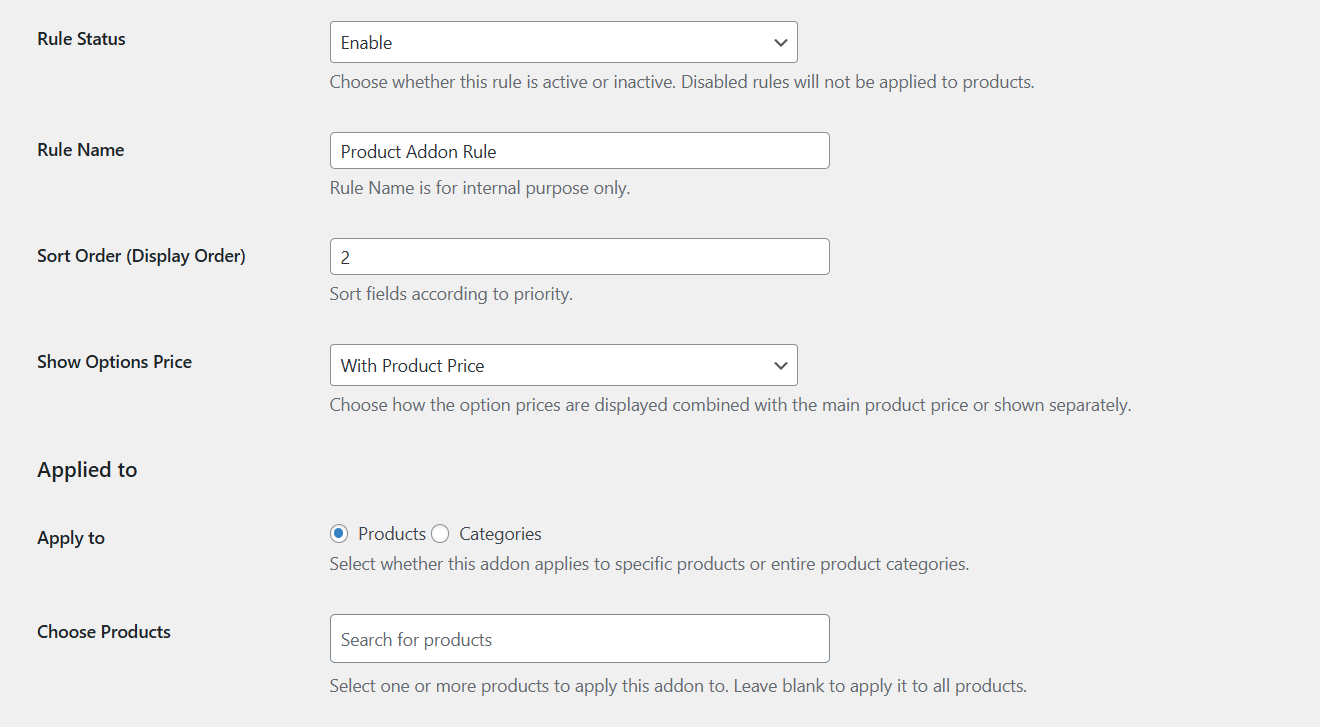
In the Product Addons tab, you can create and manage global product options. To add a new rule, click on the Add New button to configure the following:
- Rule Status: Option to enable or disable the rule.
- Rule Name: Set the name of the rule.
- Sort Order (Display Order): Set rule priority according to which fields of the rule are displayed first.
- Show Options Price: Select option price displayed with product price or separately.
- Applied to: Apply this rule for specific products or for specific categories.
- Choose Products / Categories: Choose products or categories according to the above selection.
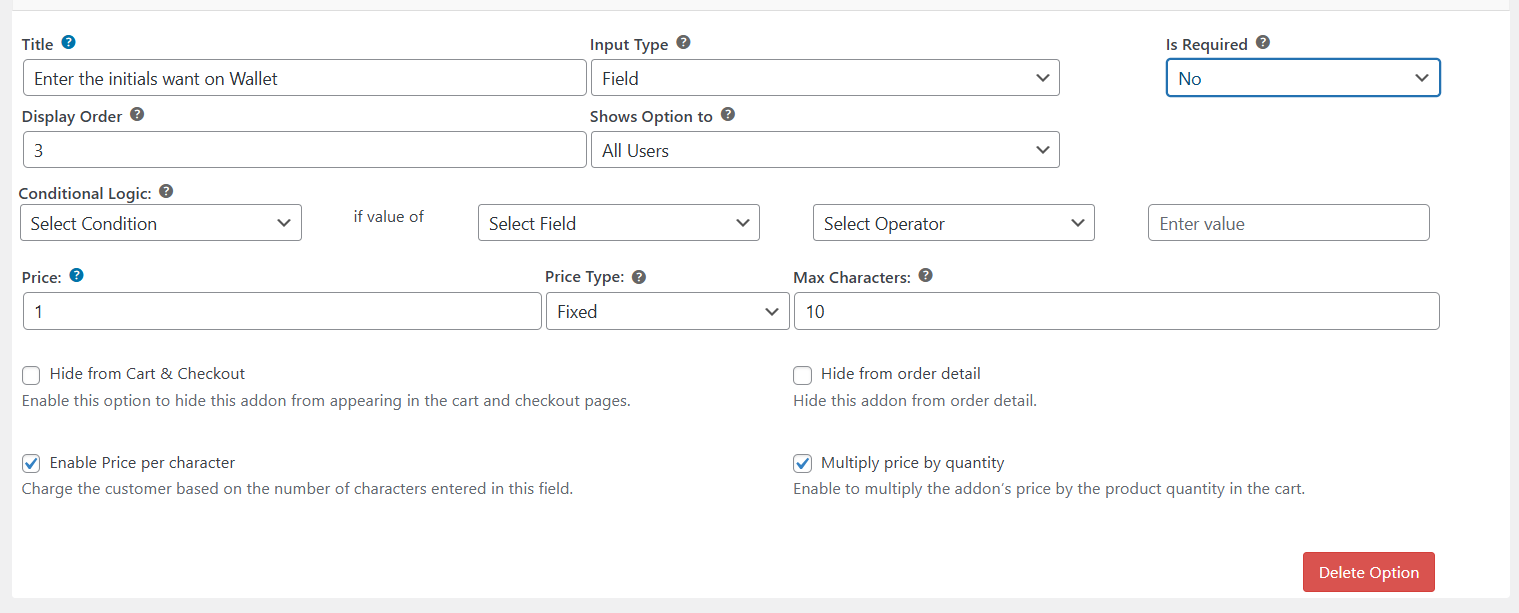
To add a field, click on a Add new Option button and configure the following.
Here we have selected a text field. After that, we will show you multiple options fields, which have different options.
- Title: Set the title of the field
- Input Type: Select field type from 19 types of fields available.
- Is Required: Make the field mandatory or optional.
- Display Order: Set the sort order of the field.
- Show Options to: Show field for specific user roles.
- Help Tip: Write text to display a tooltip in front of the field.
- Limit Total Selections(Optional): Select this option to manage the stock of product options. You can display and manage the stock for different fields, i.e., dropdown, Image radio buttons, radio buttons, checkbox, multiselect, and color button.
- Stock reminder Message: Upon enabling the limit total selection, you can display the stock quantity reminder with the help of a short code {stock}.
- Conditional Logic: Apply conditional logic for a field,d e.g., show or hide a field based on a condition.
- Price: Set the price of the field. Leave the field empty if you don’t want to charge a price.
- Price Type: Set a fixed or percentage price type.
- Max Characters: Max character limit for the field. (It is only available for text fields.)
- Hide from Cart and Checkout Page: Option to hide the field on cart and checkout pages.
- Hide From Order Detail: Checkbox option to hide the field on the order detail page.
- Enable Price per Character: Set price per character for the field.
- Multiple Price by Quantity: Select this to multiply the price of the addon based on quantity.
How to add a multiple options field?
↑ Back to topFollow the same steps as above. Click on the Add New Option button. Choose the field type as a dropdown. It will allow you to add multiple option which works as a dropdown. Here are the additional options you will get.
- Title: Set the title of the option
- Price: Choose the price of the addon.
- Price Type: Select the type of pricing for the field.
- Display Order: Set the display order of specific options. (It is sorting order between the options).
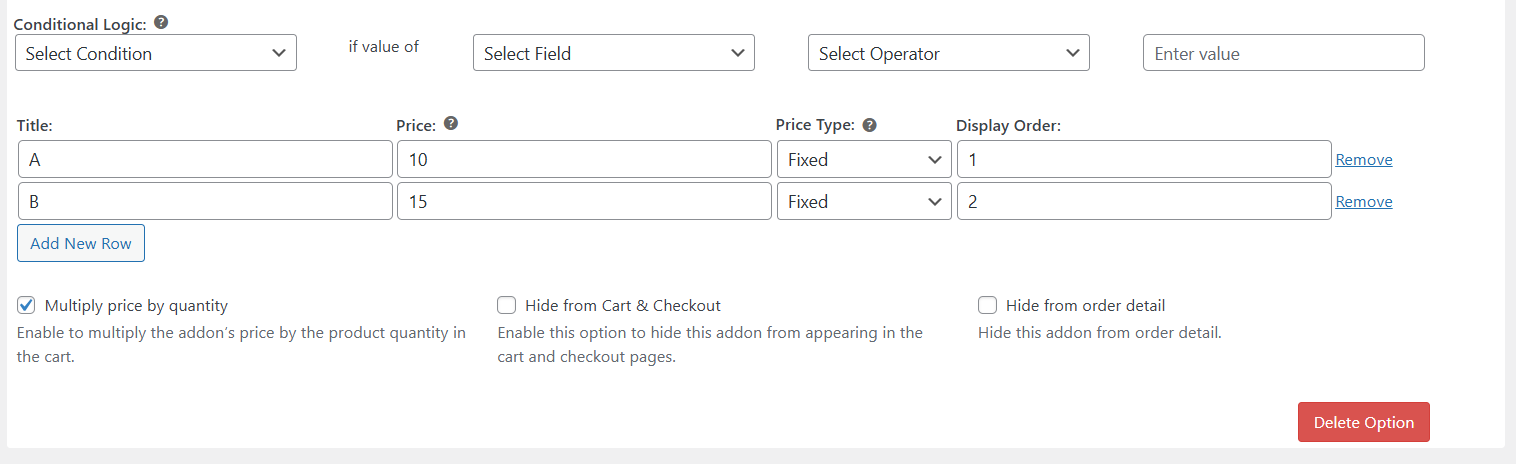
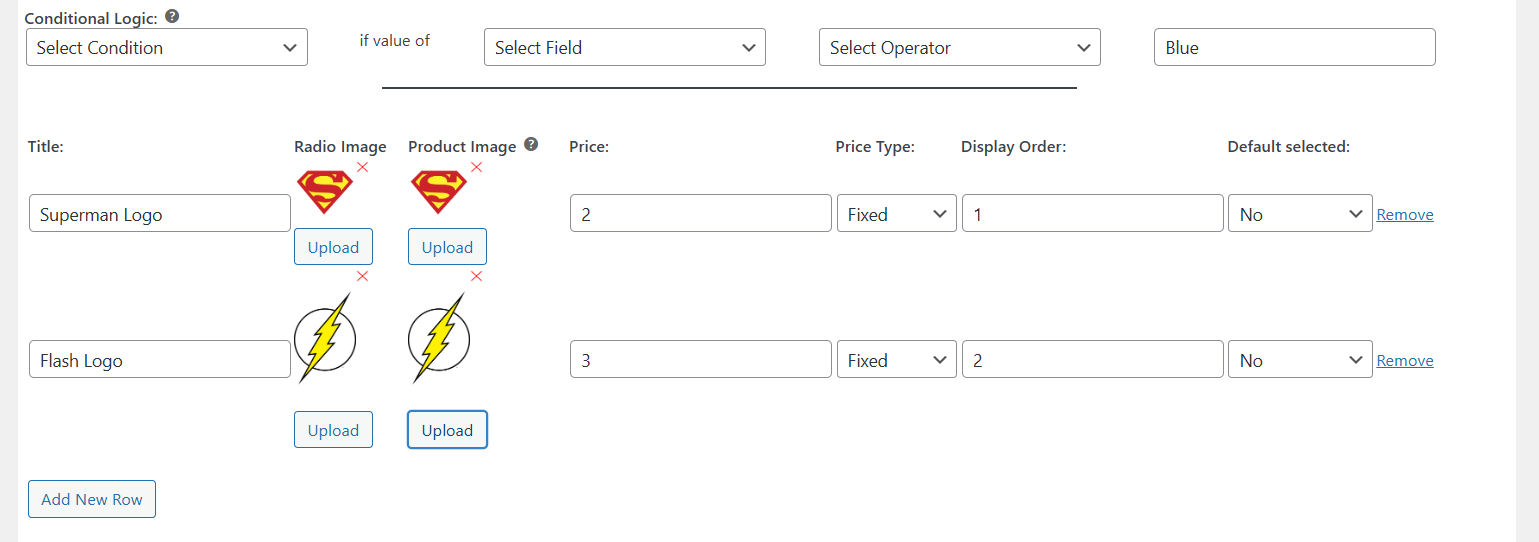
If you select the radio button, checkbox, or image radio buttons, it will show slightly different options.
By selecting the image radio button and the checkbox, you will see two additional options, i.e., radio or checkbox image and product Image.
- Radio Image: Upload the image to display radion button images swatch. You can also upload it for a checkbox.
- Product Image: Upload the same image as a radio button (recommended) to display the image as a gallery when a specific option is selected.
How to Add Product-Specific Options to an Individual Product?
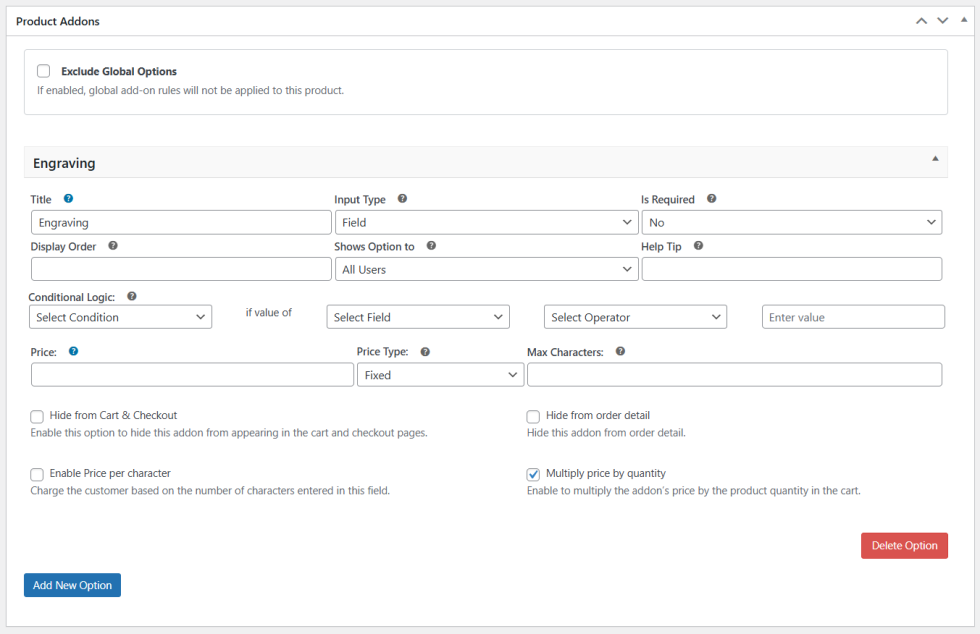
↑ Back to topGo to Products > All Products and open the product you want to configure. Once on the product edit page, scroll down to the Product Addons section.
If you do not want the global addon rules to apply to this product, check the ” Exclude Global Options”. This will prevent any store-wide addon rules from appearing on this product.
To add a product-specific option, click Add Option. This will create a new addon field where you can configure the option settings for this individual product.