AI Virtual Try-On allows your customers virtually try products before they buy.
Installation
↑ Back to topRequirements
↑ Back to top- WordPress 6.0 or later
- WooCommerce 7.0 or later
- PHP version: 7.4 or higher
To start using a product from WooCommerce.com, you can use the “Add to store” functionality on the order confirmation page or the My subscriptions section in your account.
Alternative opion:
- Upload the plugin ZIP via Plugins → Add New → Upload Plugin
- Activate the plugin

Activation Guide
↑ Back to topAfter activation, access your WordPress admin dashboard, go to WooCommerce > Settings, and select ‘Virtual Try On.’ Here, you can configure the extension’s general settings.
Setting Up Virtual Try On
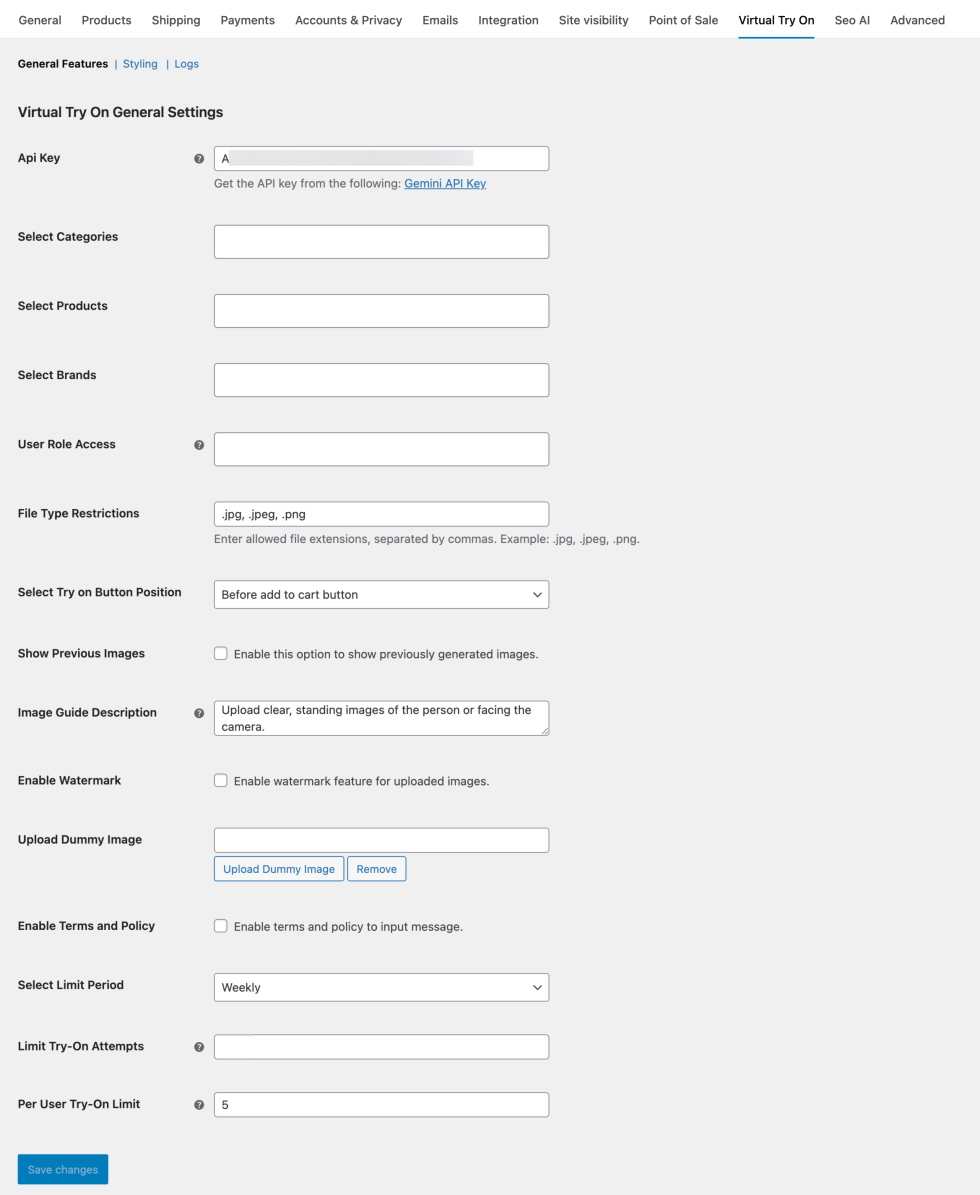
↑ Back to topTo configure general settings, Go toWP Admin Panel > WooCommerce > Settings and select Virtual Try On. Now fill in the following details:
- API Key: To generate virtual try-on images, you need to create an API Key. Select “Gemini API Key” and follow the setup instructions.
- Select Categories: Search and add specific categories for which you want to enable the virtual try-on feature
- Select Products: Choose specific products where you want to display the try-on option
- Select Brands: select the brands for which you want to enable the Try-on feature.
- User Role Access: Restrict the virtual try-on feature to specific user roles
- File Type Restrictions: Specify the permitted file extensions for customer image uploads, such as jpg, jpeg, and png.
- Select Try On Button Position: Place the try-on button:
- Before add-to-cart button
- After add-to-cart button
- Show Previous Images: Enable the option if you want to display recent uploads for customers
- Image Guide Description: Write a custom note to guide users about the image upload requirements
- Enable Watermark: Enable the button if you want to display a watermark on each image
- Upload Watermark Image: Click “Upload Watermark Image” and select an image from your media gallery
- Upload Dummy Image: Add a dummy image to be used as a preview for the Try-On feature
- Enable Terms and Policy: Enable this option if you want customers to approve the terms and policies before using the feature.
- Message Text: Write the term and policy message, such as “We value your privacy. Please accept terms before using virtual try-on”.
Styling Try On Button
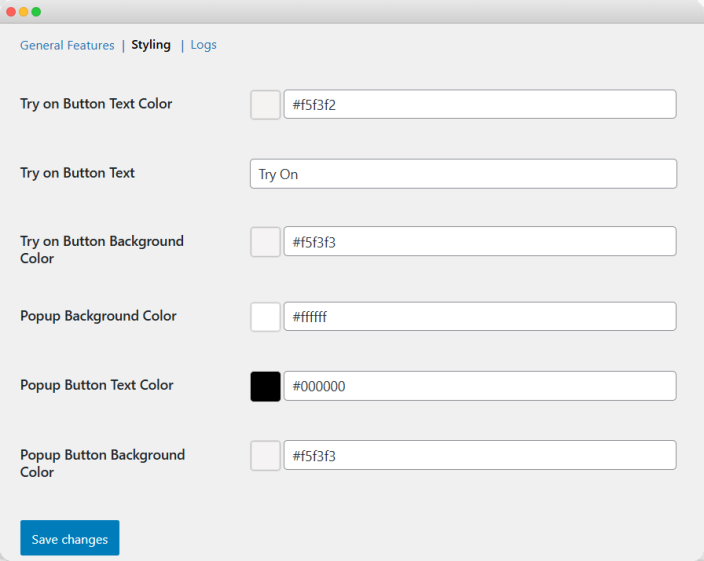
To style the “Try On” button Go to WP Admin Panel > WooCommerce > Settings and select Virtual Try On. Now, from the above options, select “Styling” and configure the following:
- Try on Button Text Color: Select a color for the Try On button text
- Try on Button Text: Write custom text such as “Try On or Style it on Me.”
- Try on Button Background Color: From the palette, select desired color for the try-on button background
- Popup Background Color: Select a background color to style the popup
- Popup Button Text Color: select the color for the text on the popup button
- Popup Button Background Color: choose the background color for the popup button
Manage Virtual Try On Logs
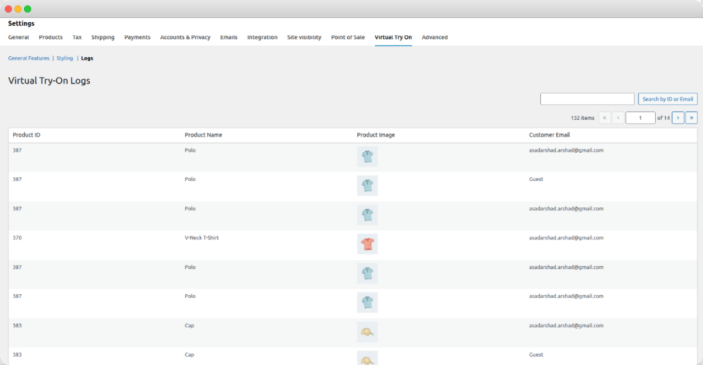
Go to WP Admin Panel > WooCommerce > Settings and select Virtual Try On. Now, from the main menu, select “Logs. Here you can view the following details:
- Product ID
- Product Name
- Product Image
- Customer Email
Product-Level Settings
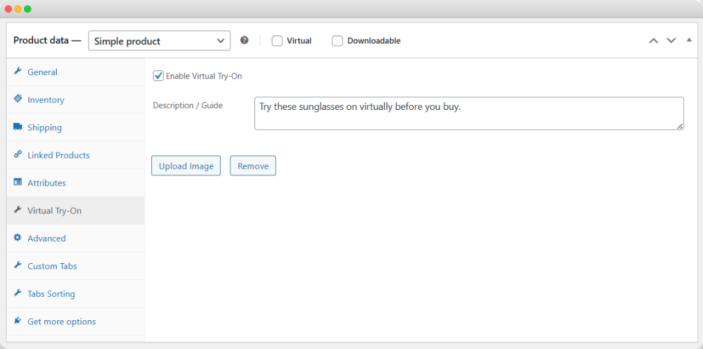
↑ Back to topBy using the extension, you can enable the Virtual Try on option for specific products. This allows merchants to assign a unique dummy image and custom description for each product. Go to WP Admin Panel > Products and from the list select any product for which you want to add a virtual try-on option. Click on Edit and from the Product Data select Virtual Try On. Now fill in the following details:
- Enable Virtual Try-On: Activate the option to add Try On button on this product
- Description/ Guide: Write a custom description to help users understand how to use the try-on feature for this product
- Upload Image: Select “Upload Image” and add the dummy image according to the item.
- You can also delete an uploaded image by clicking on “Remove.”
General FAQs
↑ Back to topQ1. How Can Customers Try Products on Themselves?
Admins can use WooCommerce Virtual Try On extension to allow customers to try different items by uploading their images. Once the plugin is activated, customers can select any product and click the “Try On” button. A form will appear where they can upload their image and preview the product easily. For the detailed overview, follow the steps mentioned below:
- From the product page, select the “Try On” button.
- A form will appear, where you can upload an existing image by selecting “Upload from Device” or capture a new one by choosing “Use Camera”.
- Before uploading the image, make sure to check the box to accept the terms and policies.
- Once uploaded or captured, you can view the product on yourself and save the result by selecting “Download.”
Q2. How to Enable Virtual Try On for Specific Products and Categories?
You can use AI Virtual Try On for WooCommerce extension to add the Try On feature for specific products, categories, and brands. Once the plugin is installed, go to WP Admin Panel > WooCommerce > Settings and select Virtual Try On. Here you can add specific categories, products, and brands for which the Try On option will be available. For a detailed overview, follow the steps below:
- Install the extension and then go to WP Admin Panel > WooCommerce > Settings and select Virtual Try On.
- From the general settings, you can select specific products, categories, and brands where the Try-On button will be displayed
- Admins can also restrict Try-On feature to selected user roles and define allowed file extensions (eg, jpg, jpeg, png) for customer uploads
- Now, place the try-on button before/after the add-to-cart button and enable a custom watermark on each upload
- Add terms and policies for customers and click on save.
Q3. How to Enable Virtual Try On at the Product Level?
By using AI Virtaul Try on for WooCommerce extension, you can enable try on button for individual products. Install the plugin, go to WP Admin Panel > Products, and navigate to the product for which you want to add a Try On option. Click on Edit, and from the Product data select Virtual Try On. Enable the option, add a custom description/guide for the users, and upload a dummy image according to the product. For a detailed overview, follow these steps:
- Install the plugin, then go to WP Admin Panel and select Products. From the product list, you can select any item for which you want to enable Virtual Try On feature.
- Now click on Edit and from the Product Data select Virtual Try On. Enable the option to display Try On button for this product.
- Add a custom description or guide to assist customers during the Try On process.
- Now select Upload Image and add a dummy image relevant to the product.
- Click on Save