
Under the EU Consumer Rights Directive, customers who buy online have the right to withdraw from a purchase within 14 days without giving any reason. For store owners, honoring this right usually means fielding requests over email, updating orders by hand, and keeping records in case of a dispute. The EU Order Withdrawal Button plugin for WooCommerce replaces that manual process with a structured workflow: customers submit withdrawal requests directly on your store, and you review, approve, and track every request from a dedicated dashboard inside WooCommerce.
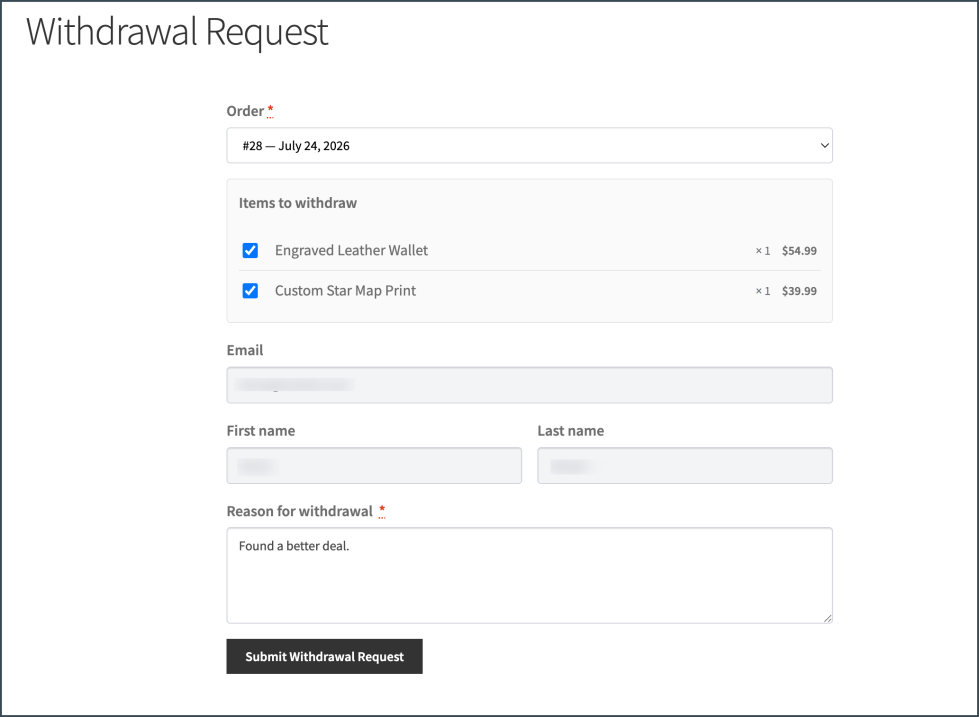
This guide covers every feature of the plugin. The admin area has two parts: a Requests tab where withdrawal requests are listed and processed, and a Settings tab organized into four sections: General, Rules & Exclusions, Workflow, and Advanced.
How the workflow runs
↑ Back to top- A customer submits a withdrawal request through your store, within the withdrawal window you define.
- The request appears in your dashboard, and the linked order status can update automatically.
- You open the request, review the details and the customer’s stated reason, and approve or reject it.
- On approval, the order status updates again, and the entire history is preserved in a timeline and activity log.
The Requests dashboard
↑ Back to topThe Requests tab opens with two summary cards. The first shows the number of open requests awaiting action, with a week-over-week comparison. The second shows requests approved in the last 30 days, with a percentage trend.
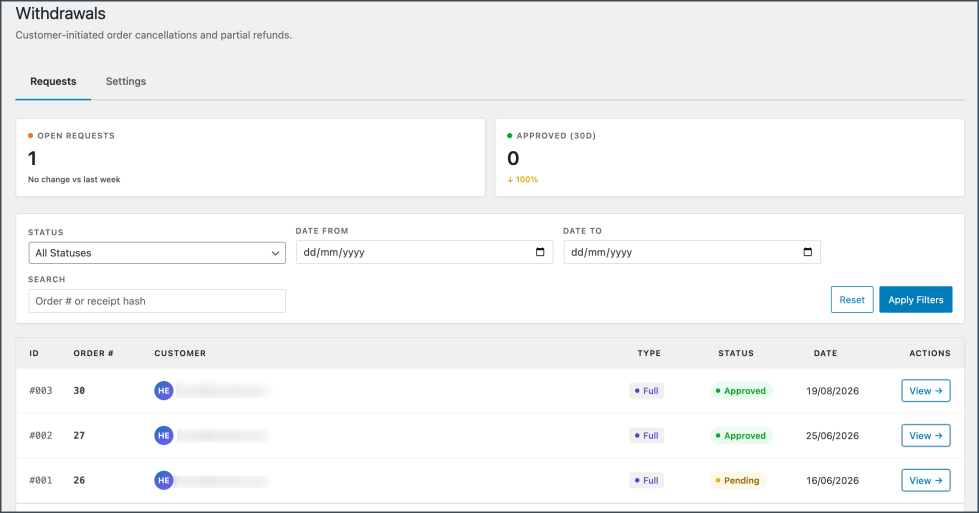
Below the cards, a filter bar narrows the request list by status, date range, or order number search, with a one-click reset. The request table lists every withdrawal with its ID, order number, customer email, type (full or partial withdrawal), color-coded status badge, submission date, and a View action. The table is paginated so it stays usable as volume grows.
The request detail view
↑ Back to topClicking View opens a page designed to support a decision on one screen.
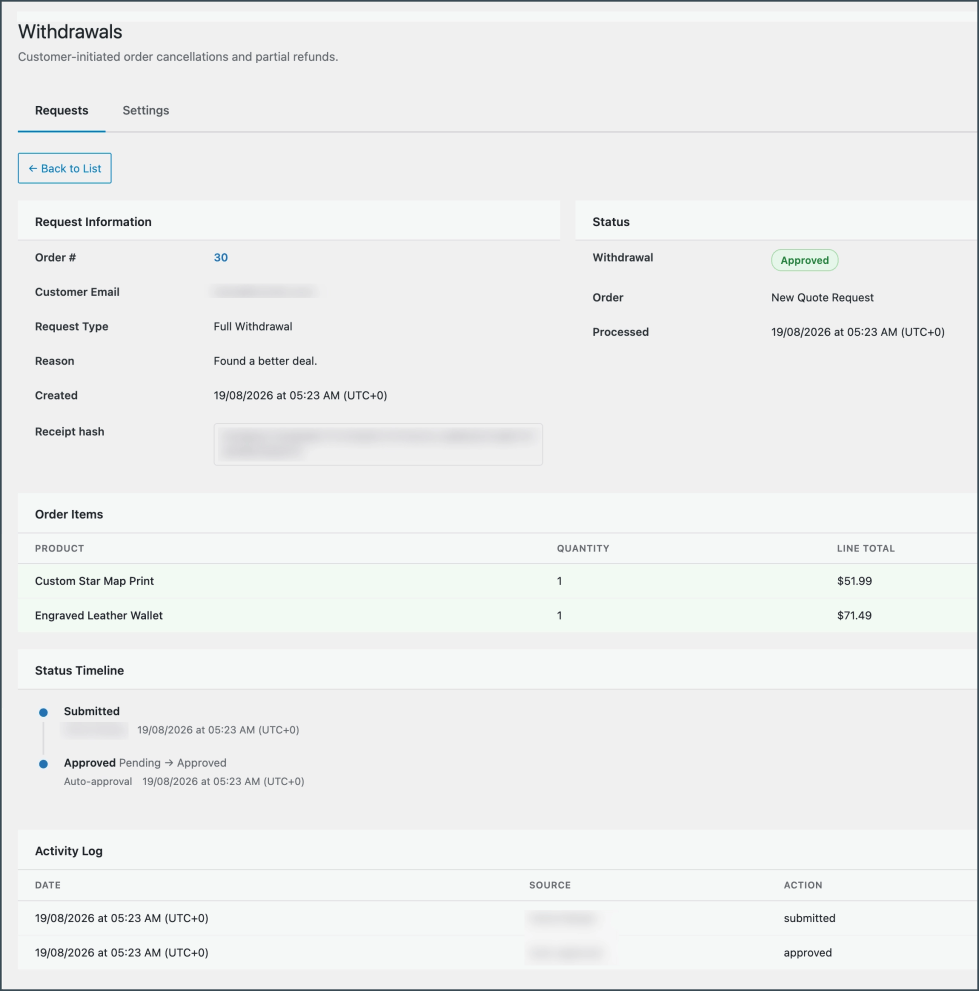
Request Information shows the order number (linked to the order), the customer’s email, the request type, the reason the customer provided, and the creation timestamp.
Status tracks the withdrawal status and the current WooCommerce order status side by side, along with the processing time, so you can confirm the two remain in sync.
Order Items lists the products covered by the request with quantity and line total. For a partial withdrawal, this shows exactly which items the customer wants to return.
Status Timeline presents the request lifecycle as a vertical timeline: each transition, who performed it, and when.
Activity Log is the audit trail. Every action is recorded with date and time, actor, action taken, and an optional note. For EU compliance, this log is your evidence that requests were received and handled within the legal window.
General settings
↑ Back to topThe General section controls the core behavior and presentation of the withdrawal form.
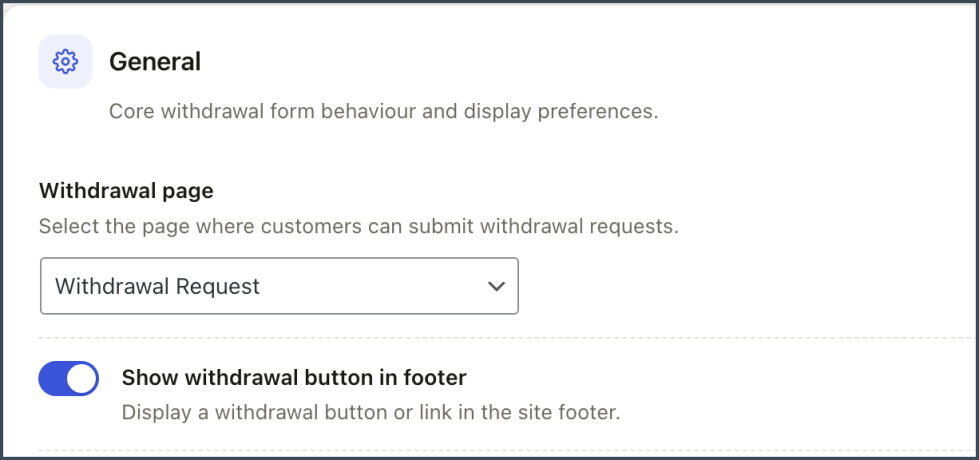
Withdrawal page. Choose the page where customers submit requests. The plugin renders the request form on the page you select.
Show withdrawal button in footer. Display a withdrawal button or link in the site footer, so the option is always easy to find, which matters for EU compliance.
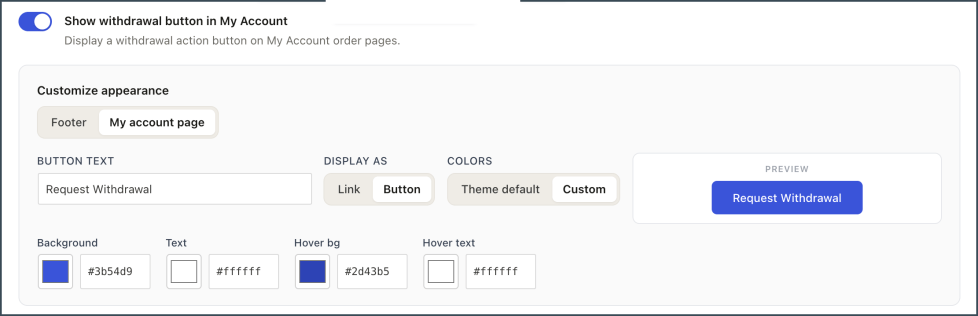
Show withdrawal button in My Account. Display a withdrawal action button directly on My Account order pages. Customers can start a request from the order itself, without hunting for a separate page.
Customize appearance. A dedicated panel styles both placements. Switch between the Footer and My Account tabs, set the link text (default “Request Withdrawal”), choose whether it renders as a plain link or a button, and either inherit your theme’s default colors or define custom ones. A live preview shows the result as you edit.
Display scope. Show the withdrawal form and links globally across the site, or only on WooCommerce pages.

Allow partial withdrawals. This recommended setting lets customers withdraw individual items instead of the entire order.
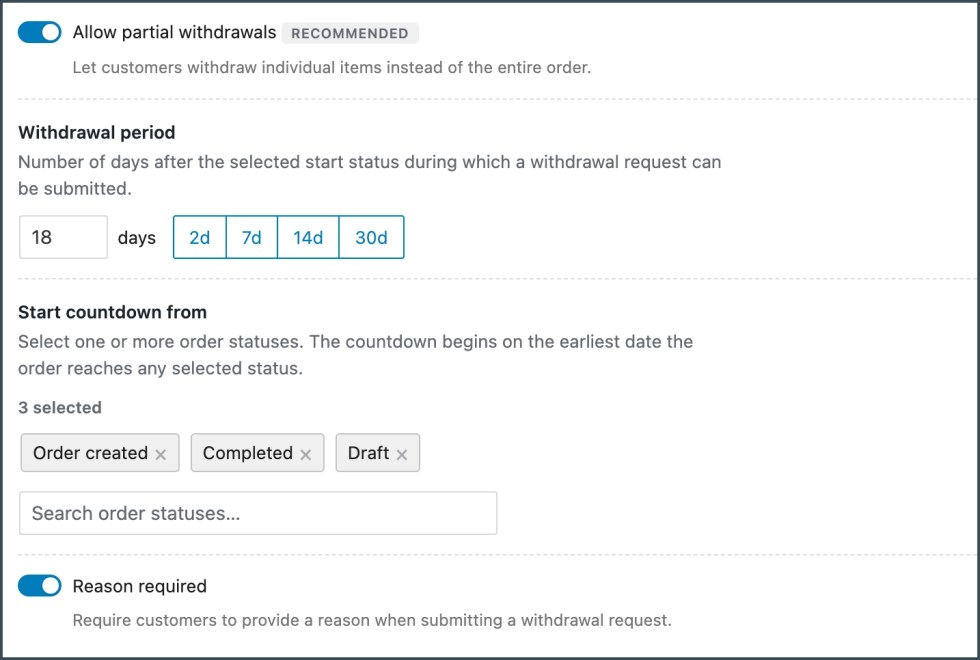
Withdrawal period. Define the number of days during which a request can be submitted, with quick presets for 2, 7, 14, or 30 days. The 14-day default matches the EU statutory minimum; you can extend it for a longer voluntary window.
Start countdown from. Rather than always counting from the purchase date, choose one or more order statuses that trigger the withdrawal countdown. The clock starts on the earliest date the order reaches any selected status. The default is Order created, but a store could, for example, count from Completed so the window aligns with delivery rather than checkout.
Reason required. Require customers to provide a reason with their request. EU customers are not legally obliged to justify a withdrawal, so this is a policy choice; when enabled, the reason appears in the request detail view and helps you spot patterns such as sizing or pricing issues.
Form display mode. Present the withdrawal form on a separate page, or in an accessible popup modal that opens in place. The modal keeps customers in their current context, which suits stores that want fewer page transitions.
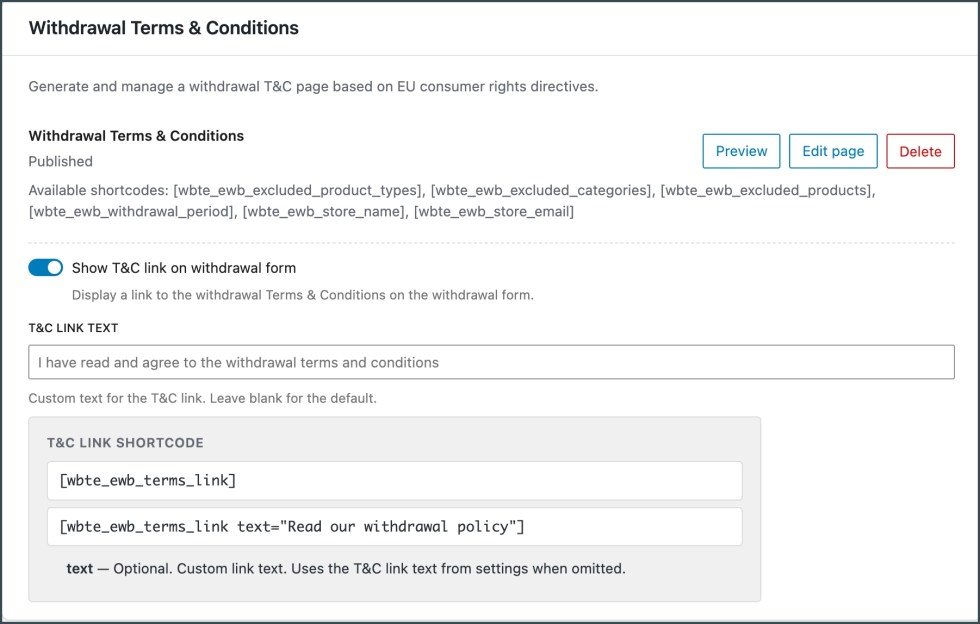
Withdrawal Terms & Conditions. Generate a withdrawal T&C page for your store based on EU consumer rights directives. The section shows the page’s current status, such as Published, along with three actions: Preview to see the page as customers will, Edit page to adjust the wording in the WordPress editor, and Delete to remove the page.
Available Shortcodes. The T&C page uses shortcodes to pull in details from your plugin and store settings. When you change a setting, such as the withdrawal period or excluded products, the page updates automatically, so you don’t have to edit the text by hand. You can also use these shortcodes when you edit the page.
| Shortcode | What it displays |
|---|---|
[wbte_ewb_excluded_product_types] | Product types excluded from withdrawal |
[wbte_ewb_excluded_categories] | Product categories excluded from withdrawal |
[wbte_ewb_excluded_products] | Individual products excluded from withdrawal |
[wbte_ewb_withdrawal_period] | The withdrawal period set for your store |
[wbte_ewb_store_name] | Your store name |
[wbte_ewb_store_email] | Your store email address |
Show T&C link on withdrawal form. Display a link to your withdrawal T&C page on the withdrawal form, so customers can review your terms before submitting a request.
T&C link text. Set the wording for the T&C link. Leave it blank to use the default text, “I have read and agree to the withdrawal terms and conditions.”
Adding the T&C link elsewhere
To place the T&C link anywhere else on your site, such as a footer, an FAQ page, or your returns policy page, use the T&C link shortcode:
[wbte_ewb_terms_link]This uses the link text from your settings. To use different wording in a particular place, add the optional text attribute:
[wbte_ewb_terms_link text="Read our withdrawal policy"]Rules & Exclusions
↑ Back to topThis section controls who sees the withdrawal option and which products qualify.
Geo-targeting
↑ Back to topThe right of withdrawal is an EU obligation, and stores selling worldwide may not want to offer it everywhere. With geo-targeting enabled, the plugin restricts withdrawal button visibility to EU countries. It determines location from the billing address for logged-in users and from WooCommerce geolocation for guests.
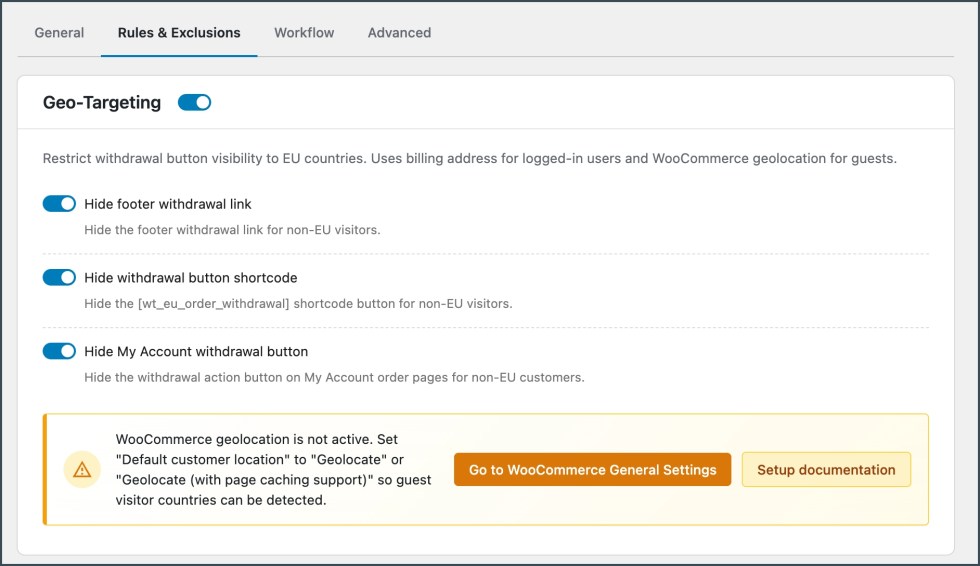
Three toggles control exactly what non-EU visitors do not see: the footer withdrawal link, the shortcode button, and the My Account withdrawal button. This lets you comply fully in the EU while keeping the interface clean for everyone else.
Geolocation for guests depends on a WooCommerce core setting. If it is not active, the plugin shows a warning with a direct link to WooCommerce General Settings, where “Default customer location” must be set to “Geolocate” or “Geolocate (with page caching support)”, plus a link to setup documentation.
Exclusions
↑ Back to topEU law itself carves out exceptions to the right of withdrawal, such as personalized goods and unsealed digital content. Exclusions let you encode those rules at three levels.
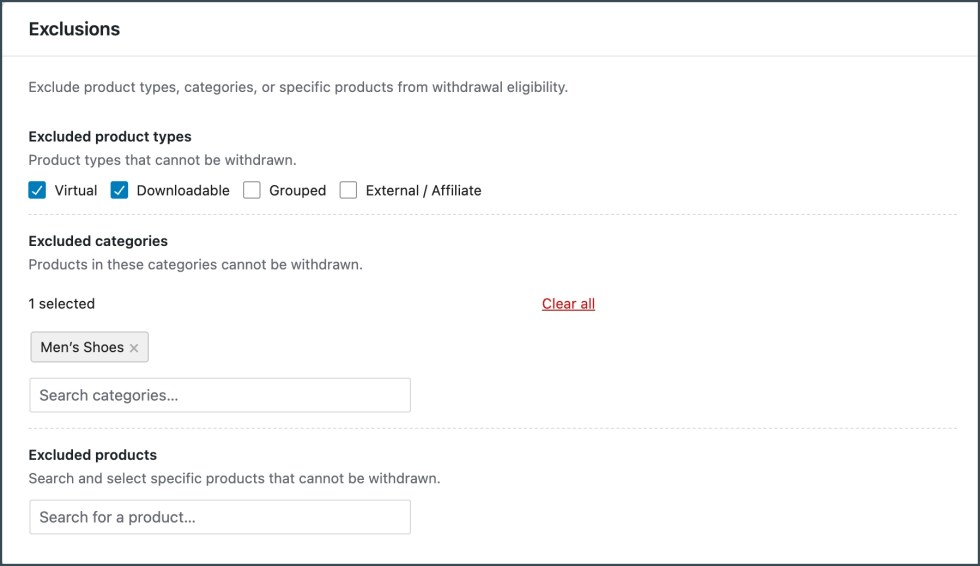
Excluded product types. Block entire WooCommerce product types: Virtual, Downloadable, Grouped, and External / Affiliate. Digital and downloadable products are the most common exclusions, since the right of withdrawal typically lapses once a download begins.
Excluded categories. Search for and select product categories; everything in a selected category becomes ineligible. Useful for perishables, hygiene products, or made-to-order lines.
Excluded products. For fine-grained control, search for and exclude individual products regardless of type or category.
A product excluded at any level cannot be included in a withdrawal request.
Workflow
↑ Back to topThe Workflow section connects withdrawal requests to your order operations through three panels: order status automation, auto-processing, and email notifications.
Order status
↑ Back to top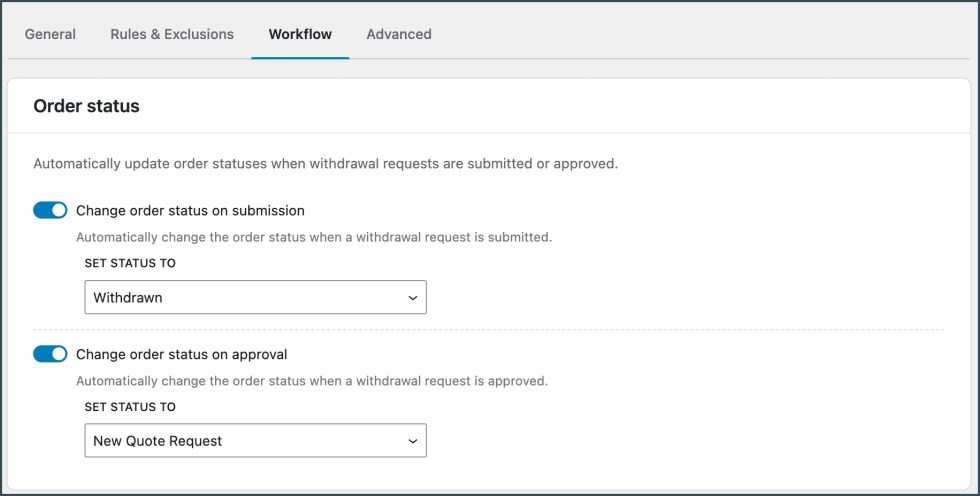
When a customer submits a request, the plugin can automatically move the linked order to a status of your choice, such as Pending Withdrawal, flagging it for your fulfillment team before anything ships. When you approve the request, the order transitions again, to Withdrawn or any status you select from the dropdown. Both changes are independent toggles, and with both enabled your order list always reflects the true state of every withdrawal without manual edits.
Auto-processing
↑ Back to topFor stores that want withdrawals handled without any manual intervention, auto-processing automates the approval itself and everything that follows.
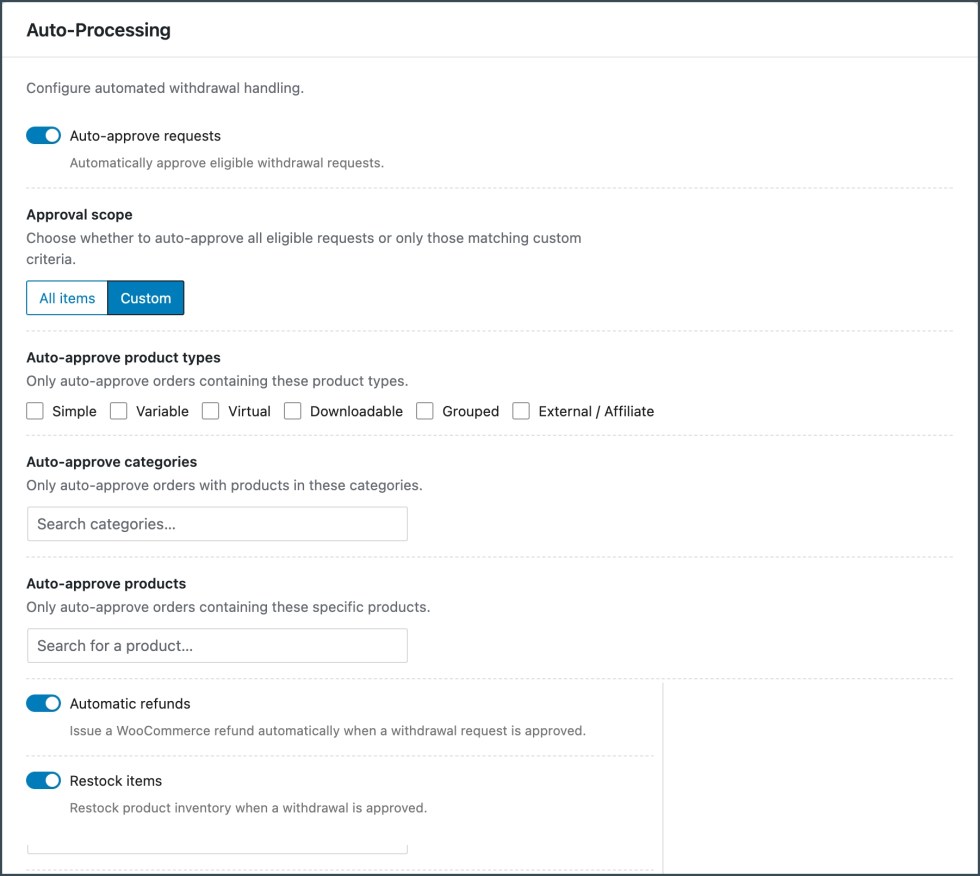
Auto-approve requests. Eligible withdrawal requests are approved automatically the moment they arrive. An approval scope control decides how wide this applies: choose All items to auto-approve every eligible request, or Custom to auto-approve only requests matching your own criteria while the rest wait for manual review.
Automatic refunds. When a withdrawal request is approved, the plugin issues the corresponding WooCommerce refund automatically, so the money side of the withdrawal happens without opening the order.
Restock items. Approved withdrawals can also restock product inventory automatically, returning the withdrawn items to stock so your inventory counts stay accurate.
With all three enabled, a compliant withdrawal can run end to end, from customer submission through approval, refund, and restocking, with no admin action at all. The status timeline and activity log still record every step, so automation does not cost you the audit trail.
Email notifications
↑ Back to topThis panel controls who hears about withdrawal activity.
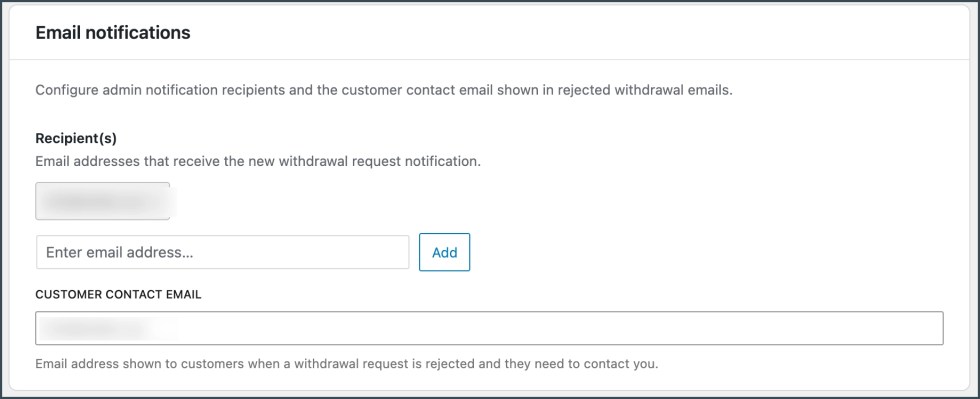
Recipients. Add any number of email addresses that receive the new withdrawal request notification. Recipients are managed as removable tags, so routing alerts to a shared support inbox or several team members takes seconds.
Customer contact email. Set the email address shown to customers when their withdrawal request is rejected and they need to contact you. This keeps rejection emails actionable instead of leaving the customer at a dead end.
Advanced
↑ Back to topWithdrawal button shortcode. Place a withdrawal request button on any page or post; the button links to your configured withdrawal page.
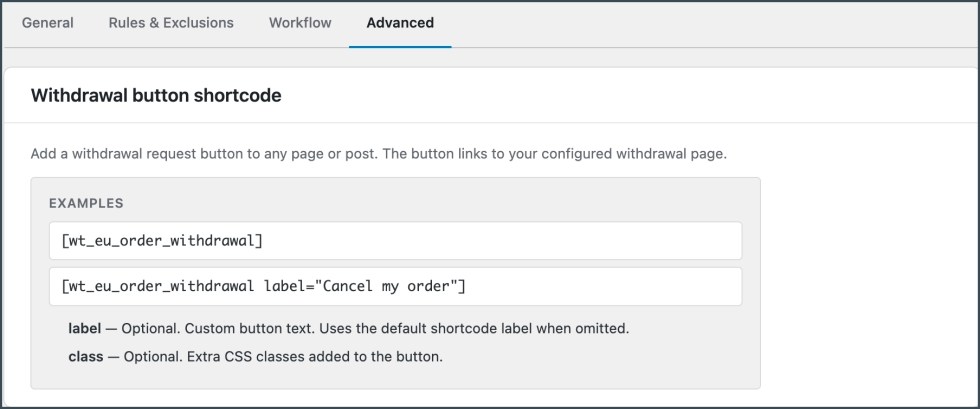
The base shortcode is:
[wt_eu_order_withdrawal]
Two optional attributes customize it:
labelsets custom button text, for example[wt_eu_order_withdrawal label="Cancel my order"]. When omitted, the default shortcode label is used.classadds extra CSS classes to the button for custom styling.
This makes it easy to surface the withdrawal option on a returns policy page, a product page, or anywhere else in your content.
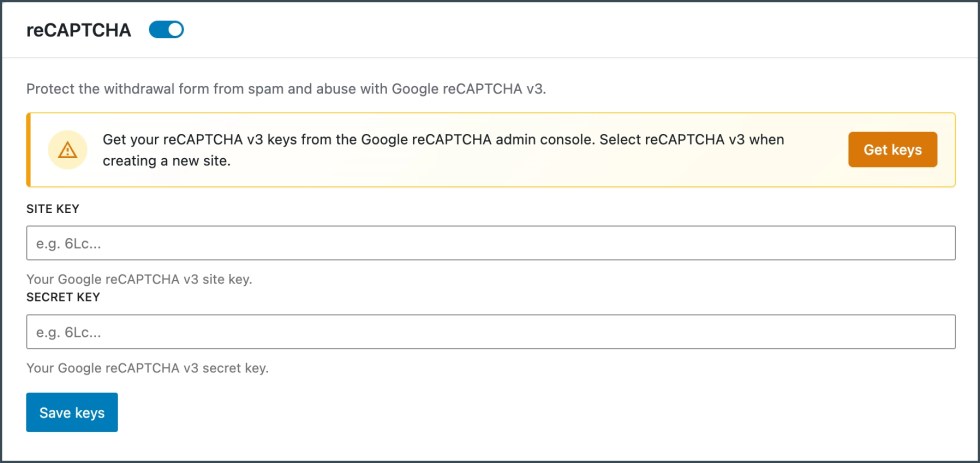
reCAPTCHA. Protect the withdrawal form from spam and abuse with Google reCAPTCHA v3. reCAPTCHA v3 runs in the background without asking customers to solve a challenge, so the form stays quick to submit. Turn on the toggle to enable it, then add your keys.
Get keys. Opens the Google reCAPTCHA admin console, where you register your site and generate keys. When you create the site, select reCAPTCHA v3, because keys from other reCAPTCHA versions won’t work with this setting.
Site key and Secret key. Paste the site key and secret key from the Google reCAPTCHA admin console into these fields, then click Save keys.
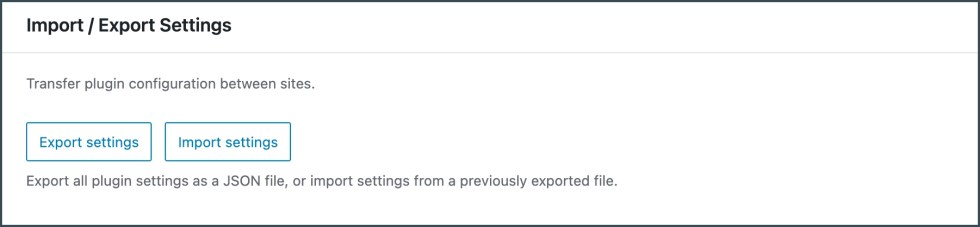
Import / Export Settings. Transfer the plugin configuration between sites. Click Export settings to download all plugin settings as a JSON file, then use Import settings on another site to apply them from that file. This is useful for copying a tested setup from a staging site to your live store, or for keeping a backup before you make changes.
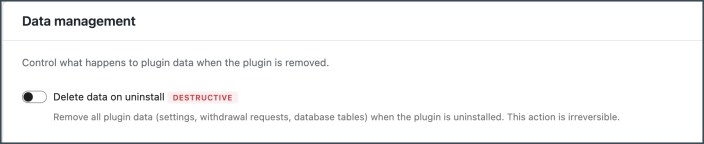
Data management. The Delete data on uninstall option, disabled by default and marked destructive, removes all plugin data (settings, withdrawal requests, and database tables) when the plugin is uninstalled. Leave it off to preserve withdrawal history through a reinstall or migration; enable it only when decommissioning the plugin permanently. The action is irreversible.

