Installation
↑ Back to topTo start using a product from WooCommerce.com, you can use the “Add to store” functionality on the order confirmation page or the My subscriptions section in your account.
- Navigate to My subscriptions.
- Find the Add to store button next to the product you’re planning to install.
- Follow the instructions on the screen, and the product will be automatically added to your store.
Alternative options and more information at:
Managing WooCommerce.com subscriptions.

Setup and Configuration
↑ Back to topAfter installing, navigate to the WordPress admin menu bar, where you will find the installed plugin, WooCommerce checkout field editor
The prime feature of the WooCommerce checkout field editor is to add/manage fields in the default checkout form. The WooCommerce checkout field editor plugin creates an easy path to do this.
Go to WooCommerce -> Checkout Fields after installing the plugin. There exists our form builder.
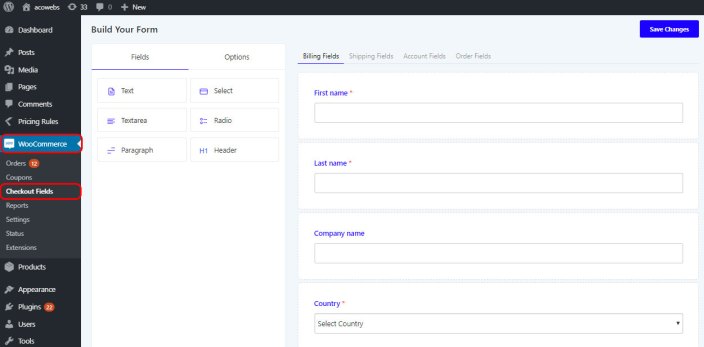
In the left part of the form builder, you can see two tabs; Fields and Options. The tab fields will show the available fields that can be added to the checkout form. The options tab shows the options that can be applied to fields when a field is selected on the right side. In the right side, you can see the default checkout fields as Billing Fields, Shipping Fields, Account Fields, and Order Fields.
1. Adding New Fields
↑ Back to topThe new fields from the left can be dragged and dropped here.
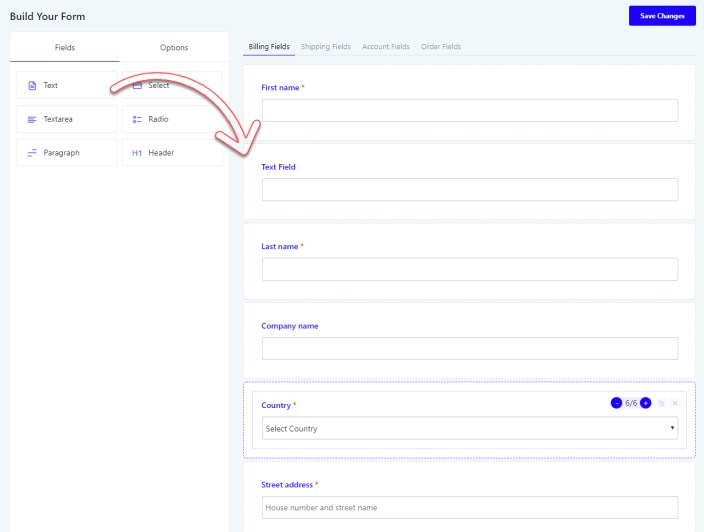
The above screenshot shows how a text field is added inside the default checkout form. You can just drag and drop it wherever you want.
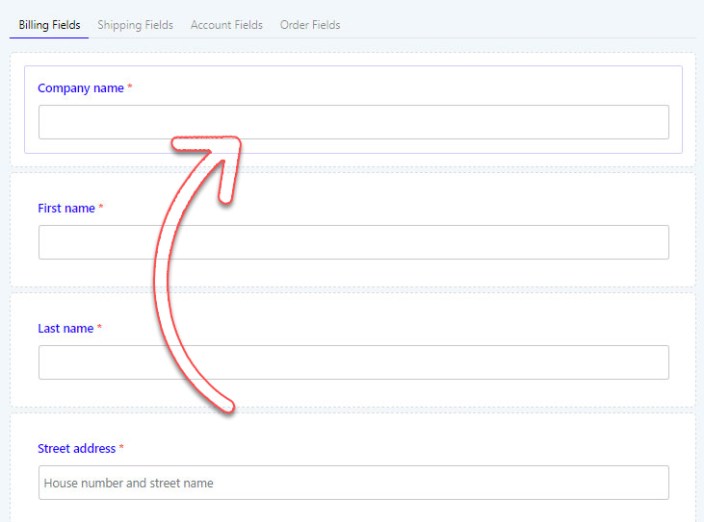
2. Changing Position of Fields
↑ Back to topTo change the position of a field, just drag and drop it over one another.
3. Adjusting the Width of the Fields
↑ Back to topYou can adjust the field widths in two modes; full(6/6) and half(3/6). If a field’s size is 3/6, then you can add another 3/6 field in the same line by dragging it there.
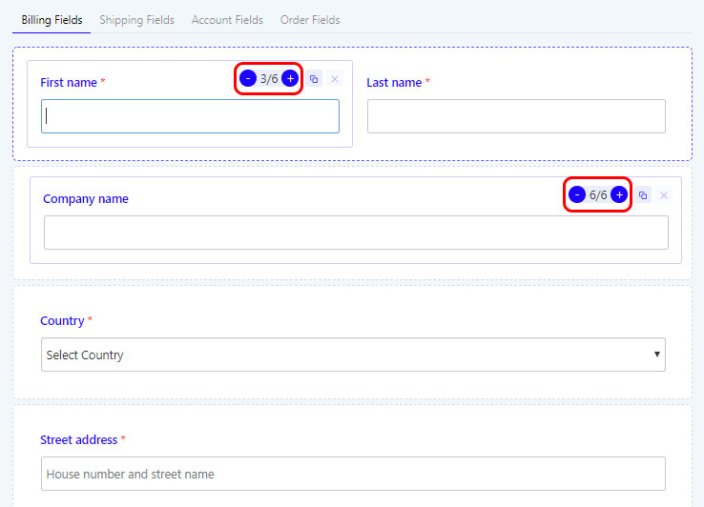
4. Duplicating the Fields
↑ Back to topFor duplicating, click on the icon shown in the screenshot. It can only be seen when you hover the mouse over the field.

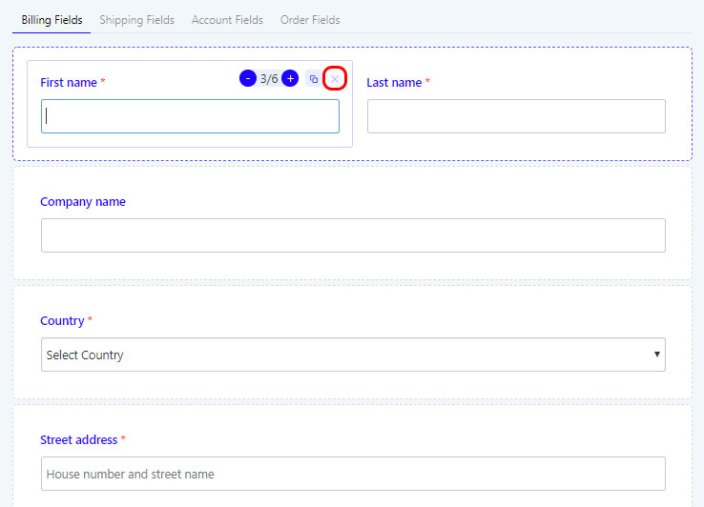
5. Closing Custom Fields
↑ Back to topCustom fields can be closed by clicking the icon “X” near the duplicate option at the top-right side of every field. Closing option for built-in fields is disabled by default.
The other tabs, Shipping, Account, and Order fields can also be edited and add new fields to it like what we done for the Billing fields tab.
FAQs
↑ Back to topHelp customers by answering commonly asked questions.
How do I set up checkout fields for different user roles?
You can configure specific checkout fields to display based on user roles (guest, customer, subscriber, etc.) using the conditional logic feature. This allows you to create personalized checkout experiences for wholesale customers, VIP members, or regular shoppers.
Can I create custom sections on the checkout page?
The answer goes Yes, you can create new custom sections beyond the default billing and shipping areas. These sections can be positioned in 13+ different locations on the checkout page, such as before customer details, after billing form, before order notes, or after shipping form.here.
How do I translate checkout fields for multilingual stores?
The answer goeThe plugin is fully compatible with WPML and Polylang translation plugins. You can translate field labels, placeholders, error messages, and all custom text for each language your store supports.s here.
How do I set up conditional logic based on shipping or payment methods?
You can show or hide specific fields based on the customer’s selected shipping method (flat rate, free shipping, local pickup) or payment method (PayPal, Stripe, cash on delivery). This is configured in the Conditional tab of each field’s settings.
Can I add custom fields to the address section?
Yes, you can add custom fields directly to the billing or shipping address sections. These fields will appear alongside default address fields and can be made required, optional, or conditionally visible based on country or state selection.
Does the plugin work with WooCommerce block-based checkout?
Yes, the plugin supports the new WooCommerce block-based checkout introduced in recent versions. You can customize both classic and block checkout pages with the same drag-and-drop interface.
Hello, does this integrate with the Elementor Product Page Builder?
Yes, Our plugins provides support with Elementor Page Builder