
The AI Image Generator and Virtual Try On plugin lets you create product images with AI right from your WooCommerce admin. It also lets customers try products on with their own photo before buying.
Installation
↑ Back to top- Download the .zip file from your WooCommerce account.
- Go to: WordPress Admin > Plugins > Add New and upload the file you have downloaded.
- “Install” and “Activate” the plugin.
Configuration
↑ Back to topAfter activating the plugin, go to WooCommerce > Settings > AI Image Generator and Automation and configure the following:
API configurations
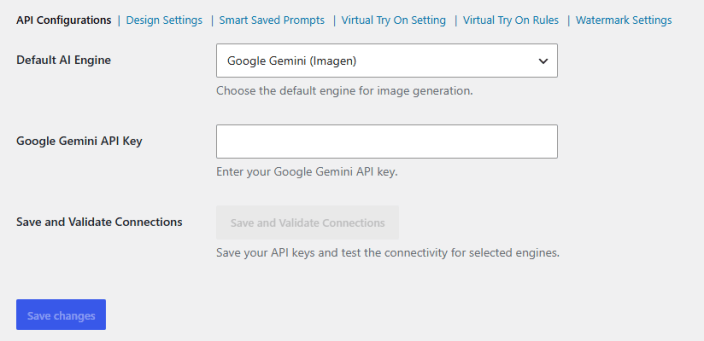
↑ Back to topNavigate to WooCommerce > Settings > AI Image Generator > API Configurations to select your AI engine and connect it with an API key.
- Default AI Engine: Choose the default AI engine for image generation.
- Google Gemini (Imagen)
- Google Gemini API Key: Enter your Google Gemini API key.
- Save and Validate Connections: Click this button to save your API keys and check that the selected engine connects.
Design settings
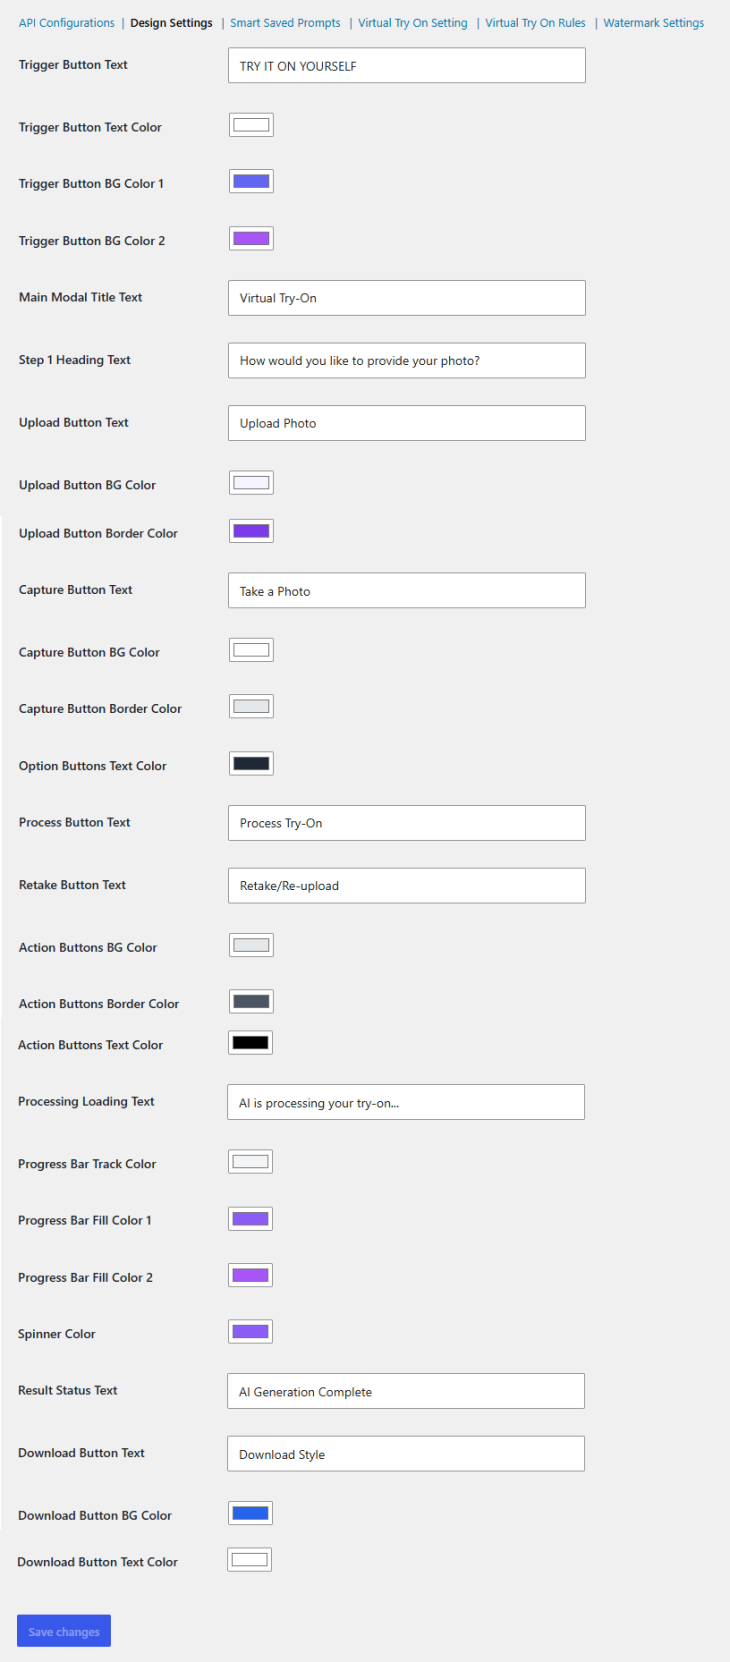
↑ Back to topHead to WooCommerce > Settings > AI Image Generator > Design Settings to customize the text and colors of the virtual try-on button and popup.
- Trigger Button Text: Set the label for the button that opens the virtual try-on popup.
- Trigger Button Text Color: Choose the text color of the trigger button.
- Trigger Button BG Color 1: Choose the first background color of the trigger button.
- Trigger Button BG Color 2: Choose the second background color of the trigger button.
- Main Modal Title Text: Set the title shown at the top of the virtual try-on popup.
- Step 1 Heading Text: Set the heading that asks customers how they want to provide their photo.
- Upload Button Text: Set the label for the button customers use to upload a photo.
- Upload Button BG Color: Choose the background color of the upload button.
- Upload Button Border Color: Choose the border color of the upload button.
- Capture Button Text: Set the label for the button customers use to take a photo with their camera.
- Capture Button BG Color: Choose the background color of the capture button.
- Capture Button Border Color: Choose the border color of the capture button.
- Option Buttons Text Color: Choose the text color of the upload and capture buttons.
- Process Button Text: Set the label for the button that starts the try-on.
- Retake Button Text: Set the label for the button customers use to retake or re-upload their photo.
- Action Buttons BG Color: Choose the background color of the process and retake buttons.
- Action Buttons Border Color: Choose the border color of the process and retake buttons.
- Action Buttons Text Color: Choose the text color of the process and retake buttons.
- Processing Loading Text: Set the message shown while the AI generates the try-on image.
- Progress Bar Track Color: Choose the background color of the progress bar.
- Progress Bar Fill Color 1: Choose the first fill color of the progress bar.
- Progress Bar Fill Color 2: Choose the second fill color of the progress bar.
- Spinner Color: Choose the color of the loading spinner.
- Result Status Text: Set the message shown once the try-on image is ready.
- Download Button Text: Set the label for the button customers use to download the generated image.
- Download Button BG Color: Choose the background color of the download button.
- Download Button Text Color: Choose the text color of the download button.
Smart saved prompts
↑ Back to topTo create and manage reusable AI prompts, open WooCommerce > Settings > AI Image Generator > Smart Saved Prompts. Saved prompts can be selected when generating images.
The Smart Prompt Templates table lists all saved prompts with the following columns:
- ID: The unique ID of the prompt.
- Title: The name of the prompt.
- Prompt Template: The prompt text sent to the AI engine.
- Actions: Options to manage the prompt.
Use Search prompts to find a prompt by keyword, or select multiple prompts and choose an option from Bulk Actions, then click Apply.
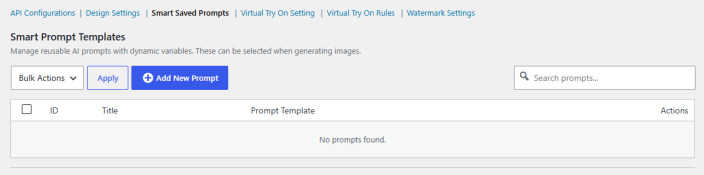
Click Add New Prompt to create a prompt.
Prompt details
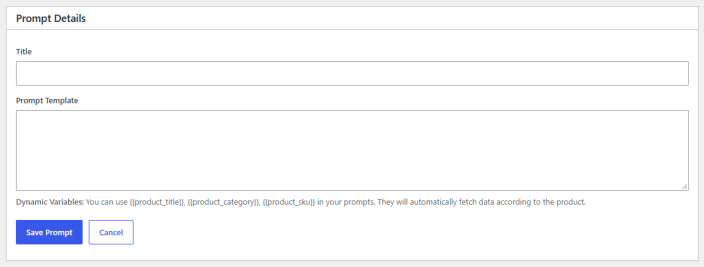
↑ Back to top- Title: Enter a name for the prompt.
- Prompt Template: Enter the prompt text. You can use the following dynamic variables, which fill in product data automatically:
- {{product_title}}
- {{product_category}}
- {{product_sku}}
Virtual try on setting
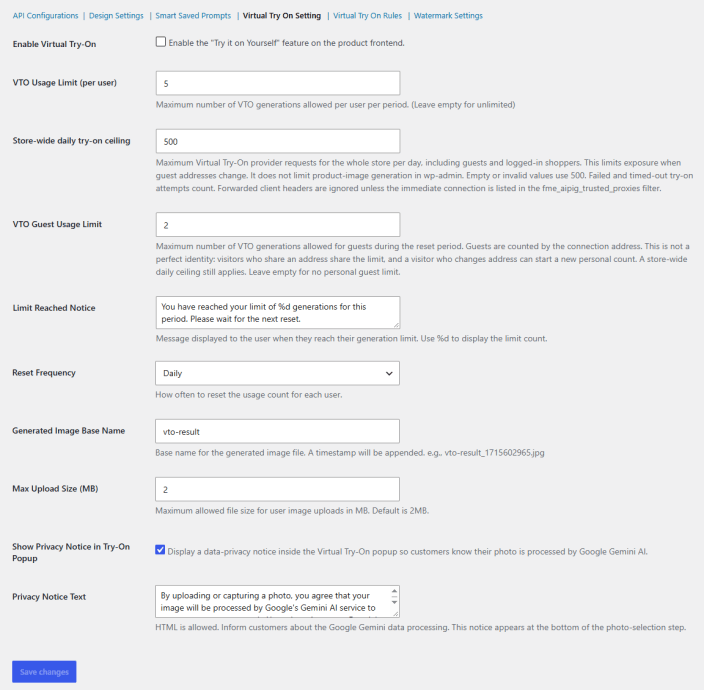
↑ Back to topGo to WooCommerce > Settings > AI Image Generator > Virtual Try On Setting to turn on virtual try-on and set usage limits, upload rules, and the privacy notice.
- Enable Virtual Try-On: Check this box to show the “Try it on Yourself” feature on product pages.
- VTO Usage Limit (per user): Set the maximum number of try-on generations each logged-in user can make per reset period. Leave it empty for unlimited.
- Store-wide Daily Try-on Ceiling: Set the maximum number of try-on requests the whole store can make per day, for guests and logged-in shoppers combined. If left empty or set to an invalid value, it defaults to 500.
- Failed and timed-out attempts count toward the limit.
- The limit does not apply to product images generated in the admin area.
- Forwarded client headers are ignored unless the connection comes from a proxy listed in the fme_aipig_trusted_proxies filter.
- VTO Guest Usage Limit: Set the maximum number of try-on generations each guest can make per reset period. Guests are counted by their connection address, so visitors who share an address share the limit, and a visitor whose address changes starts a new count. The store-wide daily ceiling still applies. Leave it empty for no per-guest limit.
- Limit Reached Notice: Enter the message shown when a user reaches their limit. Use %d to show the limit count.
- Reset Frequency: Choose how often each user’s usage count resets.
- Daily
- Weekly
- Monthly
- Generated Image Base Name: Enter the base file name for generated images. A timestamp is added to the end, e.g., vto-result_1715602965.jpg.
- Max Upload Size (MB): Set the largest photo file customers can upload, in MB. The default is 2 MB.
- Show Privacy Notice in Try-On Popup: Check this box to show a notice in the try-on popup telling customers that Google Gemini AI processes their photo.
- Privacy Notice Text: Enter the privacy notice text. HTML is allowed. The notice appears at the bottom of the photo selection step.
Virtual try on rules
↑ Back to topFrom WooCommerce > Settings > AI Image Generator > Virtual Try On Rules, you can choose which products or categories show the virtual try-on feature.
All rules are listed in the Virtual Try-On Rules table:
- ID: The unique ID of the rule.
- Rule Title: The name of the rule.
- Applied To: The products or categories the rule covers.
- Actions: Options to manage the rule.
Find a rule with Search rules, or check several rules, choose a Bulk Actions option, and click Apply to update them together.
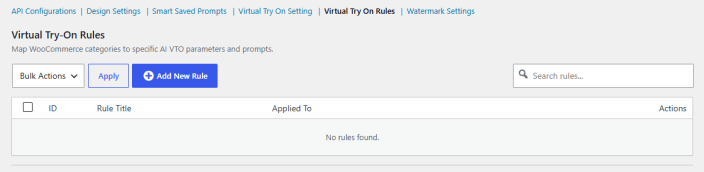
To create a rule, click Add New Rule.
Rule details
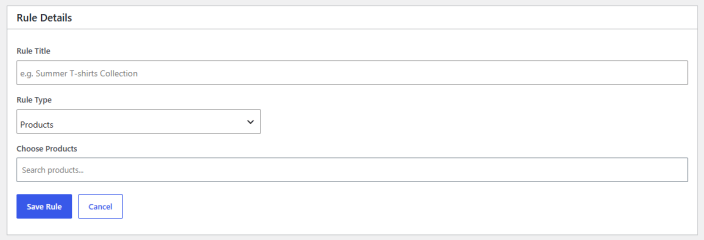
↑ Back to top- Rule Title: Enter a name for the rule, e.g., Summer T-shirts Collection.
- Rule Type: Choose what the rule applies to.
- Products
- Categories
- Search Products: Search for and select the products the rule applies to. If Rule Type is set to Categories, select categories instead.
Watermark settings
↑ Back to topOpen WooCommerce > Settings > AI Image Generator > Watermark Settings to add a text or image watermark to your AI-generated images.
- Enable Watermark: Check this box to automatically add a watermark to all AI-generated images.

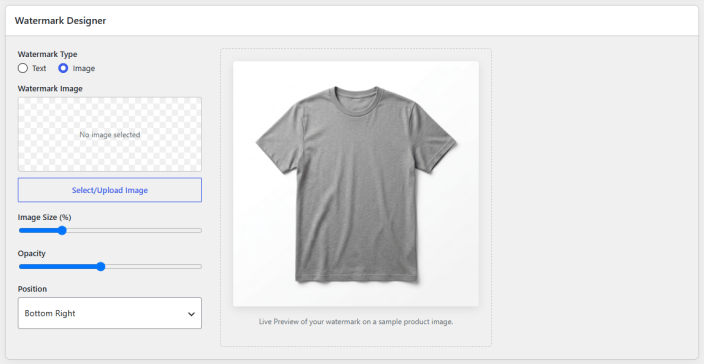
Watermark designer
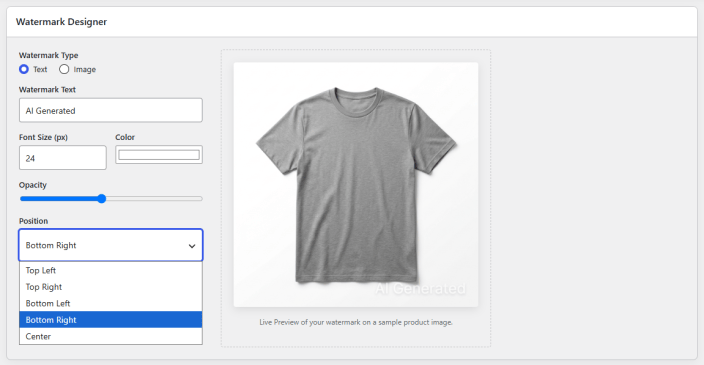
↑ Back to top- Watermark Type: Choose the type of watermark.
- Text
- Image
If Text is selected:
- Watermark Text: Enter the text to show as the watermark.
- Font Size (px): Set the size of the watermark text in pixels.
- Color: Choose the color of the watermark text.
If Image is selected:
- Watermark Image: Click Select/Upload Image to choose a watermark image from the media library or upload a new one.
- Image Size (%): Use the slider to set the size of the watermark image.
These settings apply to both watermark types:
- Opacity: Use the slider to set how transparent the watermark is.
- Position: Choose where the watermark appears on the image.
- Top Left
- Top Right
- Bottom Left
- Bottom Right
- Center
The live preview on the right shows how the watermark will look on a sample product image as you change the settings.
Product level settings
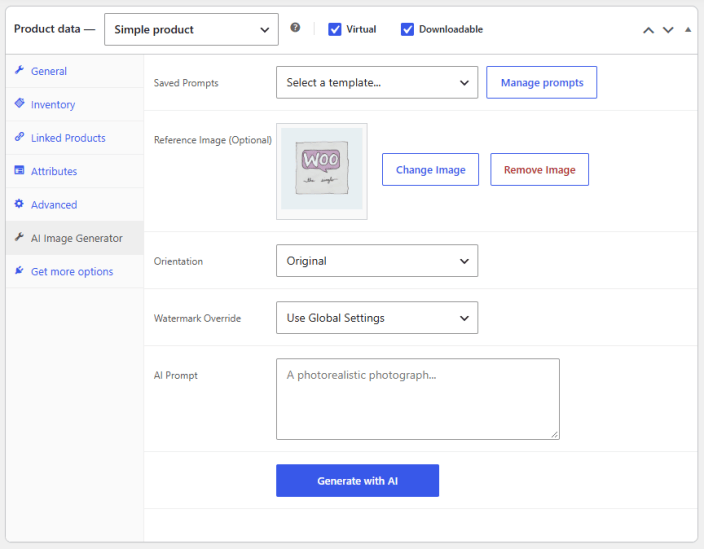
↑ Back to topTo generate an AI image for a single product, go to Products > Edit Product > Product data > AI Image Generator.
- Saved Prompts: Choose a saved prompt template to fill in the AI prompt. Click Manage prompts to create or edit templates.
- Reference Image (Optional): Add an image for the AI to use as a reference. Click Change Image to replace it or Remove Image to clear it.
- Orientation: Choose the shape (aspect ratio) of the generated image.
- Original
- Square (1:1)
- Horizontal (16:9)
- Horizontal (4:3)
- Horizontal (3:2)
- Vertical (9:16)
- Vertical (3:4)
- Vertical (2:3)
- Watermark Override: Choose how the watermark is handled for this product.
- Use Global Settings
- Custom Watermark
- No Watermark
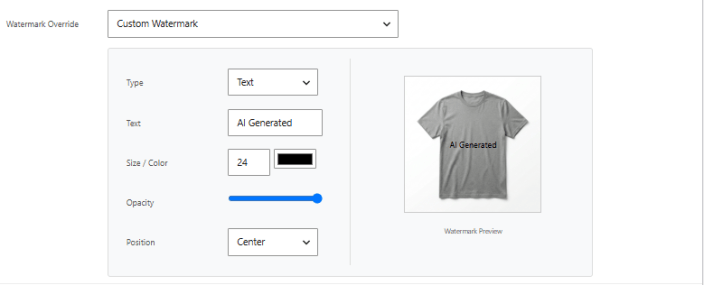
If Custom Watermark is selected:
- Type: Choose the watermark type.
- Text
- Image
If Text is selected:
- Text: Enter the watermark text.
- Size / Color: Set the size and color of the watermark text.
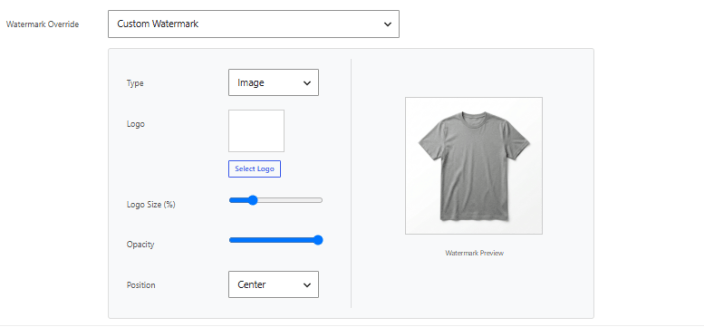
If Image is selected:
- Logo: Click Select Logo to choose a logo from the media library or upload a new one.
- Logo Size (%): Use the slider to set the size of the logo.’
These settings apply to both types:
- Opacity: Use the slider to set how transparent the watermark is.
- Position: Choose where the watermark appears on the image.
The watermark preview shows how the watermark will look on a sample image.
- AI Prompt: Enter a description of the image you want to generate. If you picked a saved prompt, its text appears here, and you can edit it.
Click Generate with AI to create the image.