
Block unwanted or spam users from your store with the Blacklist for WooCommerce plugin. Create rules and restrict based on conditions such as name, IP address, phone number, and more.
Installation
↑ Back to top- Download the .zip file from your WooCommerce account.
- Go to: WordPress Admin > Plugins > Add New and upload the file you have downloaded.
- Install and activate the plugin.
More information at Install and Activate Plugins/Extensions.
Configuration
↑ Back to topAfter activating the plugin, go to WooCommerce > Settings > Blacklist Manager and configure the following:
General Settings
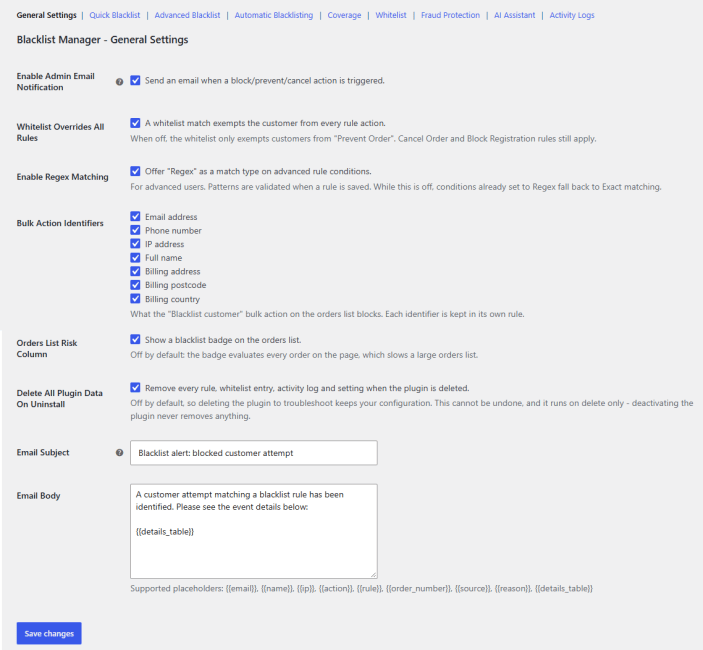
↑ Back to topConfigure the general settings for the blacklist and block plugin. Go to WooCommerce > Settings > Blacklist Manager > General Settings and set up the following settings:
- Enable Admin Email Notification: Check to send an email to the admin when a block/prevent/cancel action is triggered.
- Whitelist Overrides All Rules: Enable the whitelist to exempt specific customers from every rule action. When off, the whitelist only exempts customers from “Prevent Order”. Cancel Order and Block Registration rules still apply.
- Enable Regex Matching: Check the box to enable “Regex” as a match type on advanced rule conditions.
- Bulk Action Identifiers: Choose the bulk action identifiers that the order list blocks. These identifiers include:
- Email address
- Phone number
- IP address
- Full name
- Billing address
- Billing postcode
- Billing country
- Orders List Risk Column: Enable to show a blacklist badge on the orders list.
- Delete All Plugin Data On Uninstall: Check the box to remove every rule, whitelist entry, activity log, and setting when the plugin is deleted. This cannot be undone, and it runs on delete only – deactivating the plugin never removes anything.
- Email Subject: Add the subject line for the notification email.
- Email Body: Write a custom email body. Use supported placeholders to automatically populate the email with relevant event details, including {{email}}, {{name}}, {{ip}}, {{action}}, {{rule}}, {{order_number}}, {{source}}, {{reason}}, {{details_table}}.
Quick Blacklist
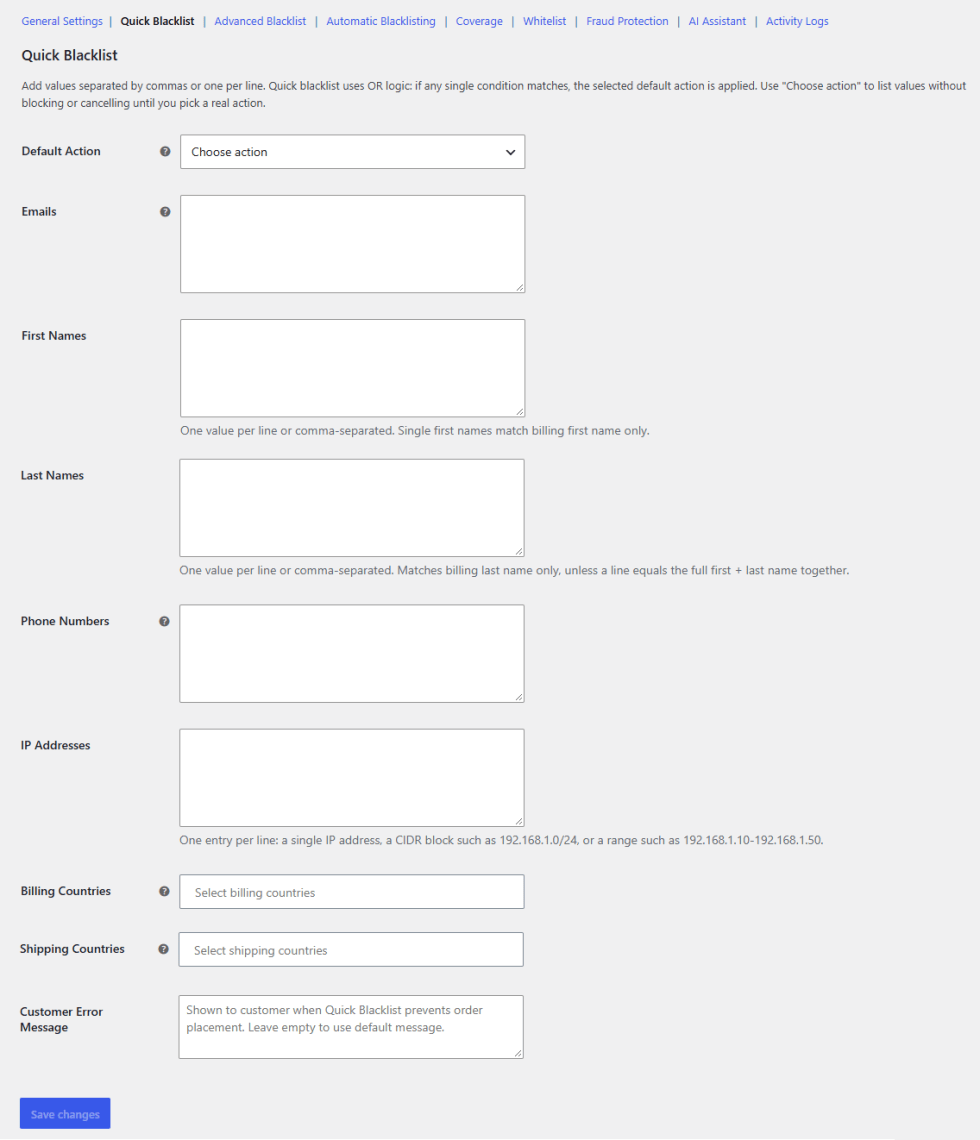
↑ Back to topEasily add values to the blacklist separated by commas. Go to WooCommerce > Settings > Blacklist Manager > Quick Blacklist and configure the following:
Add your values separated by commas or one per line, and choose a default action. It uses OR logic, meaning if any single condition matches, the selected action is applied immediately.
- Default Action: Choose what action happens when a match is found. You can choose between the following actions:
- Prevent Order
- Cancel Order
- Block Registration
- Emails: Add email addresses to block.
- First Names: Add first names that you want to block. Accepts multiple values per line or comma-separated.
- Last Names: Add last names, or enter a full first and last name together for more precise matching.
- Phone Numbers: Add phone numbers to block.
- IP Addresses: Add IP addresses to block.
- Billing Countries: Add billing countries to restrict.
- Shipping Countries: Add shipping countries to restrict.
- Customer Error Message: Set a custom message that blocked customers will see, such as “You can not place an order with this email.”
Advanced Blacklist
↑ Back to topCreate advanced rules to block or restrict customers from certain actions. Each rule opens in dedicated meta boxes. Advanced rules are evaluated first and override quick blacklist matches. Go to WooCommerce > Settings > Blacklist Manager > Advanced Blacklist and click on “Add New Blacklist Rule” to create new rules:
Rule Name: Add a name for the specific rule.
Rule Action and Status
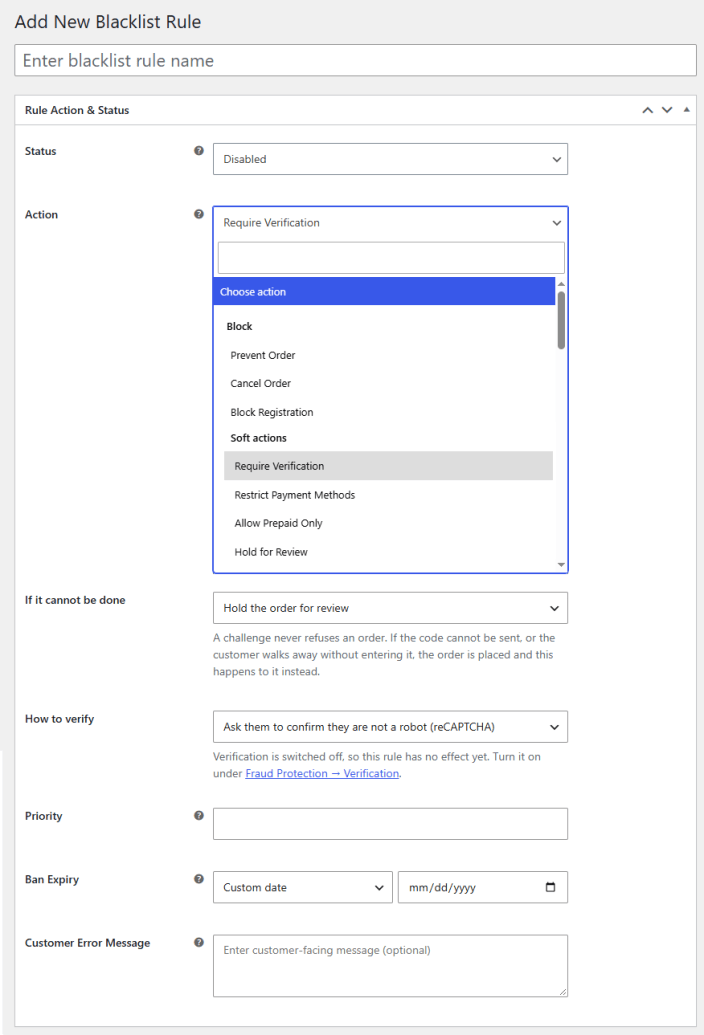
↑ Back to top- Status: Enable or disable the rule.
- Action: Select what action to take when this rule matches. You have two options: “Block” or “Soft Actions”. Blocking actions stop the customer from performing the specific action. Soft actions let the order through and hold it, flag it, or limit how the customer can pay.
- Blocking Actions
- Prevent Order
- Cancel Order
- Block Registration
- Block Login
- Soft Actions
- Require Verification
- If It Cannot Be Done: In case the code cannot be sent, or the customer walks away without entering it, the order is placed, and this happens to it instead.
- Hold the Order for Review
- Flag the Order Only
- How to Verify: Choose how the customer can do the verification:
- Email a Code
- Ask them to confirm they are not a robot (reCAPTCHA)
- If It Cannot Be Done: In case the code cannot be sent, or the customer walks away without entering it, the order is placed, and this happens to it instead.
- Restrict Payment Methods
- Payment Methods to Hide: Select the payment methods that you want to hide from the customer.
- If It Cannot Be Done: If it would hide every payment method, all of them stay available, and this happens to the order instead.
- Hold the Order for Review
- Flag the Order Only
- Allow Prepaid Only
- If It Cannot Be Done: If it would hide every payment method, all of them stay available, and this happens to the order instead.
- Hold the Order for Review
- Flag the Order Only
- If It Cannot Be Done: If it would hide every payment method, all of them stay available, and this happens to the order instead.
- Hold for Review
- Hold Status: The order will be created and kept in this status until you approve or reject it from the order screen.
- Flag Only
- Flag Label: Add a label for the flag message. It will be shown on the Orders list and the order screen. The customer sees nothing.
- Require Verification
- Blocking Actions
- Priority: Set a priority for the rule.
- Ban Expiry: Choose the period for which the ban will last. You can permanently ban or ban for a specific period of time:
- Permanent
- 7 Days
- 30 Days
- 90 Days
- 1 Year
- Custom Date
- Customer Error Message: Add the custom message that will be shown when a customer is blocked from checkout or registration.
Identity Conditions
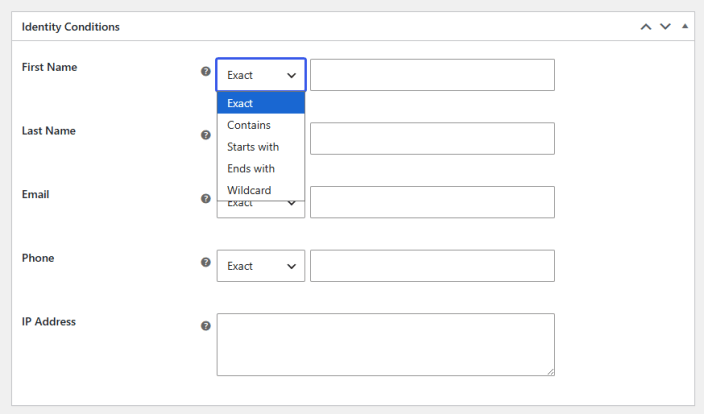
↑ Back to topSet the identifying conditions for restricting customers.
- First Name: Add a first name to match against the rule. You can apply conditions for the first name, including:
- Exact
- Contains
- Start with
- Ends with
- Wildcard
- Last Name: Add the last name that you want to block.
- Email: Enter the email address that the rule will block.
- Phone: Add the phone number that the rule will block.
- IP Address: Enter an IP address to add to the blacklist.
Address Conditions
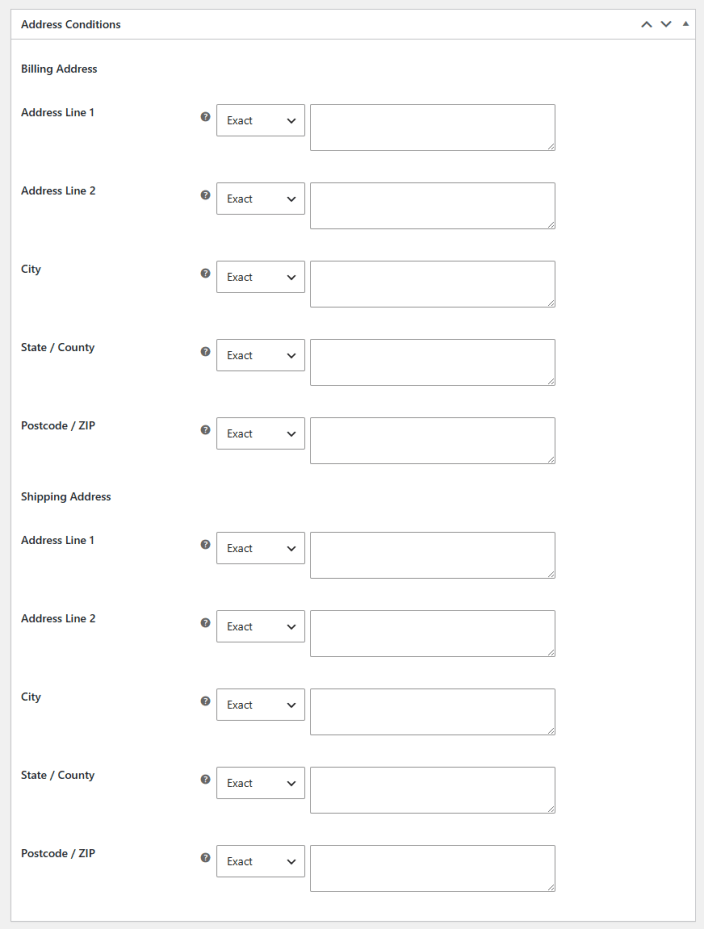
↑ Back to topConfigure address conditions to block customers. You can configure the following address conditions for both Billing Address and Shipping Address.
- Address Line 1: Enter the address line 1 that you want to restrict.
- Address Line 2: Add address line 2 to block.
- City: Add the city that you want to block by this rule.
- State/County: Select the state or county that you want to block.
- Postcode/ZIP: Add the postcode or ZIP code that you want to restrict.
For each of the above settings, you can choose to apply the rule based on different conditions:
- Exact
- Contains
- Start with
- Ends with
- Wildcard
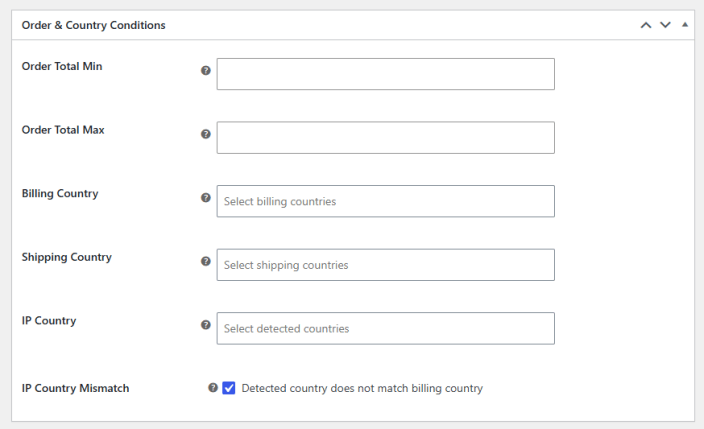
Order and Country Conditions
↑ Back to top- Order Total Min: Set a minimum order total for blocking the customer.
- Order Total Max: Set a maximum order total to block the user.
- Billing Country: Choose the billing countries for which the rule will block the customer.
- Shipping Country: Choose the shipping countries that you want to block.
- IP Country: Select the countries that you want to restrict based on IP addresses.
- IP Country Mismatch: Check the box to restrict a user if the IP address (detected country) does not match the billing country.
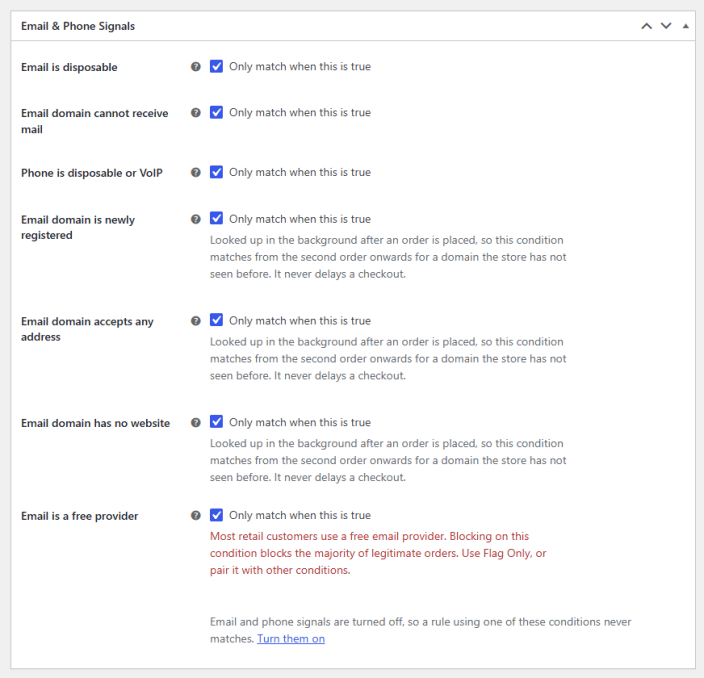
Email and Phone Signals
↑ Back to top- Email is Disposable: Restrict if the email is from a disposable or temporary email service.
- Email Domain Cannot Receive Mail: Restrict if the email address matches a domain that cannot receive email at all.
- Phone is Disposable or VoIP: Match phone numbers in ranges. A national numbering plan reserves for VoIP, location-independent, or forwarding numbers. A number without a country code is read with the billing country.
- Email Domain is Newly Registered: Apply rule if address matches a domain registered within the period set in the signals page. Looked up in the background after an order is placed, so this condition matches from the second order onwards for a domain the store has not seen before. It never delays a checkout.
- Email Domain Accepts any Address: If match addresses at a domain whose mail server accepts every address, then a valid-looking address there proves nothing.
- Email Domain has no Website: Block if the email address matches a domain with nothing answering at its web address.
- Email is a Free Provider: Restrict when an email address matches a free email provider such as gmail.com or Yahoo.com. Most retail customers use a free email provider. Blocking on this condition blocks the majority of legitimate orders. Use Flag Only, or pair it with other conditions.
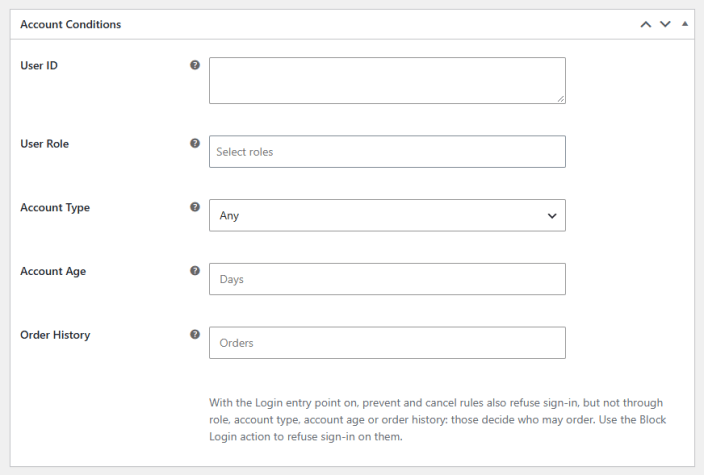
Account Conditions
↑ Back to top- User ID: Match registered customers based on their account ID. A new phone number or email address does not get them past it.
- User Role: Restrict logged-in customers if any of these user roles match.
- Account Type: Block customers based on the type of account.
- Guest (No Account): Most first-time customers check out as guests. With a blocking action and no other condition, this rule refuses every guest order. Pair it with a country or an order total, or use Flag Only or Hold for Review.
- Registered Customer
- Account Age: Set age in days and restrict customers whose account age is less than the set limit.
- Order History: Block customers based on their order history. Match customers with at least this many cancelled, refunded, or failed orders. Registered customers are counted by account, guests by billing email.
Automatic Blacklisting
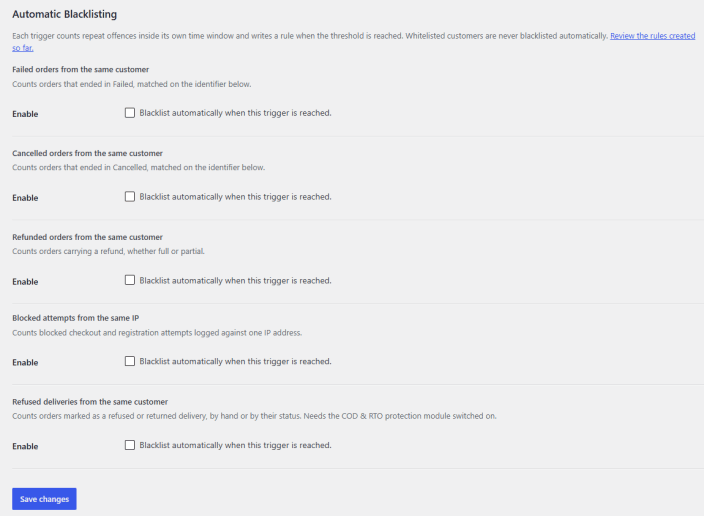
↑ Back to topAutomatically blacklist customers based on different triggers. Go to WooCommerce > Settings > Blacklist Manager > Automatic Blacklisting and configure the following settings:
Each trigger counts repeat offences within its own time window and writes a rule when the threshold is reached. Whitelisted customers are never blacklisted automatically.
- Failed Orders From the Same Customer: Automatically blacklist a customer after multiple failed orders.
- Cancelled Orders From the Same Customer: Block when the same customer has multiple cancelled orders.
- Refunded Orders From the Same Customer: Automatically block when a customer has refunded orders.
- Blocked Attempts From the Same IP: Auto-block customers when they make too many attempts from the same IP.
- Refused Deliveries from the Same Customer: Automatically block customers whose orders are marked as refused or returned delivery, by hand or by their status. Needs the COD & RTO protection module switched on.
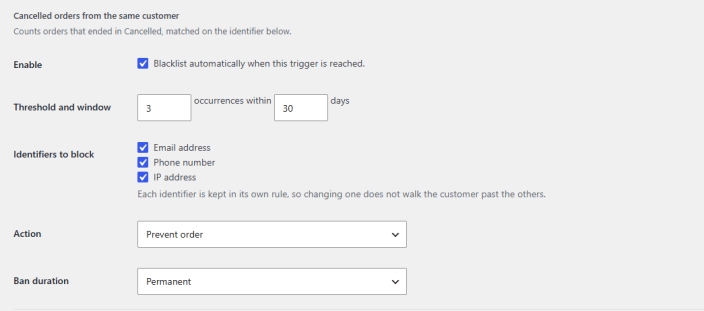
For each trigger, you can configure the following options:
- Threshold and Window: Set the number of occurrences and the number of days to trigger a blacklist.
- Identifiers to Block: Choose the identifiers for blocking a customer. You can choose between:
- Email address
- Phone number
- IP address
- Action: Choose the specific action for blacklisting:
- Prevent Order
- Cancel Order
- Block Registration
- Ban Duration: Set the duration for the block:
- Permanent
- 7 Days
- 30 Days
- 90 Days
- 1 Year
Coverage
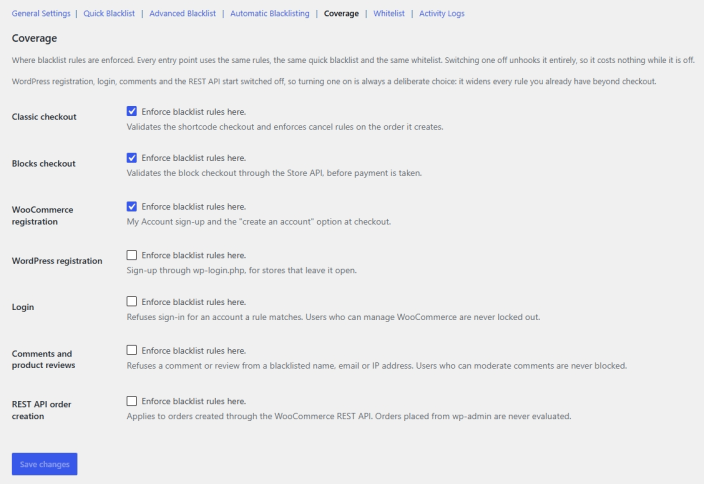
↑ Back to topControl where blacklist rules are enforced. Go to WooCommerce > Settings > Blacklist Manager > Coverage and configure the following settings:
Every entry point uses the same rules, the same quick blacklist, and the same whitelist. Switching an entry point off unhooks it entirely, so it costs nothing while it is off. WordPress registration, login, comments, and the REST API start switched off, so turning one on is always a deliberate choice that widens every rule you already have beyond checkout.
- Classic Checkout: Validates the shortcode checkout and enforces cancel rules on the order it creates.
- Blocks Checkout: Validates the block checkout through the Store API before payment is taken.
- WooCommerce Registration: Covers My Account sign-up and the “create an account” option at checkout.
- WordPress Registration: Covers sign-up through wp-login.php, for stores that leave it open.
- Login: Refuses sign-in for an account a rule matches. Users who can manage WooCommerce are never locked out.
- Comments and Product Reviews: Refuses a comment or review from a blacklisted name, email, or IP address. Users who can moderate comments are never blocked.
- REST API Order Creation: Applies to orders created through the WooCommerce REST API. Orders placed from wp-admin are never evaluated.
Whitelist
↑ Back to topExempt trusted customers from blacklist rules. Go to WooCommerce > Settings > Blacklist Manager > Whitelist and configure the following settings:
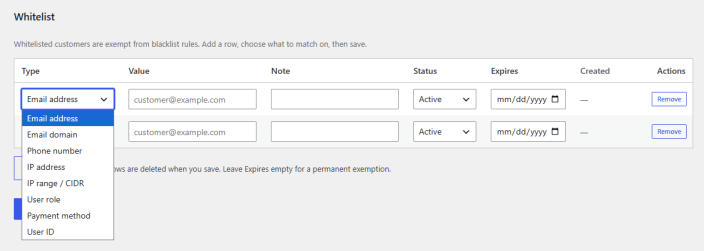
Whitelisted customers are exempt from blacklist rules. Add a row, choose what to match on, then save. Empty rows are deleted when you save. Leave Expires empty for a permanent exemption.
- Type: Choose what the whitelist entry matches on. You can choose between:
- Email address
- Email domain
- Phone number
- IP address
- IP range/CIDR
- User role
- Payment method
- User ID
- Value: Enter the value to match, based on the type selected.
- Note: Add an optional note to identify the entry.
- Status: Set the entry as Active or Inactive.
- Expires: Set an expiry date for the exemption, or leave empty to keep it permanent.
- Created: Shows the date the entry was added.
- Actions: Remove a whitelist entry.
Fraud Protection
↑ Back to topKeep your store safe from fraud. Go to WooCommerce > Settings > Blacklist Manager > Fraud Protection, and here you will find the following setting tabs:
Evaluation Scope
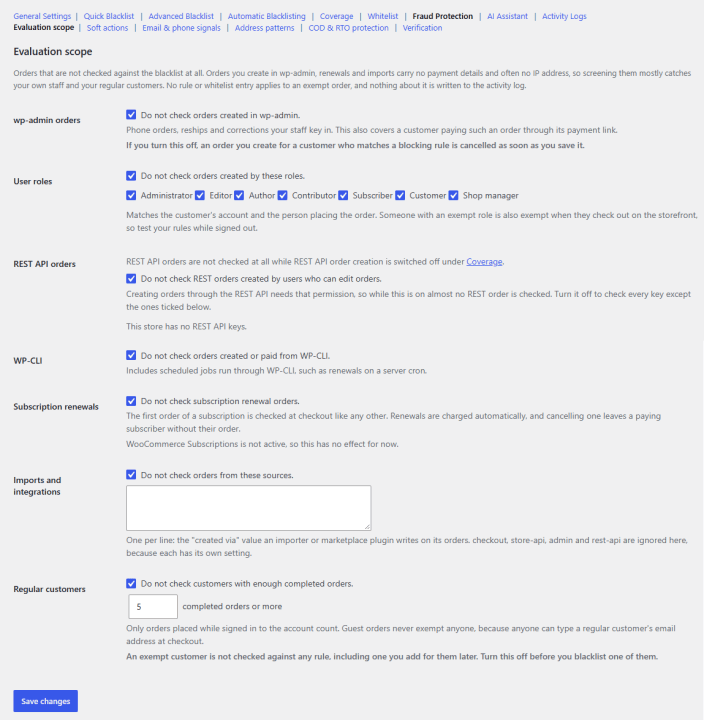
↑ Back to topEvaluate orders that are not checked against the blacklist at all. Orders you create in wp-admin, renewals, and imports carry no payment details and often no IP address, so screening them mostly catches your own staff and your regular customers. No rule or whitelist entry applies to an exempt order, and nothing about it is written to the activity log.
- WP-Admin Orders: Enable to not check orders created in wp-admin. (Phone orders, reships, and corrections your staff key in. This also covers a customer paying such an order through its payment link.)
- User Roles: Do not check orders created by teh selected user roles. Matches the customer’s account and the person placing the order. Someone with an exempt role is also exempt when they check out on the storefront, so test your rules while signed out.
- REST API Orders: Do not check REST orders created by users who can edit orders. Creating orders through the REST API needs that permission, so while this is on, almost no REST order is checked. Turn it off to check every key except the ones ticked below.
- WP-CLI: Do not check orders created or paid from WP-CLI. Includes scheduled jobs run through WP-CLI, such as renewals on a server cron.
- Subscription Renewals: Do not check subscription renewal orders. The first order of a subscription is checked at checkout like any other. Renewals are charged automatically, and cancelling one leaves a paying subscriber without their order.
- Imports and Integrations: Do not check orders from these sources. One per line: the “created via” value an importer or marketplace plugin writes on its orders. checkout, store-api, admin, and rest-api are ignored here, because each has its own setting.
- Regular Customers: Do not check customers with enough completed orders. Only orders placed while signed in to the account count. Guest orders never exempt anyone, because anyone can type a regular customer’s email address at checkout.
Soft Actions
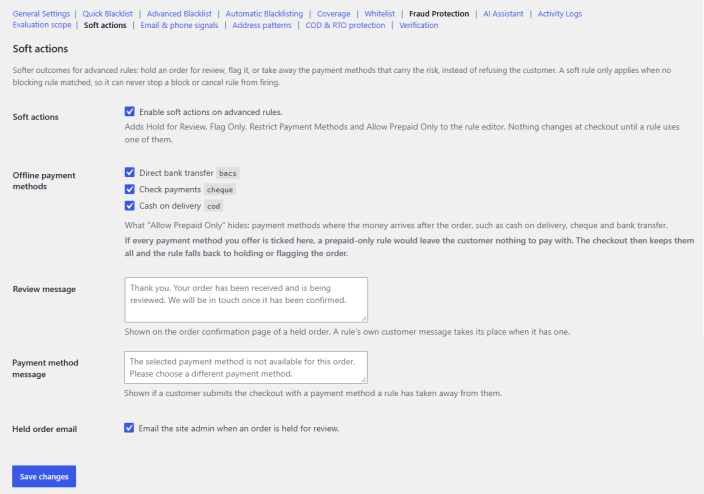
↑ Back to topConfigure soft actions for advanced rules. A soft rule only applies when no blocking rule matches, so it can never stop a block or cancel rule from firing.
- Soft Actions: Enable soft actions on advanced rules. Adds Hold for Review, Flag Only, Restrict Payment Methods, and Allow Prepaid Only to the rule editor.
- Offline Payment Methods: Choose what “Allow Prepaid Only” hides: payment methods where the money arrives after the order, such as cash on delivery, cheque, and bank transfer. (If every payment method you offer is ticked here, a prepaid-only rule would leave the customer nothing to pay with. The checkout then keeps them all, and the rule falls back to holding or flagging the order)
- Review Message: Add message to be shown on the order confirmation page of a held order.
- Payment Method Message: Enter the message to be shown if a customer submits the checkout with a payment method a rule has taken away from them.
- Held Order Email: Email the site admin when an order is held for review.
Email and Phone Signals
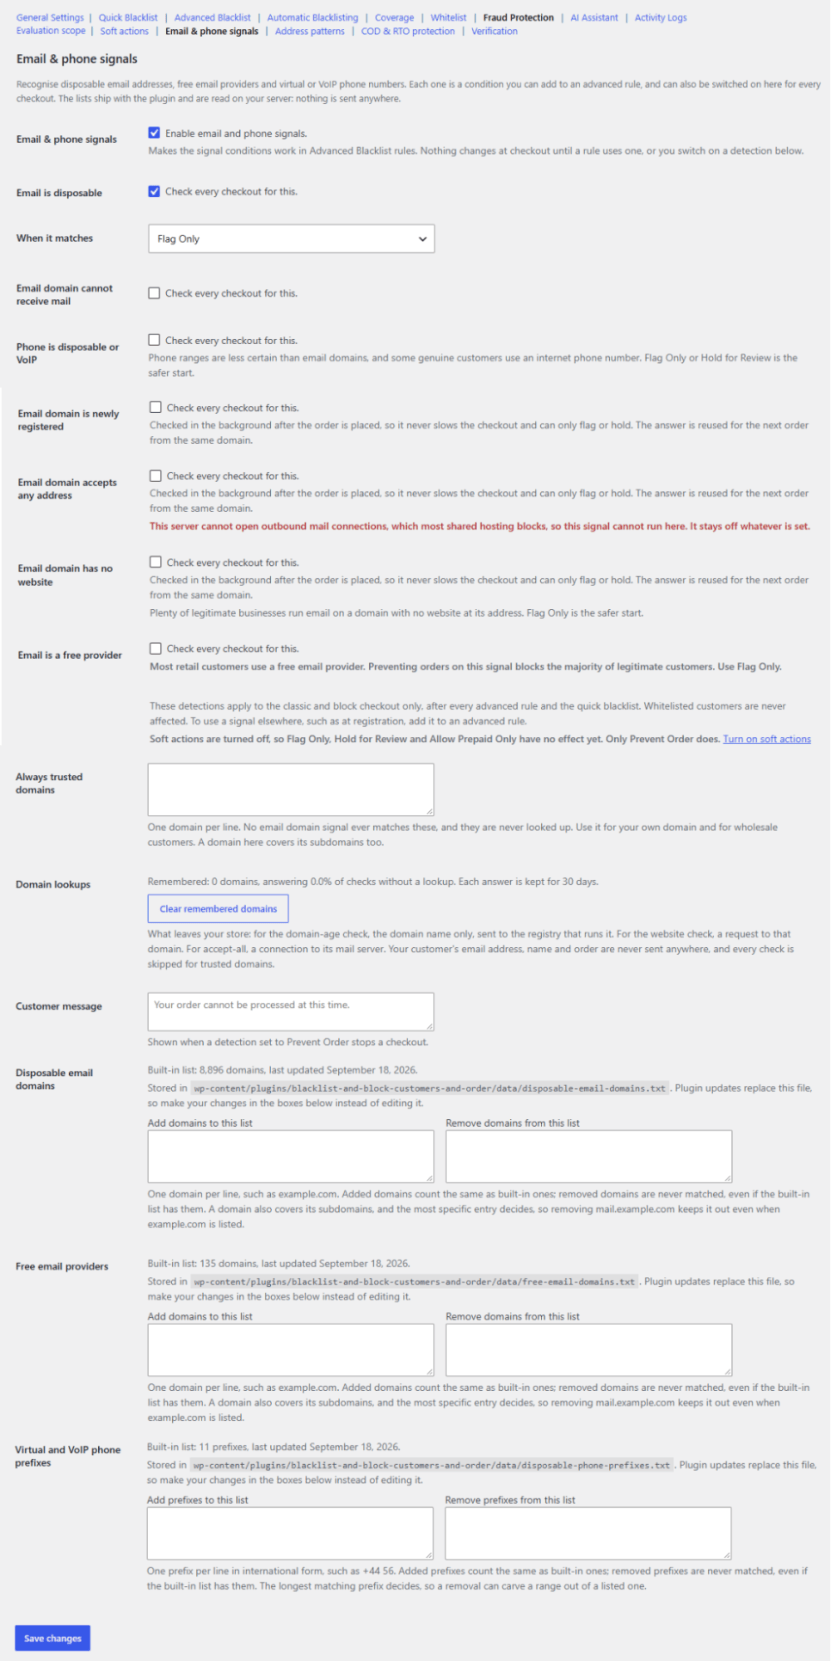
↑ Back to topDetects disposable email addresses, free email providers, and virtual or VoIP phone numbers. Each signal can be added as a condition in an Advanced Blacklist rule or switched on here to check every checkout. The lists are included with the plugin and read on your server.
- Email & Phone Signals: Enable to make the signal conditions available in Advanced Blacklist rules. Nothing changes at checkout until a rule uses a signal or a detection below is enabled.
- Email is Disposable: Enable to check every checkout for disposable email addresses.
- When it Matches: What to do if the condition matches:
- Flag Only
- Hold for Review
- Allow Prepaid Only
- Prevent Order
- Email Domain Cannot Receive Mail: Enable to check every checkout for email domains that cannot receive mail.
- When it Matches: What to do if the condition matches:
- Flag Only
- Hold for Review
- Allow Prepaid Only
- Prevent Order
- Phone is Disposable or VoIP: Enable to check every checkout for disposable, virtual, or VoIP phone numbers. Some genuine customers use internet phone numbers, so start with Flag Only or Hold for Review.
- When it Matches: What to do if the condition matches:
- Flag Only
- Hold for Review
- Allow Prepaid Only
- Prevent Order
- Email Domain is Newly Registered: Check every checkout for email domains that are newly registered.
- When it Matches: What to do if the condition matches:
- Flag Only
- Hold for Review
- Allow Prepaid Only
- Prevent Order
- Treat a Domain as New for its First: Set the number of days a domain is considered new after registration.
- Email Domain Accepts any Address: Enable to check every checkout for email domains that accept mail sent to any address. The check runs in the background after the order is placed and can only flag or hold the order. It requires outbound mail connections, which most shared hosting blocks. If your server blocks them, a notice appears, and the signal stays off.
- When it Matches: What to do if the condition matches:
- Flag Only
- Hold for Review
- Allow Prepaid Only
- Prevent Order
- Email Domain has no Website: Enable to check every checkout for email domains with no website at their address. The check runs in the background after the order is placed and can only flag or hold the order. Many legitimate businesses use email on a domain with no website, so Flag Only is recommended to start.
- When it Matches: What to do if the condition matches:
- Flag Only
- Hold for Review
- Allow Prepaid Only
- Prevent Order
- Email is a Free Provider: Enable to check every checkout for free email providers. Most retail customers use a free email provider, so use Flag Only for this signal.
- When it Matches: What to do if the condition matches:
- Flag Only
- Hold for Review
- Allow Prepaid Only
- Prevent Order
- Always Trusted Domains: Enter domains that never match any email domain signal and are never looked up, one per line. Use this for your own domain and wholesale customers. A domain here also covers its subdomains.
- Domain Lookups: Caches the results of checks that need an external request, so repeat orders from the same domain don’t trigger a new request. Shows how many domains are cached, and each result is kept for 30 days. Click Clear remembered domains to empty the cache. Only the domain name is sent in these requests, never customer details, and trusted domains are skipped.
- Customer Message: Add teh error message that will be shown to customers when a detection set to “Prevent Order” stops a checkout.
- Disposable Email Domains: Shows the number of domains in the built-in list and when it was last updated. The list file is replaced by plugin updates, so make changes in the fields below instead of editing it.
- Add Domains to this List: Enter domains to add, one per line. Added domains are treated the same as built-in ones.
- Remove Domains from this List: Enter domains to exclude, one per line. Removed domains are never matched, even if they are in the built-in list.
- Free Email Providers: Shows the number of domains in the built-in list and when it was last updated.
- Add Domains to this List: Enter domains to add, one per line.
- Remove Domains from this List: Enter domains to exclude, one per line.
- Virtual and VoIP Phone Prefixes: Shows the number of prefixes in the built-in list and when it was last updated.
- Add Prefixes to this List: Enter prefixes to add, one per line, in international format (for example, +44 56).
- Remove Prefixes from this List: Enter prefixes to exclude, one per line.
The longest matching prefix takes priority, so a removal can exclude a range within a listed prefix.
Address Patterns
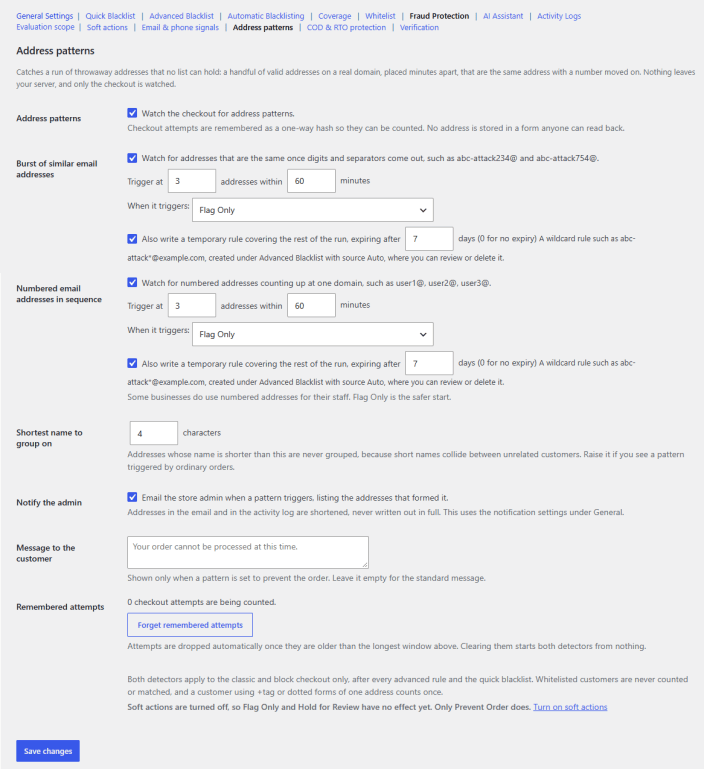
↑ Back to topDetects a run of throwaway email addresses that a blacklist cannot hold in advance, such as several valid addresses on a real domain placed minutes apart that differ only by a number. All checks run on your server, and only the checkout is monitored.
- Address Patterns: Enable to watch the checkout for address patterns. Attempts are stored as a one-way hash for counting, so no address is saved in a readable form.
- Burst of Similar Email Addresses: Enable to detect addresses that become identical once digits and separators are removed, such as abc-attack234@ and abc-attack754@.
- Trigger at / Addresses Within / Minutes: Set how many matching addresses within how many minutes will trigger the detector.
- When it Triggers: Select the action taken on the order that triggers the pattern.
- Flag Only
- Hold for Review
- Prevent Order
- Also Write a Temporary Rule: Enable to create a wildcard rule (for example, abc-attack*@example.com) under Advanced Blacklist with the source Auto, covering the rest of the run. Set the number of days before it expires, or enter 0 for no expiry.
- Numbered Email Addresses in Sequence: Enable to detect addresses that count upward at one domain, such as user1@, user2@, and user3@.
- Trigger at / Addresses within / Minutes: Set how many sequential addresses within how many minutes will trigger the detector.
- When it Triggers: Select the action taken on the order that triggers the pattern.
- Flag Only
- Hold for Review
- Prevent Order
- Also Write a Temporary Rule: Enable to create a temporary wildcard rule under Advanced Blacklist with the source Auto. Set the expiry in days, or 0 for no expiry. Flag Only is recommended to start, as some businesses use numbered addresses for staff.
- Shortest name to group on: Set the minimum number of characters an address name needs before it can be grouped. Shorter names are ignored to avoid matching unrelated customers.
- Notify the Admin: Enable emailing the store admin when a pattern triggers, listing the addresses involved. Addresses are shortened in the email and activity log, and the email uses the notification settings under General.
- Message to the Customer: Enter the message shown at checkout when a pattern is set to Prevent Order. Leave empty to use the standard message.
- Remembered Attempts: Shows how many checkout attempts are currently being counted. Click Forget remembered attempts to clear them and restart both detectors. Attempts are also removed automatically once they are older than the longest window.
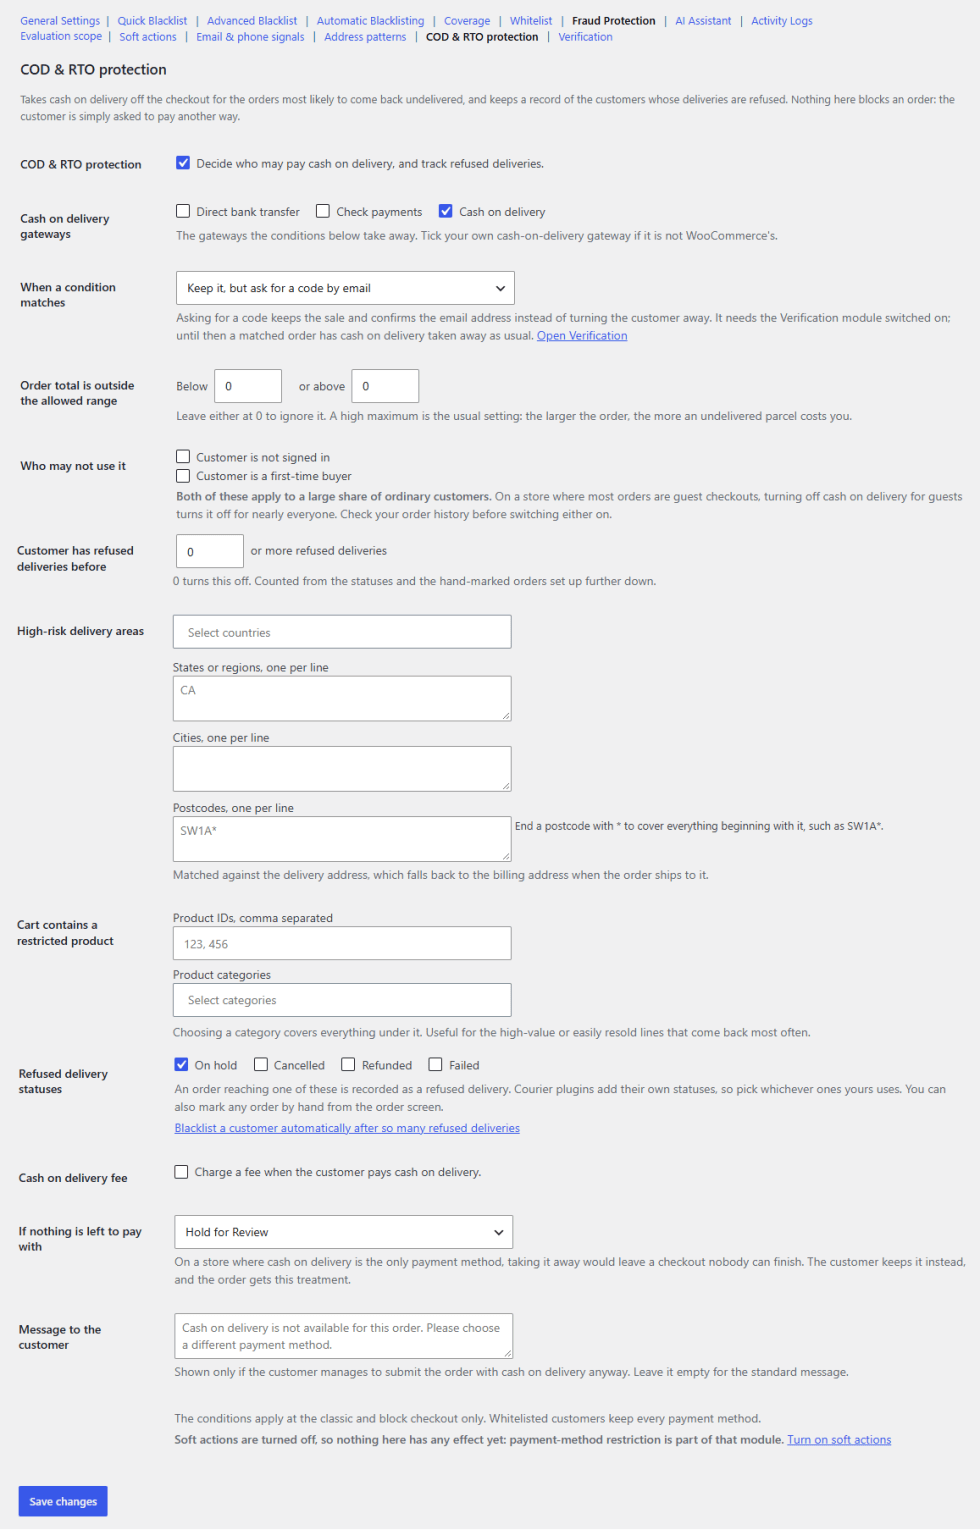
COD and RTO Protection
↑ Back to topRemoves cash on delivery from the checkout for orders most likely to be returned undelivered, and keeps a record of customers whose deliveries are refused. No order is blocked here; the customer is asked to choose another payment method.
- COD & RTO Protection: Enable to control who can pay with cash on delivery and to track refused deliveries.
- Cash on Delivery Gateways: Select the payment gateways; the conditions below will be removed. Tick your own cash on delivery gateway if you do not use the default WooCommerce one.
- When a Condition Matches: Select what happens when an order meets any of the conditions below.
- Take cash on delivery off the checkout
- Keep it, but ask for a code by email
- Order Total is Outside the Allowed Range: Set a minimum (Below) and maximum (or above) order total for cash on delivery.
- Who May Not Use It: Select the customers who cannot use cash on delivery.
- Customer is not signed in
- Customer is a first-time buyer
Both options apply to a large share of regular customers, so check your order history before enabling either.
- Customer has Refused Deliveries Before: Set the number of refused deliveries after which a customer loses cash on delivery. Enter 0 to turn this off. The count is based on the refused delivery statuses and manually marked orders.
- High-risk Delivery Areas: Define the locations where cash on delivery is not offered. Locations are matched against the shipping address, or the billing address when no separate shipping address is used.
- Select Countries: Choose one or more countries.
- States or Regions, one per line: Enter state or region codes, one per line.
- Cities, one per line: Enter city names, one per line.
- Postcodes, one per line: Enter postcodes, one per line. End a postcode with * to cover all postcodes beginning with it, such as SW1A*.
- Cart Contains a Restricted Product: Remove cash on delivery when the cart contains specific products or categories.
- Product IDs: Enter the IDs of the restricted products.
- Product Categories: Select the restricted categories. Selecting a category includes all products under it.
- Refused Delivery Statuses: Select the order statuses that count as a refused delivery (On hold, Cancelled, Refunded, Failed). Statuses added by courier plugins also appear here. Orders can also be marked as refused manually from the order screen.
- Cash on Delivery Fee: Enable to charge an extra fee when the customer pays with cash on delivery.
- If Nothing is Left to Pay With: Select how the order is handled when cash on delivery is the only payment method available.
- Hold for Review
- Flag Only
- Message to the Customer: Enter the message shown if the customer still submits the order with cash on delivery. Leave empty to use the standard message.
Verification
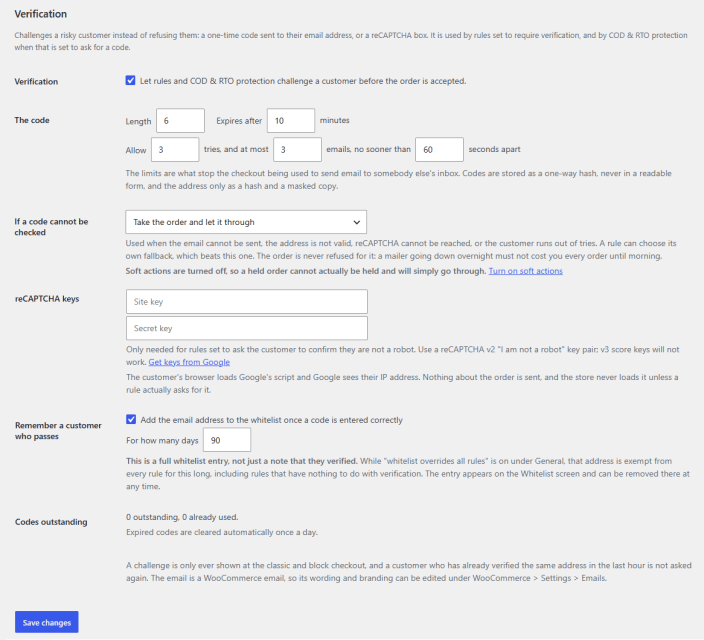
↑ Back to topChallenge a risky customer instead of refusing the order, either with a one-time code sent to their email address or a reCAPTCHA check. It is used by rules set to require verification and by COD & RTO protection when set to ask for a code.
- Verification: Enable to let rules and COD & RTO protection challenge a customer before the order is accepted.
- The Code: Configure the one-time code and its sending limits.
- Length: Set the number of characters in the code.
- Expires After: Set how many minutes the code stays valid.
- Allow Tries: Set how many attempts the customer has to enter the code correctly.
- At Most Emails: Set the maximum number of code emails that can be sent.
- No Sooner than Seconds Apart: Set the minimum wait time between code emails.
These limits prevent the checkout from being used to send email to someone else’s inbox.
- If a Code Cannot be Checked: Select what happens when the email cannot be sent, the address is invalid, reCAPTCHA cannot be reached, or the customer runs out of tries.
- Take the order and hold it for review
- Take the order and let it through
- reCAPTCHA Keys: Enter your Google reCAPTCHA Site key and Secret key. These are only needed for rules that ask the customer to confirm they are not a robot. Use a reCAPTCHA v2 “I am not a robot” key pair, as v3 score keys are not supported. The reCAPTCHA script only loads when a rule requests it, and no order data is sent to Google.
- Remember a Customer Who Passes: Enable to add the customer’s email address to the whitelist after they enter a code correctly.
- For How Many Days: Set how long the whitelist entry lasts.
- Codes Outstanding: Shows the number of active and already used codes. Expired codes are cleared automatically once a day.
AI Assistant
↑ Back to topAdd an AI Assistant to help you create rules and manage the plugin settings. To configure, go to WooCommerce > Settings > Blacklist Manager > AI Assistant.
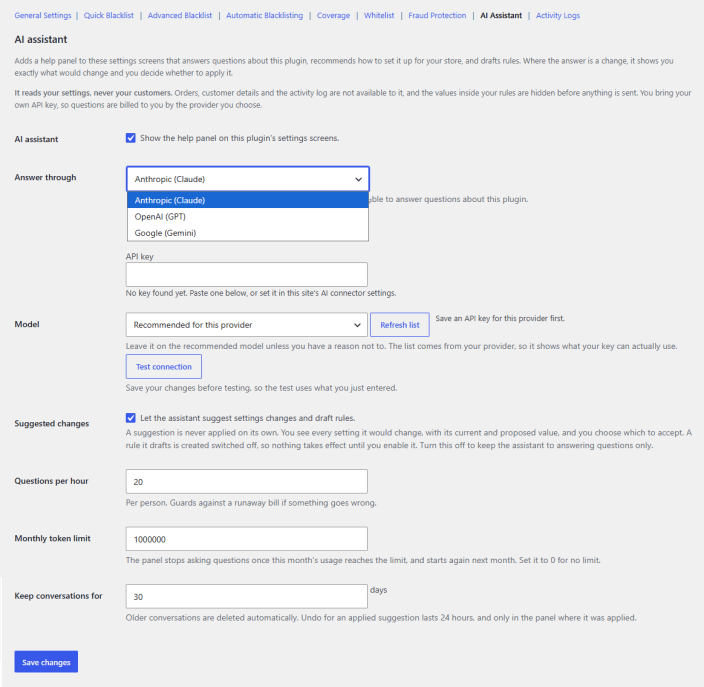
Adds a help panel to the plugin’s settings screens that answers questions about the plugin, recommends a setup for your store, and drafts rules. Any suggested change is shown in full before you decide whether to apply it. The assistant reads only your settings; orders, customer details, and the activity log are never shared, and values inside your rules are hidden before anything is sent. You use your own API key, so usage is billed by your chosen provider.
- AI Assistant: Enable to show the help panel on the plugin’s settings screens.
- Answer Through: Select the AI provider to use.
- Anthropic (Claude)
- OpenAI (GPT)
- Google (Gemini)
- API Key: Enter the API key for the selected provider, or set it in your site’s AI connector settings.
- Model: Select the model to use. Keeping the recommended model is advised.
- Click Refresh list to load the models available to your key (save the API key first).
- Click Test connection to check the setup after saving your changes.
- Suggested Changes: Enable to let the assistant suggest settings changes and draft rules. Each suggestion shows the current and proposed value, and nothing is applied until you accept it. Drafted rules are created disabled. Turn this off to limit the assistant to answering questions.
- Questions per Pour: Set the maximum number of questions each user can ask per hour, to prevent unexpected costs.
- Monthly Token Limit: Set the maximum tokens used per month. The panel stops answering once the limit is reached and resumes the next month.
- Keep Conversations For: Set how many days conversations are kept before being deleted automatically. An applied suggestion can be undone within 24 hours, only from the panel where it was applied.
Activity Logs
↑ Back to topReview a record of every blocked action. Go to WooCommerce > Settings > Blacklist Manager > Activity Logs and view the following:
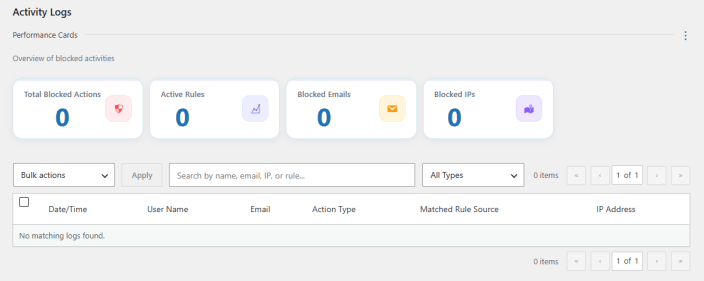
Performance Cards: An overview of blocked activities, showing:
- Total Blocked Actions: The total number of actions blocked across all rules.
- Active Rules: The number of currently active blacklist rules.
- Blocked Emails: The number of emails blocked.
- Blocked IPs: The number of IP addresses blocked.
Below the performance cards, the activity log table lists every matched action with the following columns:
- Date/Time: When the action was blocked.
- User Name: The name associated with the blocked action.
- Email: The email address associated with the blocked action.
- Action Type: The type of action that was blocked, such as Prevent Order, Cancel Order, or Block Registration.
- Matched Rule Source: The rule or source that triggered the block.
- IP Address: The IP address associated with the blocked action.
Use Bulk Actions, the search field, or the All Types filter to narrow down logged entries.
Frequently Asked Questions
↑ Back to topWhat does the Blacklist for WooCommerce plugin do?
↑ Back to topIt blocks or restricts unwanted and spam customers from your store based on conditions you define, such as name, email, phone number, IP address, billing details, or order value.
What actions can a blacklist rule trigger?
↑ Back to topThree actions are available across the plugin: Prevent Order (stops the order at checkout), Cancel Order (cancels an order after it’s placed), and Block Registration (stops the customer from creating an account).
What’s the difference between Quick Blacklist and Advanced Blacklist?
↑ Back to topQuick Blacklist lets you add simple values (emails, names, phone numbers, IPs, countries) separated by commas, with one default action applied using OR logic, meaning any single match triggers it. Advanced Blacklist lets you build detailed rules with multiple conditions, match types (exact, contains, starts with, ends with, wildcard), priorities, and expiry periods. Advanced rules are evaluated first and override quick blacklist matches.
Can I block customers automatically, without creating rules myself?
↑ Back to topYes. Automatic Blacklisting lets you set thresholds for failed orders, cancelled orders, refunded orders, or blocked attempts from the same IP within a time window. Once a customer crosses the threshold, a rule is written automatically.
Are whitelisted customers ever blacklisted automatically?
↑ Back to topNo. Whitelisted customers are excluded from automatic blacklisting as well as manual rules, so long as Whitelist Overrides All Rules is enabled in General Settings.
Where are blacklist rules enforced by default?
↑ Back to topClassic checkout, block checkout, WooCommerce registration, and REST API order creation are covered from the start. WordPress registration, login, comments, and product reviews start switched off, since these extend blacklist enforcement beyond checkout and are treated as an opt-in decision.

