Manage shipping and payment options with Conditional Shipping and Payments for WooCommerce, using rules based on products, cart, customers, and locations.
Installation
↑ Back to top- Download the Extendons Conditional Shipping and Payment Methods.zip file from your WooCommerce account.
- Go to WordPress Admin > Plugins > Add New and Upload Plugin.
- Click on Choose File to upload the file you downloaded.
- Install Now and Activate the extension.
Setup and Configuration of the Plugin
↑ Back to topAfter activating the plugin, if your Shipping and Payment methods are not enabled, you can enable or manage them by going WooCommerce > Settings > Shipping and WooCommerce > Settings > Payments.
To configure the plugin, go to WooCommerce > Settings > Payment and Shipping Settings. Here you will see two tabs.
- Payment Gateways – Create Payment Gateway Rules
- Shipping Methods – Create Shipping Methods Rules
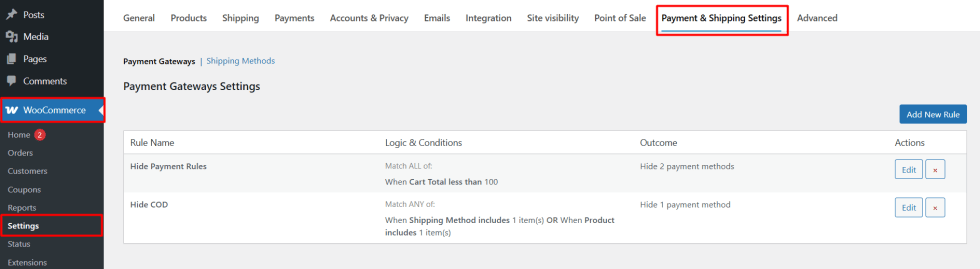
Payment Gateways:
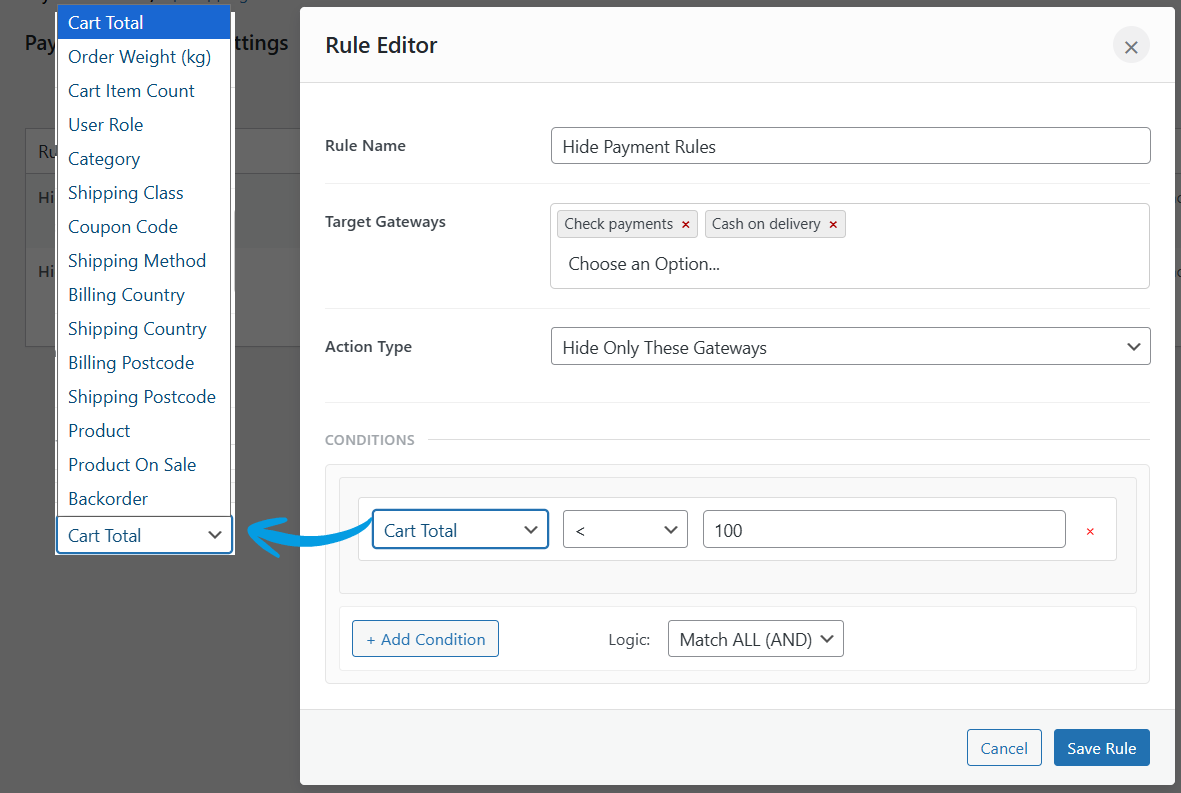
↑ Back to topClick on the Add New Rule button to start the configuration of the rule. Upon clicking a pop-up will appear.
- Rule Name: Set a custom rule name to help you distinguish between multiple rules.
- Target Gateways: Select the payment method to which this rule will be applied.
- Action Type: Select the type of action you want to apply. You can choose from
- Hide Only These Gateways
- Show Only These Gateways
- Prevent Order Submission
- Conditions: Set the conditions for the payment gateways. You choose between “AND” or “OR” logic. Choose the preferred option from
- Cart Total
- Order Weight
- Cart Item Count
- User Role
- Category
- Shipping Class
- Coupon Code
- Shipping Method
- Billing Country
- Shipping Country
- Billing Postcode
- Shipping Postcode
- Product
- Product on Sale
- Backorder
- Then you can choose from metrics like
- < (Less Than)
- > (Greater Than)
- = (Equals)
- ≤ (Less Than or Equals)
- ≥ (Greater Than or Equals)
After filling in all the details. Click Save Rule.
Shipping Methods
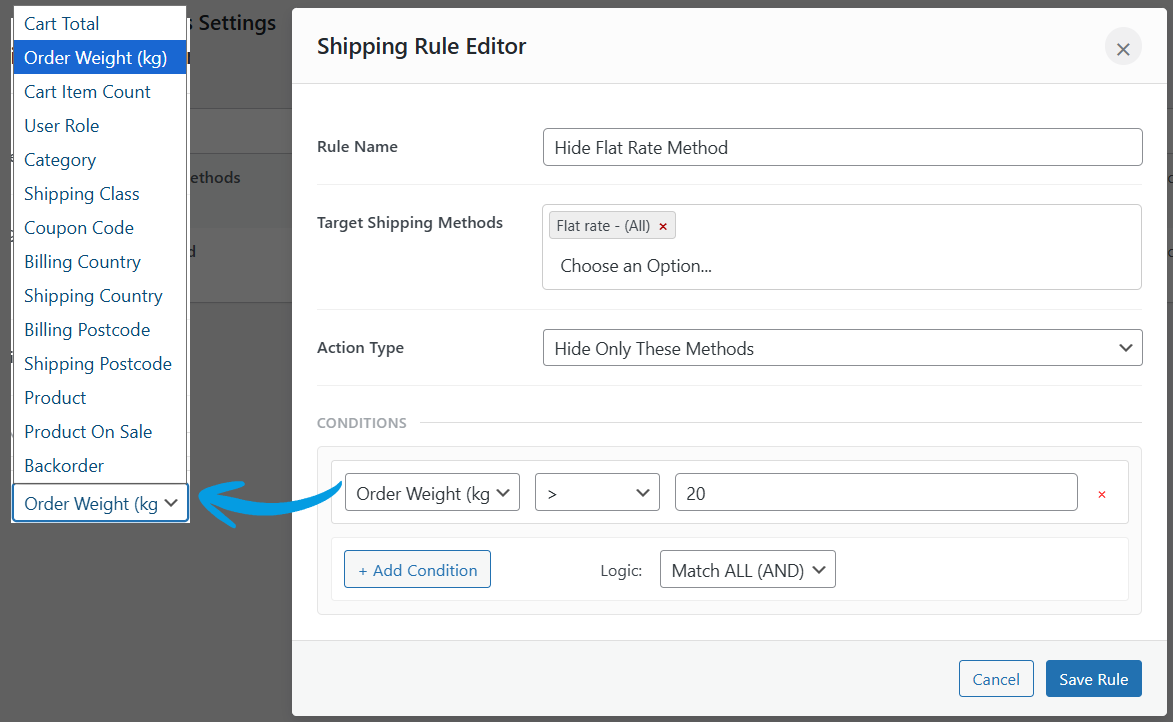
↑ Back to topClick on the Add New Shipping Rule button to start the configuration of the rule. Upon clicking, a pop-up will appear.
- Rule Name: Assign a custom name to the rule, and manage easily when multiple rules are created.
- Target Shipping Methods: Use this option to specify the shipping method to which the rule should apply.
- Action Type: Select the type of action you want to apply. You can choose from
- Hide Only These Methods
- Show Only These Methods
- Conditions: Set the conditions for the shipping methods by selecting “AND” or “OR” logic, then choose the criteria you want to apply.
- Cart Total
- Order Weight
- Cart Item Count
- User Role
- Category
- Shipping Class
- Coupon Code
- Billing Country
- Shipping Country
- Billing Postcode
- Shipping Postcode
- Product
- Product on Sale
- Backorder
- Next, choose a comparison metric for the rule:
- < (Less Than)
- > (Greater Than)
- = (Equals)
- ≤ (Less Than or Equals)
- ≥ (Greater Than or Equals)
- After configuring all details, click Save Rule to apply the conditions.