Installation
↑ Back to top1. Download the Control Your Order Status.zip file from your WooCommerce account.
2. Go to WordPress Admin > Plugins > Add New and Upload Plugin.
3. Click on Choose File to upload the file you downloaded.
4. Install Now and Activate the extension
Configuration
↑ Back to topAfter you have installed and activated the Plugin, Go to WooCommerce > Order State Control, Here you can create Multiple rules in which you can control which type of orders should be auto-completed.
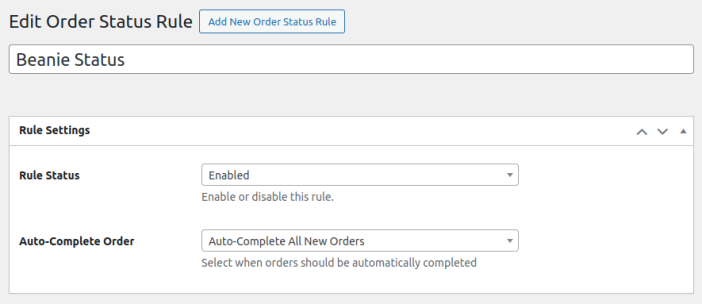
Add New Order Status rule
↑ Back to top- Click on a Add new rule button in WooCommerce > Order Status Control, Here you can set the name of the rule and configure the following:
- Rule Status: Option to enable or disable the rule.
- Auto-Complete Order: Select when order should be completed, there are four options for this:
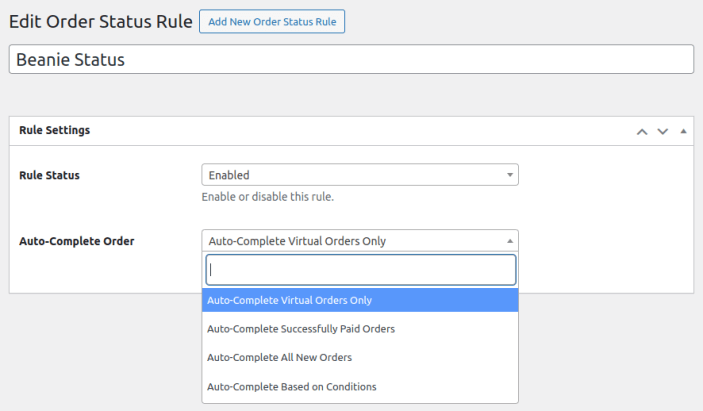
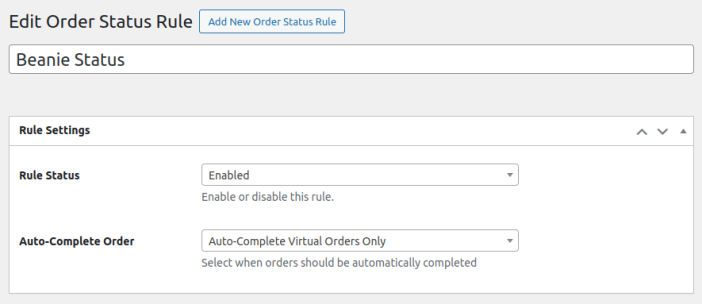
Auto-Complete Virtual Order Only
↑ Back to topIf store owner select auto complete virtual orders Than all orders with virtual products autom completed, If customers add any other product which is not virtual than this will not work
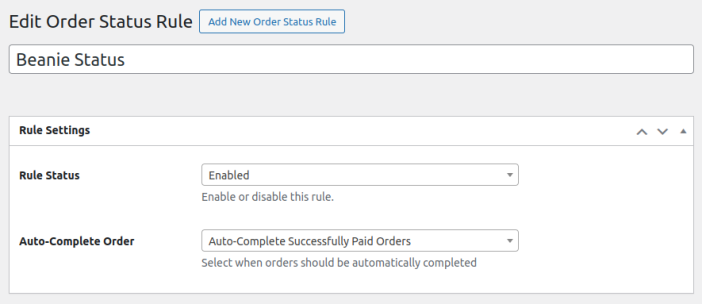
Auto-Complete Successfully Paid Orders
↑ Back to topThis status will work with all paid orders
Auto-Complete All new Orders
↑ Back to topIf auto complete all new orders is selected than all new orders received on store will be auto-completed
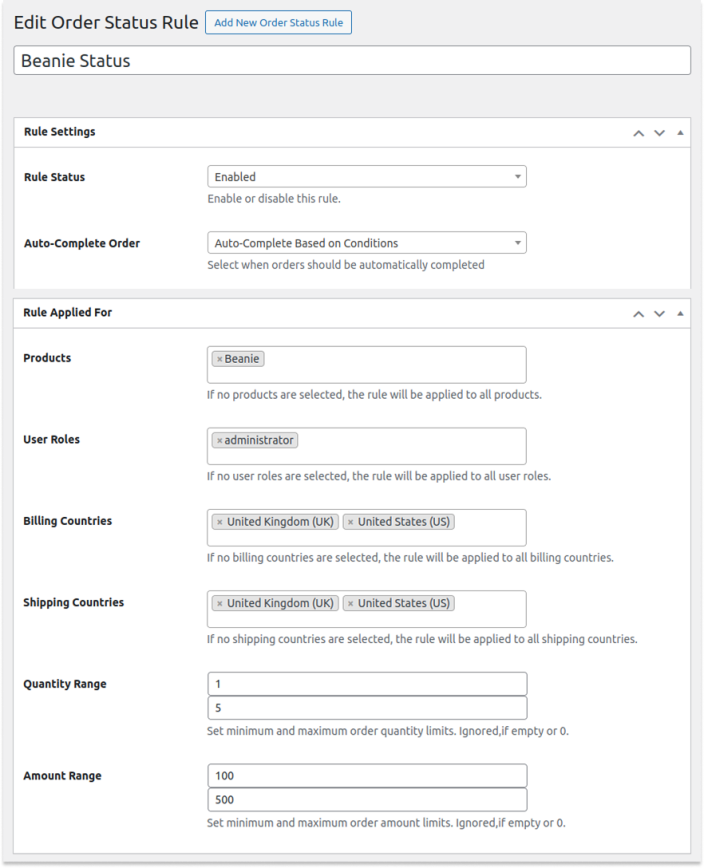
Auto-Complete Based on Conditions
↑ Back to topYou need to configure following for auto-complete based on conditions:
- Products: Select products on which you want to apply this rule, if no products selected, The rule will be applied on all products.
- User Roles: Select roles on which you want apply rule, if left empty rule will be applied on all user roles.
- Billing Countries: Select billing countries if left empty applied to all billing countries.
- Shipping Countries: Choose shipping countries, if left empty, applied on all countries.
- Quantity Range: Set minimum and maximum order quantity limits. Ignored,if empty or 0.
- Amount Range: Set minimum and maximum order amount limits. Ignored,if empty or 0.