Order Management Solution streamlines the process of creating and managing orders from your store’s WP Admin dashboard. It is ideal for customer service agents, retail stores, and businesses that take phone or in-person orders.
Installation
↑ Back to topTo start using a product from WooCommerce.com, you can use the “Add to store” functionality on the order confirmation page or the My subscriptions section in your account.
- Navigate to My subscriptions.
- Find the Add to store button next to the product you’re planning to install.
- Follow the instructions on the screen, and the product will be automatically added to your store.
Alternative options and more information at:
Managing WooCommerce.com subscriptions.

Setup and configuration
↑ Back to top- From your store’s WP Admin dashboard, navigate to WooCommerce > Add Order.
- Configure default shipping methods, tax settings, and Google Maps API (optional).
- Assign permissions to roles that will be using the order creation features.
- Create new order based on existing order.
- Create new customer based on existing order.
- Pause and resume the order.
- Edit created order.
- Set own shipping price (add method to shipping zone).
- Clear all items in cart with a push of a button.
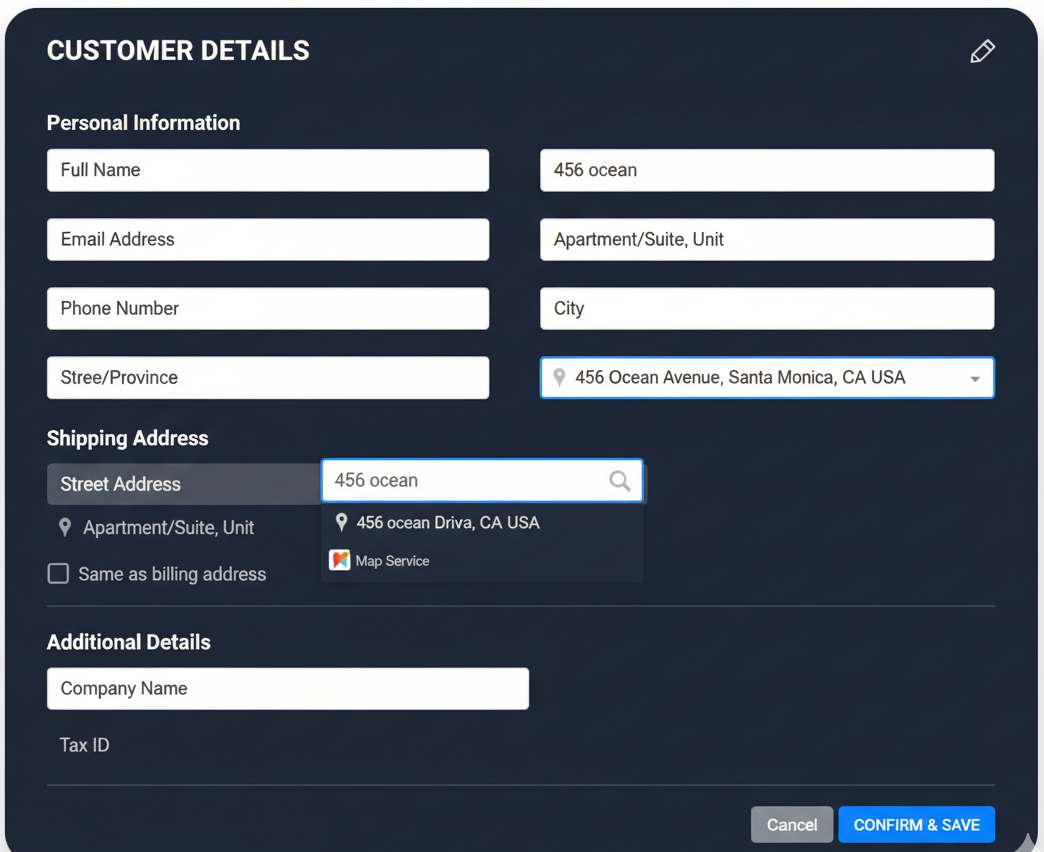
- Save address details to the customer’s profile.
- Accept orders at front-end page.
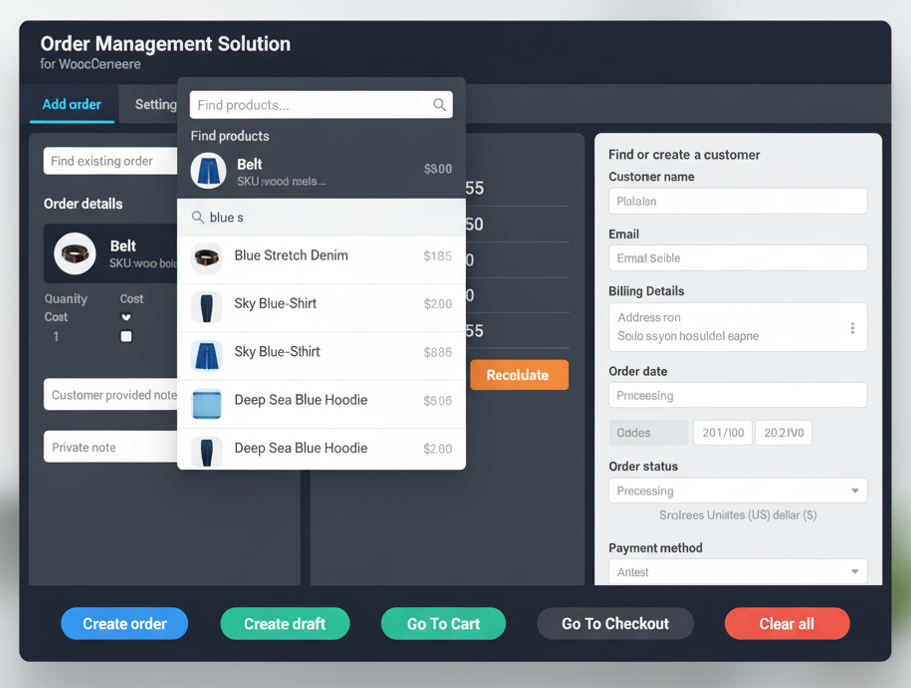
Easy Order Creation – Create WooCommerce orders from the admin area using a fast, intuitive interface.
Customer Management – Quickly search and select existing customers, or create new ones during order creation.
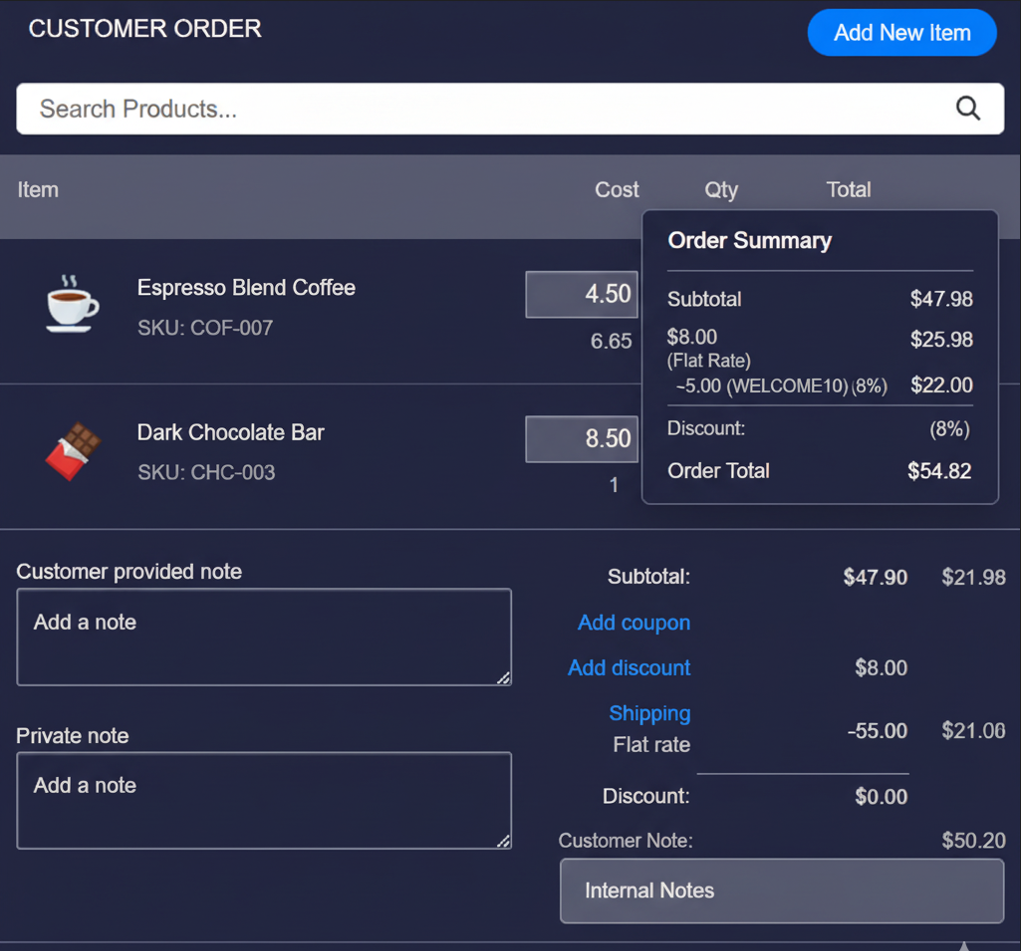
Product Search – Search for products and variations with advanced filtering.
Payment Processing – Choose from available payment gateways or apply custom payment methods.
Shipping Options – Assign shipping methods and customize shipping costs.
Order Management – View, edit, update, and delete orders from a central dashboard.
Tax Calculation – Automatic tax calculations based on WooCommerce tax settings and customer location.
Invoice Generation – Send professional invoices directly from the order page.
Order History – Access customer order history and re-order details with one click.
Front-end page setup
↑ Back to topTo make the front-end order page functional:
- Publish the page and ensure only authorized roles can access it.
- Create a new page, e.g. “Add Orders Front-end Page”.
- Add the required shortcode or template that loads the front-end order form (usually provided by the extension or custom code).
- Paste the page URL into the front-end page URL field in the extension’s settings.

Example page URL: https://yourdomain.com/add-orders-frontend-page
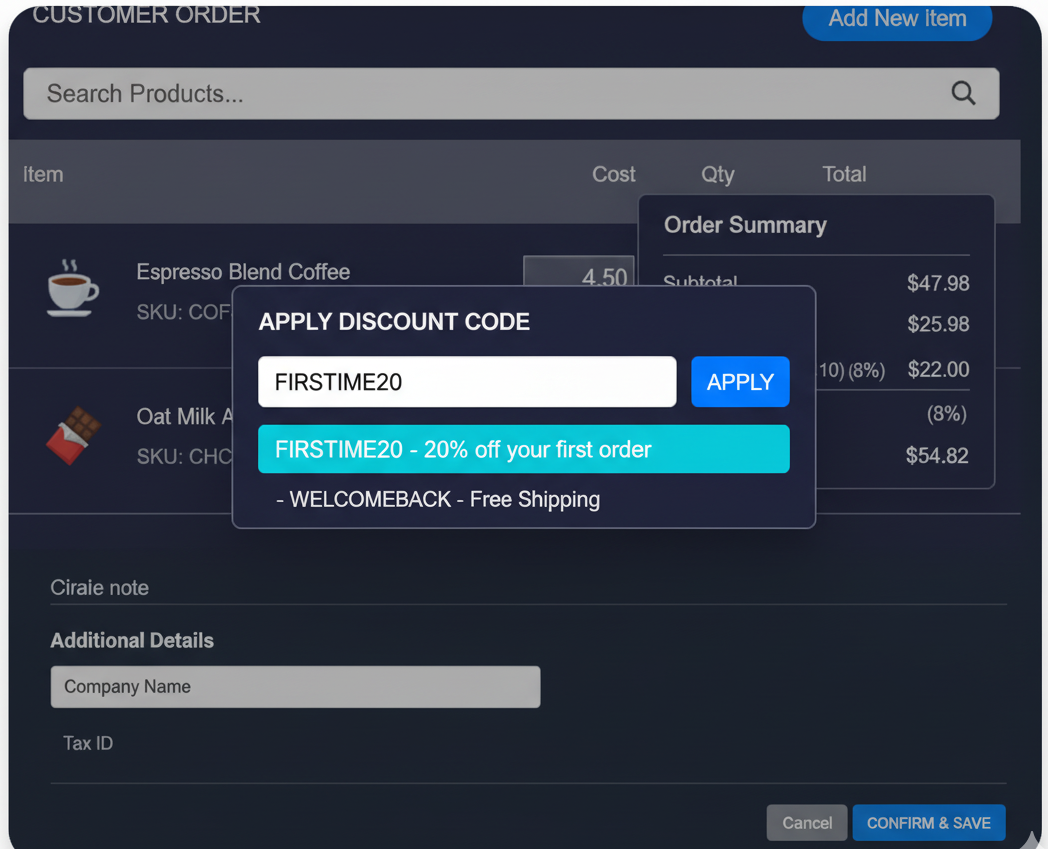
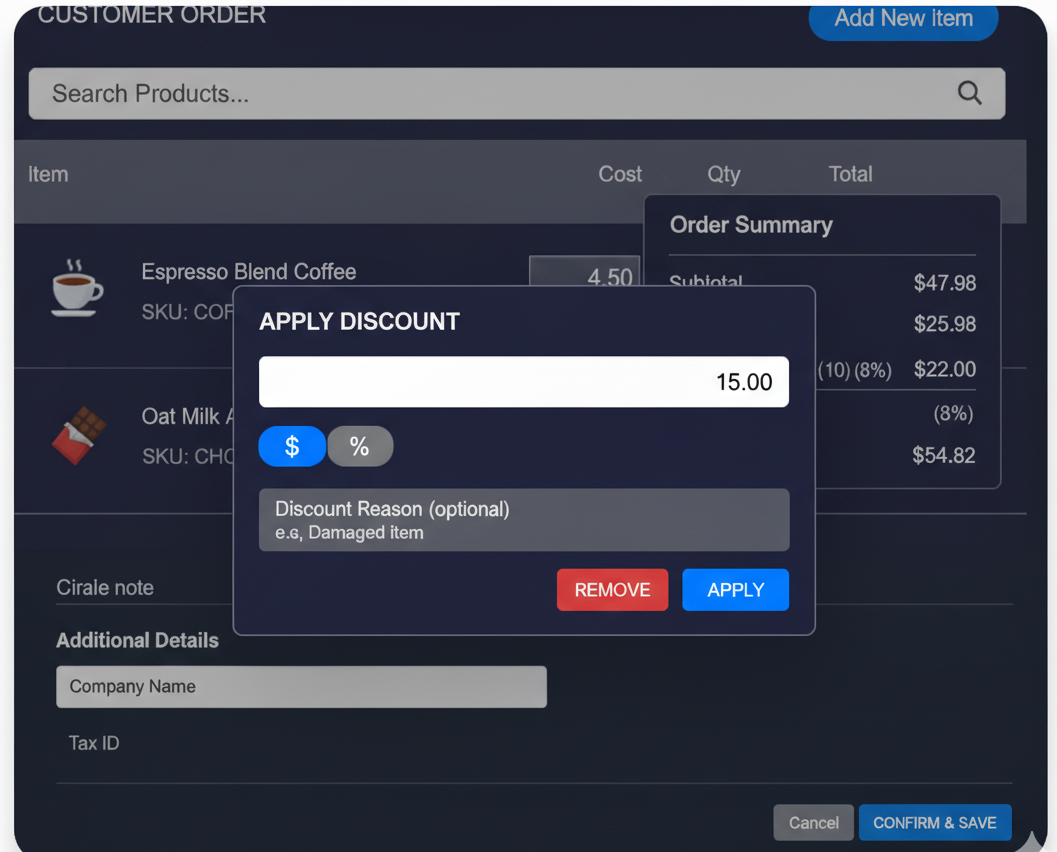
Screenshots
↑ Back to top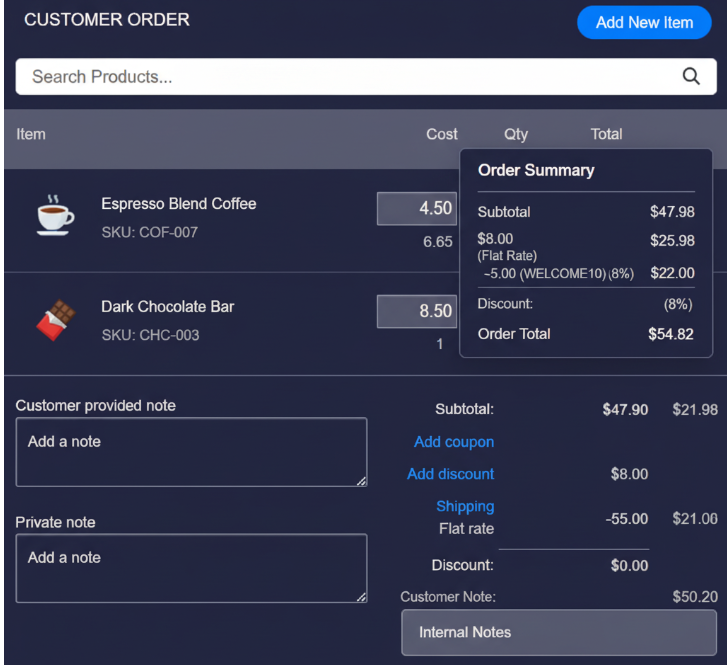

Use cases
↑ Back to top- Phone orders: Sales teams and customer support can easily input orders.
- Retail environments: Cashiers or staff can use the admin panel to process purchases.
- Service businesses: Book and charge for appointments or service orders.
- B2B commerce: Handle large orders and manage customer accounts.
- Multi-location support: Operate and manage orders across various locations with unified control.