Allow customers to find nearby physical store locations using Google Maps. It offers features like customizable store details, product availability indicators, and search filters.
Installation:
↑ Back to top- Download the WooCommerce Multistore and save your .zip file
- Go to the Plugins section at the WordPress admin panel, and click ‘Add New’ to upload and install the plugin you just downloaded from WooCommerce.
- Upload the .zip file to proceed with the installation.
- Wait until the plugin installs. After successful installation, activate the plugin, and move on to configuration settings.
Configuration:
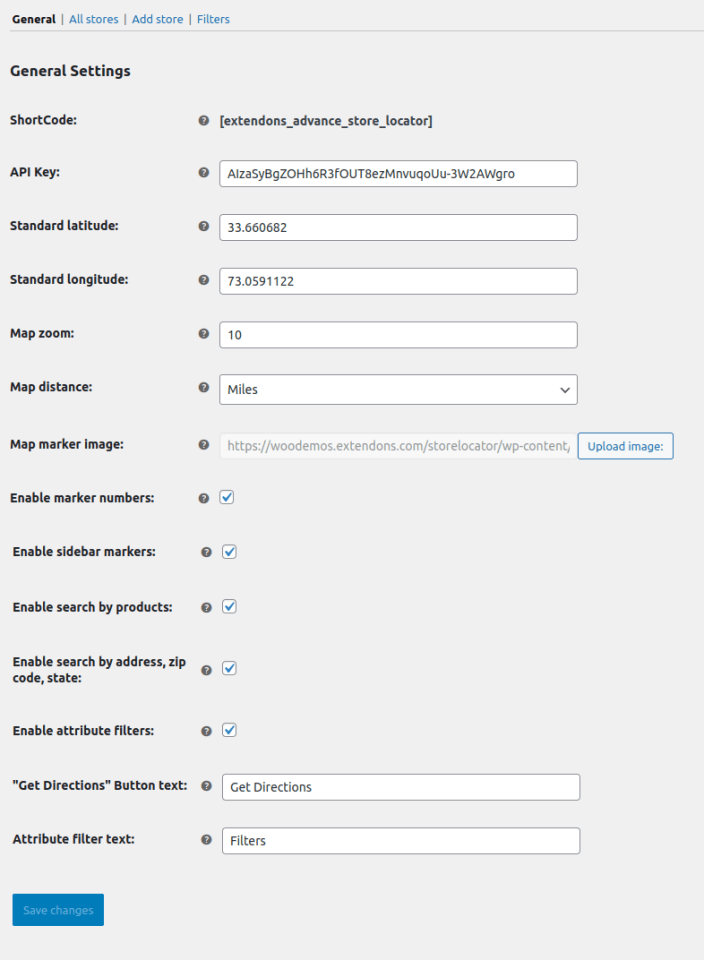
↑ Back to topAt the WooCommerce Multistore admin panel, go to WooCommerce > Settings > Store Locator for configuration. Here you will find four tabs: General, All Stores, Add Stores and Filters.
General Settings:
↑ Back to top- Shortcode: Use this shortcode to display the store locator on your desired page.
- API Key: Enter the Google Map API Key.
- Standard Latitude: Enter the default latitude the map should be pointing to on page load.
- Standard Longitude: Enter the default longitude the map should be pointing to on page load.
- Map Zoom: Enter the default zoom value for the map, default is 10.
- Map distance: Select unit of distance for the map.
- Map marker image: Select the map marker image.
- Enable marker numbers: Check to display marker numbers.
- Enable sidebar markers: Check to display sidebar marker number.
- Enable search by products: Check to enable search by products.
- Enable search by address, Zip, Code, State: Check to enable search by address, zip code, and state.
- Enable attribute filters: Check to enable attributes filters.
- “Get Direction” button text: (Set the button text to “get direction”)
- Attribute filter text: Write a text for attribute filters.
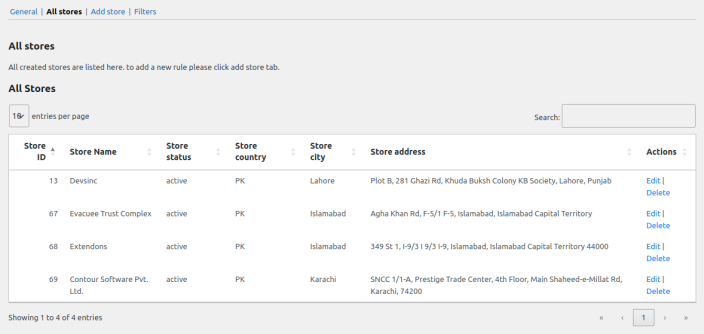
All Stores:
↑ Back to topAll created stores are listed here, you can edit and delete already created stores in this section.
Add Store:
↑ Back to topYou can add the following general Information for a store:
- Store name: Set a custom name for the store.
- Store Status: Choose whether the store is active or inactive.
- Meta title: Enter a custom meta title for the store.
- Meta keywords: Provide the necessary meta keywords for the store.
- Meta description: Provide a meta description for the store.
- Store image: Set up a custom image for the store.
- Store description: Enter the store description with the help of editor
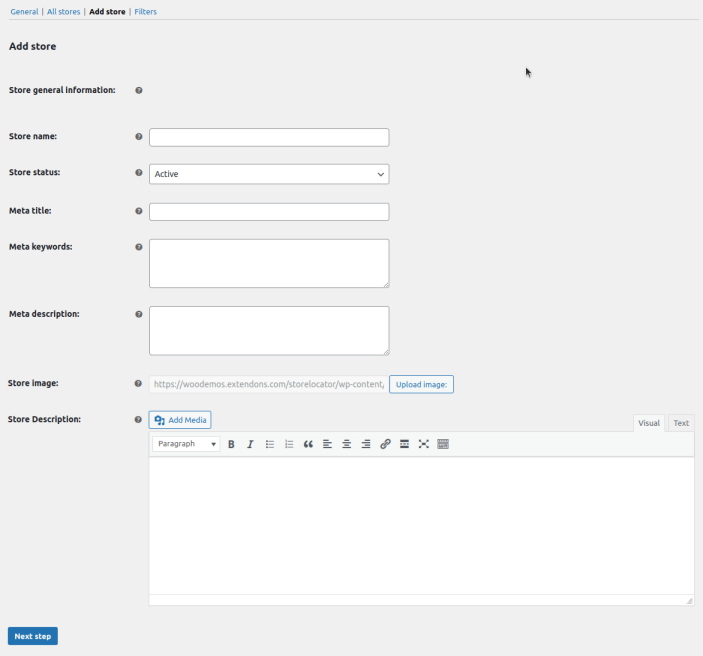
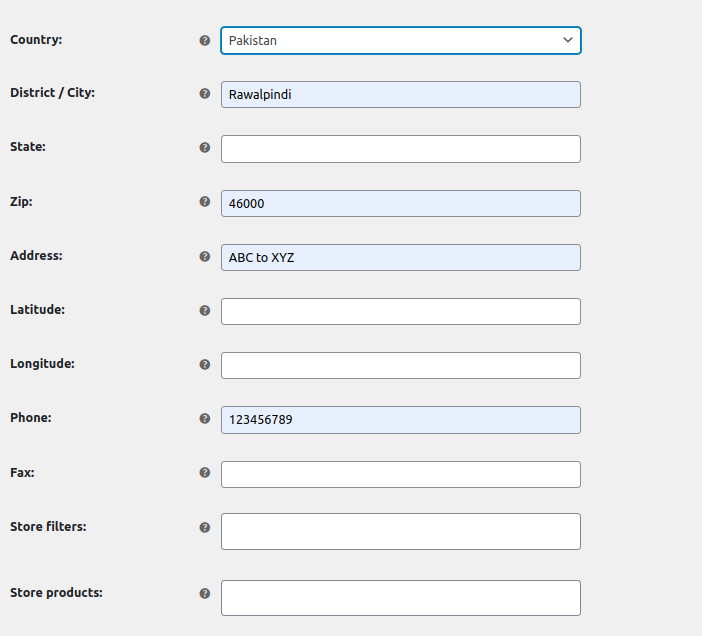
After the above mentioned steps, click on ‘next step’ to add additional information for the store such as:
- Country: Select the country the store is located in.
- District/city: Enter the store district/city.
- State: Enter the store state the store is located in.
- Zip: Enter zipcode of the store.
- Address: Write address of the store.
- Latitude: Enter the store latitude.
- Longitude: Enter the store longitude.
- Phone: Add store phone number.
- Fax: Enter the store fax number.
- Store filters: Select the filter attribute for store.
- Store products: Choose products for the store.
Filters:
↑ Back to topYou can add multiple filters for each store from here, These filters can be selected when adding a store in the settigns and then, in turn, can be used to filter stores in frontend view.
- Filter name: (Enter the name of new filter)
- Filter status: (Set the status of filter active or inactive)
Also, you can change the status and delete the filter anytime in the table below this section.
