Track and manage inventory across multiple locations, suppliers, and purchase orders, with real-time stock updates and forecasting.
Installation
↑ Back to top- Download the .zip file from your WooCommerce Account.
- Go to WordPress Admin > Plugins > Add New and upload the plugin file.
- Click Install Now and then Activate.
Setup and Configuration
↑ Back to topTo access the plugin settings, log in to your WordPress admin panel and navigate to WooCommerce > Settings > Multi Inventory. There you will find all the settings organized under the tabs below.
General
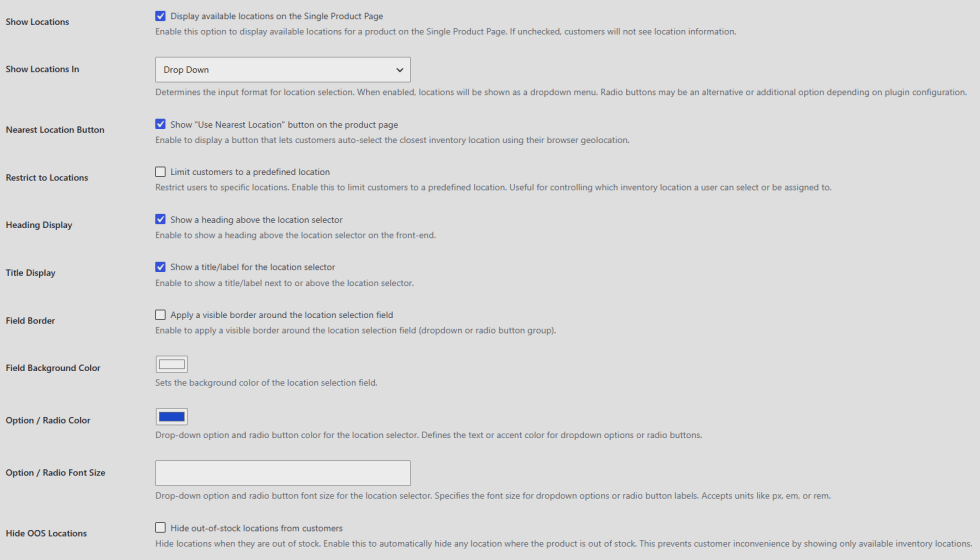
↑ Back to top- Display available locations on the Single Product Page: Check this to show customers the available locations for a product on the single product page. Leave unchecked to hide location information from customers entirely.
- Show Locations In: Choose Drop Down or Radio Buttons to control how customers select a location.
- Show “Use Nearest Location” button on the product page: Check this to display a button that lets customers auto-select the closest inventory location using their browser’s geolocation.
- Limit customers to a predefined location: Check this to restrict which location a customer can select or be assigned to.
- Show a heading above the location selector: Check this to display a heading above the selector on the front end.
- Show a title/label for the location selector: Check this to display a title or label next to or above the selector.
- Apply a visible border around the location selection field: Check this to add a border around the dropdown or radio button group.
- Field Background Color: Set the background color of the location selection field.
- Option / Radio Color: Set the text or accent color for dropdown options or radio buttons.
- Option / Radio Font Size: Set the font size for dropdown options or radio labels, accepts units like px, em, or rem.
- Hide out-of-stock locations from customers: Check this to automatically hide any location where the product is out of stock.
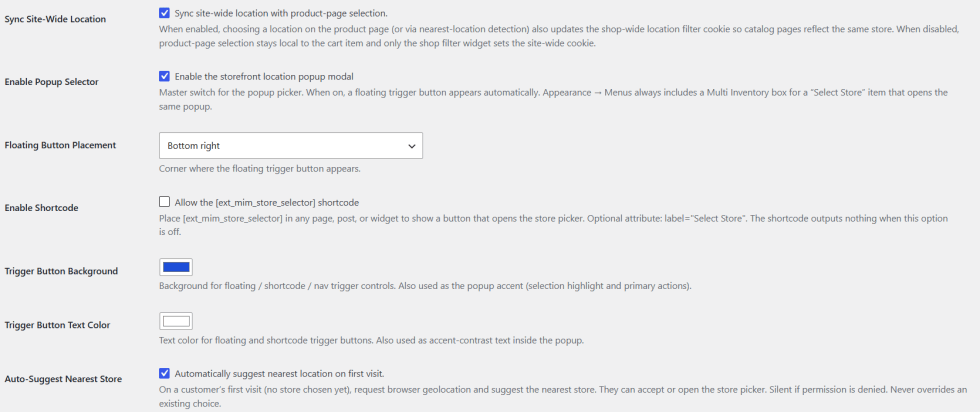
- Sync site-wide location with product-page selection: Check this so choosing a location on the product page, or through nearest location detection, also updates the shop-wide location filter. Catalog pages then show the same store. When unchecked, the selection stays with the cart item and only the shop filter widget sets the site-wide location.
- Enable the storefront location popup modal: Check this to turn on the popup location picker. A floating trigger button appears automatically, and Appearance > Menus includes a Multi Inventory box with a Select Store item that opens the same popup.
- Floating Button Placement: Choose the corner of the screen where the floating trigger button appears, for example Bottom right.
- Allow the [ext_mim_store_selector] shortcode: Check this to place the shortcode in any page, post, or widget and show a button that opens the store picker. Use the optional label attribute to change the button text, for example label=”Select Store”. The shortcode shows nothing when this option is off.
- Trigger Button Background: Set the background color of the floating, shortcode, and menu trigger buttons. It is also used as the popup accent color for the selection highlight and primary actions.
- Trigger Button Text Color: Set the text color of the floating and shortcode trigger buttons. It is also used for the contrast text inside the popup.
- Automatically suggest nearest location on first visit: Check this to request the visitor’s browser location on their first visit, when no store is chosen yet, and suggest the nearest store. Customers can accept it or open the store picker. Nothing happens if permission is denied, and an existing choice is never overridden.
Locations
↑ Back to top- Add New Location: Click this to create a new location.
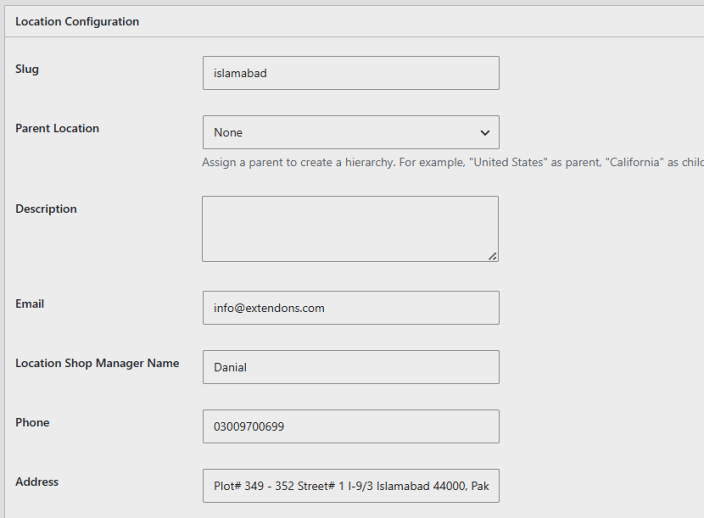
- Location Name and Slug: Set the display name and URL slug for the location.
- Parent Location: Assign a parent to build a hierarchy, for example United States as parent and California as child.
- Description: Add internal notes about the location.
- Email, Location Shop Manager Name, Phone, Address: Enter the contact details for the location.
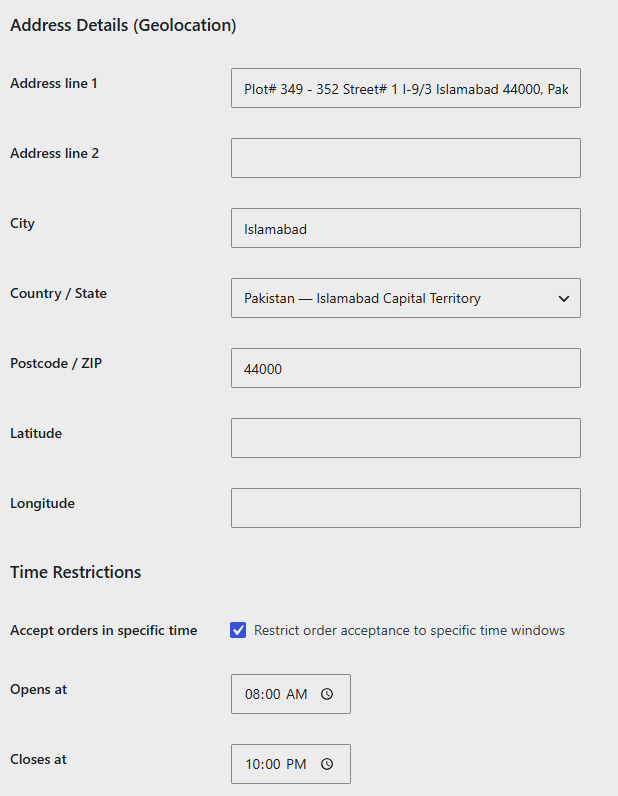
- Address Details (Geolocation): Enter address line 1 and 2, city, country/state, postcode/zip, and latitude/longitude, used for the nearest location feature.
- Restrict order acceptance to specific time windows: Check this to only accept orders for this location during set hours.
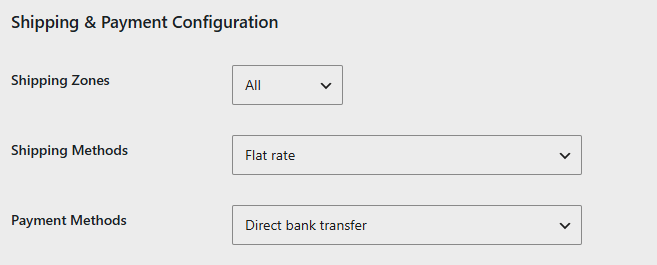
- Shipping Zones, Shipping Methods, Payment Methods: Assign the shipping and payment options available at this location.
Product Level Inventory
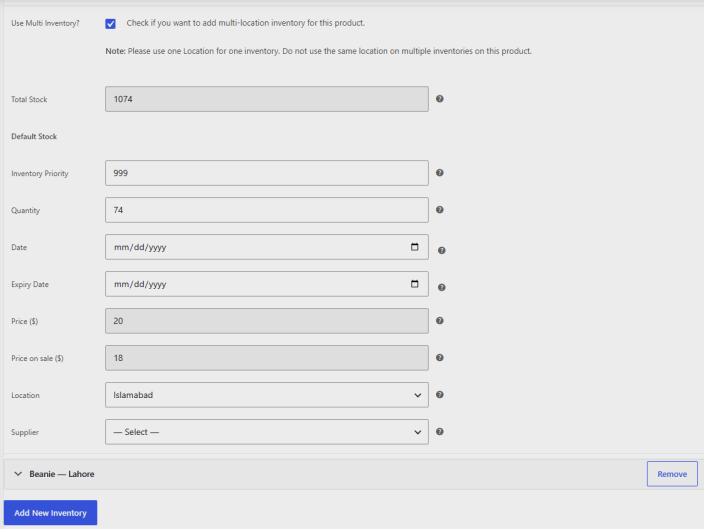
- Use Multi Inventory?: Check this on the product edit page to add stock for this product at more than one location. Use one location per entry, do not add the same location twice on one product.
- Total Stock: Shows the combined stock added across all locations for this product.
- Inventory Priority: Sets which location is used first when a product has stock at more than one location.
- Quantity: The stock quantity available for this product at the selected location.
- Date, Expiry Date: The start date and expiry date for this stock entry.
- Price (),Priceonsale(), Price on sale ( ),Priceonsale(): The regular and sale price for this product at the selected location.
- Location: Choose which location this stock entry belongs to.
- Supplier: Choose which supplier this stock is sourced from.
- Add New Inventory: Click this to add another location and stock entry to the same product.
Suppliers
- Add New Supplier: Click this to create a new supplier.
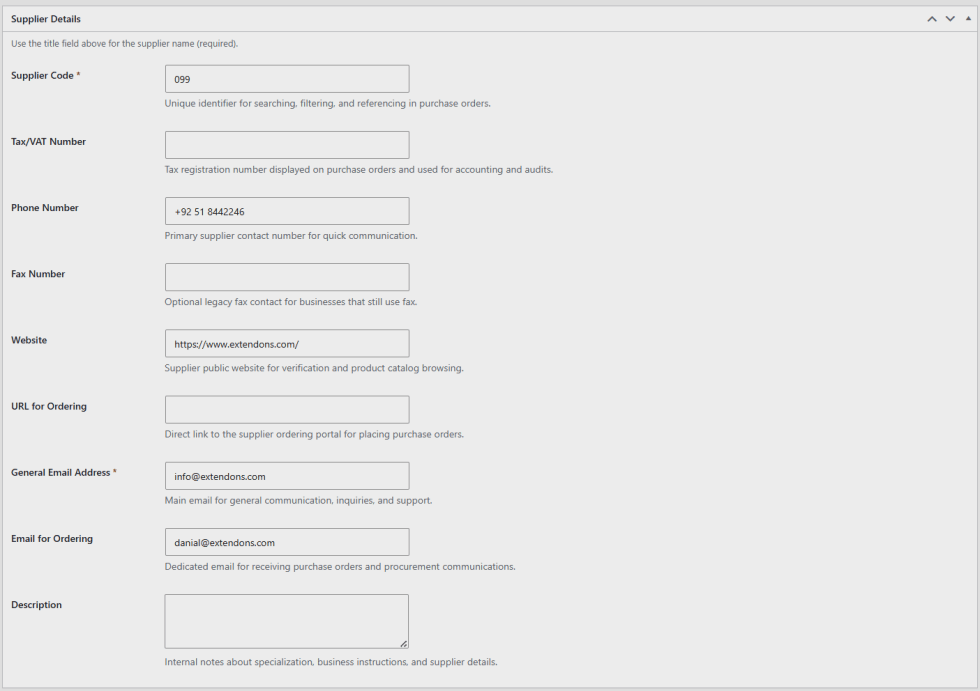
- Supplier Name and Supplier Code: Set the display name and a unique identifier used for searching, filtering, and referencing in purchase orders.
- Tax/VAT Number: Enter the tax registration number shown on purchase orders.
- Phone Number, Fax Number, Website: Enter the supplier’s contact details.
- URL for Ordering: Add a direct link to the supplier’s ordering portal.
- General Email Address: Enter the main email used for communication and support, required.
- Email for Ordering: Enter a dedicated email for receiving purchase orders.
- Description: Add internal notes about the supplier’s specialization or business instructions.
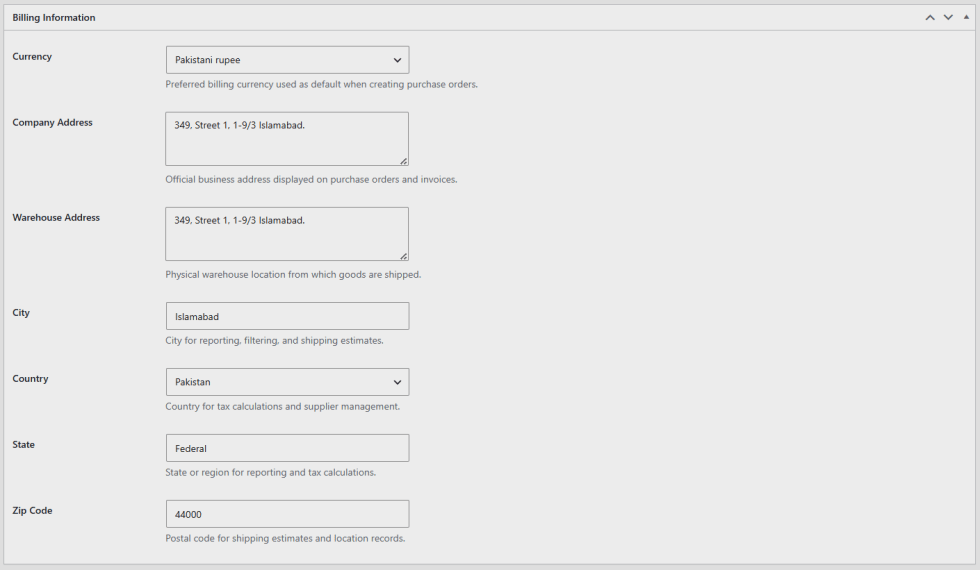
- Currency: Set the preferred billing currency used by default on purchase orders.
- Company Address, Warehouse Address: Enter the supplier’s official business address and the warehouse location goods ship from.
- City, Country, State, Zip Code: Enter the location details used for reporting and tax calculations.
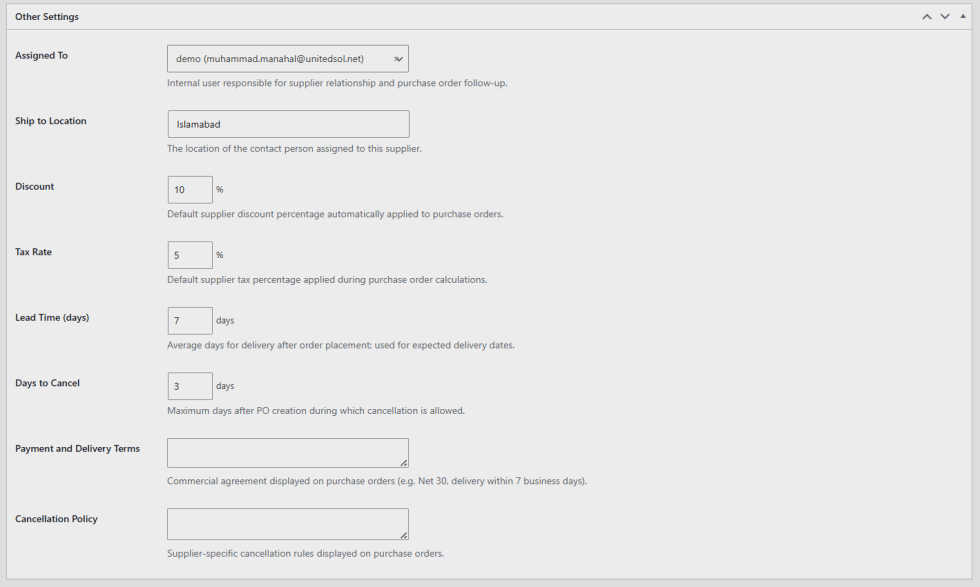
- Assigned To: Choose the internal user responsible for this supplier relationship.
- Ship to Location: Set the location this supplier’s orders should be shipped to.
- Discount: Set the default discount percentage automatically applied to purchase orders.
- Tax Rate: Set the default tax percentage applied during purchase order calculations.
- Lead Time (days): Set the average number of days for delivery after an order is placed.
- Days to Cancel: Set the maximum number of days after a purchase order is created during which cancellation is allowed.
- Payment and Delivery Terms: Add the commercial agreement shown on purchase orders, for example Net 30.
- Cancellation Policy: Add the supplier’s cancellation terms.
Purchase Orders
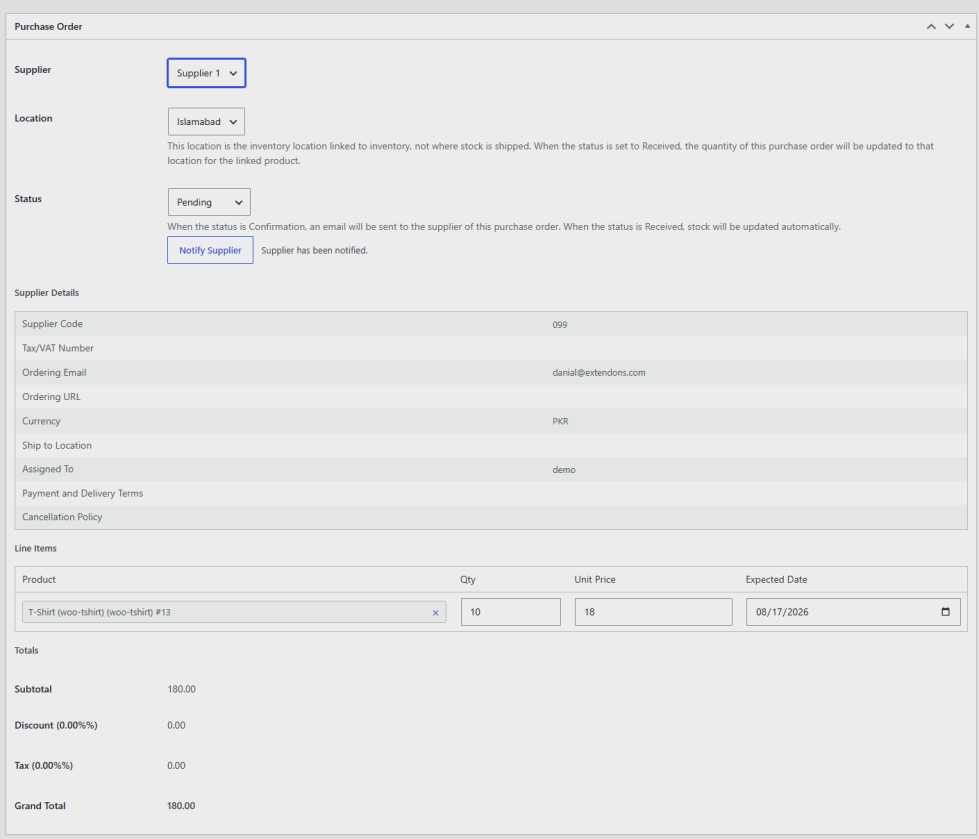
↑ Back to top- Add New Purchase Order: Click this to create a new purchase order.
- Supplier: Select the supplier this order is placed with.
- Location: Select the inventory location this order will update. This is the location stock updates against, not necessarily where goods are physically shipped.
- Status: Set to Confirmation to notify the supplier by email, or Received to automatically update stock at the linked location.
- Notify Supplier: Click this to email the purchase order to the supplier.
- Line Items: Add products with quantity, unit price, and expected delivery date.
- Totals: Subtotal, discount, tax, and grand total calculate automatically from the supplier’s default discount and tax rate.
Backend Mode Only
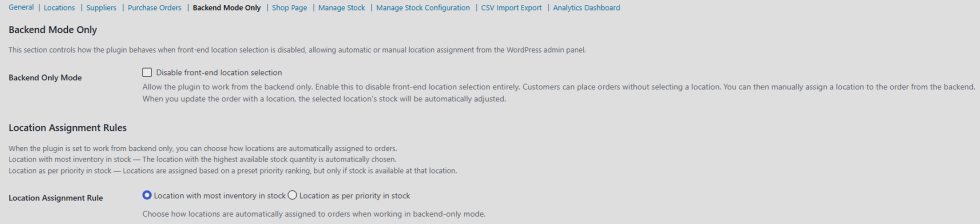
↑ Back to top- Disable front-end location selection: Check this to let the plugin work from the backend only. Customers can place orders without selecting a location, and you assign a location to the order manually from the backend, which updates that location’s stock.
- Location Assignment Rule: Choose Location with most inventory in stock to auto-select the location with the highest available quantity, or Location as per priority in stock to assign locations based on a preset priority ranking, applied only where stock is available.
Shop Page
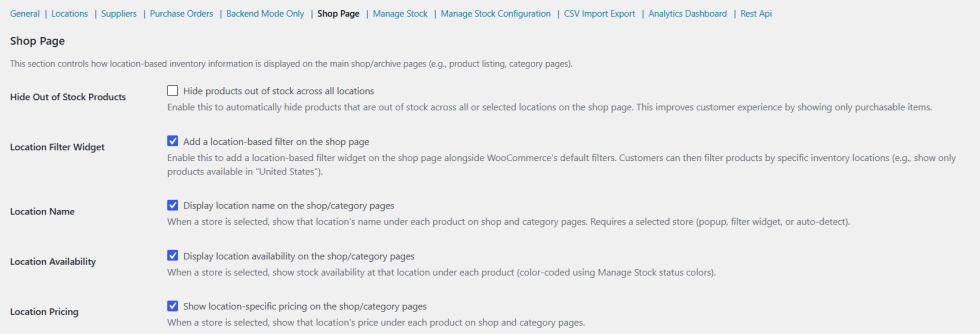
↑ Back to top- Hide products out of stock across all locations: Check this to hide products that are out of stock across all or selected locations on the shop and archive pages.
- Add a location-based filter on the shop page: Check this to add a location filter widget alongside WooCommerce’s default shop filters, letting customers filter products by a specific location.
- Display location name on the shop/category pages: Check this to show the selected location’s name under each product on shop and category pages. A store must be selected through the popup, filter widget, or auto-detect.
- Display location availability on the shop/category pages: Check this to show stock availability at the selected location under each product, color-coded with the Manage Stock status colors.
- Show location-specific pricing on the shop/category pages: Check this to show the selected location’s price under each product on shop and category pages.
Manage Stock
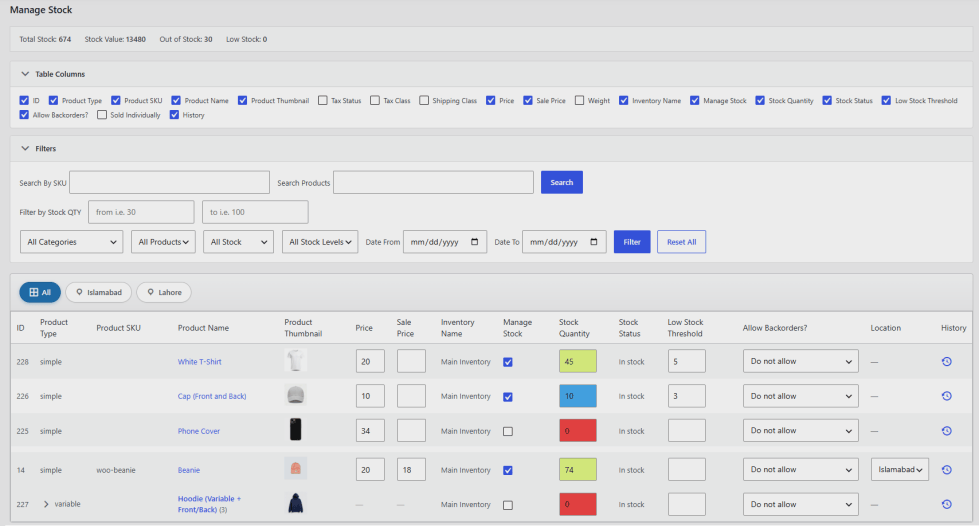
↑ Back to top- Summary bar: View Total Stock, Stock Value, Out of Stock count, and Low Stock count across your catalog.
- Table Columns: Toggle which columns appear in the table, including ID, Product Type, SKU, Product Name, Thumbnail, Tax Status, Tax Class, Shipping Class, Price, Sale Price, Weight, Inventory Name, Manage Stock, Stock Quantity, Stock Status, Low Stock Threshold, Allow Backorders, Sold Individually, and History.
- Search By SKU / Search Products: Search the table by SKU or product name.
- Filter by Stock QTY: Set a minimum and maximum stock quantity to filter by.
- All Categories, All Products, All Stock, All Stock Levels: Filter the table by category, product type, stock level, or stock status.
- Date From / Date To: Filter by the date a stock change was last recorded.
- Location tabs: Switch between an All view and individual location tabs to see stock for a specific location only.
- Per-row editing: Edit price, sale price, manage stock toggle, stock quantity, low stock threshold, allow backorders setting, and assigned location directly in the table.
- History: Click the history icon on any row to view that product’s stock change history.
Manage Stock Configuration
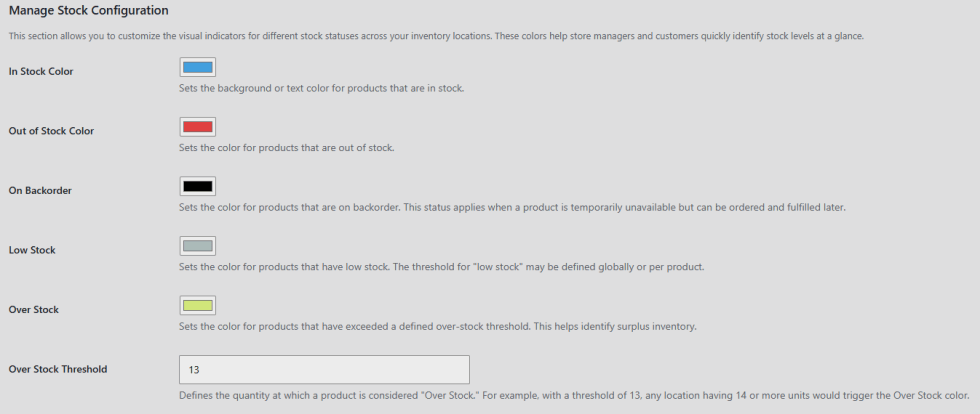
↑ Back to top- In Stock Color, Out of Stock Color, On Backorder Color, Low Stock Color, Over Stock Color: Set the color used to visually flag each stock status across the Manage Stock table and front end.
- Over Stock Threshold: Set the quantity at which a product is considered overstocked. For example, a threshold of 13 means any location with 14 or more units triggers the Over Stock color.
CSV Import Export
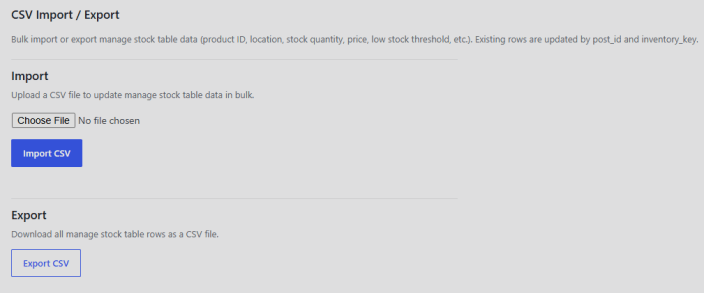
↑ Back to top- Choose File / Import CSV: Upload a CSV file to bulk update Manage Stock table data such as product ID, location, stock quantity, price, and low stock threshold. Existing rows update automatically by matching product ID and location key.
- Export CSV: Click this to download all current Manage Stock table rows as a CSV file.
Analytics Dashboard
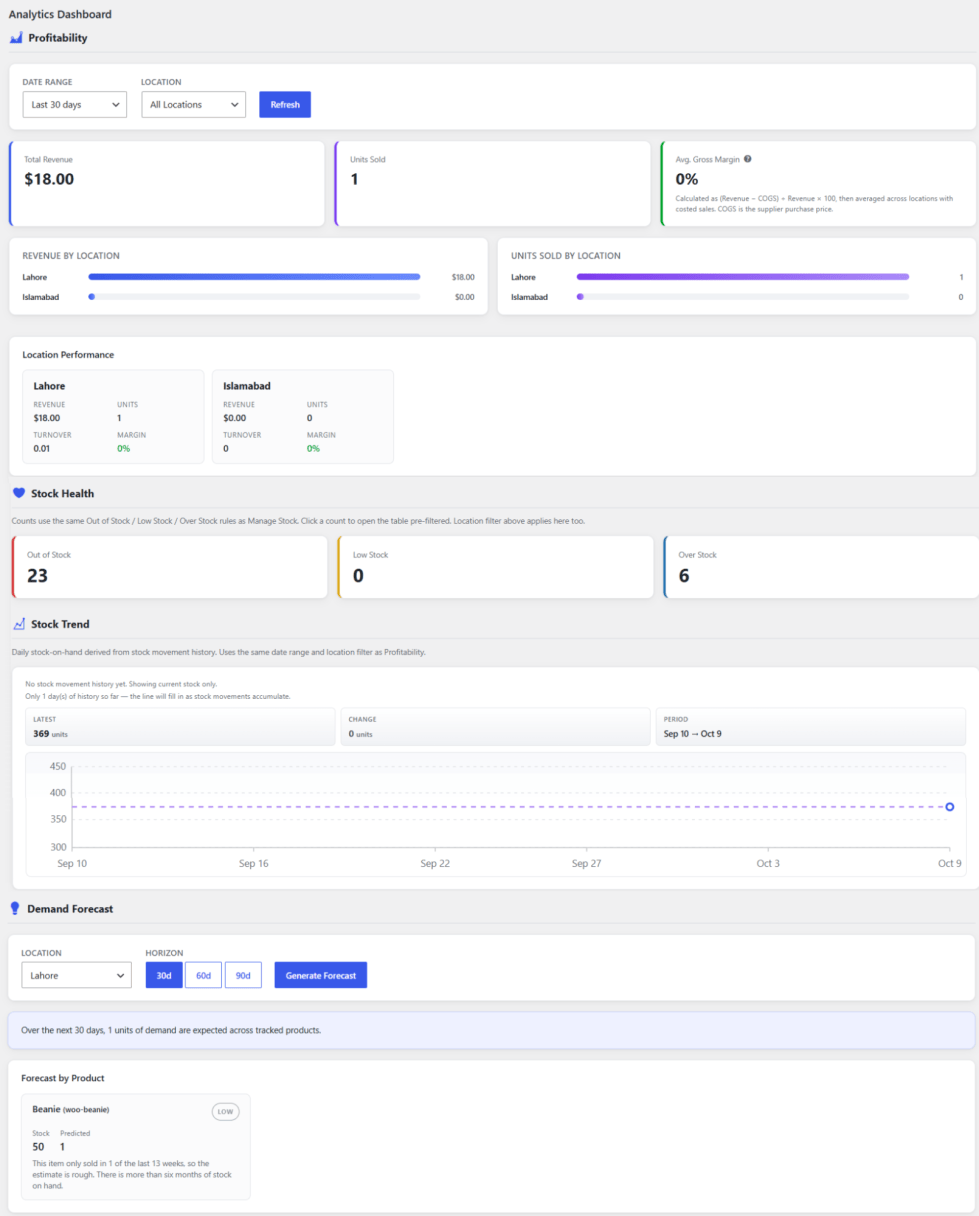
- Date Range and Location filters: Select a date range and a specific location, or All Locations, then click Refresh to update the figures below.
- Total Revenue, Units Sold, Avg. Gross Margin: View top-level performance figures for the selected range and location.
- Revenue by Location, Units Sold by Location: Compare performance across locations using the bar visualizations.
- Location Performance cards: View revenue, units, turnover, and margin broken down per individual location.
- Demand Forecast: Select a location and a horizon of 30, 60, or 90 days, then click Generate Forecast to view predicted demand.
- Forecast by Product: View each product’s current stock and predicted demand for the products.
REST API
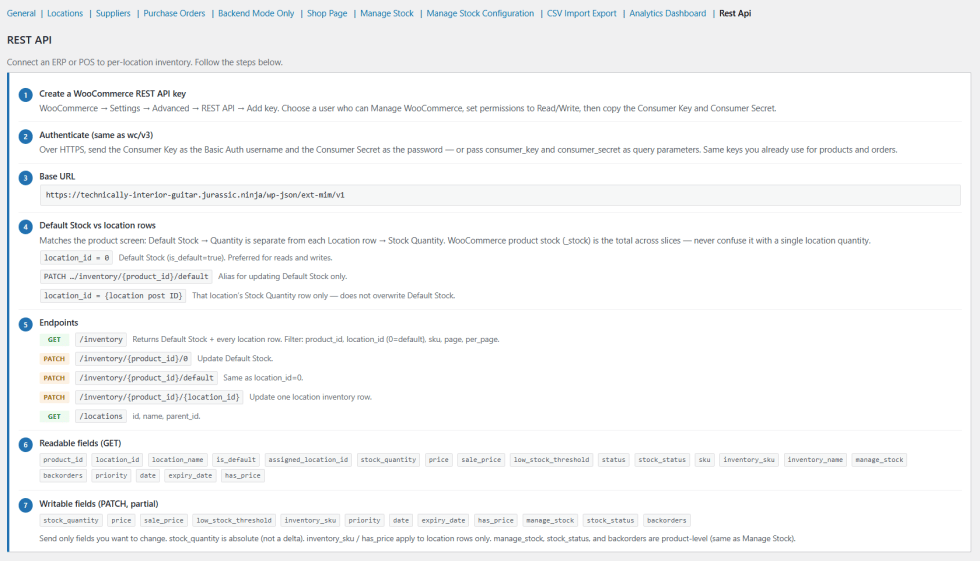
↑ Back to top- Create a WooCommerce REST API key: Go to WooCommerce > Settings > Advanced > REST API and click Add key. Choose a user who can manage WooCommerce, set permissions to Read/Write, then copy the Consumer Key and Consumer Secret.
- Authenticate (same as wc/v3): Over HTTPS, send the Consumer Key as the Basic Auth username and the Consumer Secret as the password, or pass consumer_key and consumer_secret as query parameters. These are the same keys you already use for products and orders.
- Base URL: Use https://yourdomain.com/wp-json/ext-mim/v1 and replace yourdomain.com with your site address.
- Default Stock vs location rows: This matches the product screen, where Default Stock > Quantity is separate from each Location row’s Stock Quantity. WooCommerce product stock (_stock) is the total across all of them, so never confuse it with a single location’s quantity.
- location_id = 0: Default Stock (is_default=true). Preferred for reads and writes.
- PATCH …/inventory/{product_id}/default: Alias for updating Default Stock only.
- location_id = {location post ID}: Updates that location’s Stock Quantity row only and does not overwrite Default Stock.
- Endpoints: Use the following routes under the base URL.
- GET /inventory: Returns Default Stock and every location row. Filter by product_id, location_id (0 = default), sku, page, and per_page.
- PATCH /inventory/{product_id}/0: Update Default Stock.
- PATCH /inventory/{product_id}/default: Same as location_id=0.
- PATCH /inventory/{product_id}/{location_id}: Update one location inventory row.
- GET /locations: Returns id, name, and parent_id.
- Readable fields (GET): product_id, location_id, location_name, is_default, assigned_location_id, stock_quantity, price, sale_price, low_stock_threshold, status, stock_status, sku, inventory_sku, inventory_name, manage_stock, backorders, priority, date, expiry_date, has_price.
- Writable fields (PATCH, partial): stock_quantity, price, sale_price, low_stock_threshold, inventory_sku, priority, date, expiry_date, has_price, manage_stock, stock_status, backorders. Send only the fields you want to change. stock_quantity is an absolute value, not a delta. inventory_sku and has_price apply to location rows only. manage_stock, stock_status, and backorders are product-level, the same as Manage Stock.