🛠️ Creating a Bogo Discount Rule – Step-by-Step Walkthrough
↑ Back to topThis example demonstrates how to set up a Buy One Get One (BOGO) rule using PricePulse.
🎯 Goal
↑ Back to topCreate a BOGO offer: Buy 1 T-shirt, Get 1 Free.
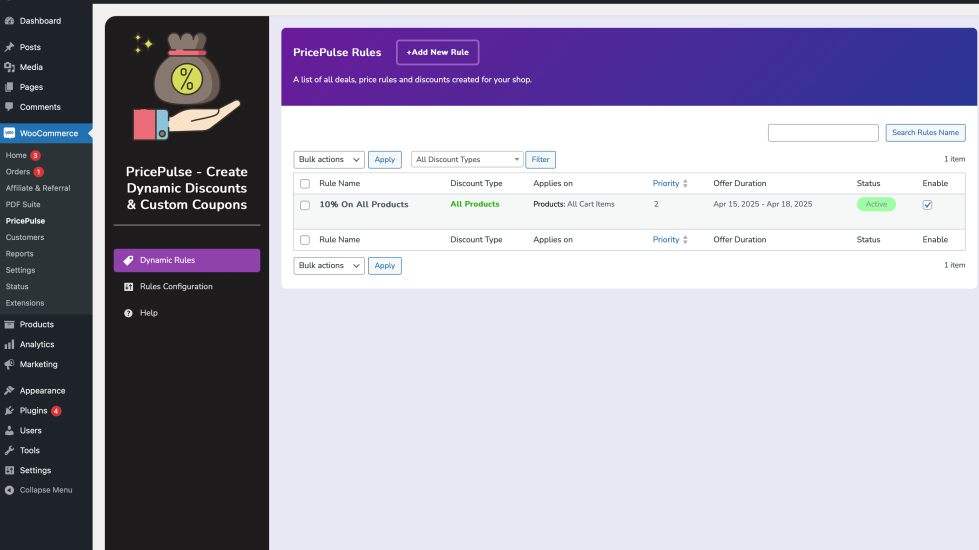
Step 1: Navigate to PricePulse
↑ Back to topGo to WooCommerce → PricePulse from your WordPress dashboard.
🖼️ Screenshot Example:
WooCommerce > PricePulse
Step 2: Add a New Rule
↑ Back to top- Click the “Add New Rule” button.
- Enter a Rule Name (e.g., “BOGO T-Shirt Offer”).
- Set Rule Type to
Buy X Get Y.
🖼️ Screenshot Example:
New Rule Setup Page
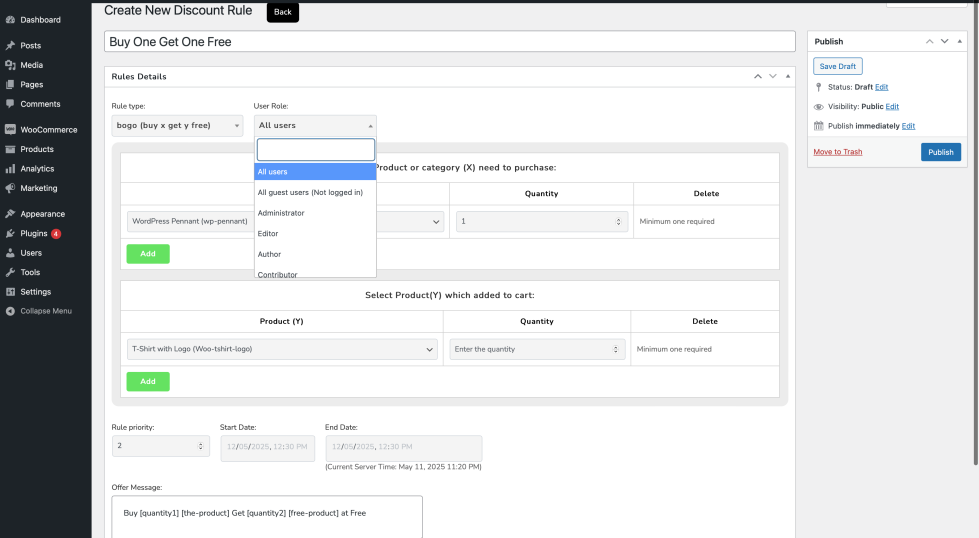
Step 3: Define Product Conditions
↑ Back to top- Buy Products: Select the product(s) or category (e.g., “T-shirts”).
- Get Products: Select the same or different product to be offered free.
- Buy Quantity: 1
- Get Quantity: 1
Step 4: Set User Conditions
↑ Back to topUnder Customer Conditions:
- Choose User Roles:
CustomerorLogged-in users.
Step 5: Optional – Schedule the Rule
↑ Back to topSet the Start Date and End Date to limit the offer duration.
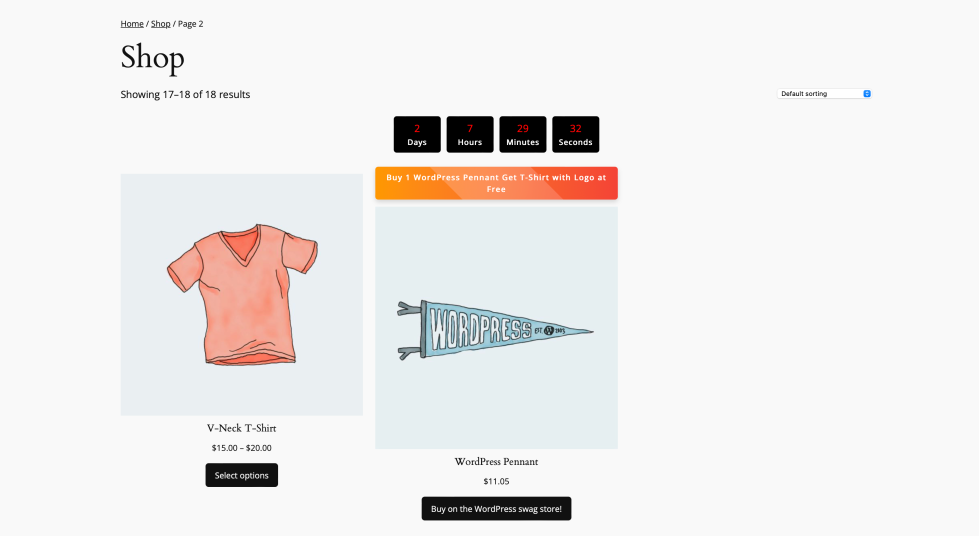
Step 6: Configure Display Settings
↑ Back to top- Enable Offer Banner: “Buy 1 T-Shirt, Get 1 Free!”
- Enable Countdown Timer if limited-time offer
🖼️ Screenshot Example:
Frontend View With Banner & Timer
Step 7: Save and Activate
↑ Back to top- Click Publish to activate the discount rule.
✅ Result
↑ Back to top- On the product page, customers will see the offer banner and timer.
- When they add 1 T-shirt to the cart, a second will be added free of charge.
🧪 Testing Your Rule
↑ Back to top- Log in as a customer.
- Add 1 T-shirt to your cart.
- Confirm that the second T-shirt appears with a 100% discount.
- Ensure the banner and timer are visible on the product page.